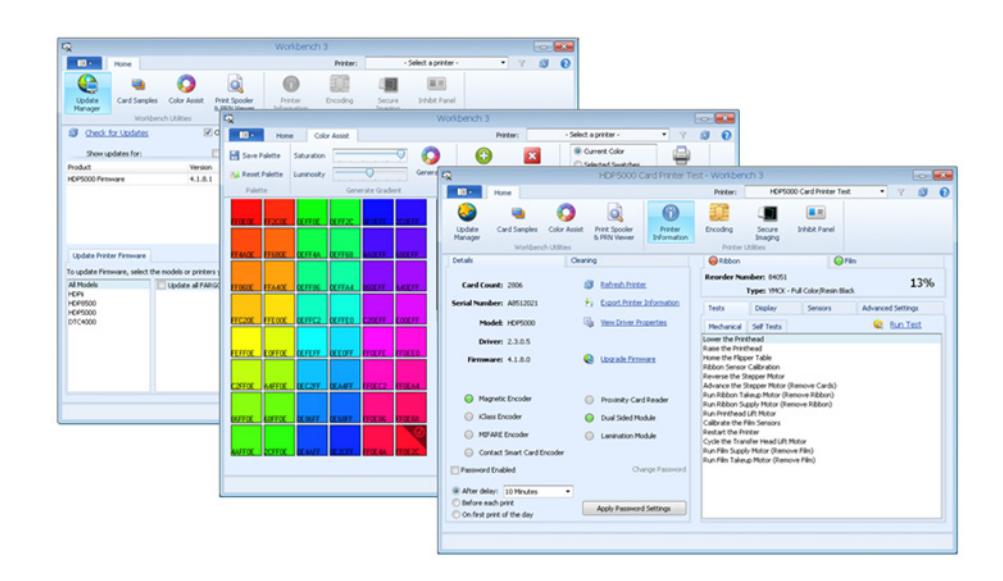
HID FARGO Workbench Utility Update Manager
Open the original PDF document
View PDF

FARGO® WORKBENCH UTILITY UPDATE MANAGER
PLT-02882, Rev. A.0 July 2016


Copyright
©2016 HID Global Corporation/ASSA ABLOY AB.
All rights reserved. This document may not be reproduced, disseminated or republished in any form without the prior written permission of HID Global Corporation.
Trademarks
HID GLOBAL, HID, the HID logo, DTC, and FARGO are the trademarks or registered trademarks of HID Global Corporation, or its licensors, in the U.S. and other countries.
Revision History
| Date | Description | Version |
|---|---|---|
| July 2016 | Initial Release | A.0 |
Contacts
For additional offices around the world, see www.hidglobal.com corporate offices.
| North America | Asia Pacific | ||
|---|---|---|---|
|
611 Center Ridge Drive
Austin, TX 78753 USA Phone: 866-607-7339 Fax: 949-732-2120 |
19/F 625 King's Road
North Point, Island East Hong Kong Phone: 852 3160 9833 Fax: 852 3160 4809 |
||
| Europe, Middle East and Africa | Brazil | ||
|
Haverhill Business Park Phoenix Road
Haverhill, Suffolk CB9 7AE England Phone: 44 (0) 1440 711 822 Fax: 44 (0) 1440 714 840 |
Condomínio Business Center
Av. Ermano Marchetti, 1435 Galpão A2 CEP 05038-001 Lapa - São Paulo/SP Brazil Phone: 55 11 5514-7100 |
||
| HID Global Customer Support: www.hidglobal.com/support | |||
Page 2 of 14 July 2016

Contents
| l | Installing Workbench | ||
|---|---|---|---|
| 1.1 Obta | ain Workbench | 4 | |
| 1.2 Using | g Update Manager to Update Printer Firmware | 6 | |
| 1.3 Using | g Update Manager to Update Printer Drivers | 10 | |
| 1.3.1 | Applying Updates | 10 | |
| 1.3.2 | Manually Starting the Update | 11 | |
| 1.3.3 | Manually Removing Existing Printer Drivers | 12 | |

1 Installing Workbench
1.1 Obtain Workbench
- 1. Download the Workbench utility from: https://www.hidglobal.com/drivers/15325.
- 2. Read and accept the End User License Agreement.
- 3. Select Save File and click OK .
- 4. Double-click the .exe file.
- 5. Click Run to start installation.
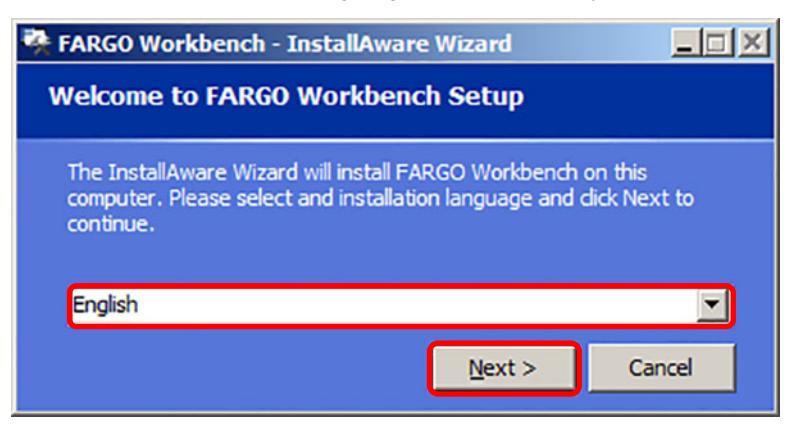
- 6. Select the installation language from the drop-down list and click Next .
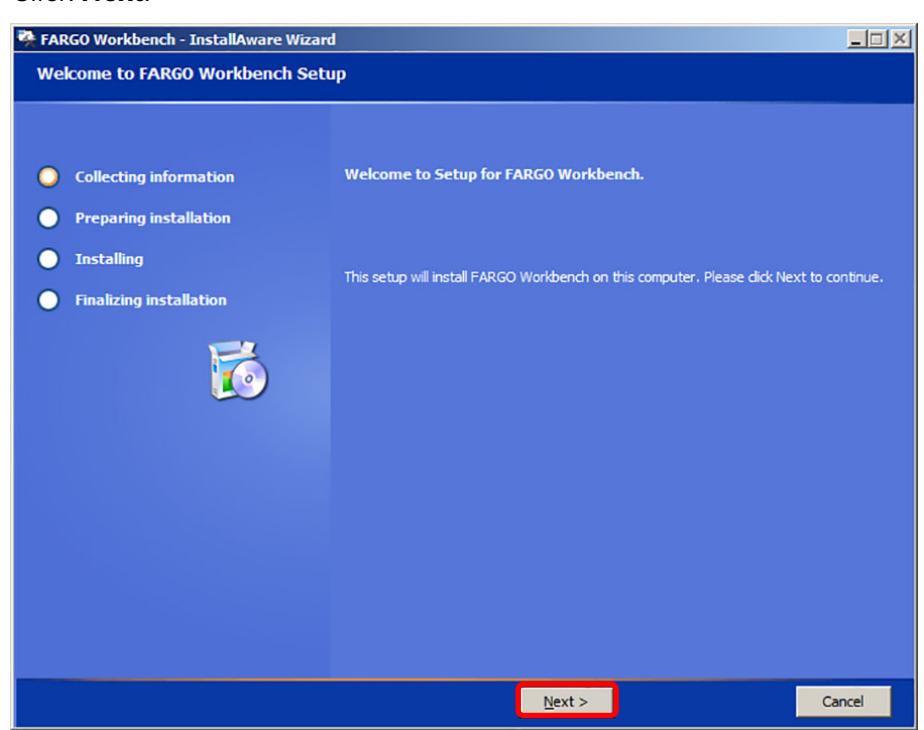
7. Click Next .
Page 4 of 14 July 2016

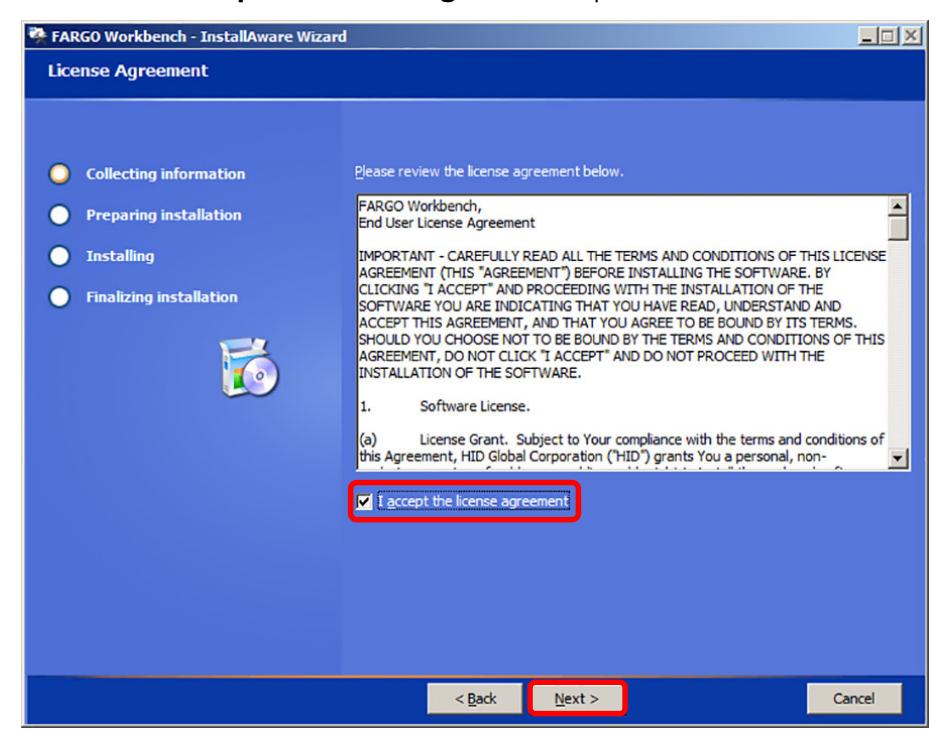
8. Select the I accept the license agreement option and click Next .
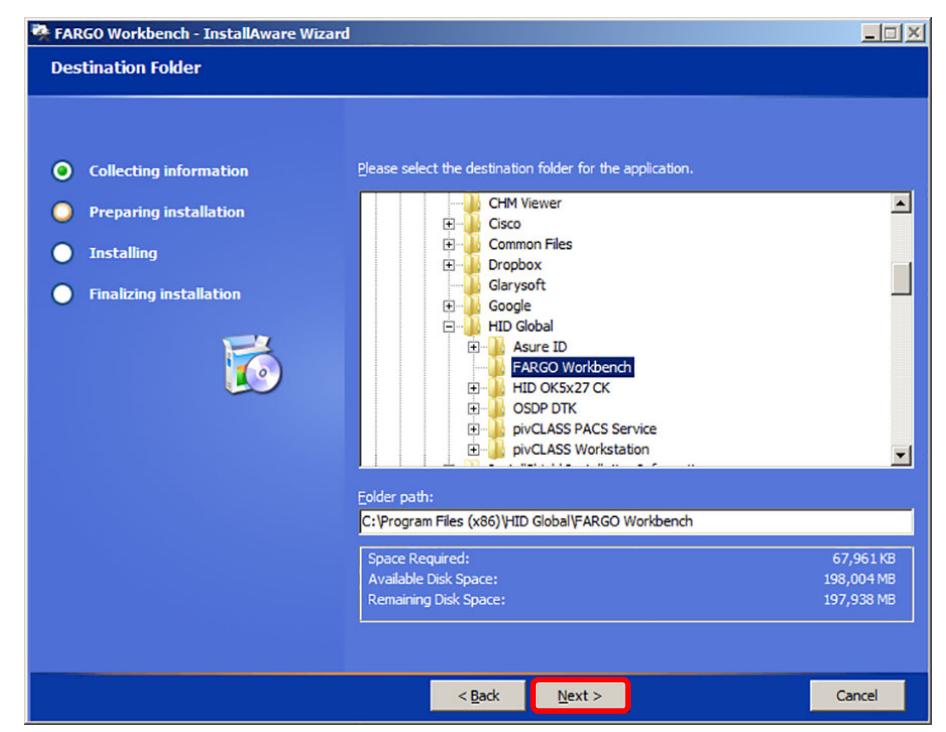
9. Select the destination folder for the application and click Next .
July 2016 Page 5 of 14

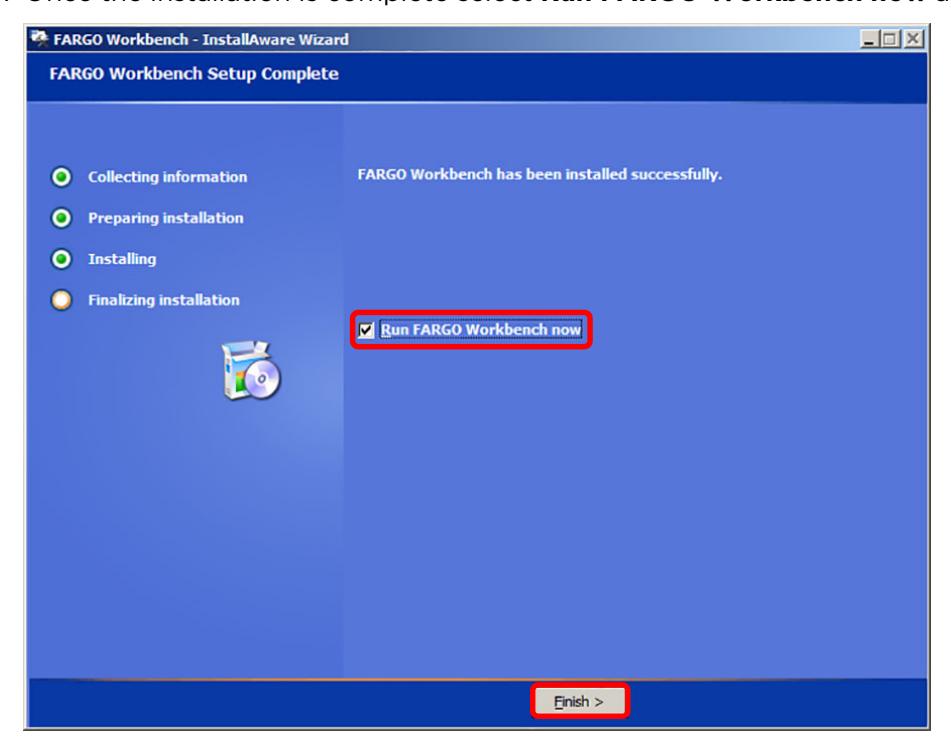
10. Once the installation is complete select Run FARGO Workbench now and click Finish .
1.2 Using Update Manager to Update Printer Firmware
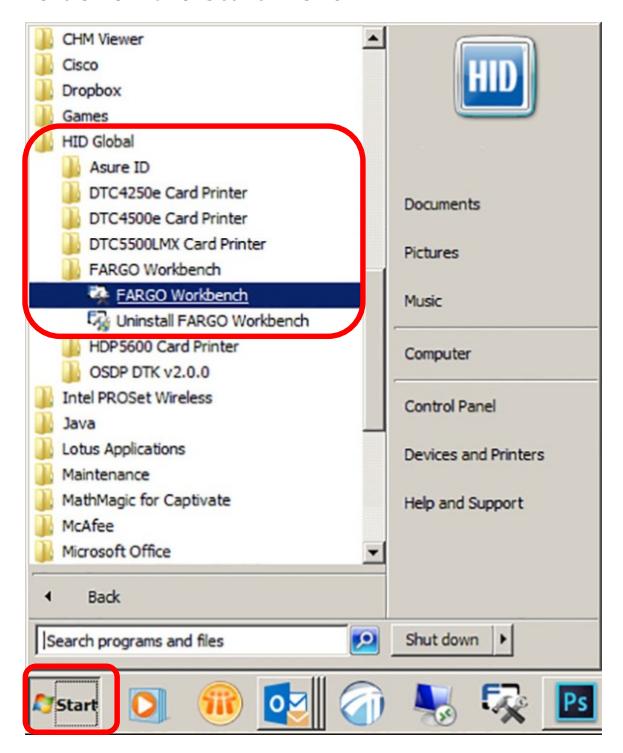
1. Once Workbench is installed, open the application. This is located under the HID Global folder on the Start menu.
Page 6 of 14 July 2016

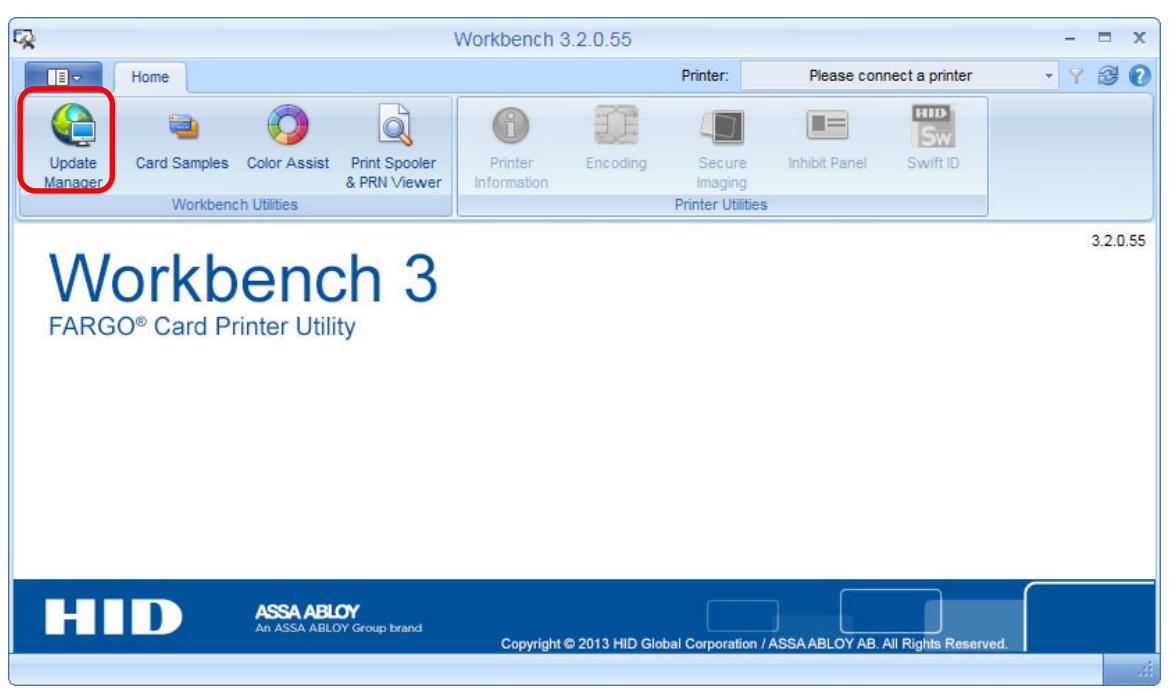
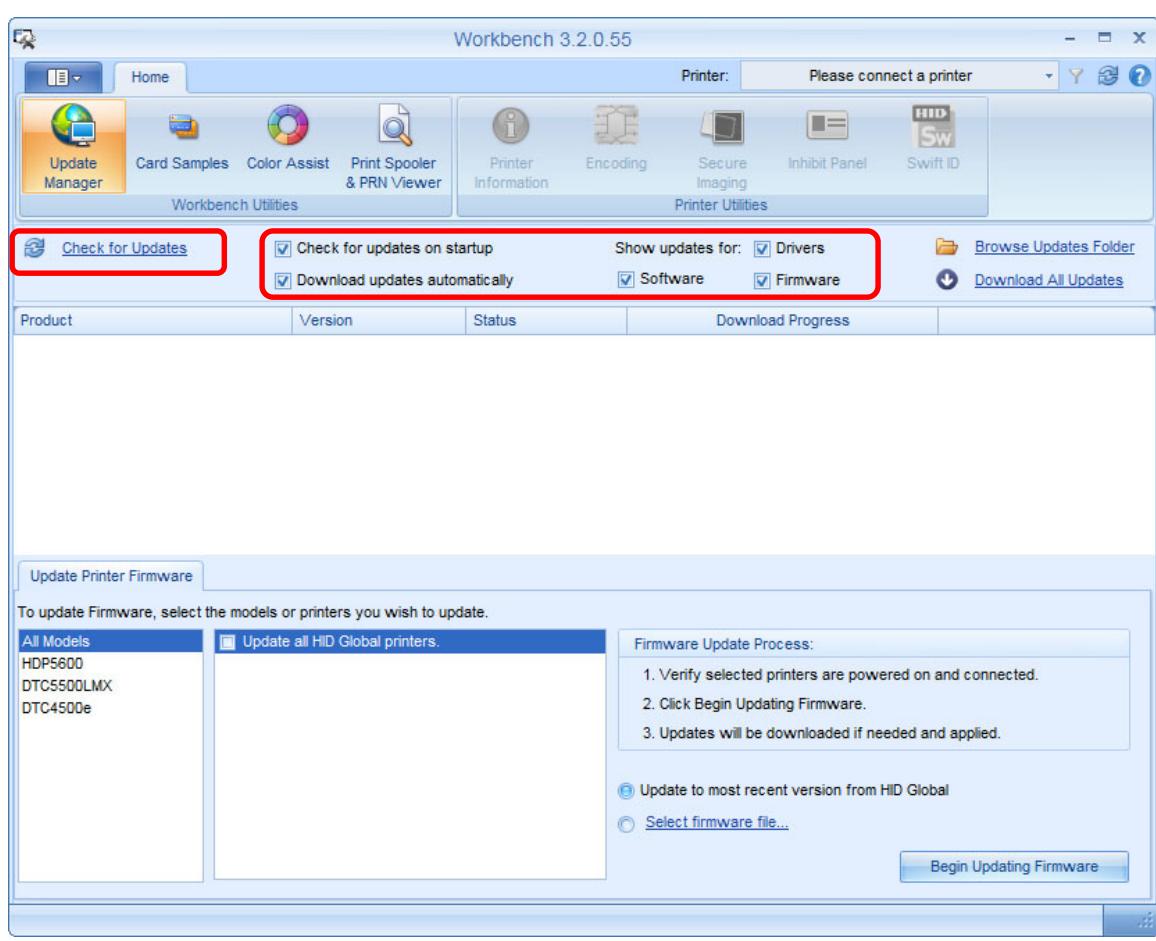
2. Once the application is open, click Update Manager .
- 3. Ensure all of the selection boxes are checked for the best user experience.
- 4. Click Check for Updates
July 2016 Page 7 of 14

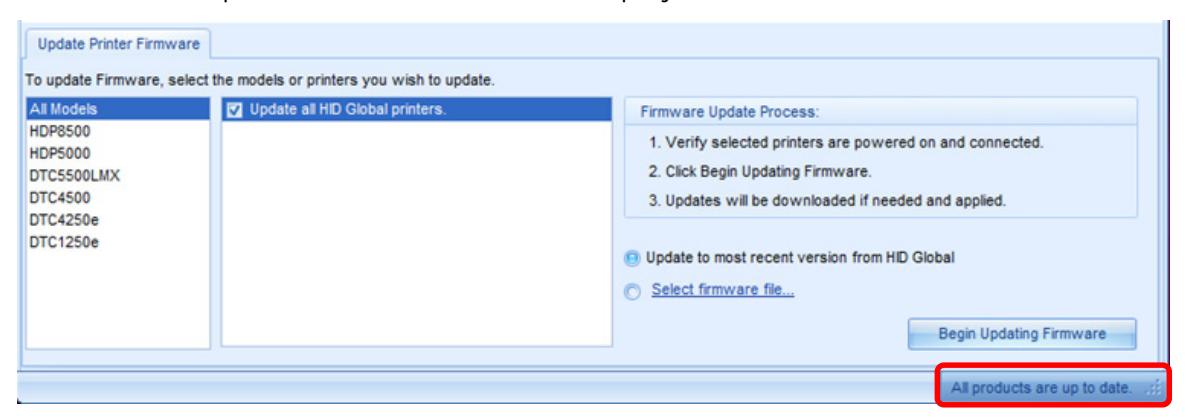
5. If all items are up-to-date a notification will display at the bottom of Workbench window.
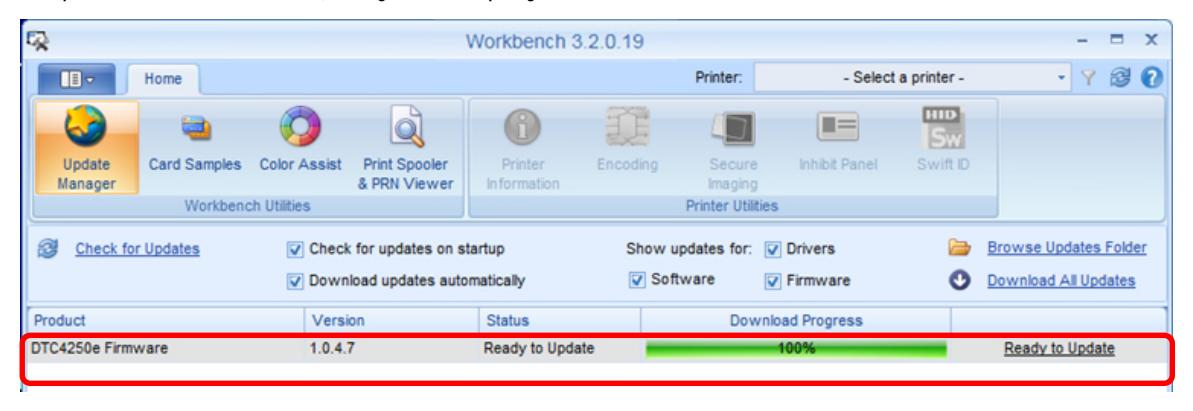
6. If updates are available, they are displayed for review.
Page 8 of 14 July 2016

- 7. Ensure that all of the printers to update are connected to the computer and powered on. Only connected printers that are powered on will receive the firmware updates.
- 8. Select the Update Printer Firmware tab.
- 9. Select Update all HID Global printers .
- 10. Click Begin Updating Firmware .
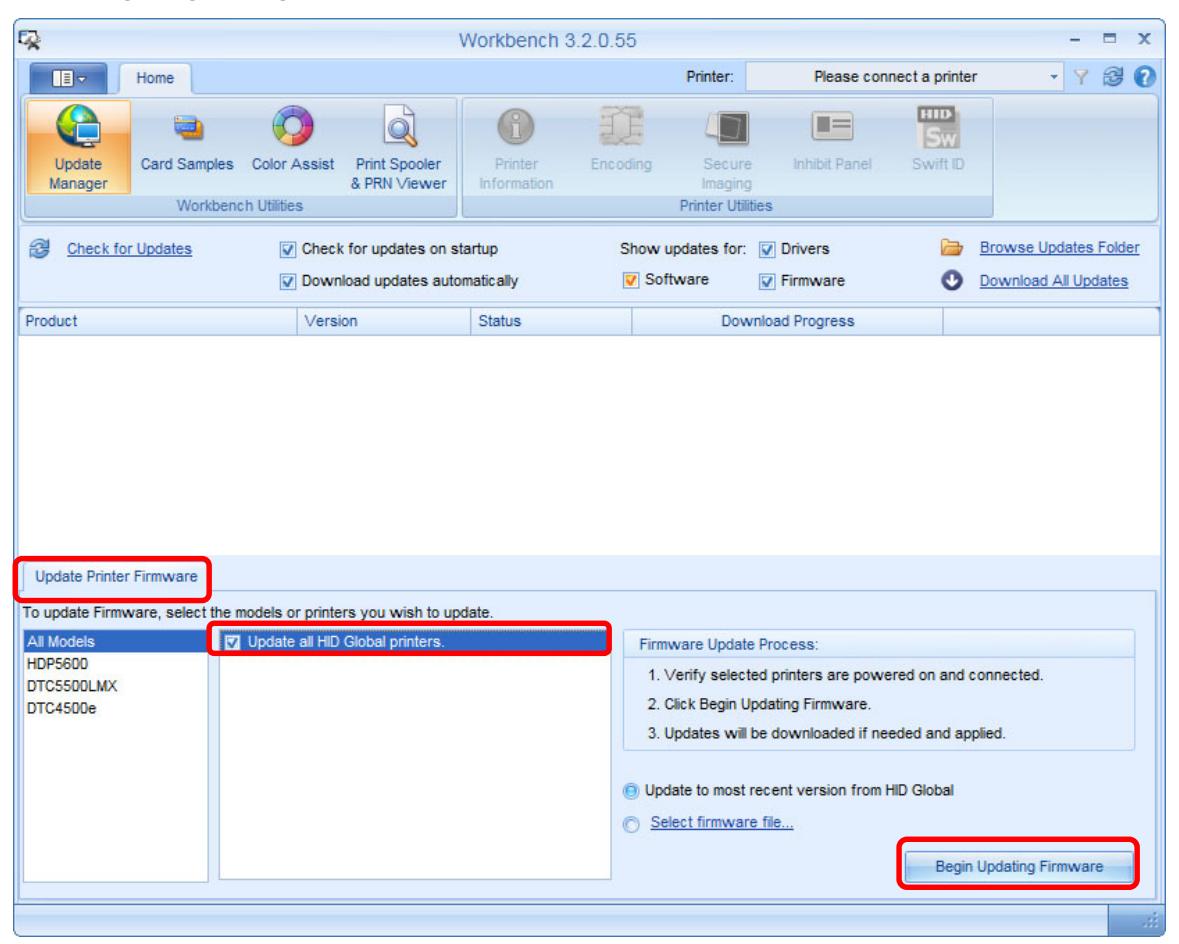
11. Firmware will be sent to the printer(s) that are powered on, connected to the computer and have available firmware updates. Do not disconnect the printer(s) or turn off power to the printer(s) during the update process.
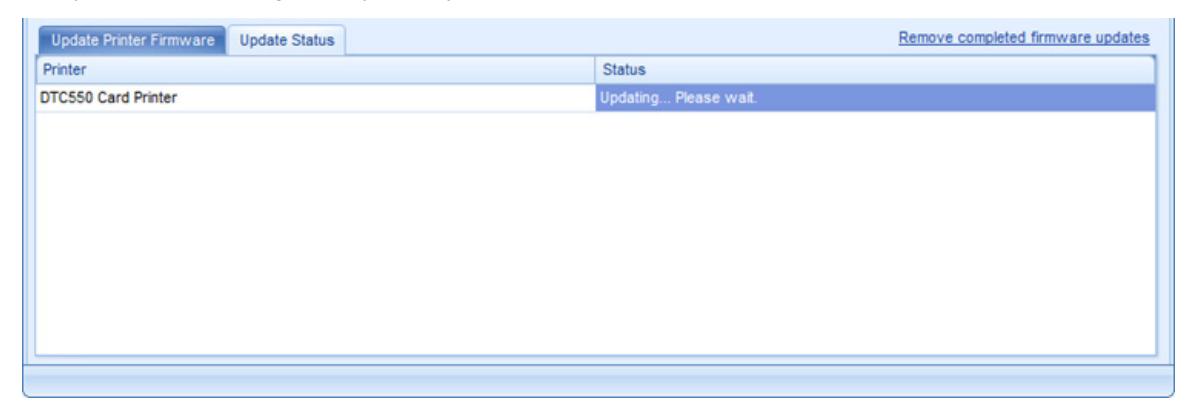
July 2016 Page 9 of 14

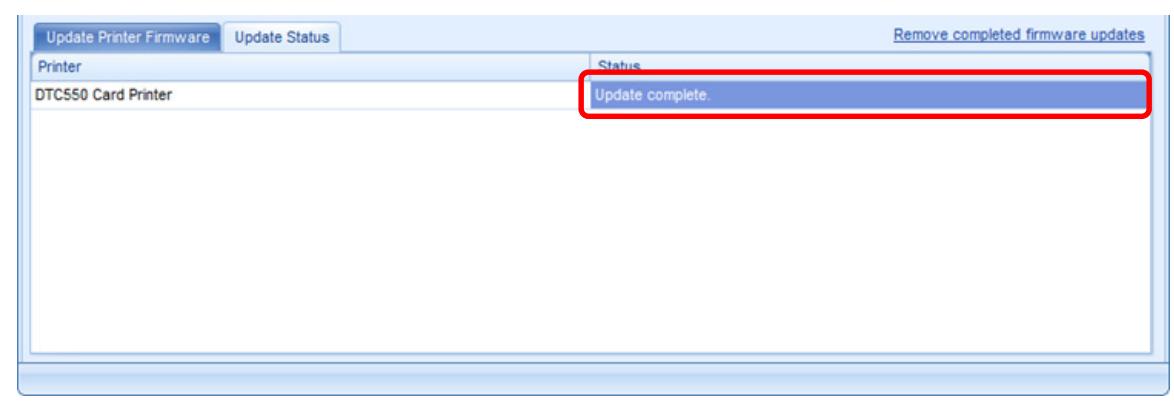
12. When the firmware update is complete, a notice displays.
1.3 Using Update Manager to Update Printer Drivers
To ensure the best performance, apply all available driver updates.
1.3.1 Applying Updates
1. Go to the Update Manager interface within Workbench and click Apply Update for the drivers you are updating. Note: The Drivers that have been downloaded will appear in the window.
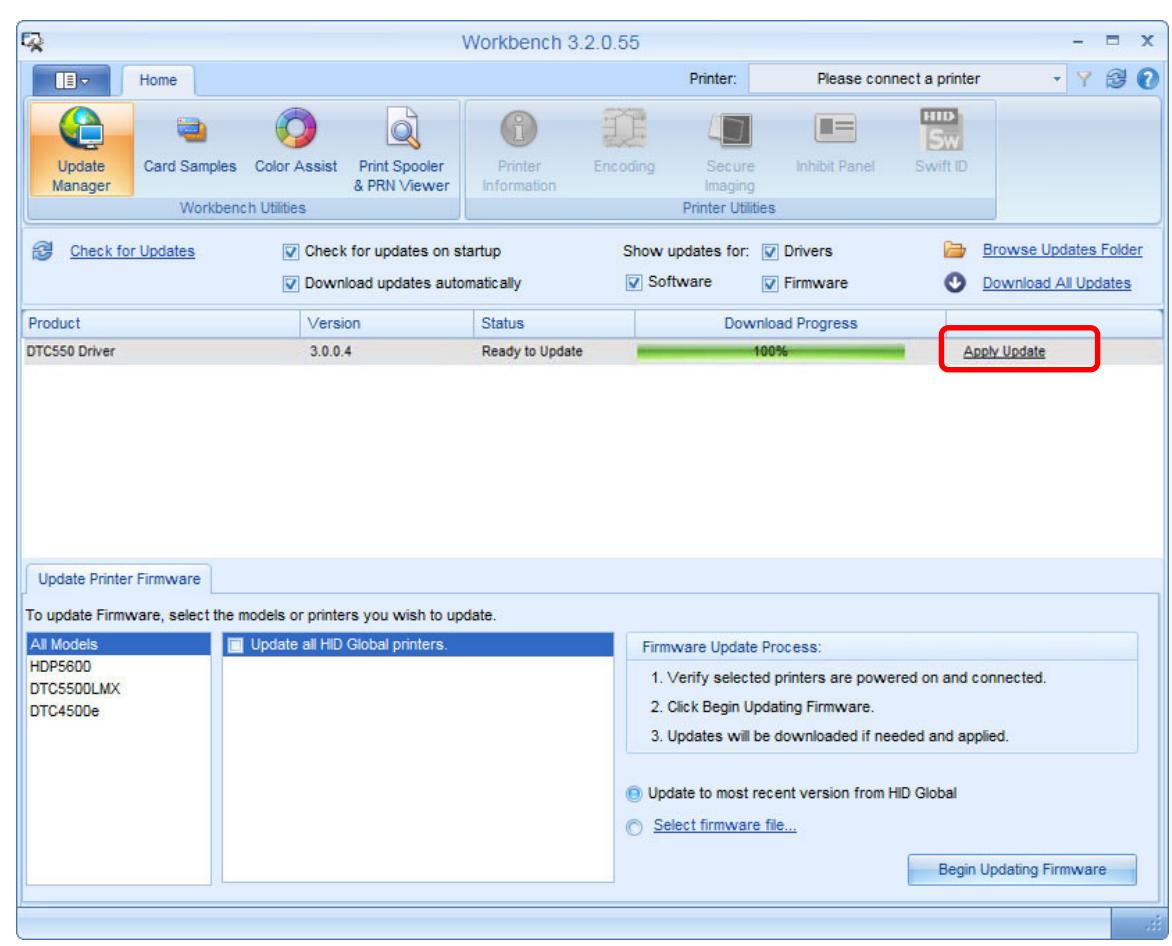
2. The driver will launch and the installation process can be started. Note: If a driver is listed but the Apply Update option is not available, see Section 1.3.2: Manually Starting the Update.
Page 10 of 14 July 2016

1.3.2 Manually Starting the Update
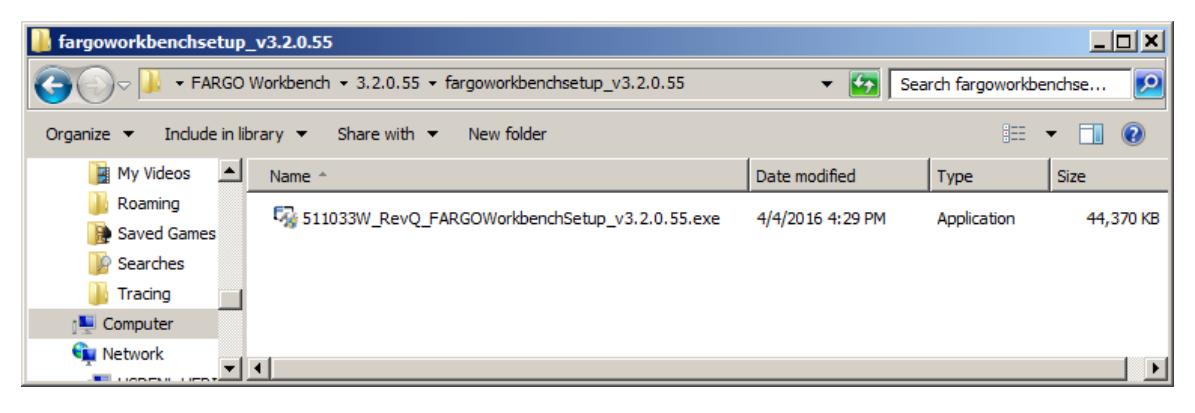
1. Select Browse Updates Folder .

2. Locate the Driver .exe file to install.
July 2016 Page 11 of 14

3. Double-click the .exe file to run the driver installer.

4. Reboot the computer to complete the driver installation.
1.3.3 Manually Removing Existing Printer Drivers
If you have issues with driver installation software not properly removing the existing version of the printer driver, you may need to remove the existing printer driver manually.
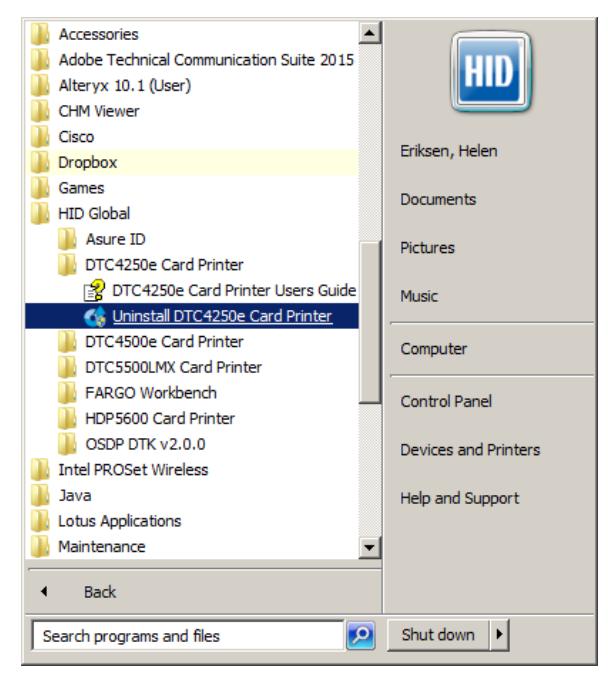
1. To remove the existing printer driver, select Start menu > HID Global and remove the drivers for the applicable printer models.
Note: Removing the printer driver(s) may cause any adjustments that were set in the printer driver(s) to be lost. Most users will not be affected by updating the printer driver.
Page 12 of 14 July 2016
Fargo® Workbench Utility Update Manager, PLT-02882, Rev. A.0

However, advanced users should keep this consideration in mind and remember to review, and if necessary, apply the modified settings to the updated driver after installation is complete.
- 2. Once existing drivers have been manually removed, reboot the computer.
- 3. Once the computer has rebooted you can return to Workbench and repeat the driver installation process.
July 2016 Page 13 of 14
