HES K20 Stand-Alone Cabinet Lock Instruction Manual
Open the original PDF document
View PDFInstruction Manual
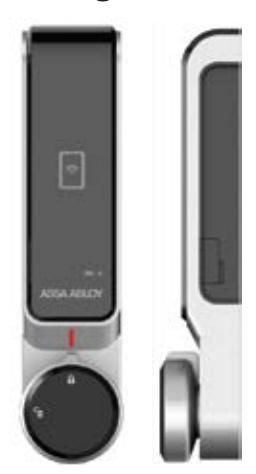
HES K20 (13.56 MHz RFID) stand-alone cabinet lock
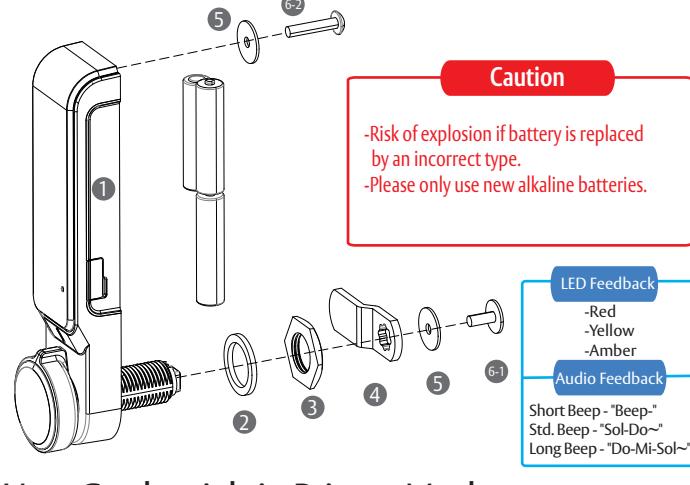
Package contents Hardware Installation
- One (1) HES K20 cabinet lock
- 2 One (1) Rubber washer
- 3 One (1) M6 nut
- One (1) Flat and one (1) Offset Locking Cam
- 5 Two (2) M4 washers
-
Five (5) Pan Head Phillips Screws
- M4 x10mm locking cam screw
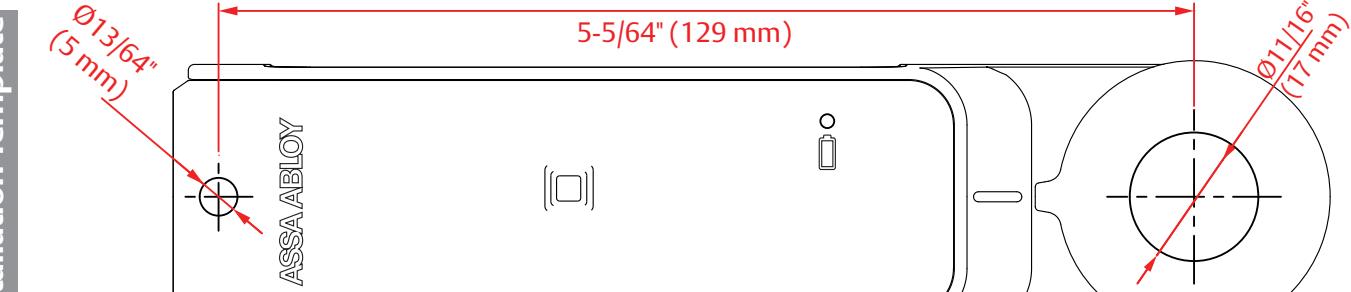
- M4 x10mm (1-5mm thick door) M4 x 20 mm (10-15mm thick door) M4 x 25 mm (15-20mm thick door) M4 x 30 mm (20-25mm thick door) 6-2
※ Power : 4.5V (AAA 1.5V x 3)
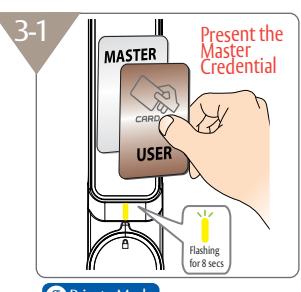
Public Mode (One -time Use)
User Credentials in Private Mode
-
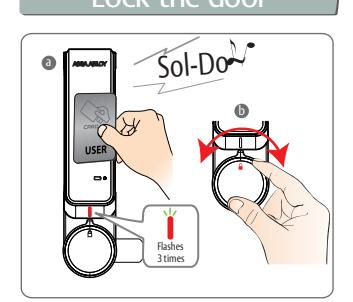
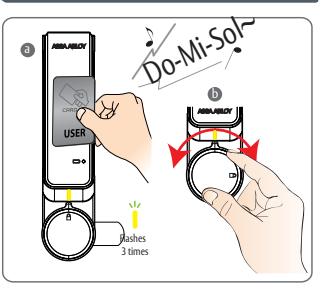
Close the cabinet door and present a User Credential
a
- -3x flashing Red LED's followed by a long beep
- b Rotate the knob to the locked position
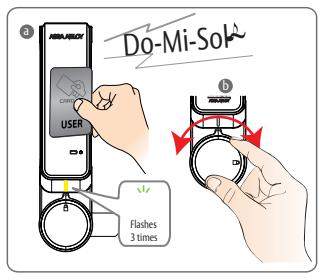
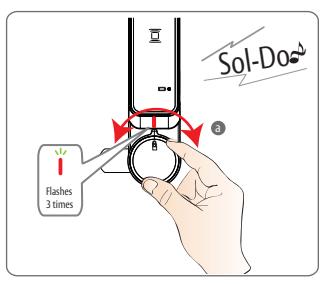
- -3x flashing Yellow LED's followed by an extended beep a Present a registered User Credential
- Rotate the knob to the locked position and open the cabinet door
- ※ Public Mode (One time use)
- Previously registered User Credential will be erased after unlock and remain open for next user.
- Present a registered User Credentia a -3x flashing Yellow LED's followed by an extended beep
- Rotate the knob to the unlocked position and open the cabinet door b
Lock the door Unlock the door Unlock the door 문을열때 Lock the door 문을잠글때
- Close the cabinet door and rotate the knob to the locked position -3x flashing Red LED's followed by a long beep a
- ※ Private Mode (Ongoing use) - Return the handle to the locked position. The lock will automatically relock after 3 seconds.
Set Up for Public & Private Mode Emergency Power
-
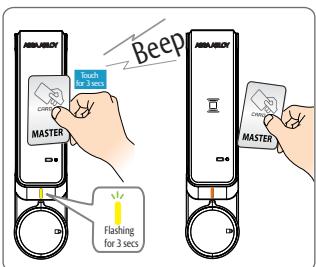
Present "1st" Master Credential for 3 seconds to set programming mode -Followed by a short beep a
- ※ -Note: Only the "1st" Master Credential can be used to set programming mode
Step 1 Step 2
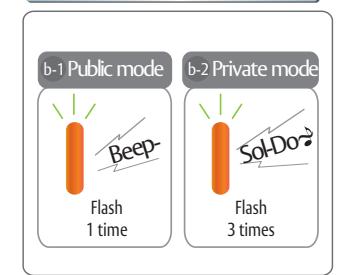
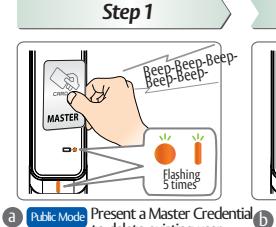
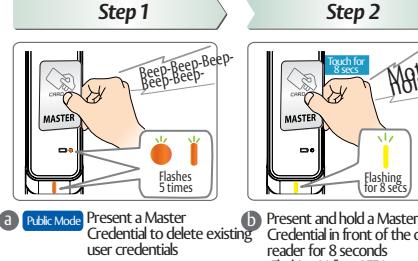
Public Mode
2x flashing Amber LED's followed by a short beep
Private Mode
3x flashing Amber LED's followed by a long beep d
Step 1 Step 2 Do-Mi-Sol~ Sol-Do Flashes 5 times
- a c Connect a standard 5 pin Micro USB cable to the USB port on the right side of the lock
- When power is applied, both LED's flash 5x followed by an extended beep
-
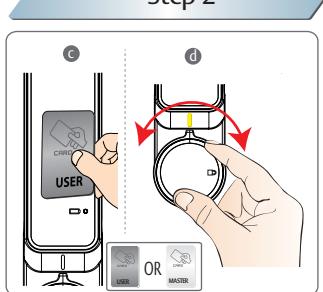
Present a valid User Credential or Master Credential to unlock the cabinet -Existing user credentials will be deleted when a valid
- Master Credential is used. -User Credentials will need to be set again during
- programming of private mode. Open the door and change all 3 batteries


Registering Credentials
Step 1: Master Credentials
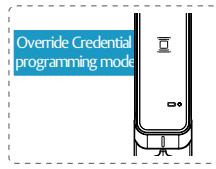
Step 2: Override Credentials
Step 3: User Credentials
-
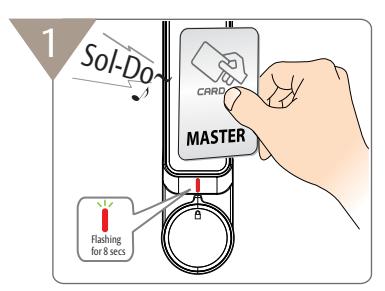
Present a credential to register as a Master Credential - Note: The first credential presented will be registered as a Master Credential
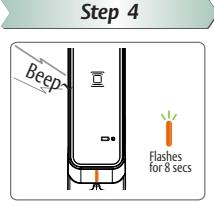
- -Flashing Red LED's for 8 seconds followed by a long beep e
- Present new Master Credential(s) -Up to 20 Master Credentials can be registered
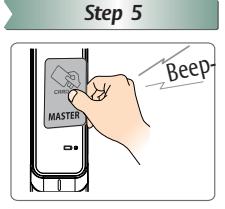
- Present the same Master Credential 2x to end Master Credential programming mode -Flashing Red LED's for 8 seconds
- * Important Note: Registration of Override Credentials starts automatically at the end of Master Credentia programming mode
- ** Clearly mark 1st Master Credential after initial programming and keep in a safe place
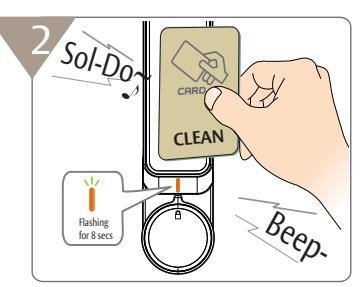
- d End of Master Credential programming mode starts Override Credential programming mode -Flashing Orange LED's for 8 seconds
- Present new Override Credential(s) -(Up to 20 Override Credentials can be registered)
-
Present the same Override Credential 2x to end Override Credential programming mode
- * Note: Skip this step if Override Credentials need to be deleted or are not required
Sol-Do
Present a User Credentia
by a long beep
-Red LED blinks 3x followed
- Present any registered Master Credential -Flashing Yellow LED's for 8 seconds
- Present new User Credential(s) -(Up to 20 User Credentials can be registered)
- Note: Skip this step if Override Credentials need to be deleted or are not required
Precautions for Override Credentials
- * Override Credentials can be used in Private Mode only
- * Note: Override Credentials are programmed to provide continuous access while the cabinet is in use.
- * Present the last Master Credential 3x or wait 8 seconds to end the Master Credential programming mode and skip programming Override Credentials.
Adding/Removing Credentials
Change the Master Credential(s)
credentials vate Mode Skip this step
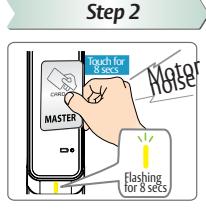
Step 2
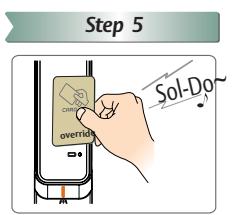
Present and hold a Master Credential in front of the card
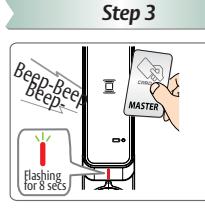
G - During RED LED blinking for 8 seconds
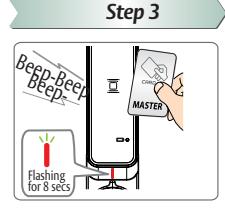
Step 4
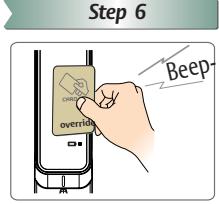
d Remove the Master Credential from the front of the card reader after hearing 3 short beeps -Flashing Red LED's for 8 seconds
е to end Master Credential programming only begin after completing Master mode only begin after completing Master Credential programming
New Master Credential(s) successfully
* Registering Override Credentials can
Change the Override Credential(s)
ivate Mode Skip this step
Credential in front of the card reader for 8 seconds -Flashing Yellow LED's
Remove the Master Credential from the front of the card reader after hearing 3 short beeps -Wait for flashing Red LED's for 8 seconds before moving to next sten
e Flashing Amber LED's for 8 seconds after short beep
Present Override Credentials to the front of the card reader to
Present the last Override Credential 2x to end Override Credentia programming mode
h New Override Credential(s) successfully
* FCC statement
This device complies with Part 15 of the FCC Rules. Operation is subject to the following two conditions:
- (1) this device may not cause harmful interference, and
- (2) this device must accept any interference received, including interference that may cause undesired operation.
- Caution: Changes or modifications not expressly approved by the party responsible for compliance could void the user's authority to operate the equipment.
- *This appliance and its antenna must not be co-located or operation in conjunction with any other antenna or transmitter.
This equipment should be installed and operated with minimum distance 20cm between the radiator your body.
leader in door opening solutions, dedicated to satisfying end-user needs for security, safety and convenience
ASSA ABLOY
ELECTRONIC SECURITRY HARDWARE