First Choice Building Products Series SW300-2 Signal Switch Installation Guide
Open the original PDF document
View PDF

Series SW300-2 Signal Switch Installation Guide
Phone: (800) 793-4544
www.firstchoicebuildingproducts.com
SW300-2 Signal Switch Contents:
- 1. Series SW300-2 Signal Switch
- 2. 3-Wire Lead, Attached to Switch

Door Frame/Exit Device Prep:
1. Drill door frame and prepare exit device for passing electrical wire through device to the door.

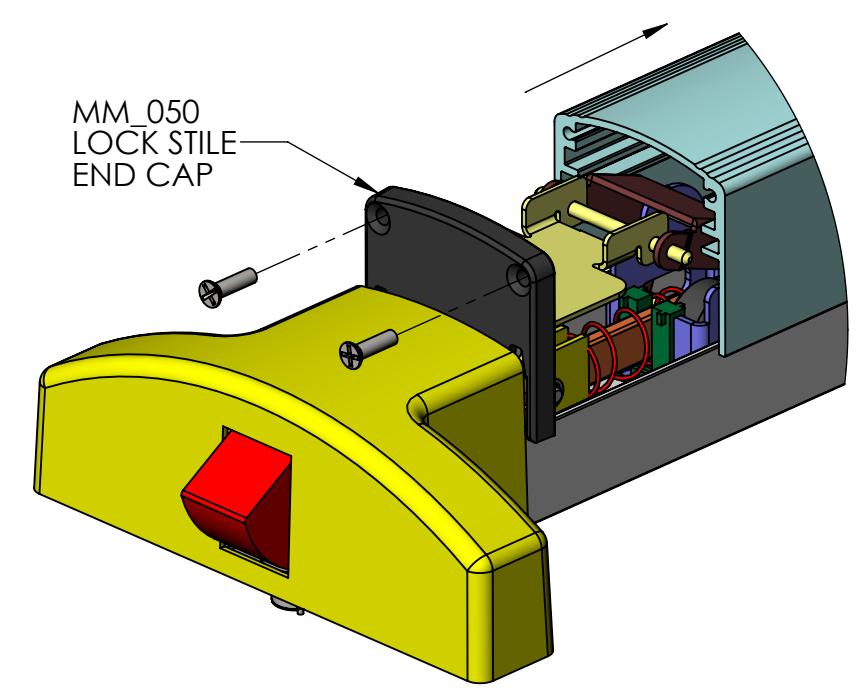
2. Remove the Lock Stile End Cap, and slide the push bar off the Exit Device. Be careful to keep Axle Pins from falling out of the assembly.
FIRST CHOICE BUILDING PRODUCTS
REVISED: 3/6/2017
Installing Signal Switch Board Into Exit Device:
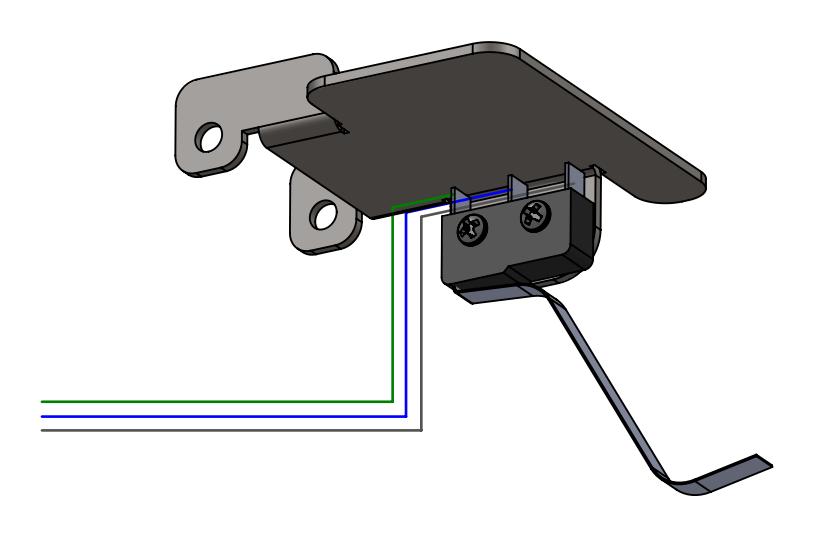
1. Locate the SW300-2 Signal Switch between the tabs on the rear Scissor Bracker with the Signal Trigger Arm oriented towards the bottom of the channel.

2. Bend the Signal Trigger Arm so that it contacts the bottom of the channel but does not activate the switch. Route the 3-Wire Lead from the Switch over the top of the scissor bracket and out the back of the device.

FIRST CHOICE BUILDING PRODUCTS
REVISED: 3/6/2017
3. Mount push bar onto the assembly by positioning the Axle Pins and Brackets in the bottom slot of the push bar extrusion (as shown in side view above), and sliding the push bar back across the channel.
Finishing Signal Switch Board Installation:
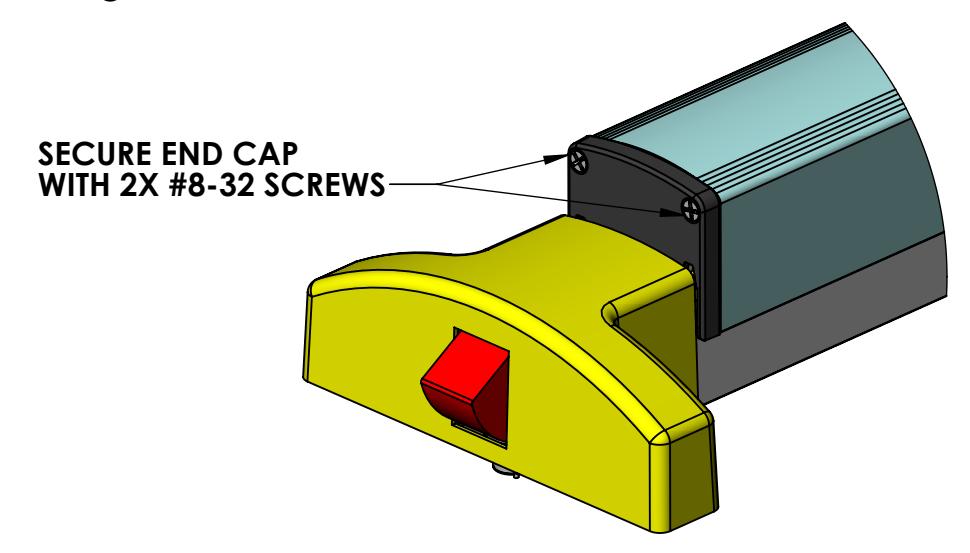
4. Re-secure the push bar to the Lock Stile End Cap by fastening with 2X #8-32 screws.
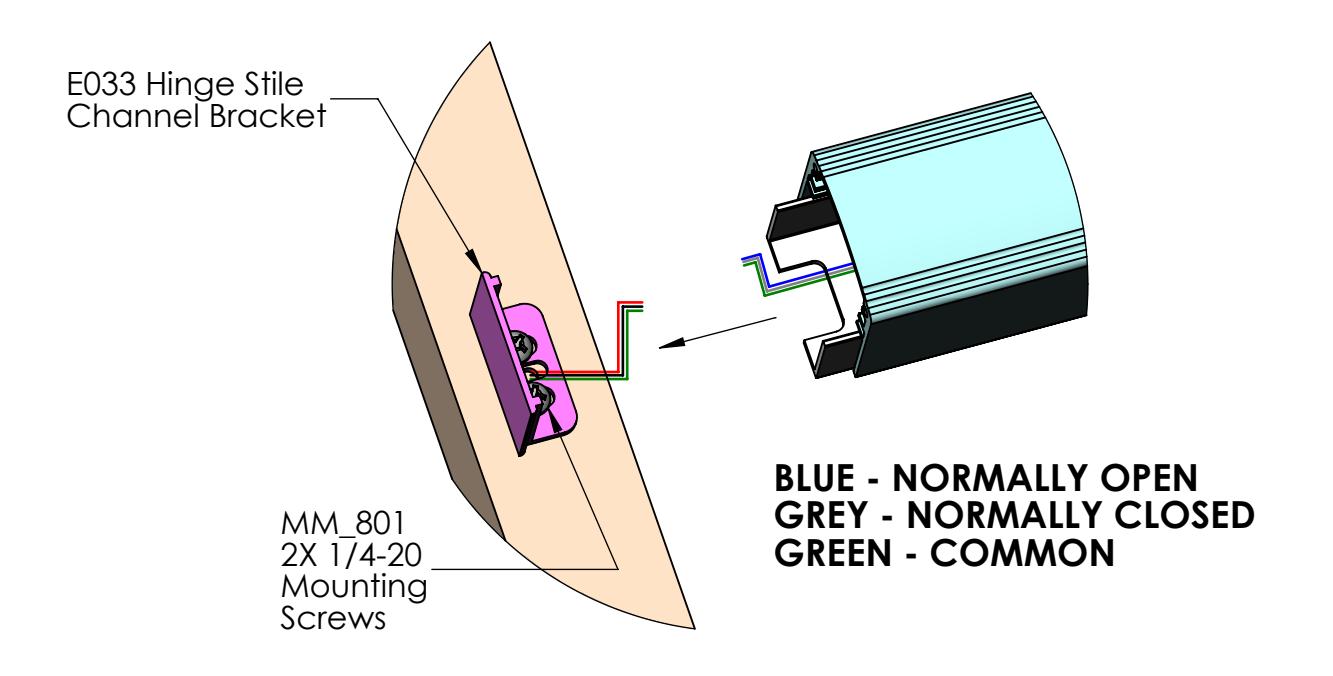
5. Connect the wires from the Door Frame to the wires from the Signal Switch. Push the remaining length of wire through the drilled hole into the Door Frame.
FIRST CHOICE BUILDING PRODUCTS
6. Finish install by fastening Hinge-Stile End Cap to the end of the push bar using #8-32 Flat Head Screws.
REVISED: 3/6/2017