First Choice Building Products Series A36 Alarm Kit Installation Guide
Open the original PDF document
View PDF

Series A36 Alarm Kit Installation Guide

Phone: (800) 793-4544
www.firstchoicebuildingproducts.com
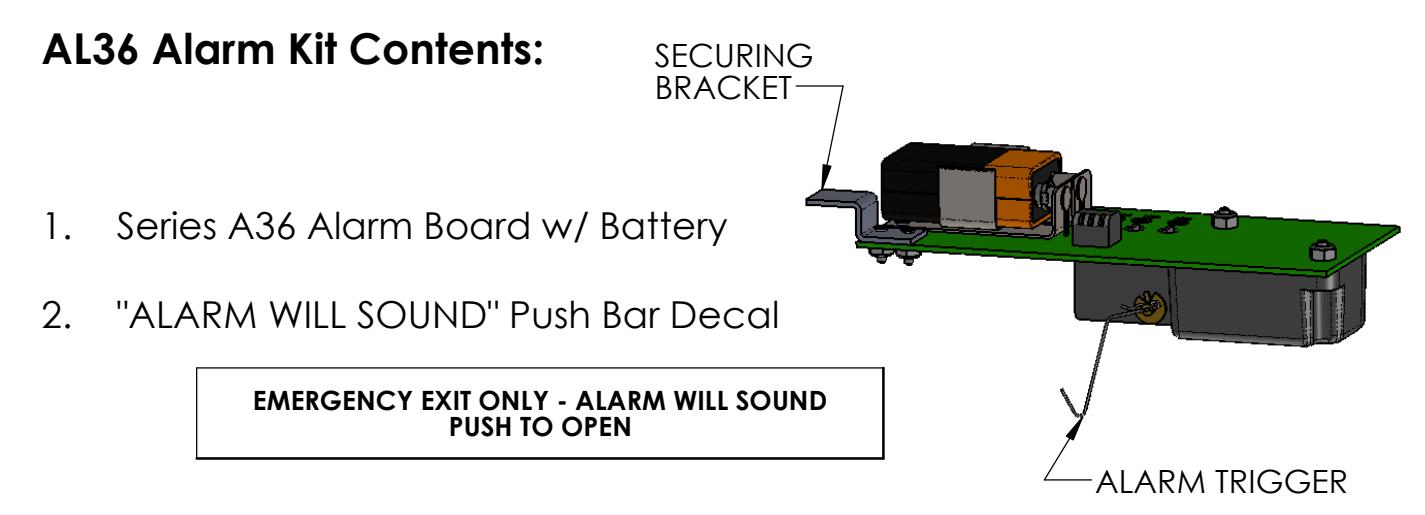
(NOTE: If shipping the exit device loose (Not installed on a door), be sure to secure the Alarm Board so that it will not fall out during handling.)
Before Mounting Alarm Board to Exit Device:
1. Dog the Exit Device before Installing Alarm Board. (This keeps from triggering the Alarm accidentally during install process.)

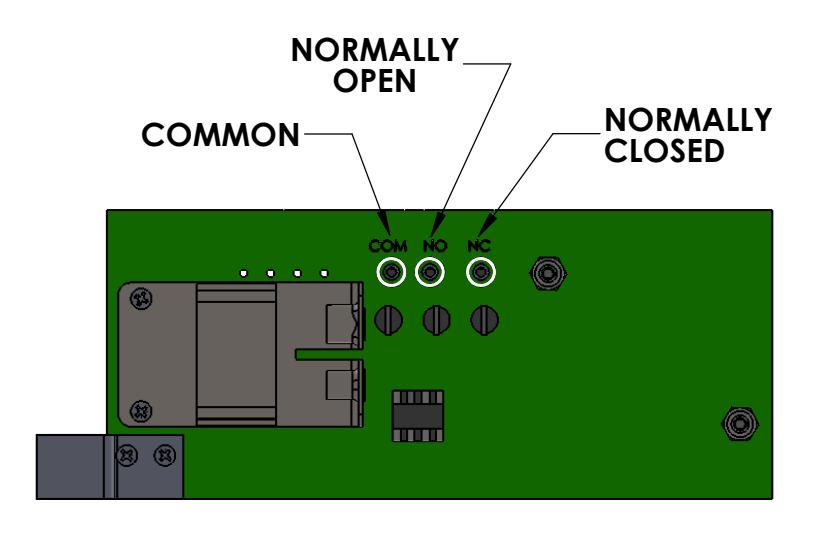
2. (Optional) To wire the Alarm Board for a Control System to receive an activation signal when Emergency Exit Device is activated, use solder locations (shown below) to solder wires to Board.
FIRST CHOICE BUILDING PRODUCTS
REVISED: 3/6/2017
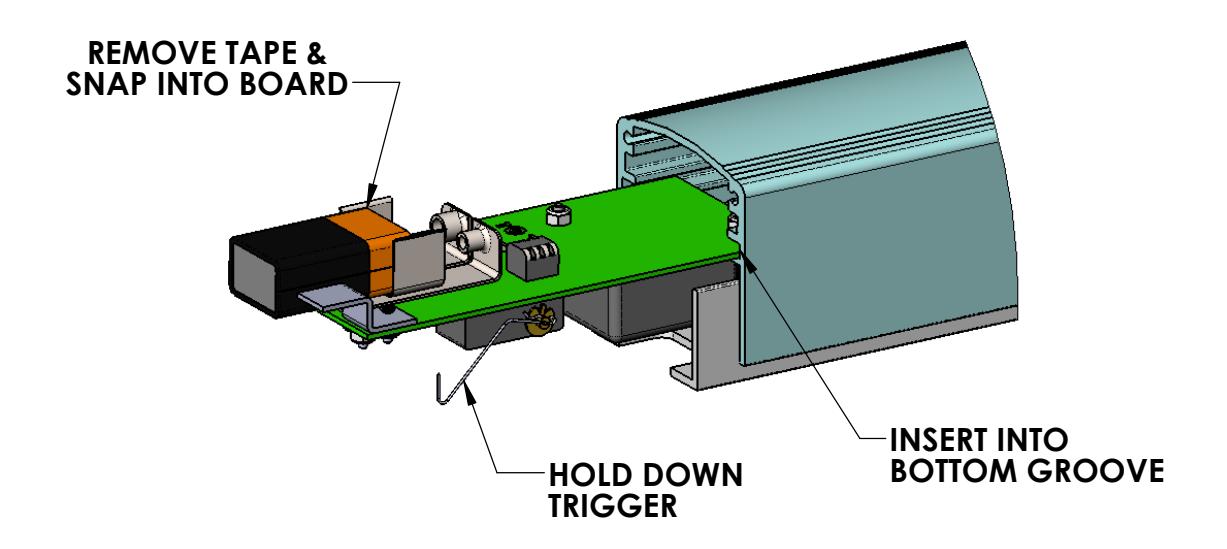
Installing Alarm Board Into Exit Device:
- 1. While holding down the Alarm Trigger, insert the Alarm Board into the rear end of the Exit Device (as shown below), locating it into the bottom groove in the push bar extrusion.
- 2. Remove the protective tape from the Battery, then fully insert and snap the Battery into the Battery-Holder on the Alarm Board. An activation "chirp" will sound.
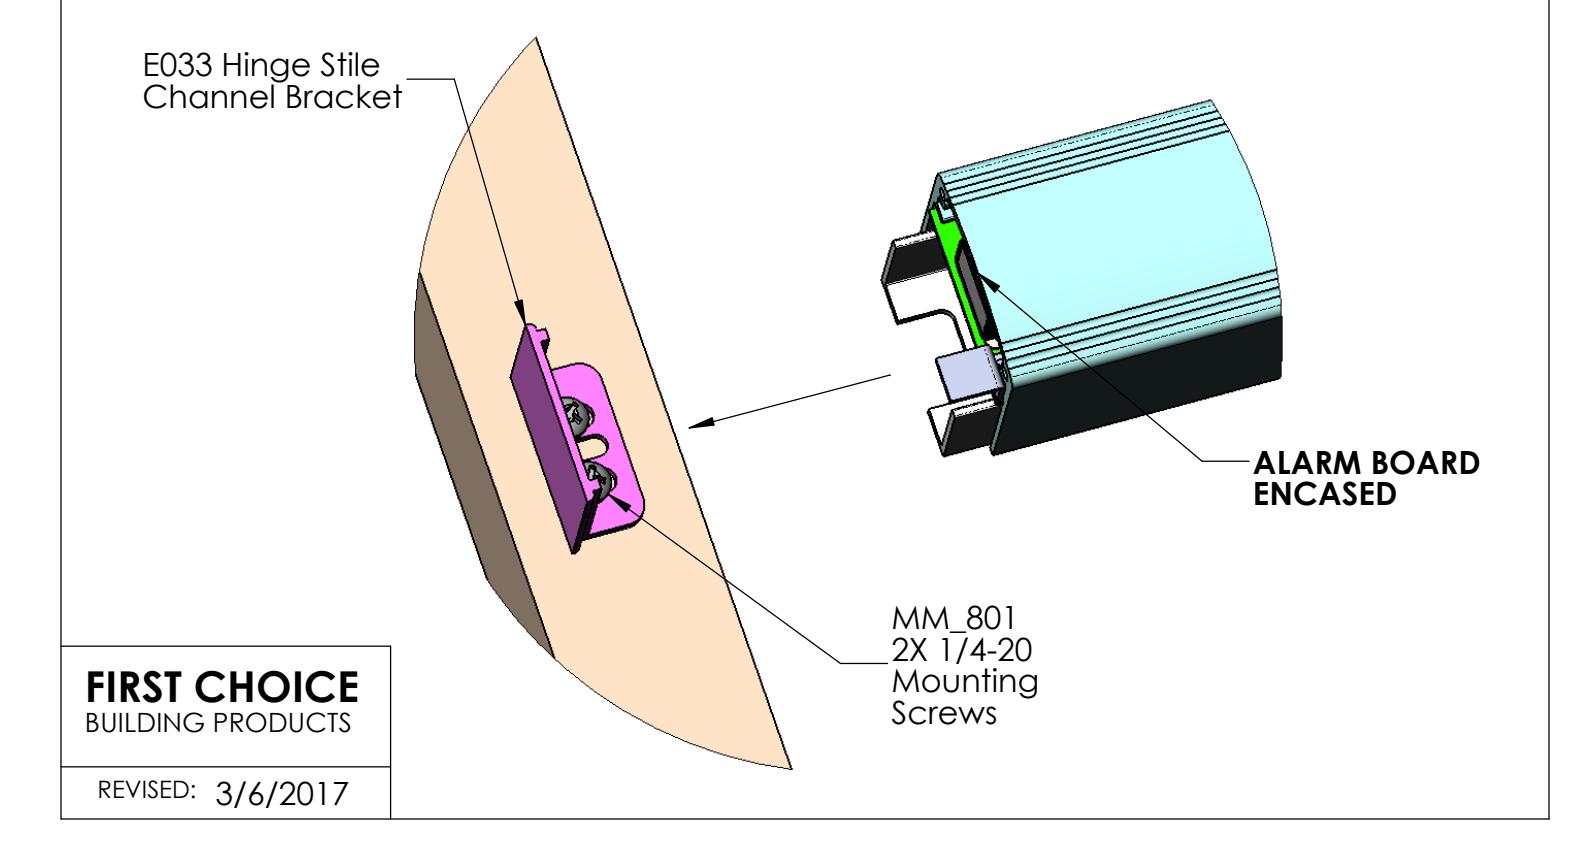
3. Mount the "dogged" Exit Device, with the Alarm Board encased in the push bar, to the door frame. Tighten the 2X 1/4-20 Mounting Screws.
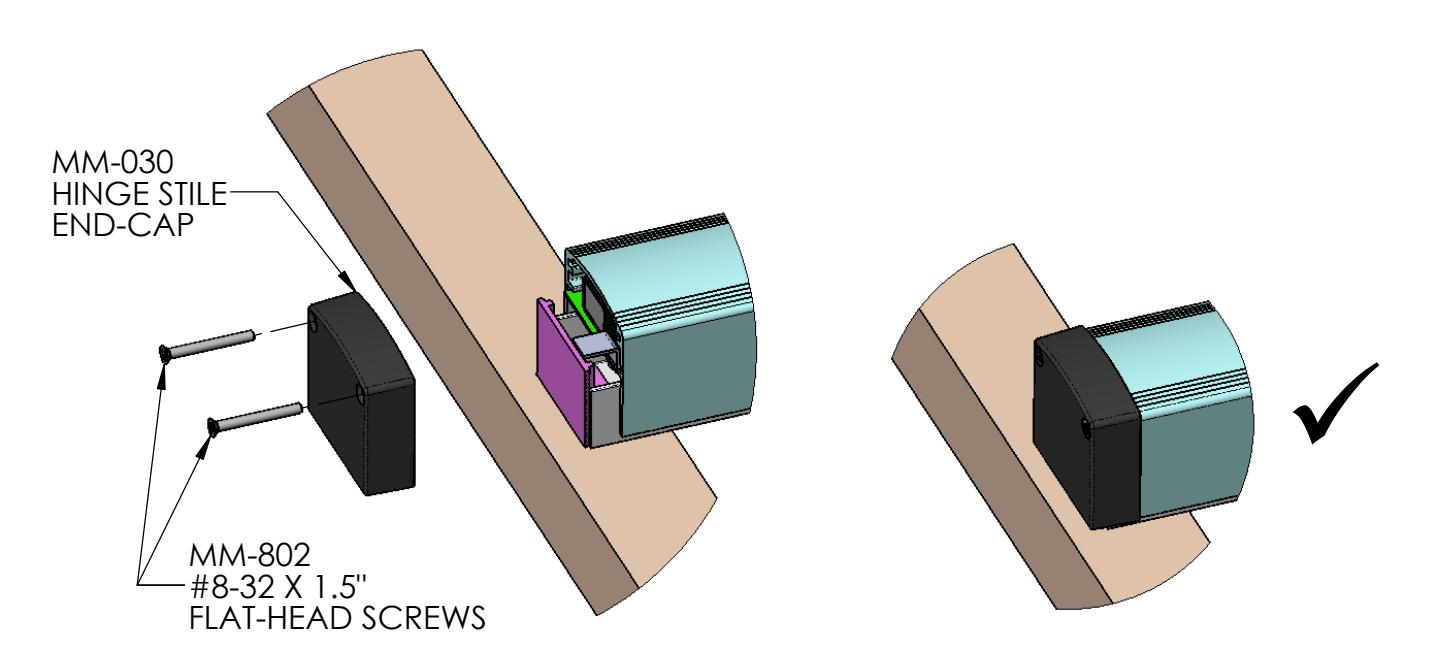
Finishing Alarm Board Installation:
4. Fasten Hinge-Stile End Cap to the push bar using #8-32 Flat Head Screws, securing Alarm Board in place.
5. Attach Sticker Decal to face of push bar. <u>Make sure NOT to cover the dogging hole in the push bar.</u>

6. Undog the Exit Device. The Alarm is now ready.

FIRST CHOICE BUILDING PRODUCTS
Operation: The alarm will sound for <u>60 seconds</u> when the push bar is depressed, then will shut off and rearm automatically (if the push bar is released.)
REVISED: 3/6/2017