First Choice Building Products Model 3690 Lock Replacement Installation Manual
Open the original PDF document
View PDF

Phone: (800) 793-4544 Fax: (800) 867-5016
www.firstchoicebuildingproducts.com

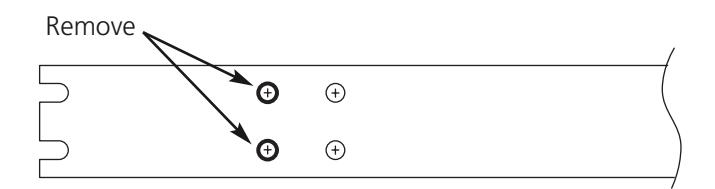
Step 1
Remove
Remove pushbar device from the door. Place on clean work surface to prevent losing parts. Unlock/undog the device.

Step 2
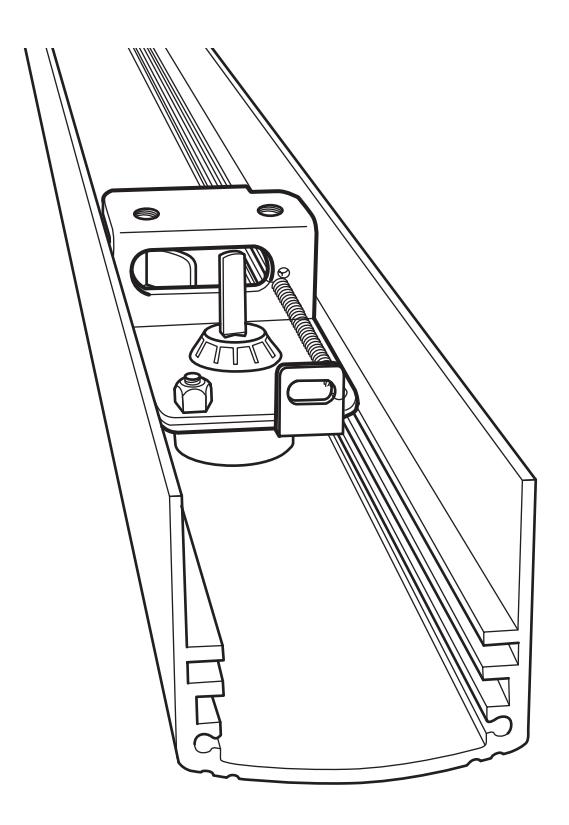
Remove end cap screws. Set screws and end cap aside.
Step 3
Turn device over, pushbar side down. Remove two screws farthest from active side end cap. Set screws aside.
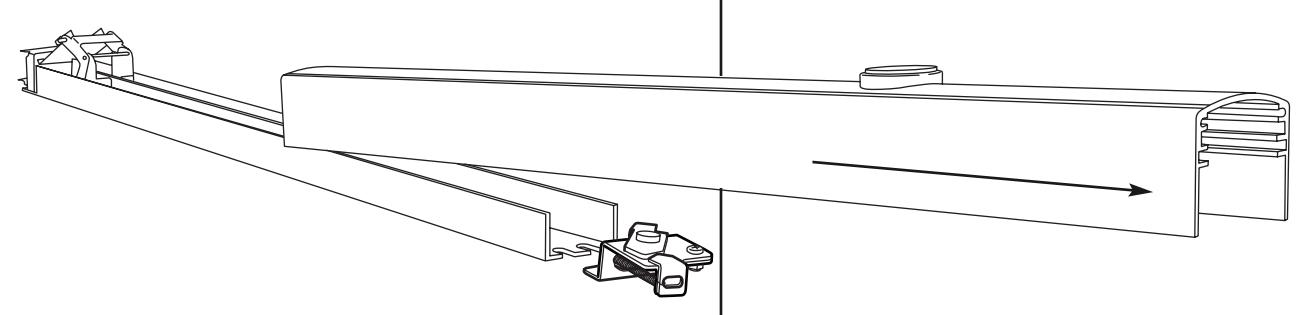
Step 4
Turn device back over, pushbar side up. Slide pushbar off device. The dogging assembly will drop off into the channel or on the table; set it aside.
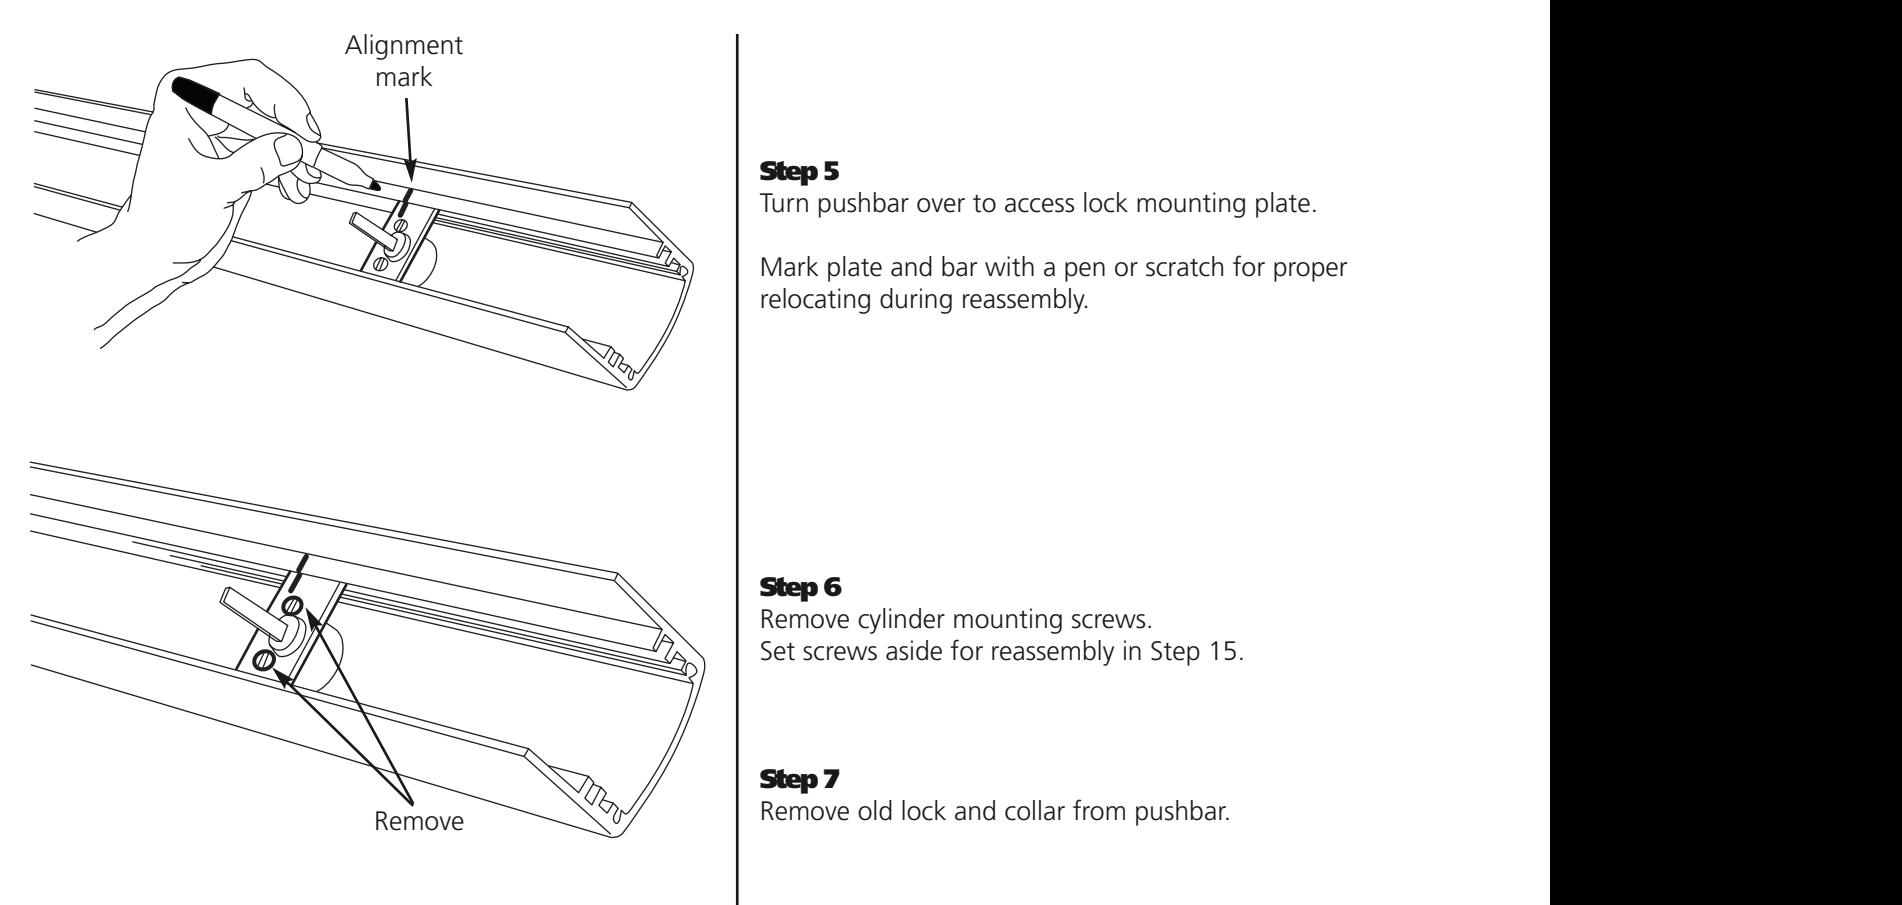
Step 5
Turn pushbar over to access lock mounting plate.
Mark plate and bar with a pen or scratch for proper relocating during reassembly.
Step 6
Remove cylinder mounting screws. Set screws aside for reassembly in Step 15.
Step 7
Remove old lock and collar from pushbar.
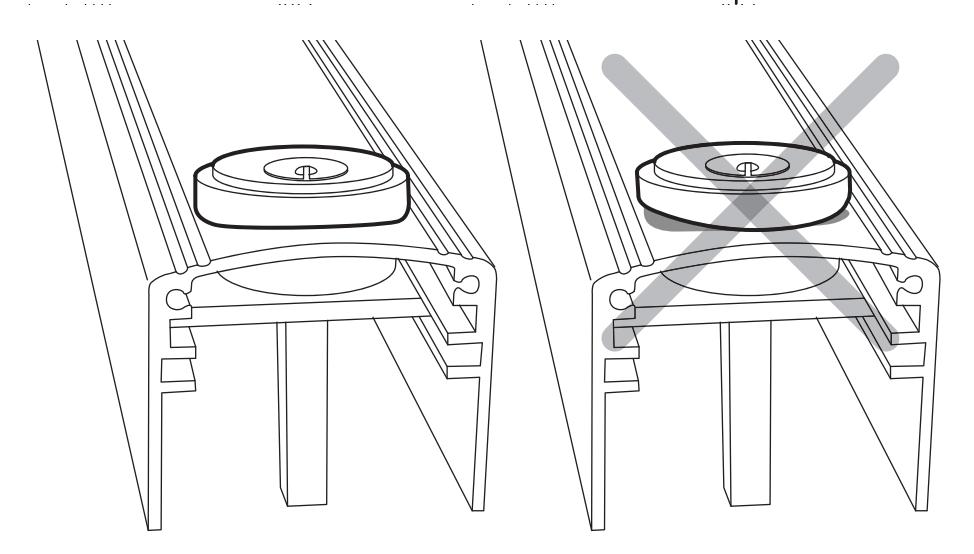
Step 8
Place new lock cylinder in collar and fit into the pushbar.
Align with slots in retaining plate. The retaining plate has slotted holes to accept most brands of cylinders.
Align contour of collar with contour of pushbar.

Step 9
Check length of tail piece. Trim as necessary so tailpiece fits just inside the edges of the pushbar. Use a straightedge to assure proper clearance.
Remove burrs and sharp edges from tailpiece, round slightly and add a small amount of grease.
Step 10
Use mounting screws from Step 6 to attach new lock.
Line up marks for proper bracket placement.
Tighten screws firmly but not too tight. to avoid bending the retaining bracket.
Make sure there is no interference between cylinder hub and cutout in bracket.
Step 11
Rotate key in lock to check for smooth movement.
Make sure lock operates freely without any binding.
Step 12
Check for flush contour alignment of collar and pushbar.
Remove key from lock.
Reassembly
Step 13
Place dogging mechanism over cylinder tailpiece.
Be sure that back of the dogging assembly is pointing to hinge side of pushbar as shown.
Step 14
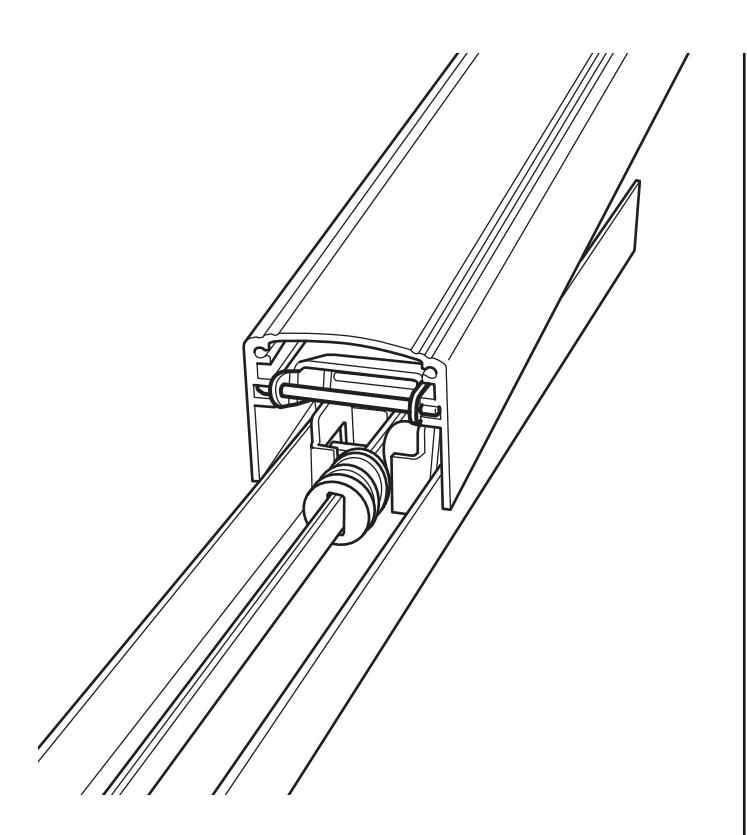
Hold dogging assembly in place while sliding pushbar back in place on the channel.
Make sure that dogging assembly sits inside the channel.
Step 15
With pushbar and dogging assembly in place, turn unit over and align screw holes of channel and dogging assembly.
Reinsert screws and tighten securely.
Step 16
Work pushbar up and down to check for any interference.
Note any problems and reset parts as needed.
If all is OK, then:
Step 17
Reattach end cap with two screws to secure pushbar in place.
Step 18
Check operation of lock and pushbar again. Pushbar should move smoothly up and down.
Lock down with a 1/4 turn of the key; remove key and pushbar should stay dogged down. Unlock with a 1/4 turn of the key and pushbar should operate smoothly.
If all checks out OK, unit is ready for remounting on door.

Phone: (800) 793-4544 Fax: (800) 867-5016
www.firstchoicebuildingproducts.com