First Choice Building Products KRM370 Keyed Removable Mullion Installation Instructions
Open the original PDF document
View PDF

INSTALLATION INSTRUCTIONS
KRM-370 Keyed Removable Mullion

Phone: 800-793-4544 Fax: 800-867-5016
www.firstchoicebuildingproducts.com
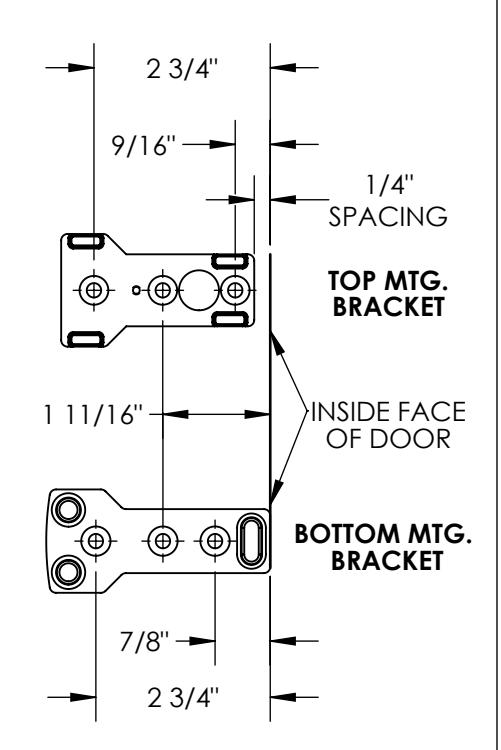
Frame Prep for Keyed Removable Mullion:
1. Locate the Top and Bottom Mounting Brackets according to the dimensions shown, and centered in the door opening (so that both doors will equally overlap the mullion.) Use the Mounting Brackets as templates to locate and drill mounting holes.
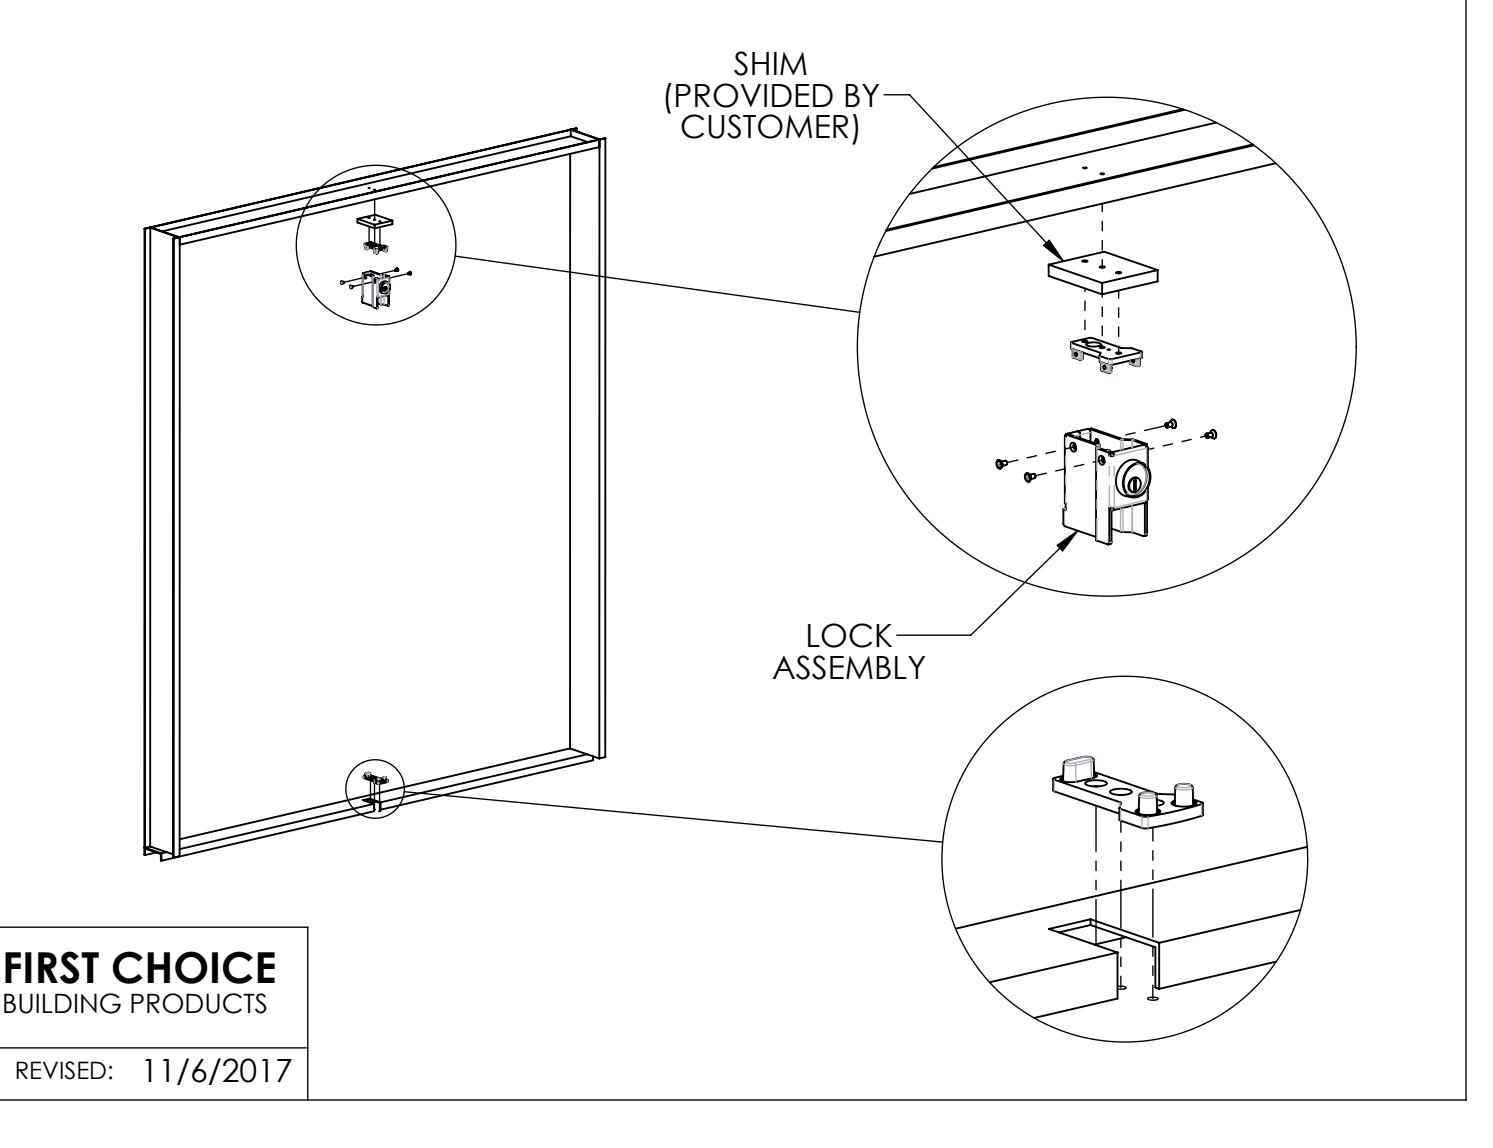
Note: Depending on the frame, a shim may be required to properly secure the Top Mounting Bracket (when overhang occurs). It is highly recommended to choose a shim that covers the entire profile of the Mounting Bracket to ensure security.
- 2. Cut the threshold for the Bottom Bracket for mounting directly to the finished floor.
- 3. With Mounting Brackets installed to the header and floor, secure the Lock Assembly to the Top Mounting Bracket using 4x #10-32 x 1/2" screws. Plastic snap-arms inside the Lock Assembly should fit over the head of #6 screw in the Top Mounting Bracket to keep the Lock Assembly from falling during installation.
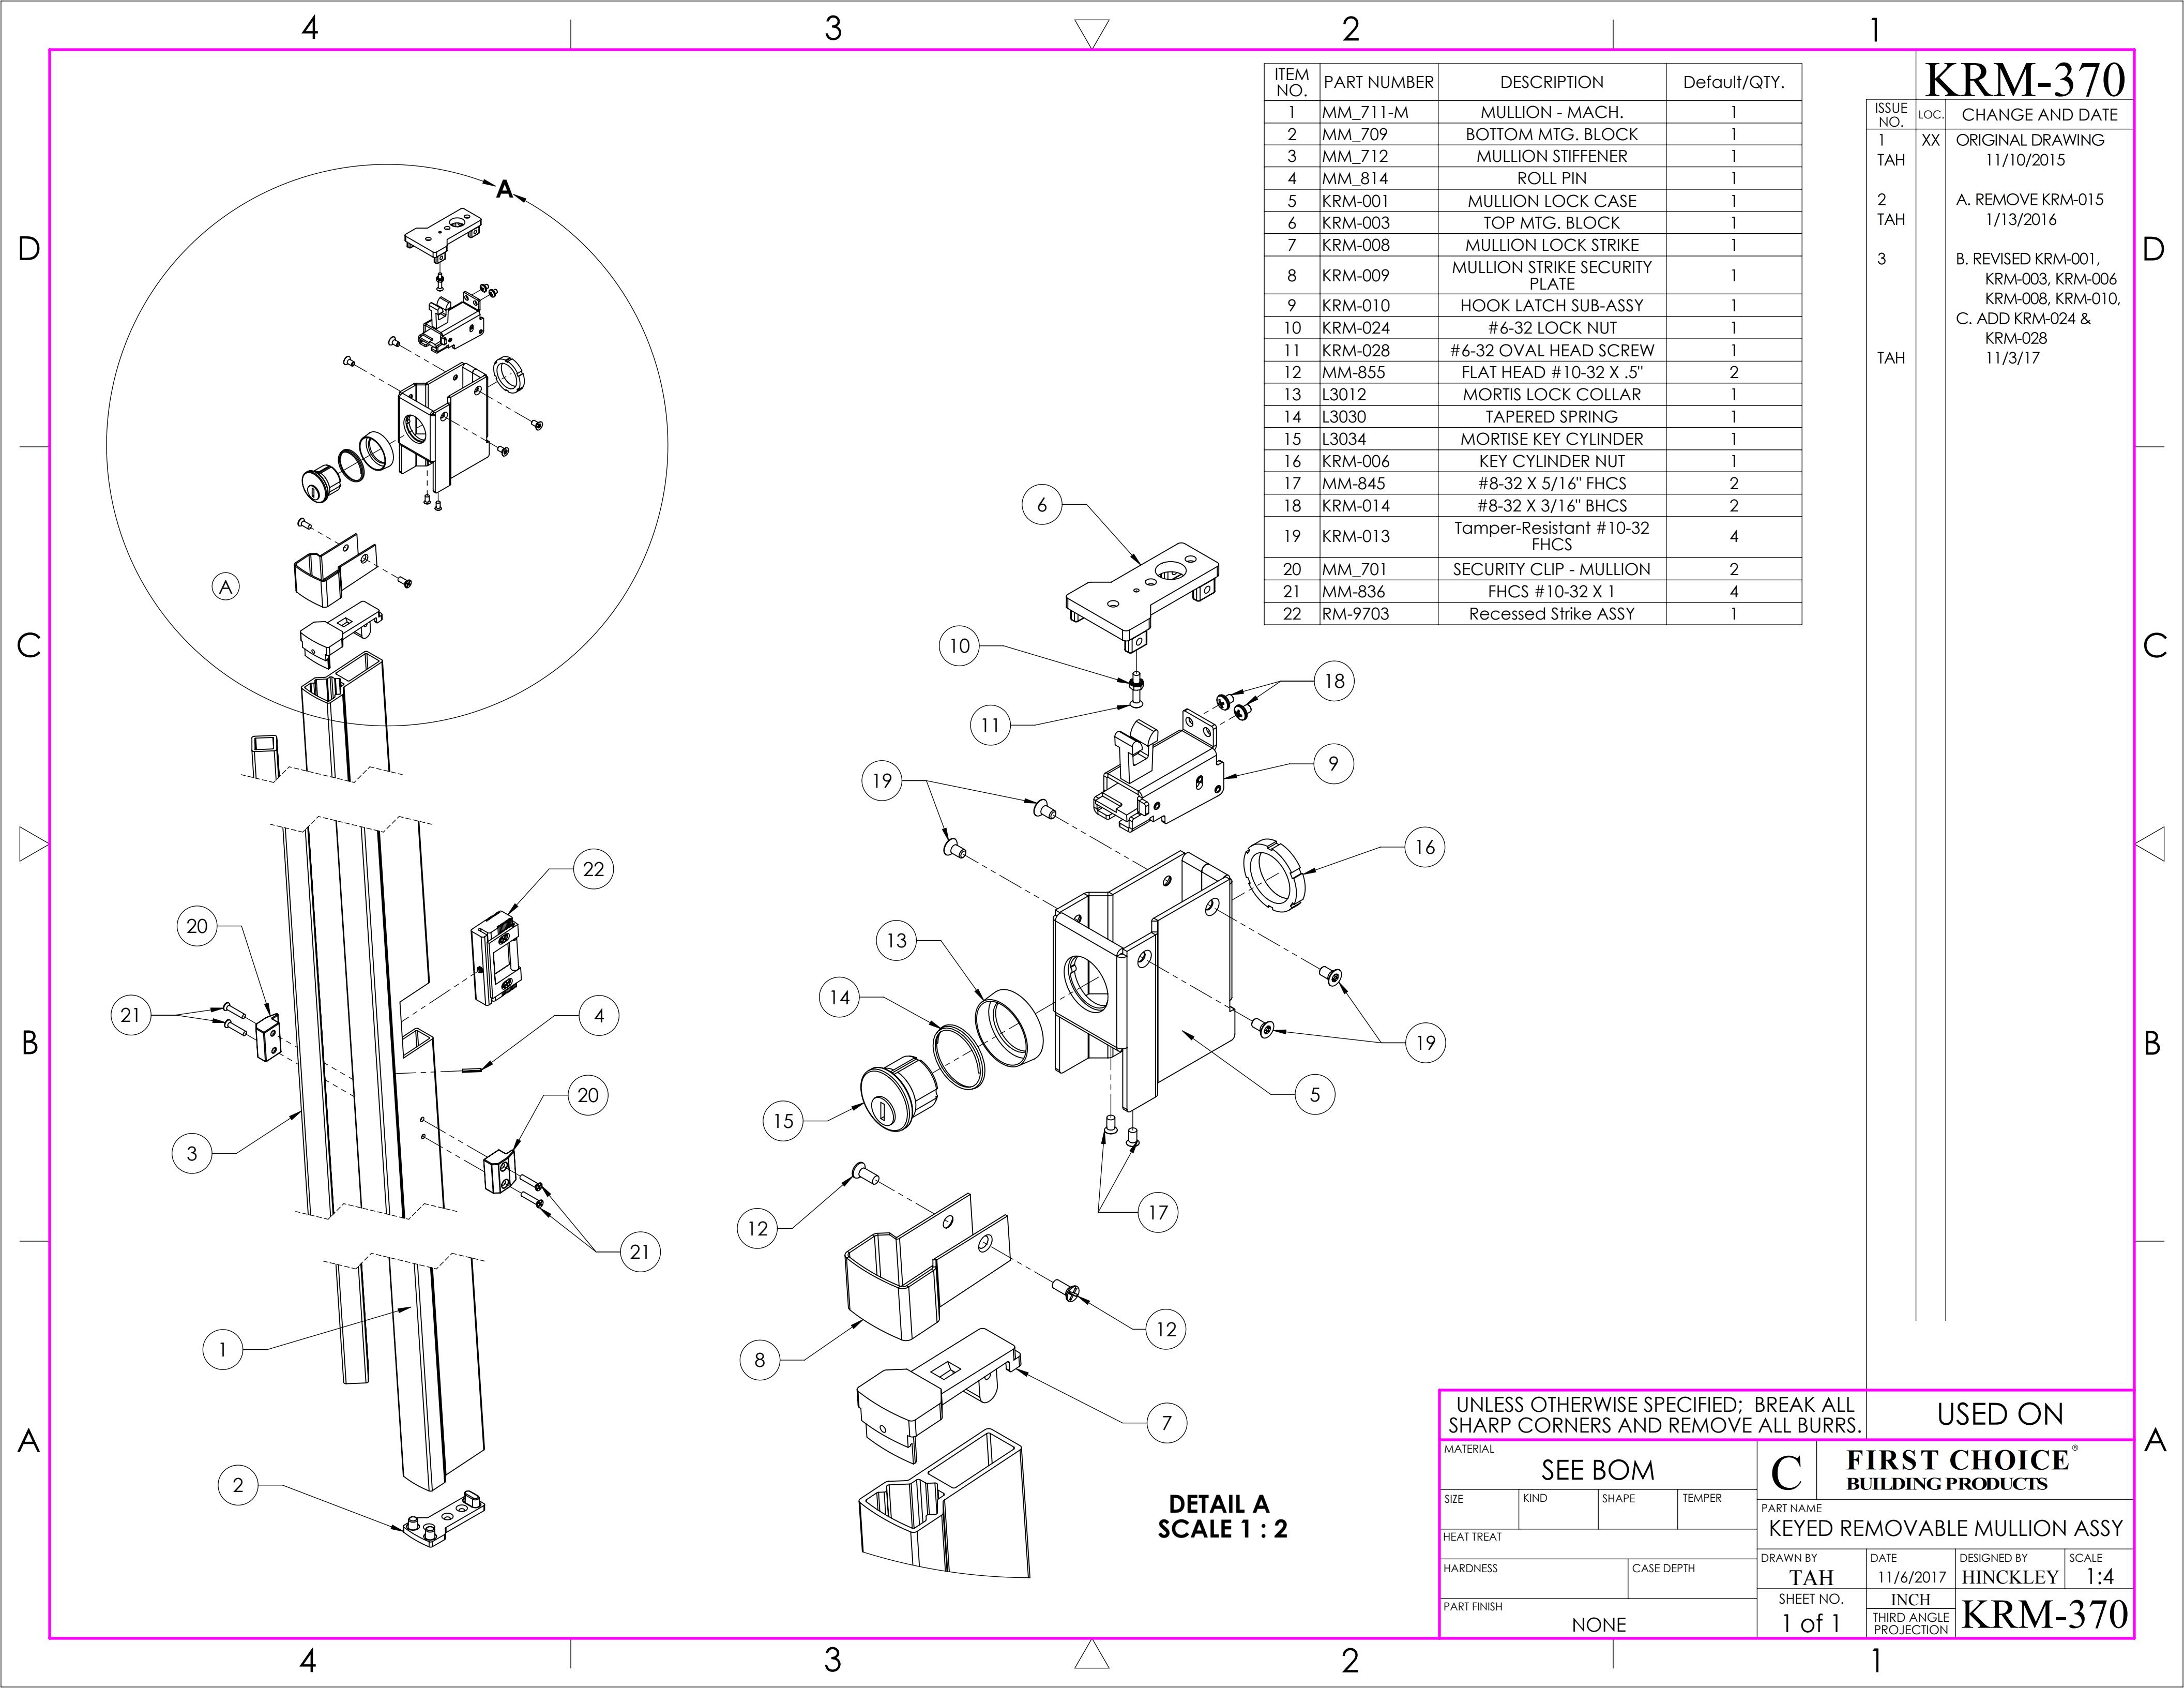
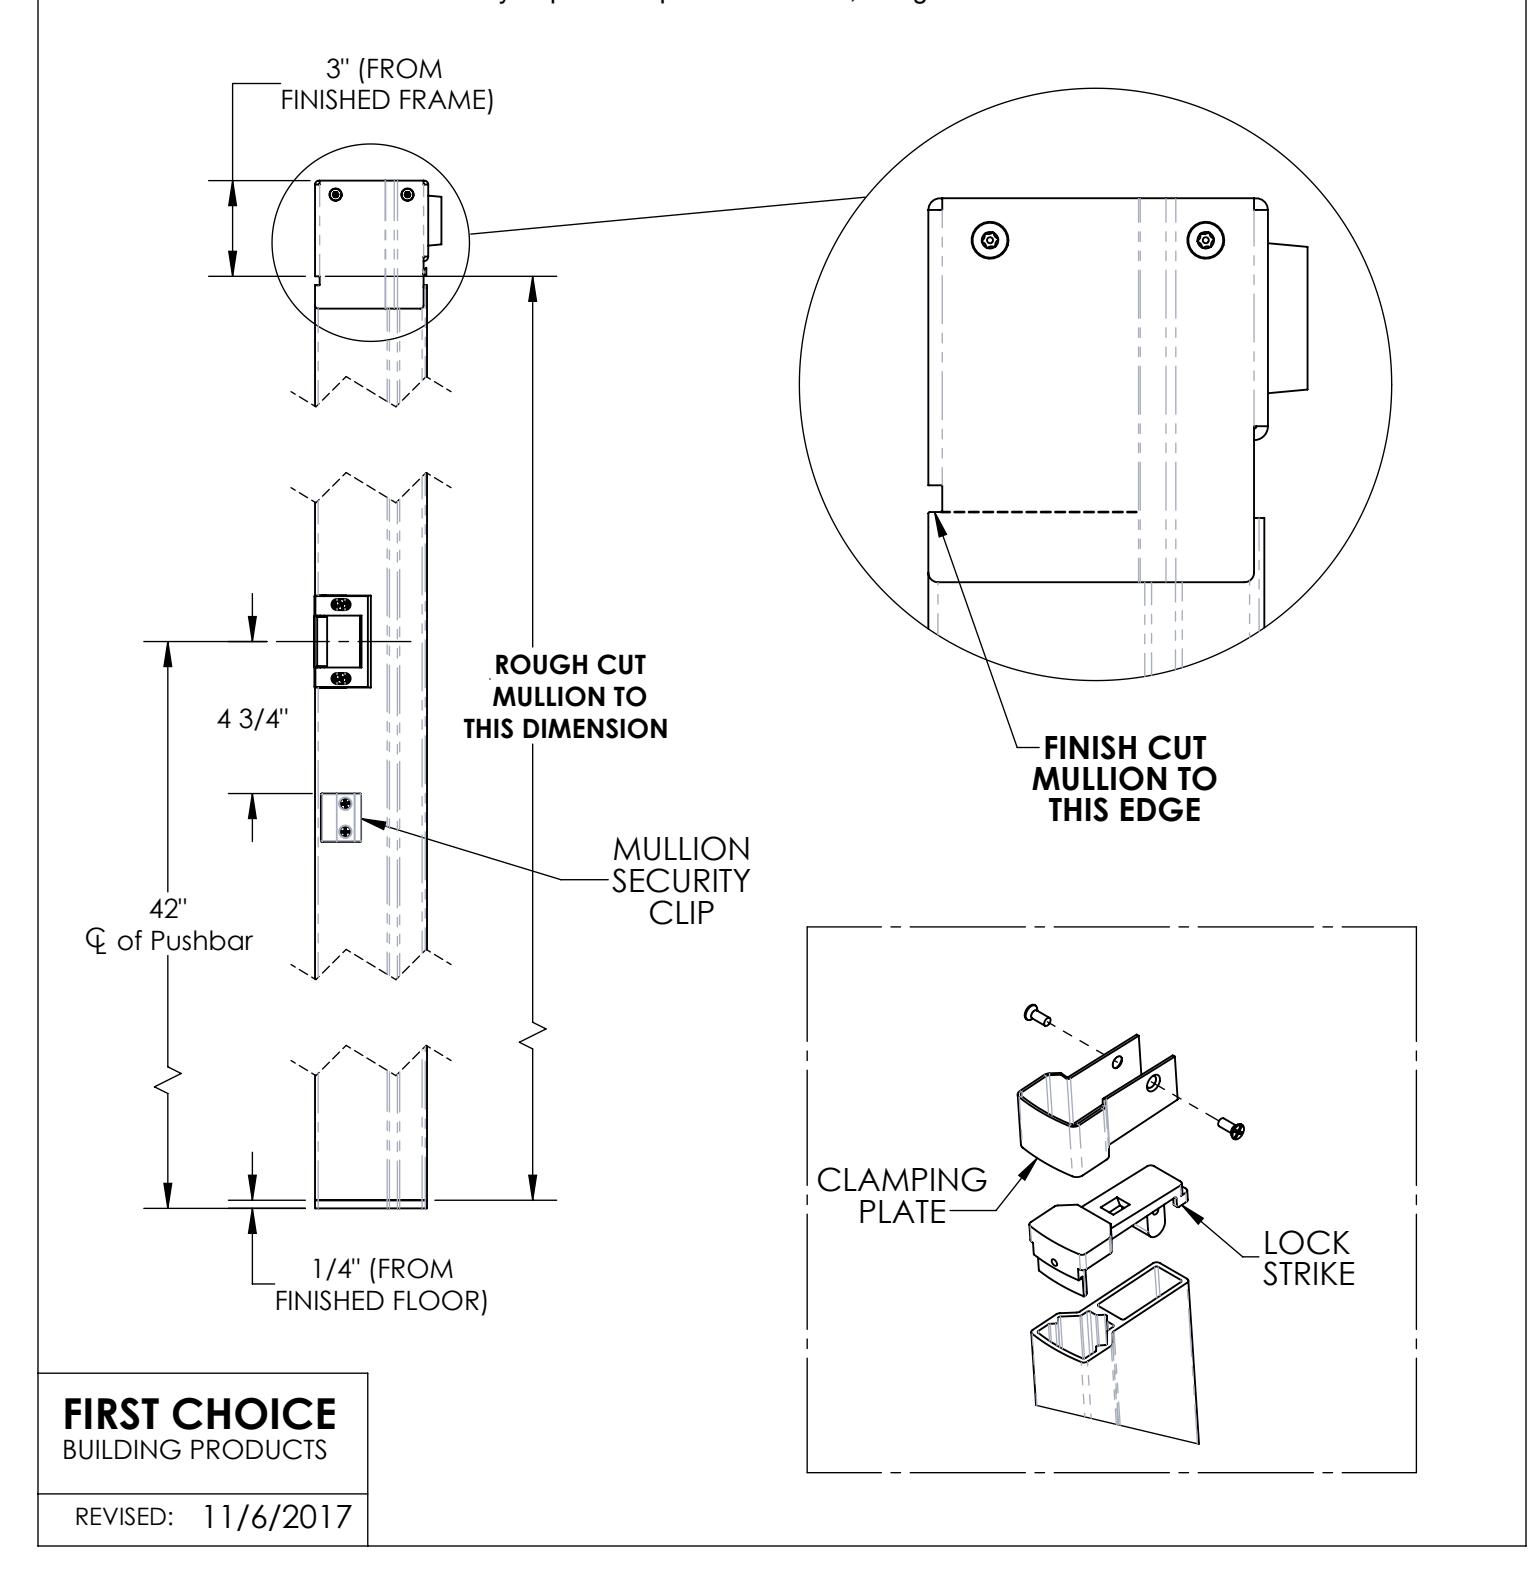
Mullion Preperation for Keyed Removable Mullion:
- 1. Rough Cut: Measure length from finished floor to finished frame and subtract 3 1/4". (If shim is used, subtract shim-thickness.) Cut Mullion to calculated length.
- 2. Finishing Cut: Place bottom of Mullion onto the Bottom Bracket and tilt into place. Using the specified edge of the Lock Housing as a guide (shown to the right), scribe/etch a line on the Mullion and cut to this exact height . Make multiple small cuts if needed.
- 3. Set the Mullion Lock Strike on top of the Mullion, slide the Clamping Plate over the top, and secure it to the Lock Strike with " Flat-Head screws.
- 4. Attach the two Mullion Security Clips to the pre-drilled holes, using 2x #10-32 Flat-Head screws each.
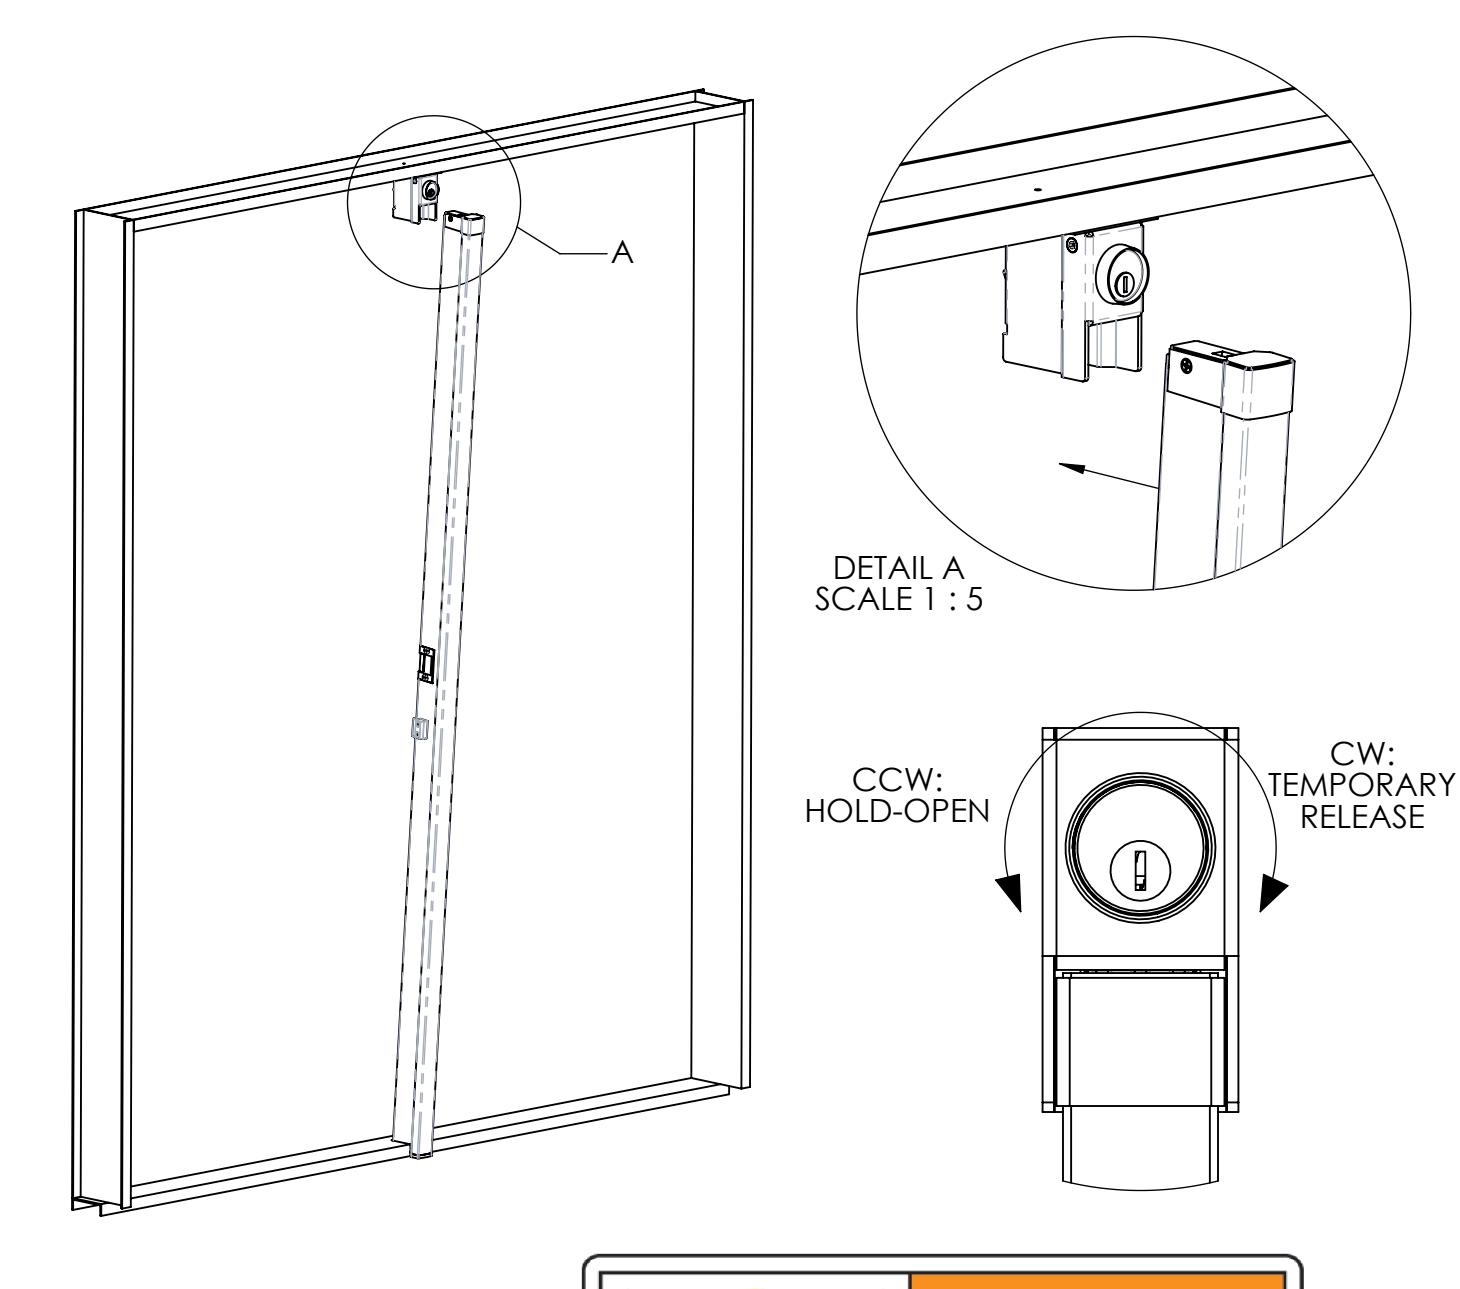
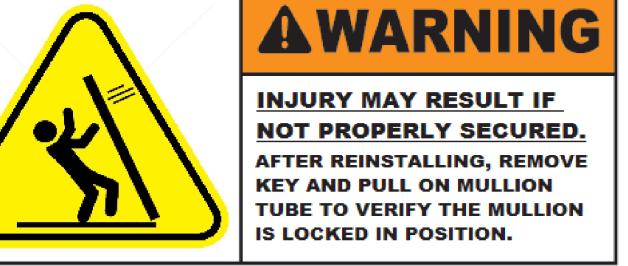
Keyed Mullion Install & Removal
1. To install the Mullion, set it down onto the Bottom Bracket, tilt it forward into the Lock Assembly, and lock it into place. The Hook Latch should engage and lock the Mullion automatically.
NOTE: If the Mullion does not fit, remove the Clamping Plate and Lock Strike and trim 1/32" off the top of the Mullion. If the Mullion is too short, increase the thickness of the shim on the Top Bracket.
2. To Remove the Mullion, insert and turn key to disengage the Hook Latch. (Clockwise rotation for temporary release, Counter-Clockwise rotation for hold-open function.)
FIRST CHOICE BUILDING PRODUCTS
REVISED: 11/6/2017
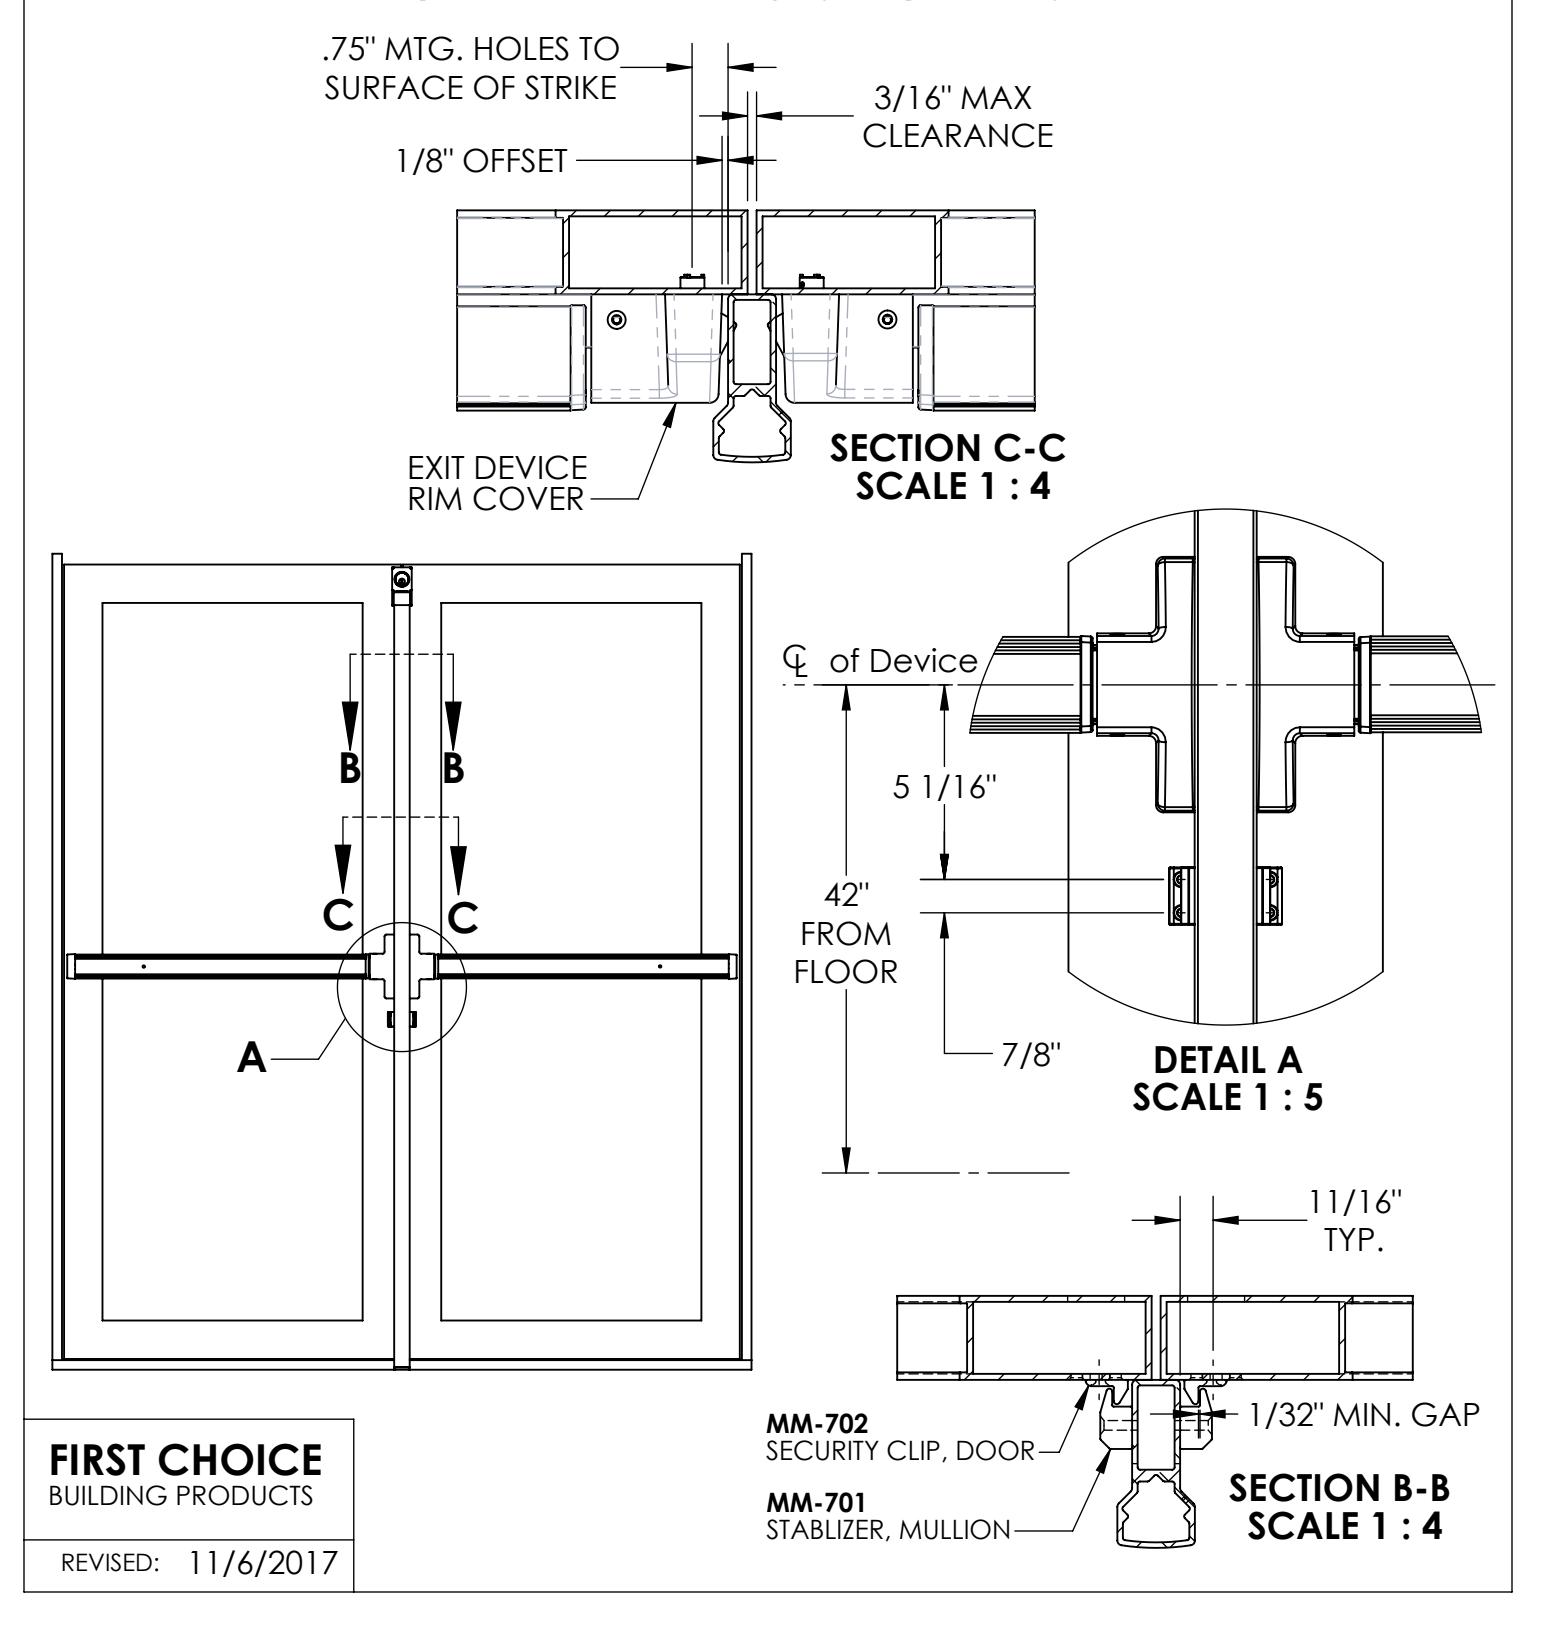
Attaching Exit Device & Door Security Clips, Keyed Mullion
- 1. Doors should overlap the front face of Mullion symmetrically with 3/16" Maximum Gap between stiles.
- 2. 3/4" dimension required from mounting-holes of Exit Device to face of Strike (1/8" offset clearance from edge of Rim Cover to face of Strike.)
NOTE: Narrow-stile doors will not fit Exit Device(s) when using Surface-Mounted Strike.
- 3. With the doors in closed position, locate each Door Security Clip so that they are aligned with and engage with Mullion Clips, leaving 1/32" minimum gap between Clips.
- 4. Mark the mounting holes, drill, and attach Security Clips using the screws provided.
Key Cylinder Replacement for Keyed Removable Mullion
To REPLACE MORTISE KEY CYLINDER, remove the Lock Assembly from the doorframe to get access to the interior.
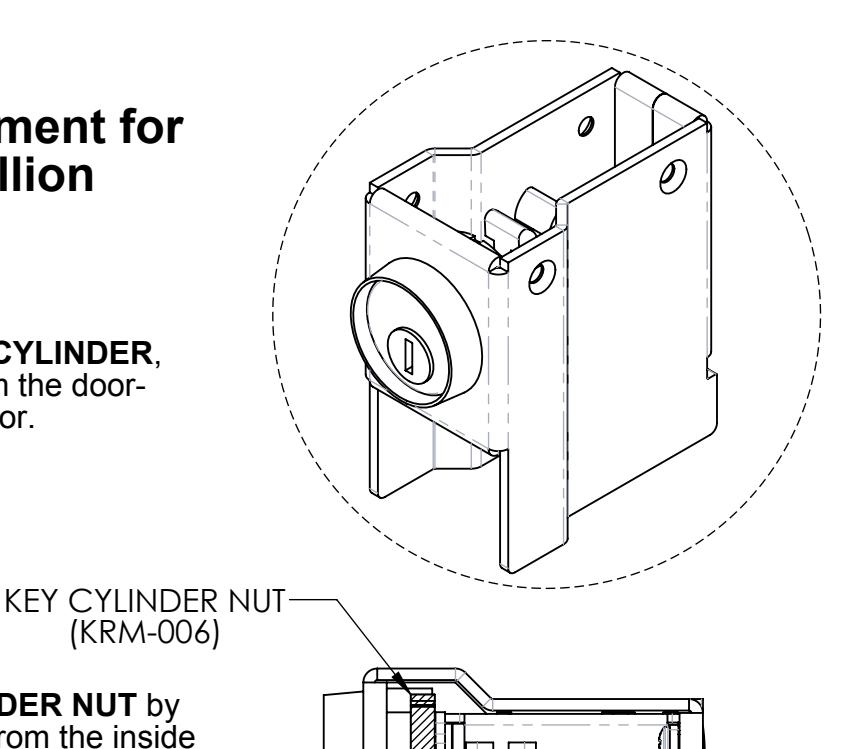
2. Remove the Brass KEY CYLINDER NUT by unscrewing counter-clockwise from the inside of the housing. (It may be necessary to push firmly on the front face of the lock to ease loosening.)
FIRST CHOICE BUILDING PRODUCTS
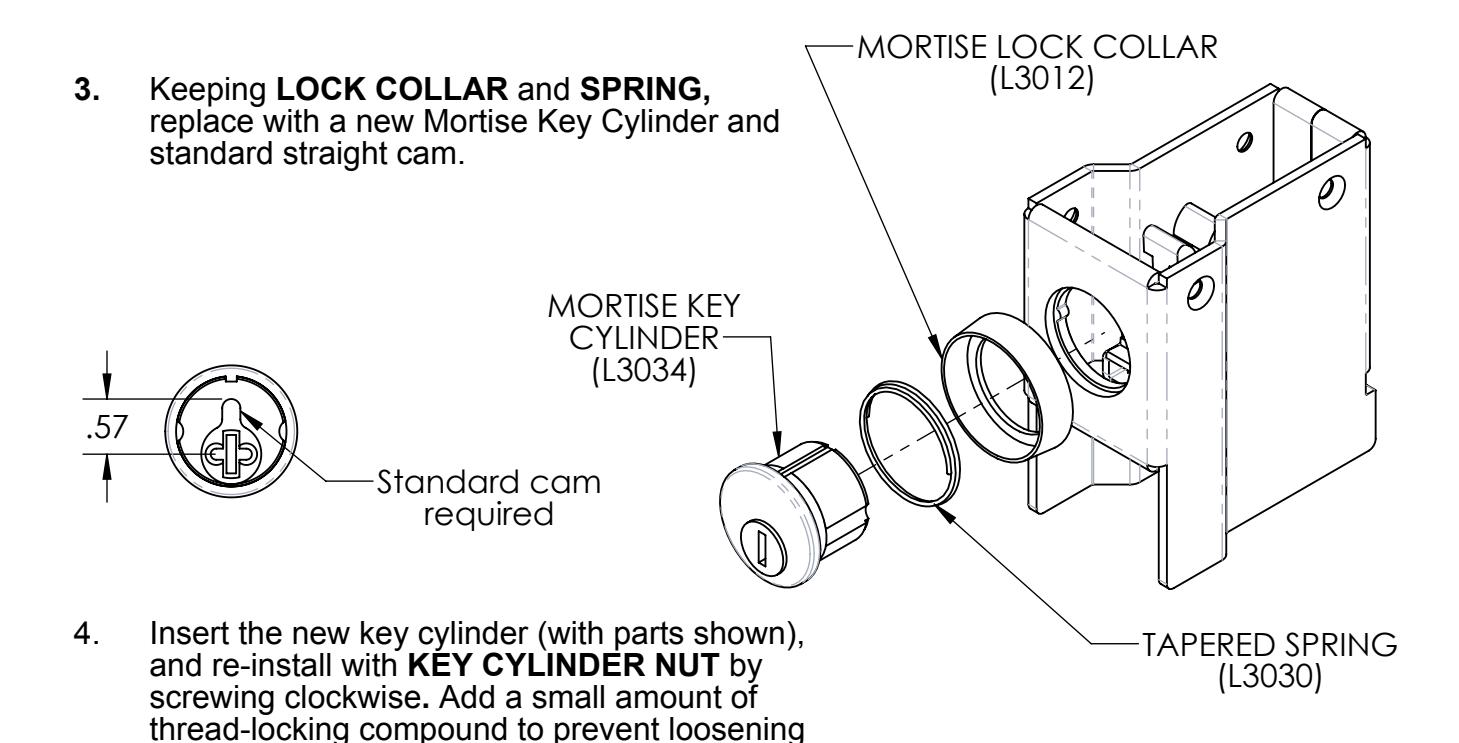
and tighten securely.
REVISED: 11/6/2017
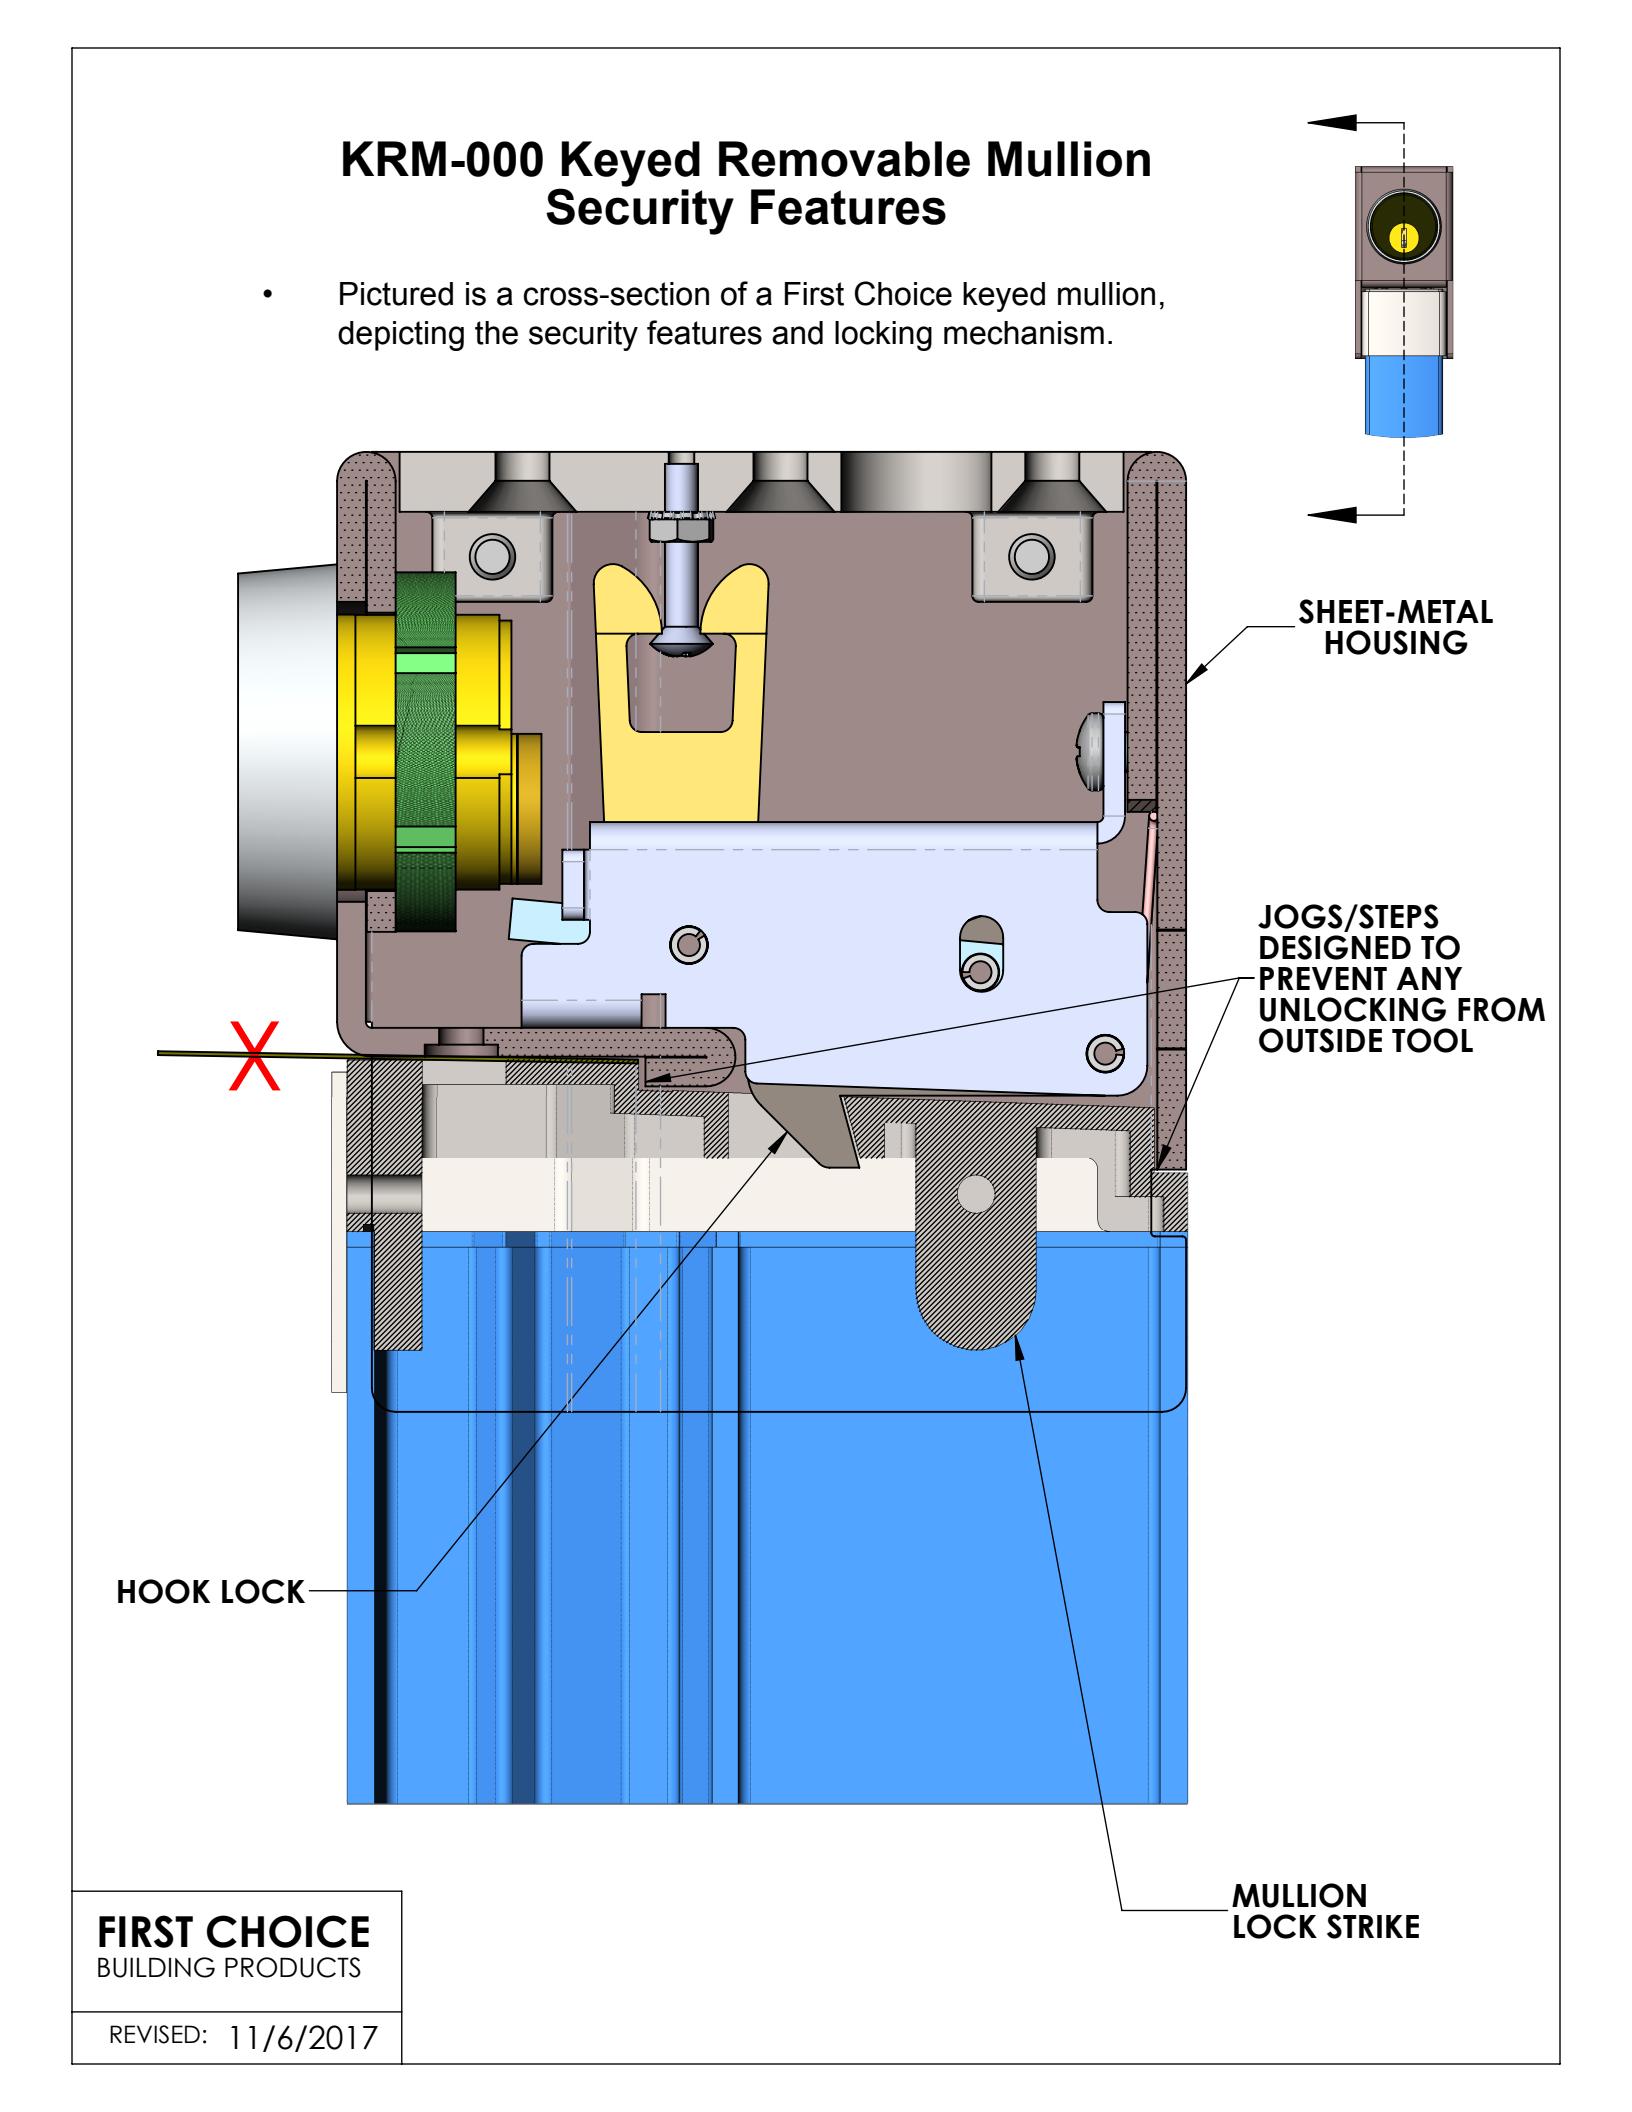
KRM-000 Keyed Removable Mullion Theft Prevention
Pictured is a front and side view of a First Choice keyed mullion with the #10-32 secuirty torx mounting screws removed in the case of an attempted theft.
WITHOUT SCREWS, TOP ASSEMBLY REMAINS ENGAGED AND LOCKED WHEN PUSHED IN SEVERAL DIRECTIONS. —
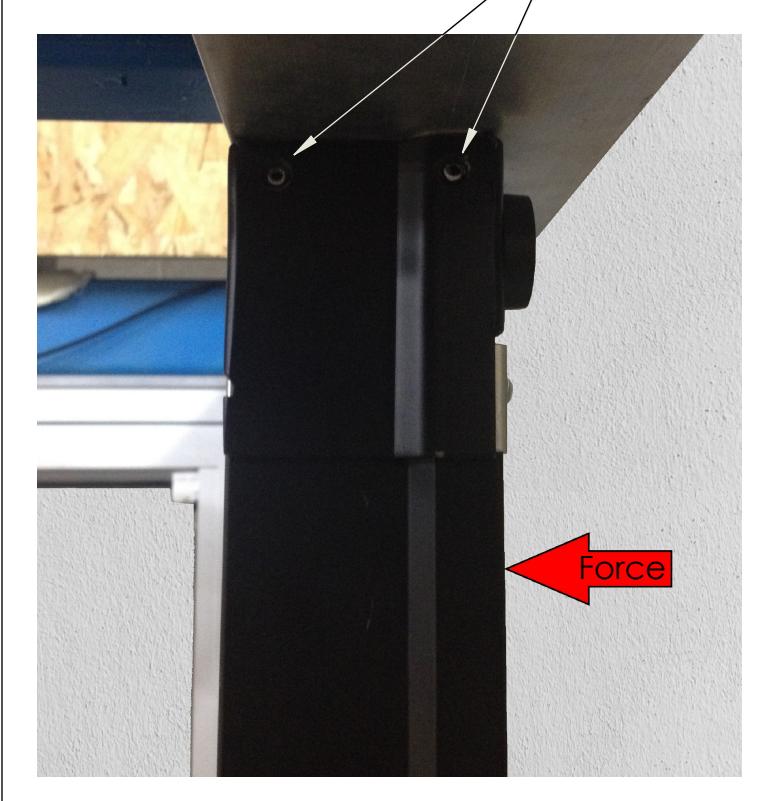
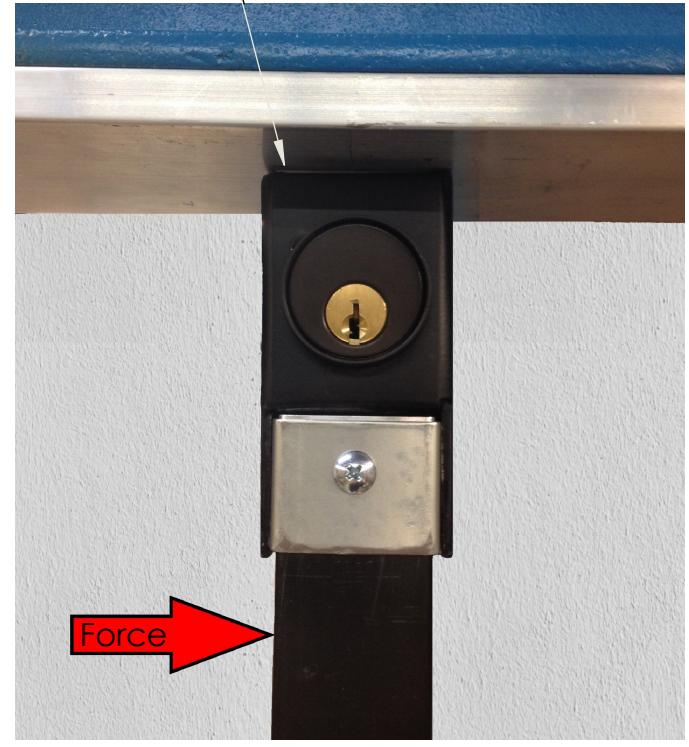
PUSHED BACK
PUSHED SIDEWAYS
FIRST CHOICE BUILDING PRODUCTS
REVISED: 3/25/2016