Falcon_4023_Mullion_Installation_Instructions_110609
Open the original PDF document
View PDF4023
640094-00
Removable Mullion Installation Instructions
Note: Use lock washers on top and bottom mullion fittings except for counter sunk screws.
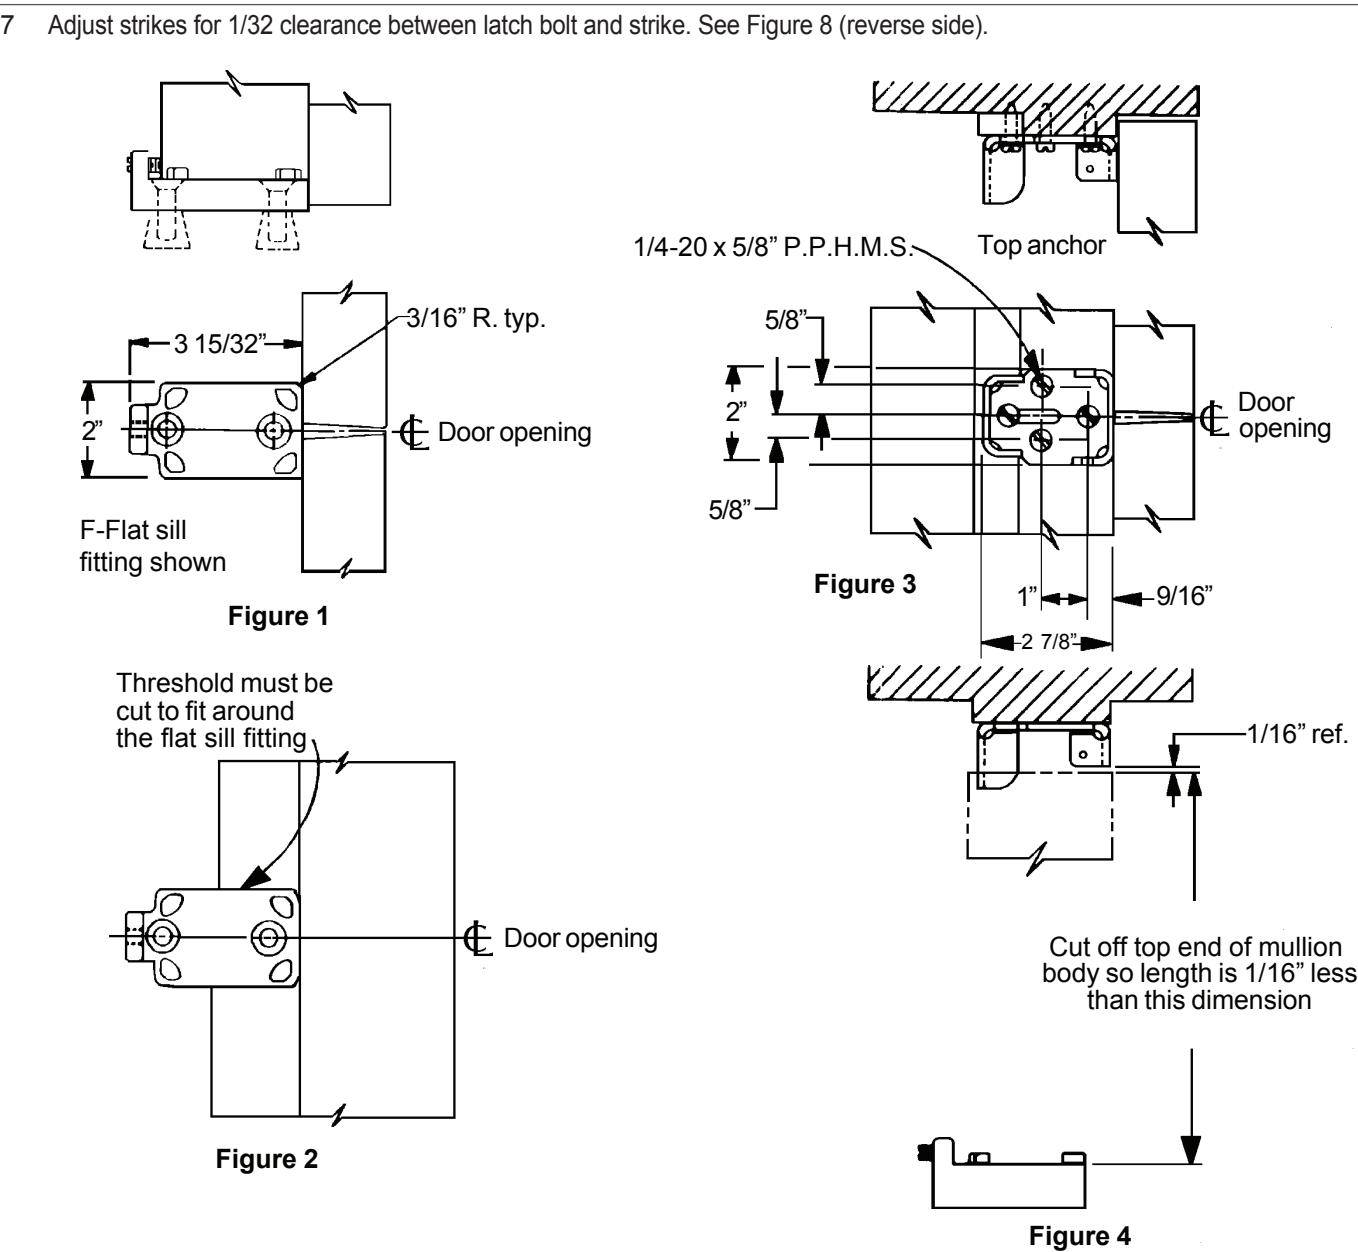
- 1 Line up bottom mullion fitting with center of door opening and flush with closed doors (Figure 1 or 2) and install.
- 2 Line up top mullion fitting with center of door opening and flush with closed doors as shown in Figure 3 and install. See Figures 5, 6, and 7 (reverse side) for optional frame conditions.
- 3 Cut mullion body to length as shown in Figure 4.
- 4 Insert mullion in top fitting and slide bottom of mullion into place. See Figure 8 (reverse side).
- 5 Nest mullion into bottom fitting and secure set screw.
- 6 Install top mullion clamp over mullion and fitting with mounting screws. See Figure 8 (reverse side).

For cutouts on inside face of door, see directions in device carton.