Falcon_4023_KR_Mullion_Installation_Instructions_110607
Open the original PDF document
View PDF4023 KR
FALCON ®
Keyed Removable Mullions
Installation Instructions
Not for use on electric or fire rated removable mullions

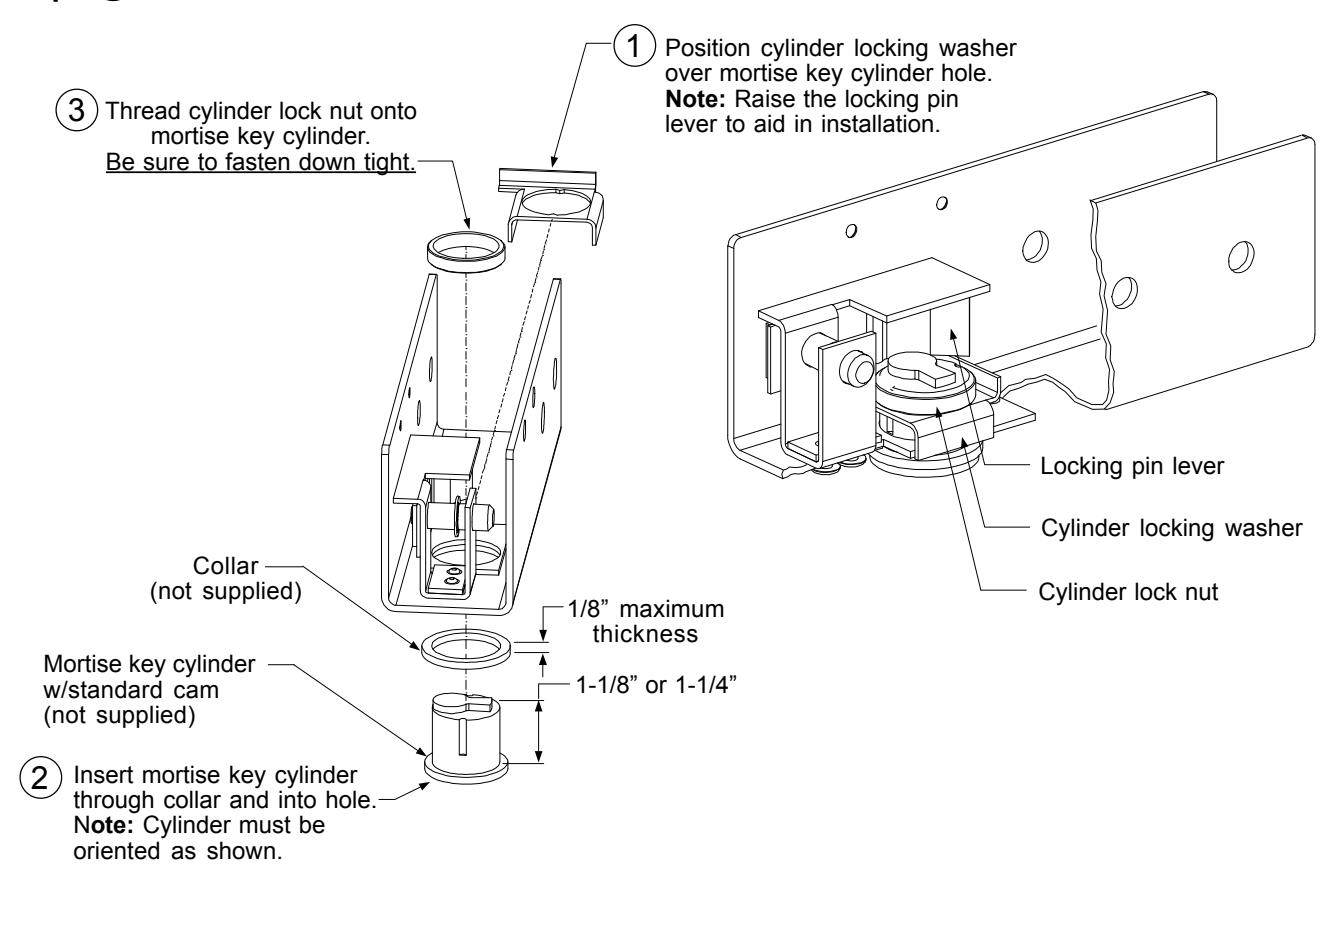
Step 1 Prepare the Keyed Removable Unit.

Step 2 Install bottom mullion fitting. (If bottom mullion fitting already exists, go to Step 3.)


4 CL Door Opening Position top mullion fitting Top Mullion Fitting Shim Note: If mullion is cut between 3/16" - 5/16" too short, add top mullion fitting shim. Install screws and Lock Washers. (5/16-18 x 1 1/4" Button Socket Head Cap Screw & 5/16 External Tooth Lock Washer) 16 Gauge Reinforcement. Supplied by frame manufacturer. Drill and tap frame for 5/16-18 screws using top mullion fitting as template. Top mullion fitting mounted flush against inside face of doors. Mark holes. CL 16 Gauge Reinforcement Angle Bracket can be purchased through 16 Gauge Von Duprin. Reinforcement 16 Gauge Reinforcement Filler block is to be supplied by frame manufacturer. Step Install top mullion fitting. Mounting Top mullion fitting on optional frame styles: 4 2 3 4 1


