Falcon XX & 18 Series Rim Exit Device with Simplex 2000-15 2015 Access Control Installation Instructions 108391
Open the original PDF document
View PDFMONARCH
HARDWARE & MFG. CO. • SHEPHERDSVILLE, KY 40165
A Subsidiary of Newman-Tonks, Inc.
D-4065-1
DATE: 3-15-95
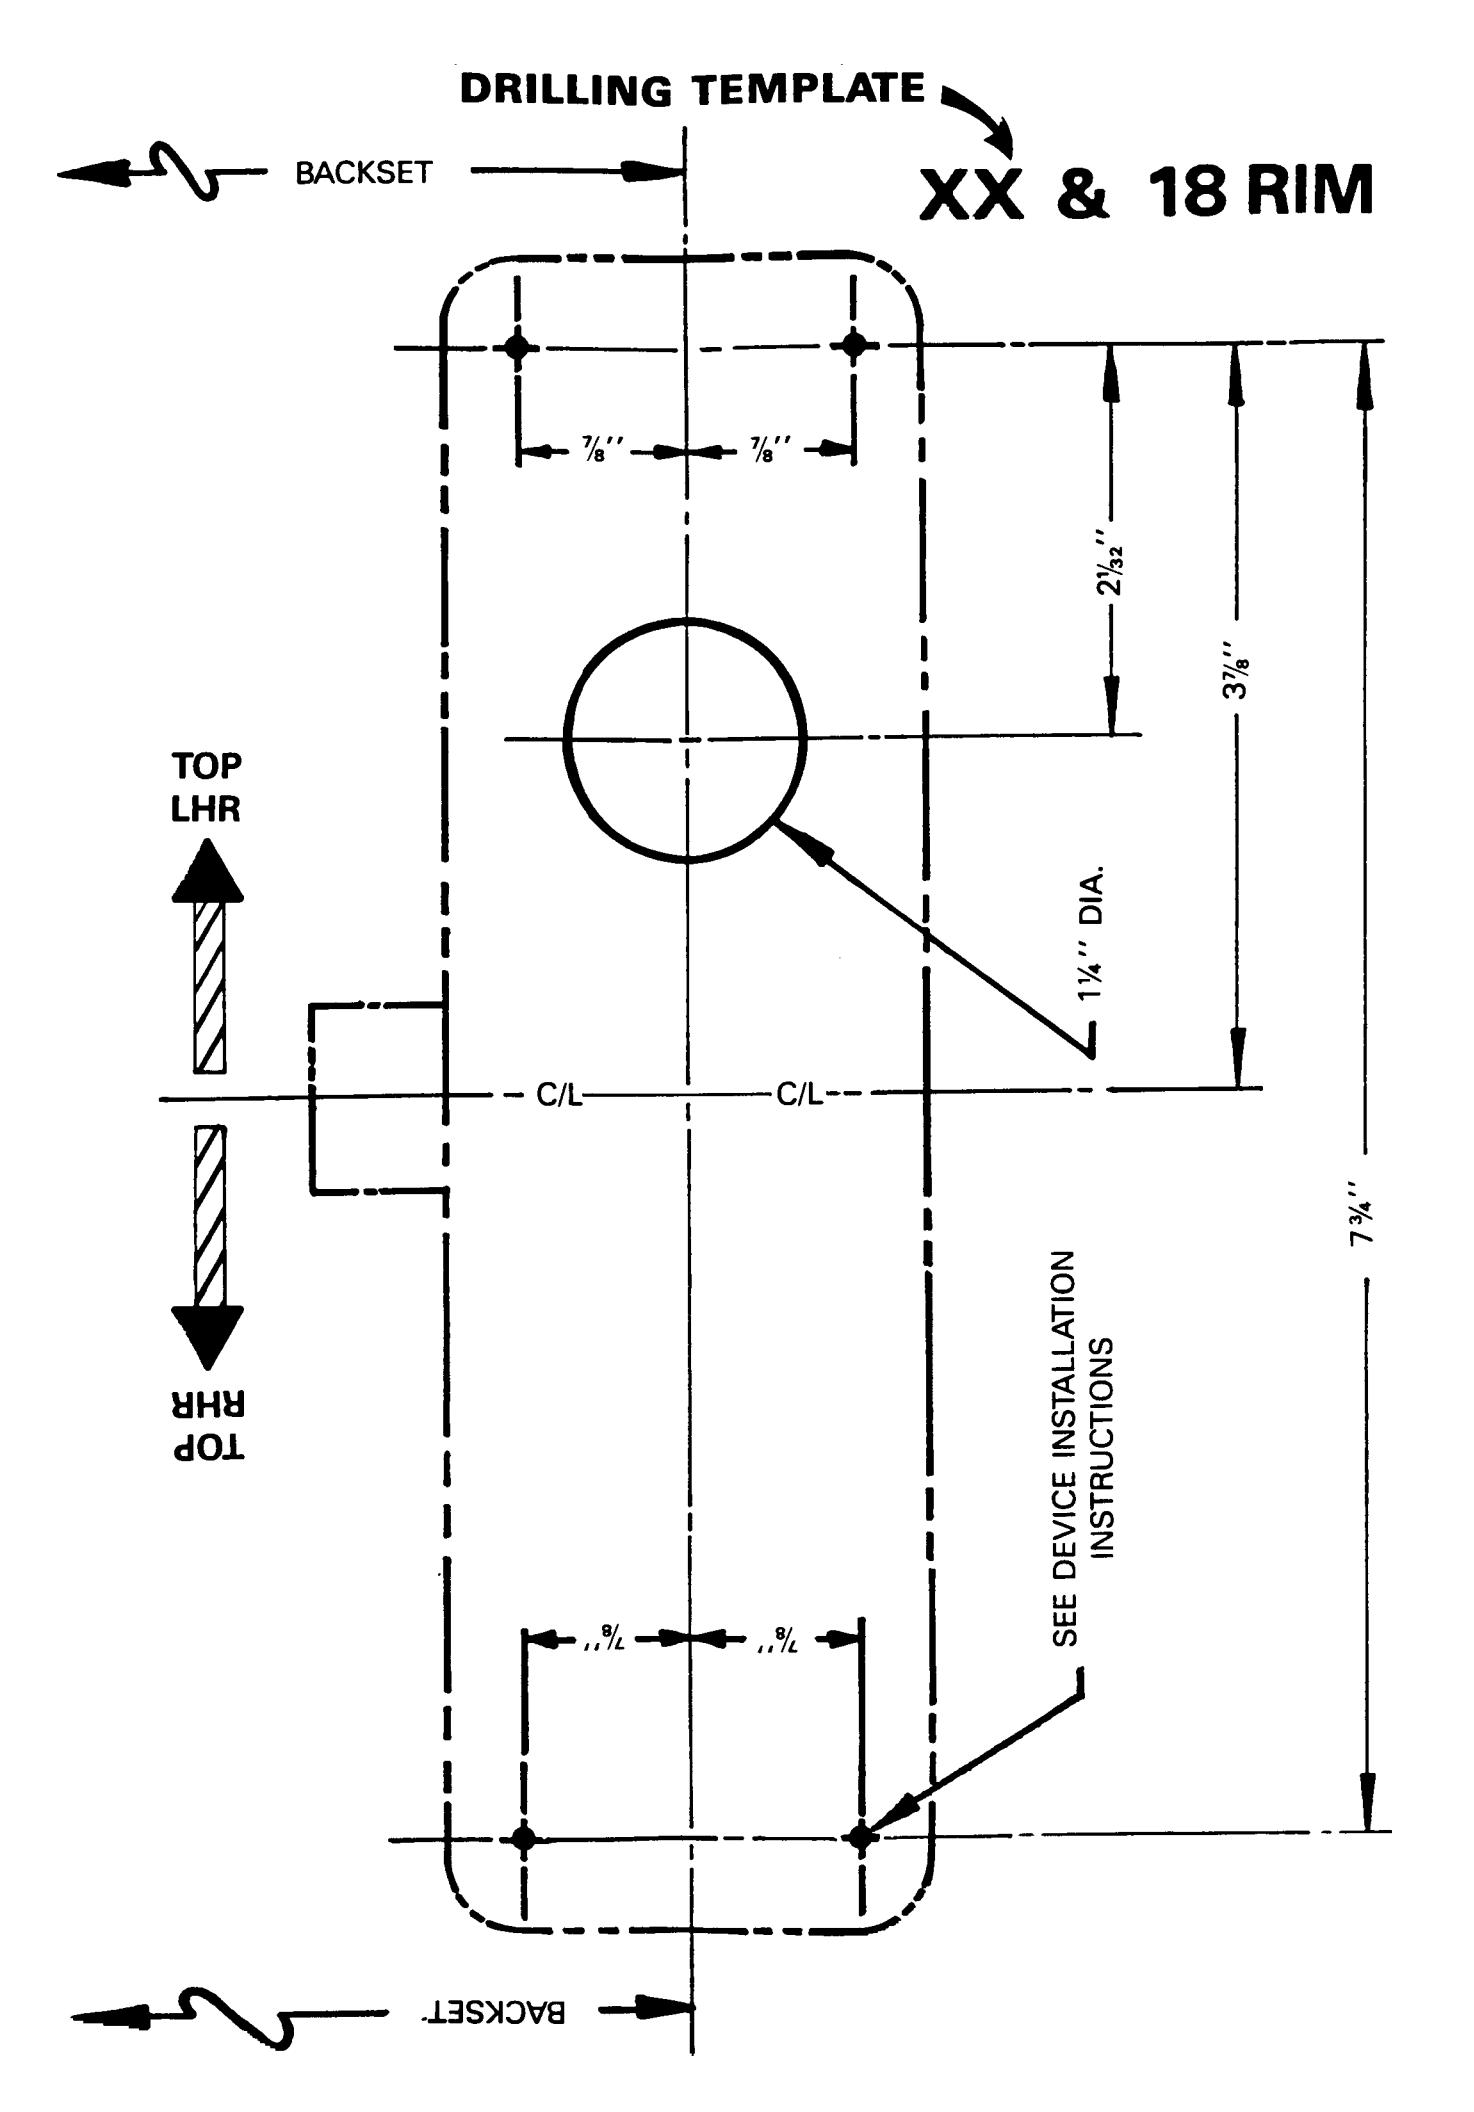
XX And 18 Series Rim Exit Device With Simplex 2000-15/2015 Access Control INSTALLATION INSTRUCTIONS
BEFORE STARTING:
Door should be fitted and hung.
2. Mullion, if used, should be installed.
3. Check that correct device is being used and that all necessary parts are on hand.
- 4. Locate reference C/L and backset per applicable device and strike templates on inside face of door.
- 5. Mark C/L and backset lines on door.
- 6. Tape drilling template to inside face of door, locating on marked lines. Be sure correct handing of template is observed.
- 7. Mark centers of four (4) chassis mounting screws and one (1) connecting bar through-bore. REF. DEVICE INSTALLATION INSTRUCTIONS.
- 8. Remove drilling template and pilot drill inside face of door for four (4) mounting screws, as required. Drill 1-1/4" through the door for the connecting bar to pass through.
- 9. Install Simplex 2000-15/2015 on outside face of door per instructions. NOTE: Paragraph III.C.2 describes various cam settings. The cam must be set per Figure 1 with the connecting bar vertical.
- 10. Cut the connecting bar so it projects 1/2" to 5/8" beyond the inside face of the door.
- 11. Install the panic device active chassis. The slots in the two white "P" cams must be aligned vertically and timed so that further rotation from the vertical rest position causes latch retraction to begin.
- 12. Complete panic device installation per instructions.
- 13. Install separate outside grip at a convenient location.