Emtek Liscio Electronic Keypad Leverset with Bluetooth Programming – Installation Guide
Open the original PDF document
View PDF

Installation Guide
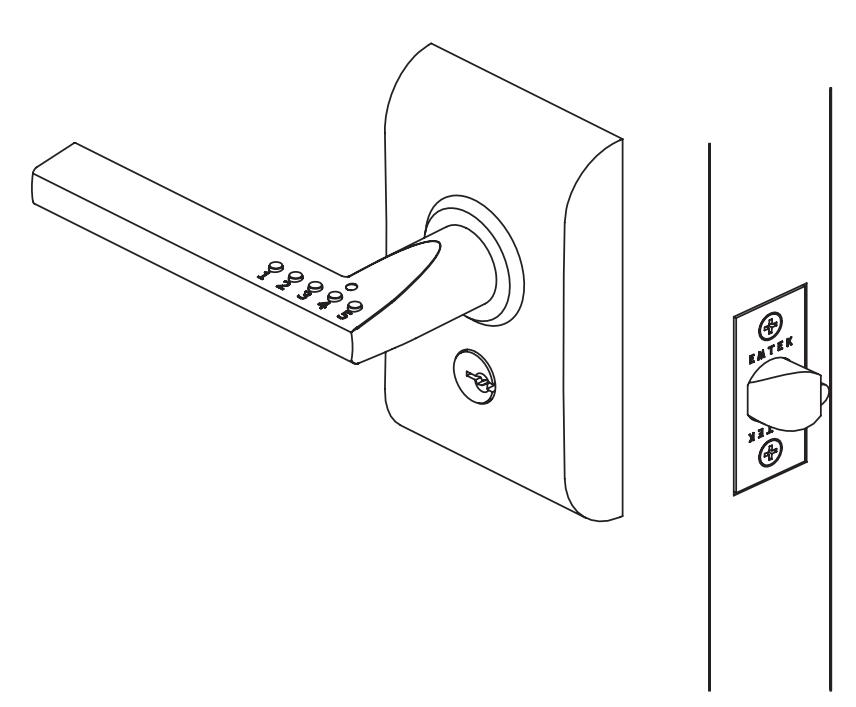
ELECTRONIC KEYPAD LEVERSET WITH BLUETOOTH PROGRAMMING
Preparation
1. Confirm Handing
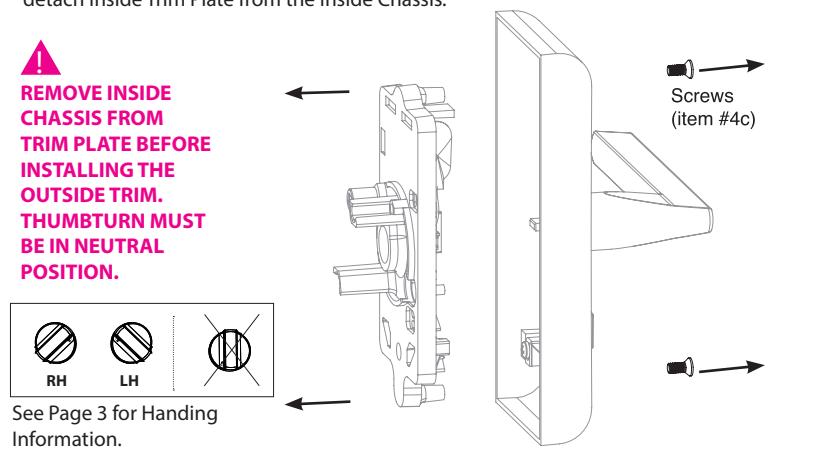
HANDING OF DOOR IS ALWAYS DETERMINED FROM THE OUTSIDE Hinge is on the left. Door is Left Hand (LH). Hinge is on the right. Door is Right Hand (RH). Hinge is on the right. Door is Right Hand (RH). Hinge is on the left. Door is Left Hand (LH). In-Swing Doors Out-Swing Doors outside outside
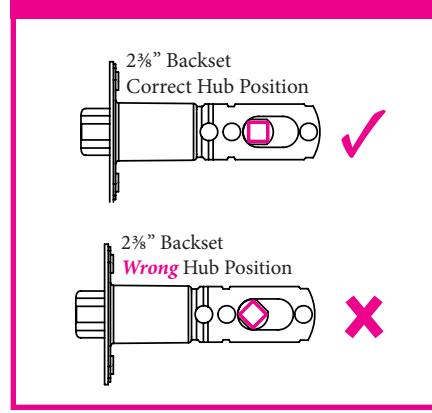
IMPORTANT! CHECK LATCH HUB POSITION BEFORE INSTALLING
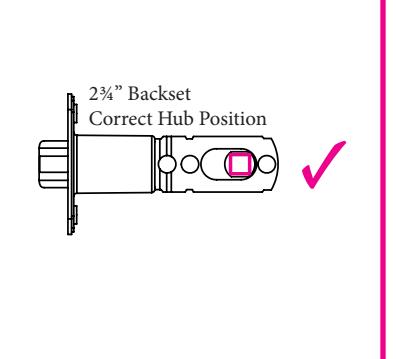
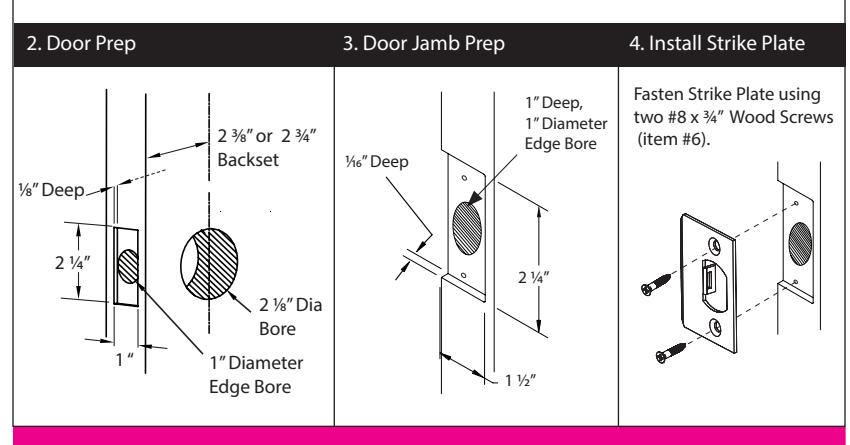
1. Install Adjustable Latch
Fasten Adjustable Latch using two #8 x 3/4" Wood Screws (item #6).
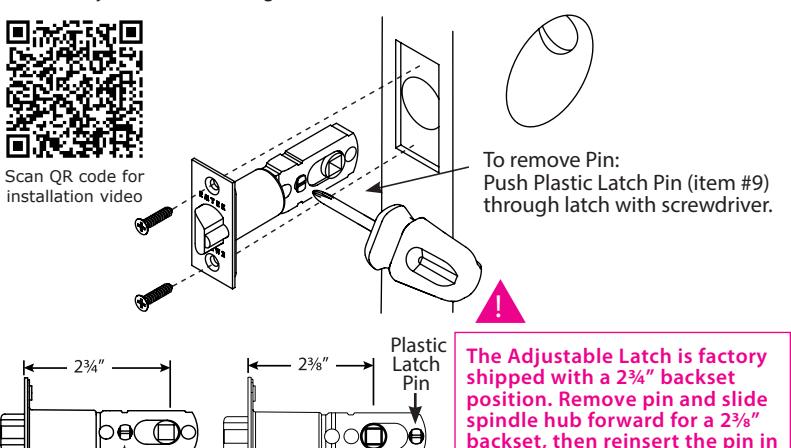
the hole at the back of the latch
as shown
2. Remove Screws from Inside Trim Plate
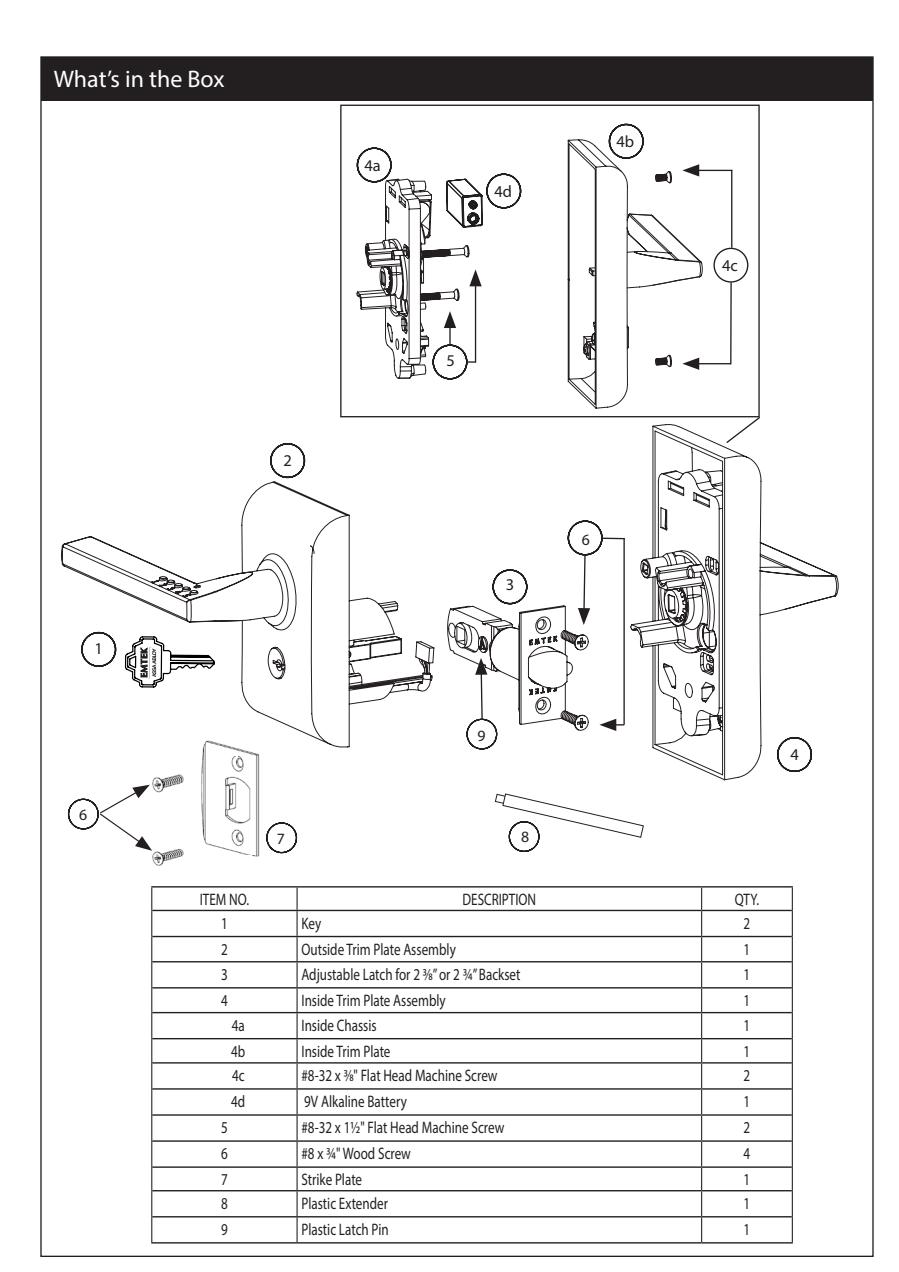
Plastic Latch Pin
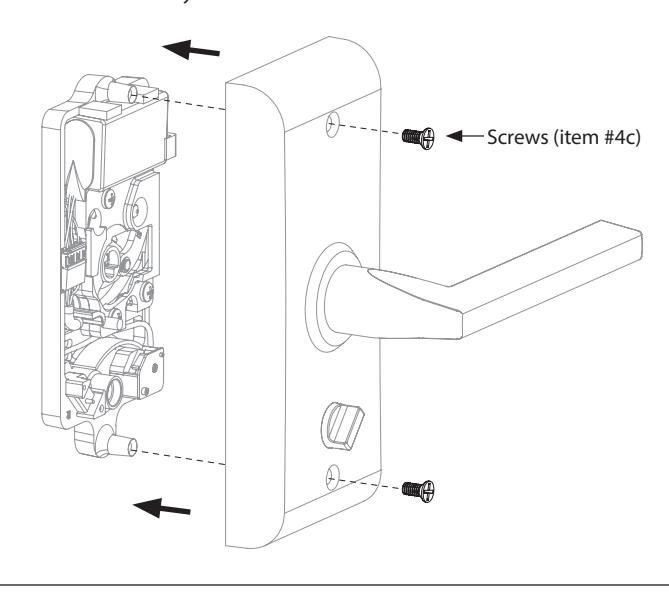
Use a Phillips head screwdriver to remove screws (item #4c) shown below and detach Inside Trim Plate from the Inside Chassis.
3. Install Outside Trim Plate Assembly
Step 1: While holding Outside Trim Plate Assembly, Press the Plastic Extender (item #8) into end of Spindle Shaft.
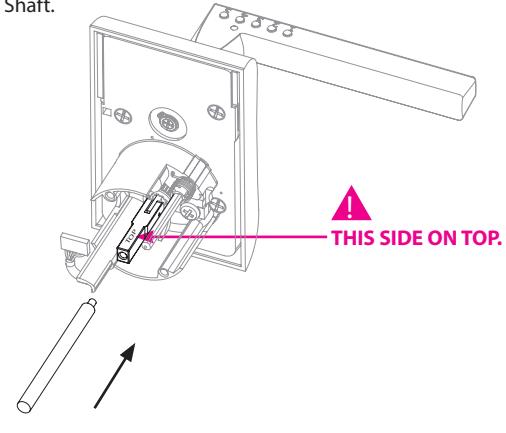
Step 2: Position the Outside Trim Plate Assembly through the bore hole.
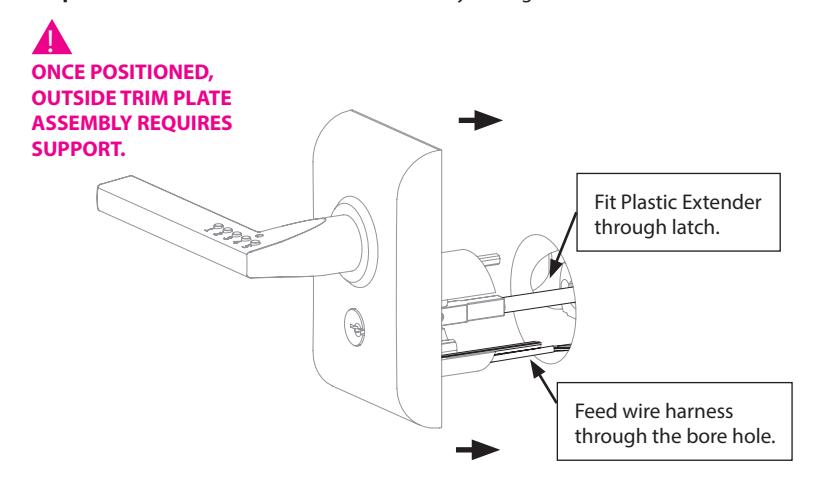
Step 3: With the Outside Trim Plate Assembly flush to the door, REMOVE the Plastic Extender.
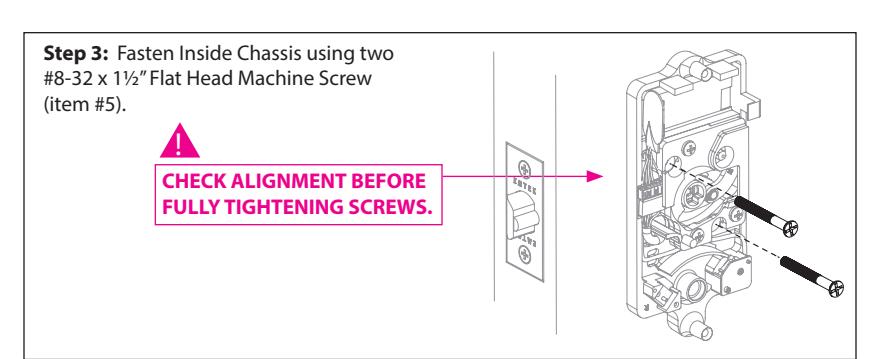
4. Install Inside Chassis
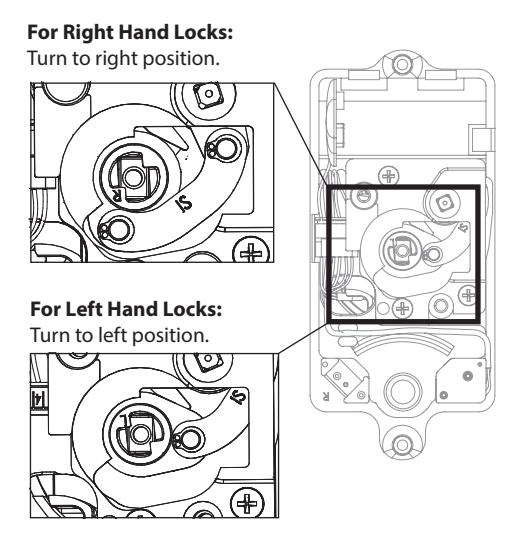
Step 1: Confirm the position of Cam Link.

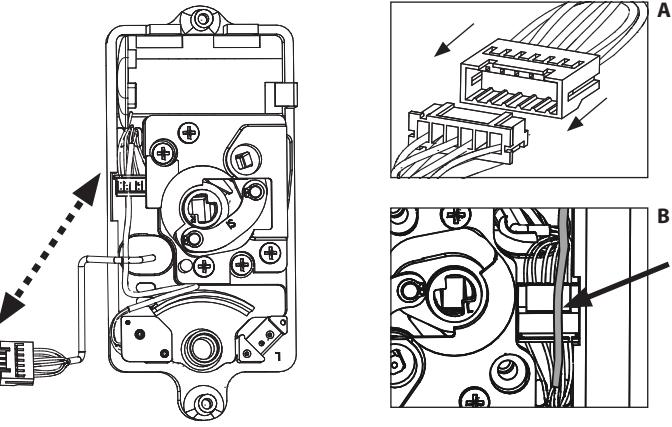
Step 2: Feed the Wire Harness through Inside Chassis.
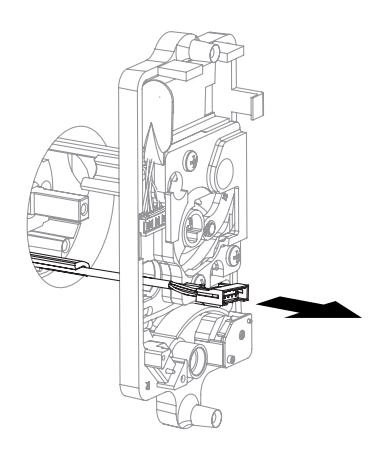
Step 4: Connect Wire Harness (A) and tuck Connectors as shown (B).
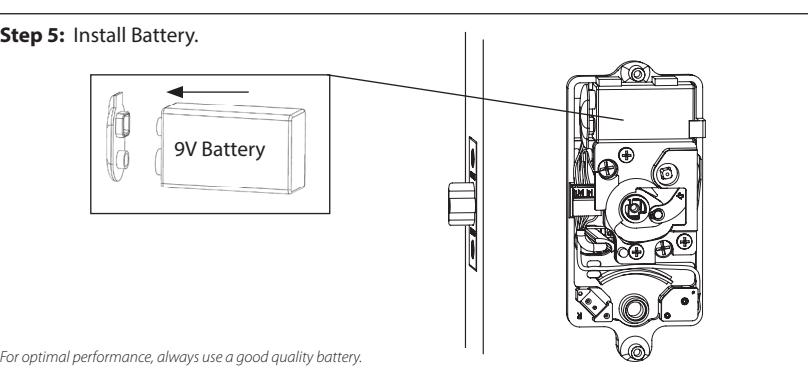
5. Install Inside Trim Plate
Fasten Inside Trim Plate using two #8-32 x 3/8" Flat Head Machine Screws (item #4c).
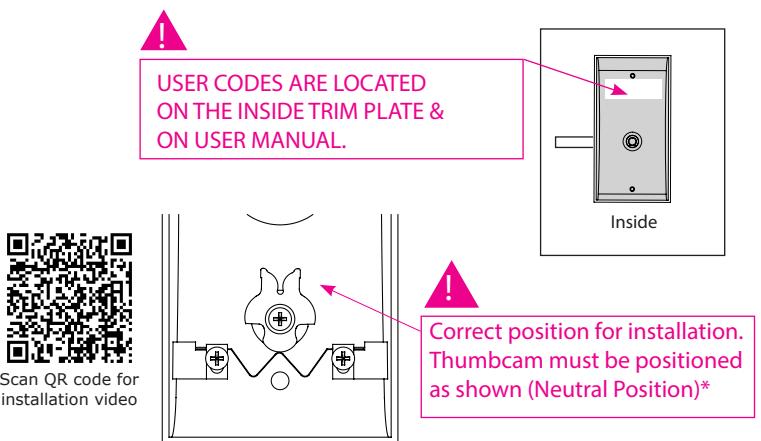
*Neutral position is required for installation and removal of the Inside Trim Plate Assembly.
IN8-LISCIO-INST 08/04/2014