EPlex 5×00 Privacy With Thumbturn Addendum
Open the original PDF document
View PDFDisclaimer: While reasonable efforts were made to ensure the accuracy of this document at the time of printing, Kaba assumes no liability for any errors or omissions. This information is subject to be revised without notice, and changes may be incorporated in future releases.
Copyright © 2015 Kaba Access & Data Systems Americas. All rights reserved.
Kaba Access & Data Systems Americas
2941 Indiana Ave. Winston-Salem NC 27105 USA 1-800-849-8324
www.kaba-adsamericas.com PKG3137 0815


E-Plex® 5x51
Privacy with Thumbturn Addendum
This addendum replaces the existing Section E in your E-Plex 5000 Cylindrical Installation Instructions.
E. INSTALLING & HANDING THE INSIDE UNIT ASSEMBLY
Note : Installing levers to the unit assemblies before mounting them may ease initial installation.
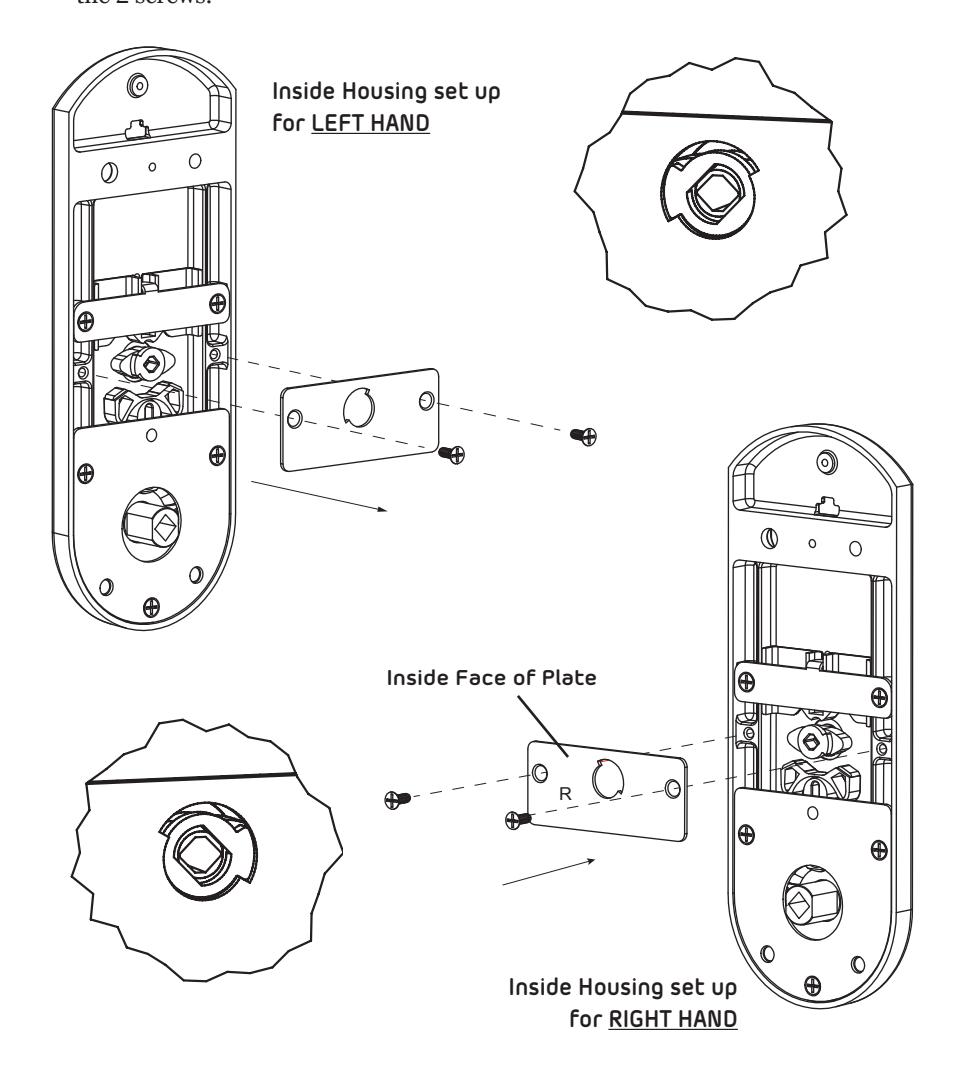
E-1 Remove the 2 screws. Flip the plate over to the side with the "R" stamped on it. With a small screwdriver, remove the oval shaped cam and replace it 180 degrees from the original position. Replace the "R" stamped plate and install the 2 screws.
E-2 Select the LectroBolt (screw with red sleeve) length that corresponds to the correct door thickness as noted in this chart:
| Door Thickness | LectroBolt Size | Mounting Screws Size |
|---|---|---|
| 1⅜" to 1 ½" | 2 ⅜" | 2 ½" |
| (35 mm to 38 mm) | (60 mm) | (64 mm) |
| 1 ⅝" to 2" | 2 ¾" | 2 ⅞" |
| (41 mm to 51 mm) | (70 mm) | (73 mm) |
| 2 ⅛" to 2 ¼" | 3" | 3 ¼" |
| (54 mm to 57 mm) | (76 mm | (83 mm) |
K E-3 Insert spindle (F) into the hole (G) as shown below until it "snaps" into place. Place the outside trim (K) onto the door, inserting the spindle (F) into the hole in the door (H). Put the thumbturn (T) in a vertical (6:00) position and place the trim assembly on the door so that the spindle (F) engages the thumbturn.
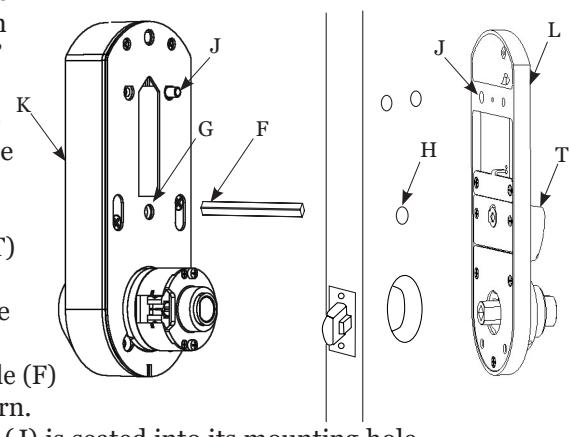
Ensure the red collar (J) is seated into its mounting hole. Carefully push the inside housing (L) flush against the door.
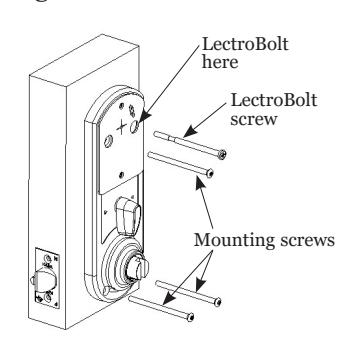
E-4 Insert LectroBolt through the red inside housing hole marked with the lightening bolt symbol.
For now, only partially tighten the LectroBolt to keep the red collars in position.
Then, insert and tighten the other three mounting bolts.
Finish tightening the LectroBolt to secure the lock on the door.
Warning : If using a power drill, please be careful not to over-tighten as this could cause damage to the mounting screws and threads.
E-5 Apply appropriate emblem to thumbturn