DynaLock 6500 Series Installation Instructions
Open the original PDF document
View PDF

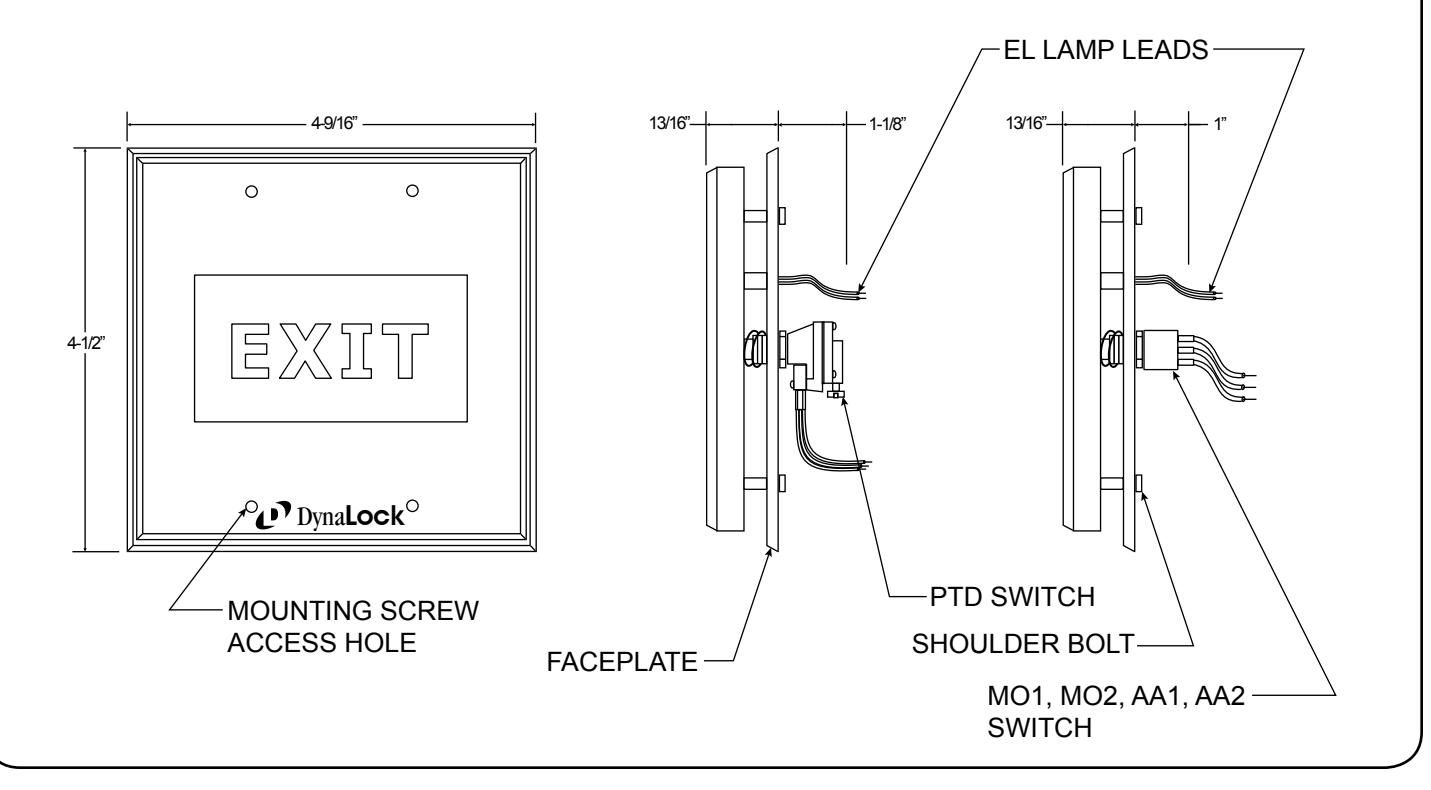
SERIES #6500 - DOUBLE GANG HIGH VISIBILITY PUSH PLATE INSTALLATION INSTRUCTIONS
OVERVIEW
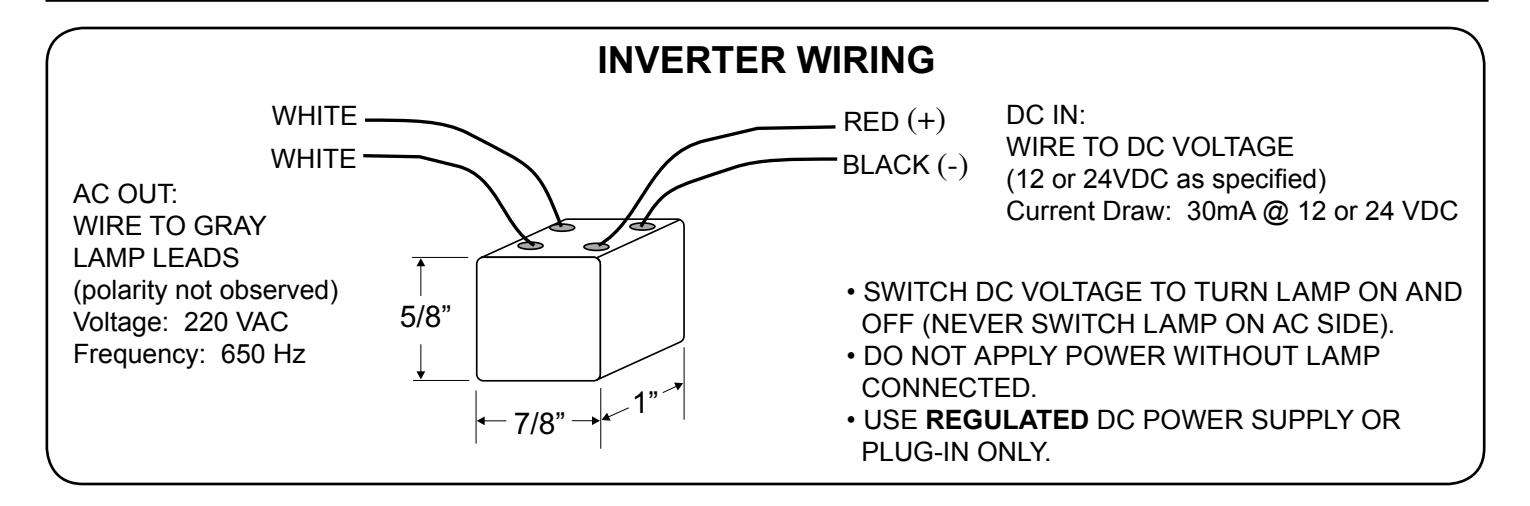
The 6500 Series Pushplate mounts to a standard 2-gang electrical box. Illuminated display uses electroluminescent blue lamp which requires high voltage AC. An inverter is included to convert regulated 12 or 24 VDC (as specified) to the necessary AC voltage. The inverter must remain inside the box to which the pushplate is being mounted. Pushplate activates the switch when completely depressed. Sensitivity can be adjusted by altering the depth of the switch.
CAUTION! INVERTER PRODUCES HIGH VOLTAGE AC. READ ALL INSTRUCTIONS PRIOR TO INSTALLATION.
INSTALLATION STEPS
- 1. Connect gray leads coming from the lamp to the white leads on inverter cube. Polarity not observed.
- 2. Connect low voltage DC to red and black leads on inverter cube (see reverse).
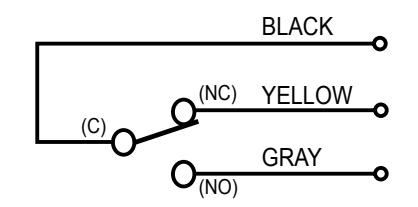
- 3. Connect switch wiring. See reverse for schematic according to style ordered.
- 4. Make sure all wiring is clear of the four shoulder bolts.
- 5. Mounting screws are accessed through the four holes on the front face of the pushplate. Using included Allen wrench, start threads on each screw.
- 6. Tighten mounting screws evenly by alternating each corner, until the faceplate is flush with the wall.
MISCELLANEOUS
Lamp Life: Indefinite. Optimal brightness - first 10,000 hours, continuous use.
Field replacements available.
Temperature Range: 15 to 120°F - Interior use only.

705 Emmett Street • Bristol, CT 06010 Phone:(860)582-4761 • Fax:(860)585-0338
SERIES #6500 - DOUBLE GANG HIGH VISIBILITY PUSH PLATE INSTALLATION INSTRUCTIONS
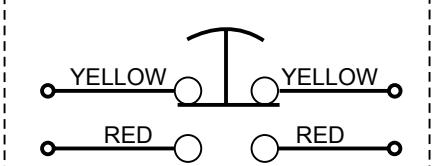
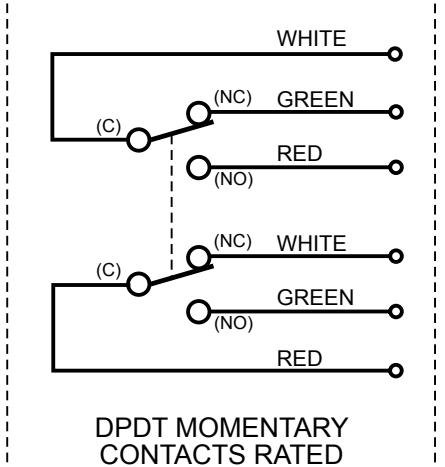
SWITCH WIRING
SWITCH STYLE: MO1
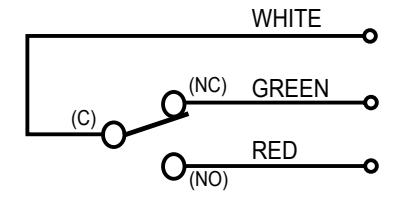
SPDT MOMENTARY CONTACTS RATED 6 AMPS @ 125VAC
SWITCH STYLE: AA1
SPDT ALTERNATE-ACTION CONTACTS RATED 6 AMPS @ 125VAC
SWITCH STYLE: PTD
MOMENTARY TIME DELAYED CONTACTS RATED 10 AMPS @ 120VAC PTD / FORM Z
SWITCH STYLE: MO2
6 AMPS @ 125VAC
SWITCH STYLE: AA2

DPDT ALTERNATE-ACTION CONTACTS RATED 6 AMPS @ 125VAC
TIME DELAY ADJUSTMENT
TIME DELAY ADJUSTMENT KNOB
BOTTOM VIEW
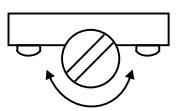
TURN CW TO INCREASE TURN CCW TO DECREASE
TIME DELAY ADJUSTMENT RANGE = 2 - 60 SECONDS