Dexter ED2000T Raised Lip Pull Plate Installation Instructions 111073
Open the original PDF document
View PDFRAISED LIP PULL PLATE INSTRUCTIONS FOR USE WITH ECONOMY TYPE EXIT DEVICES
STEP A: INSTALL CYLINDER (SKIP TO STEP B FOR DUMMY PULL PLATE)
- 1. Use template to mark hole locations on door. If all holes have been drilled or cut, start to install cylinder first.
- 2. Install rim cylinder through provided cylinder collar, then insert the rim cylinder through hole in raised lip pull plate and insert cylinder retaining cup from back side of the raised lip pull plate.
- 3. Fasten rim cylinder assembly using the two (2) break-off screws provided with the rim cylinder.
Note: The thinner cylinder collar provided with the rim cylinder when it is bought from cylinder supplier in your market, it can just be used for 1-1/8"(28mm) cylinder only. Cylinder Collar For 1-1/8" (28mm) long cylinder use only Cylinder Retaining Cup Break-off screws - provided with cylinder Tab must fit into slot on pull plate Rim Cylinder 1-1/8"(28mm)
If a taller cylinder collar is required for a longer rim cylinder use, order it separately.
with IC or standard
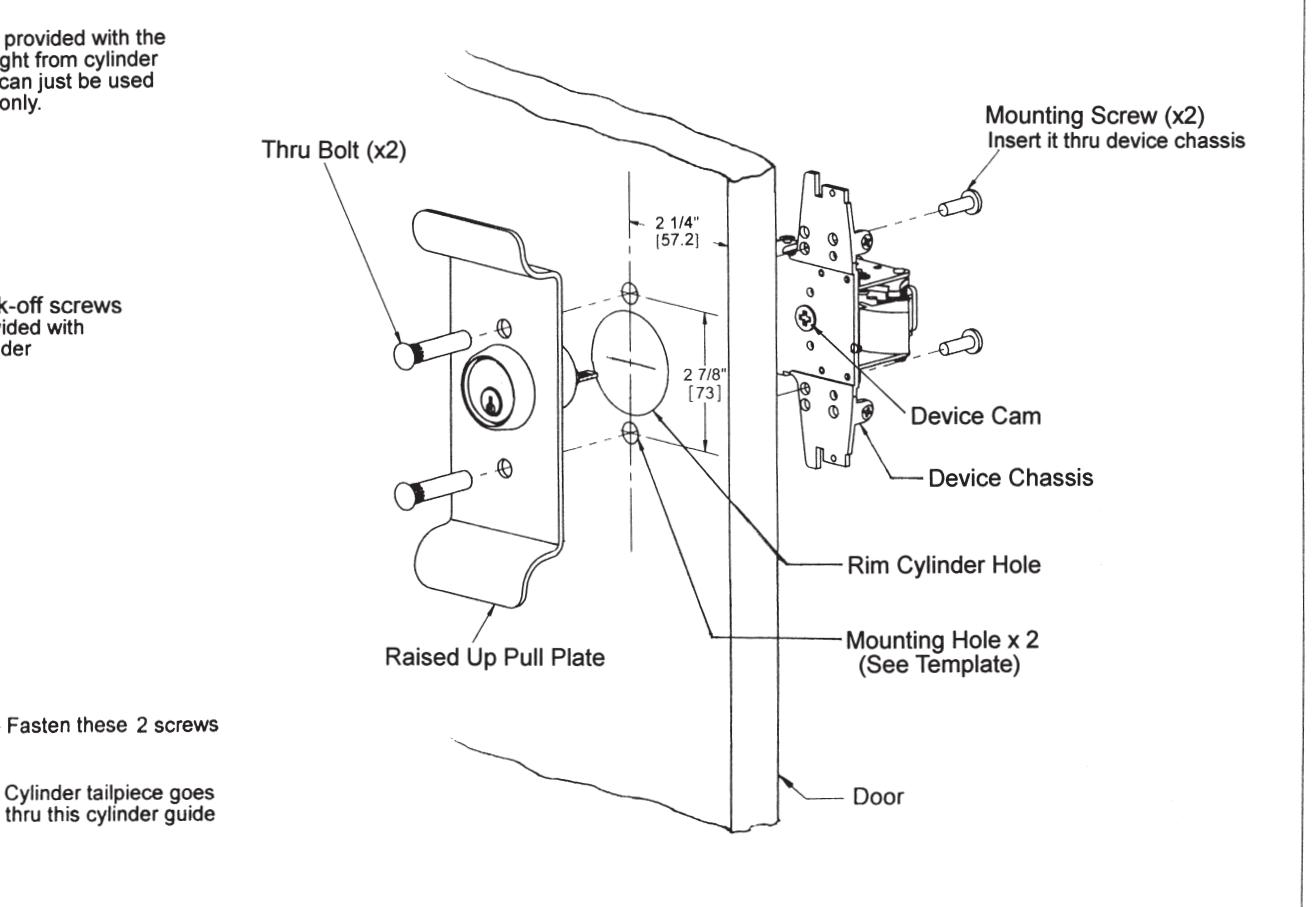
STEP B: INSTALL RAISED UP PULL PLATE
- 1. Install raised lip pull plate with through bolts through door.
- 2. Rim cylinder tailpiece should insert into exit device cam approximately 7/16"(11mm)long. If it is too long and beyond inside face of door, carefully measure and mark at the closest break-off line. Then use pliers to break off excess and get appropriate length.
- 3. Fasten raised lip pull plate and exit device together using the supplied two (2) mounting screws.