Dexter ED2000T Escutcheon Lever Wide Stile Trim Installation Instructions 111067
Open the original PDF document
View PDFESCUTCHEON LEVER TRIMS INSTALLATION INSTRUCTIONS
Trims covered by these instructions:
Cylinder Escutcheon (CE) – Key locks & unlocks lever Blank Escutcheon (BE) – Lever is always operable Night Latch Escutcheon (NL) – Key retracts latch bolt Dummy Escutcheon (DE) – Pull when dogged
DOOR APPLICATIONS
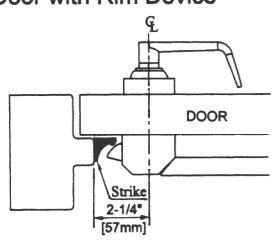
Single Door with Rim Device
Double Door with Mullion G DOOR DOOR DOOR
Double Door with Rim Device and Surface Vertical Rod Device
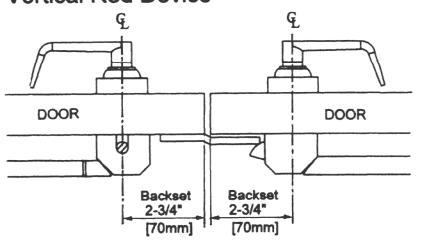
Double Door with Surface Vertical Rod Device
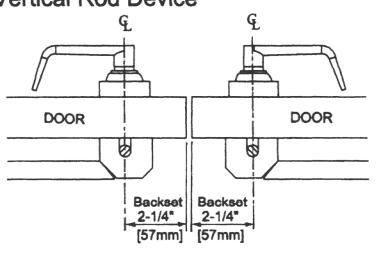
2-1/4" Mullion 2" 2-1/4" [57mm] [51mm] [57mm]
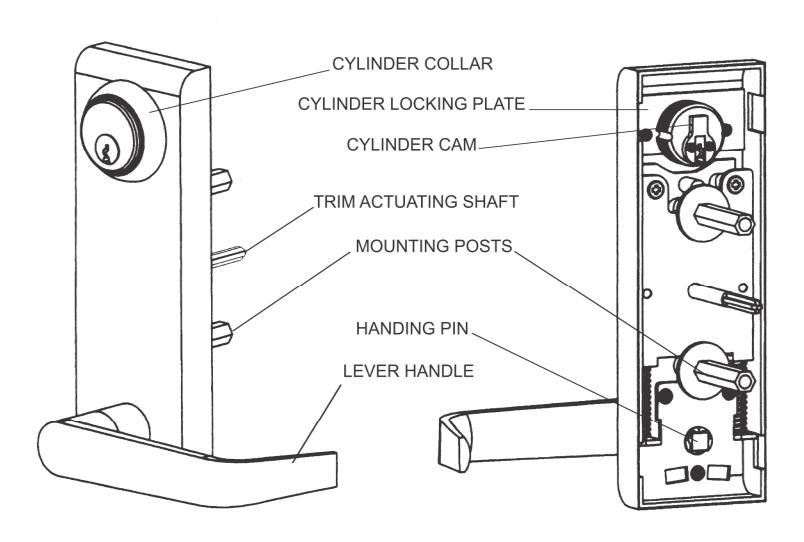
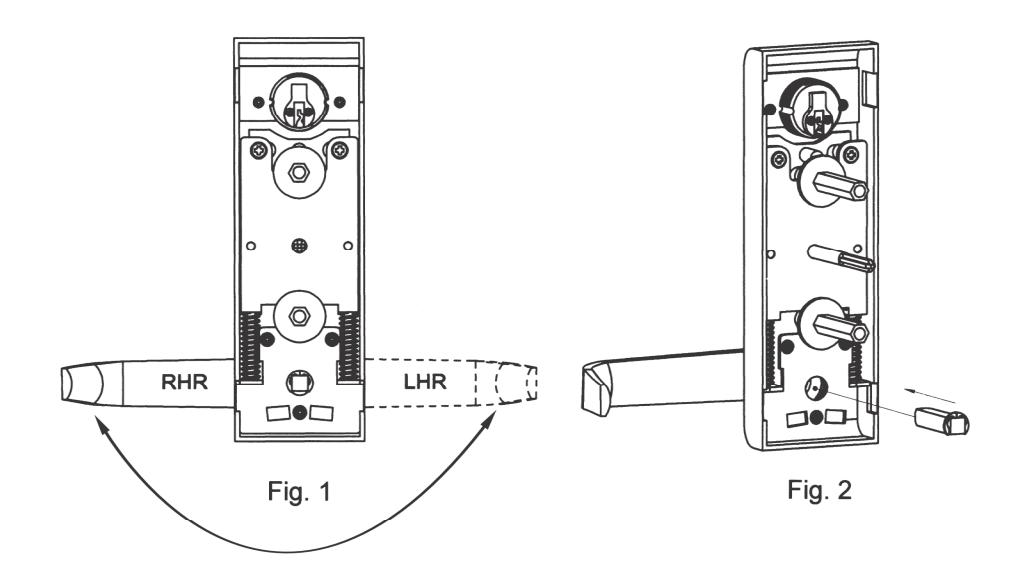
SET TRIM HANDING
- 1. Rotate lever handle to right or left direction to match desired door handling. (See Fig. 1.) In case the handle is knob type, skip to Step 2.
- 2. Insert the square spindle into the hub. (See Fig. 2.)
- 3. Proceed with EXIT DEVICE INSTRUCTIONS.
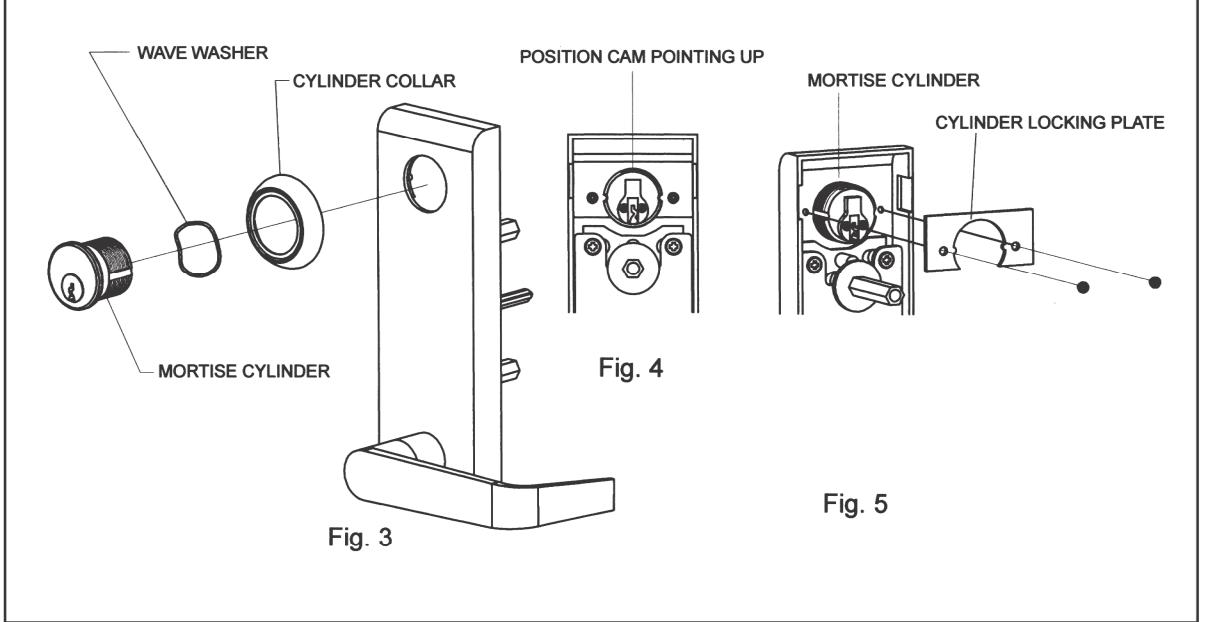
INSTALL MORTISE CYLINDER
- 1. Slide wave washer and cylinder collar onto mortise cylinder body. (See Fig. 3.)
- 2. Screw cylinder into escutcheon trim with cam up positioned. (See Fig. 4.)
- 3. Install cylinder locking plate and fasten it with provided screws. (See Fig. 5.)
- 4. Blank Escutcheon (passage function) and Dummy Escutcheon skip these steps.
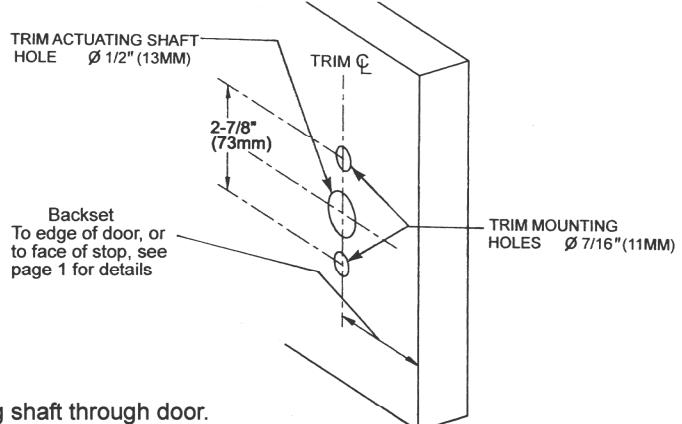
MARK AND DRILL MOUNTING HOLES ON DOOR
- Mark horizontal centerline by matching it to the centerline of exit device, which can be found on the inside face of door.
- Apply template to the door using centerline. Refer to Applications Section on page 1 to determine the location of the vertical centerline. This vertical centerline should match the centerline of exit device located on the inside face of door.
- 3. Mark and drill 7/16" holes for mounting posts as shown on template.
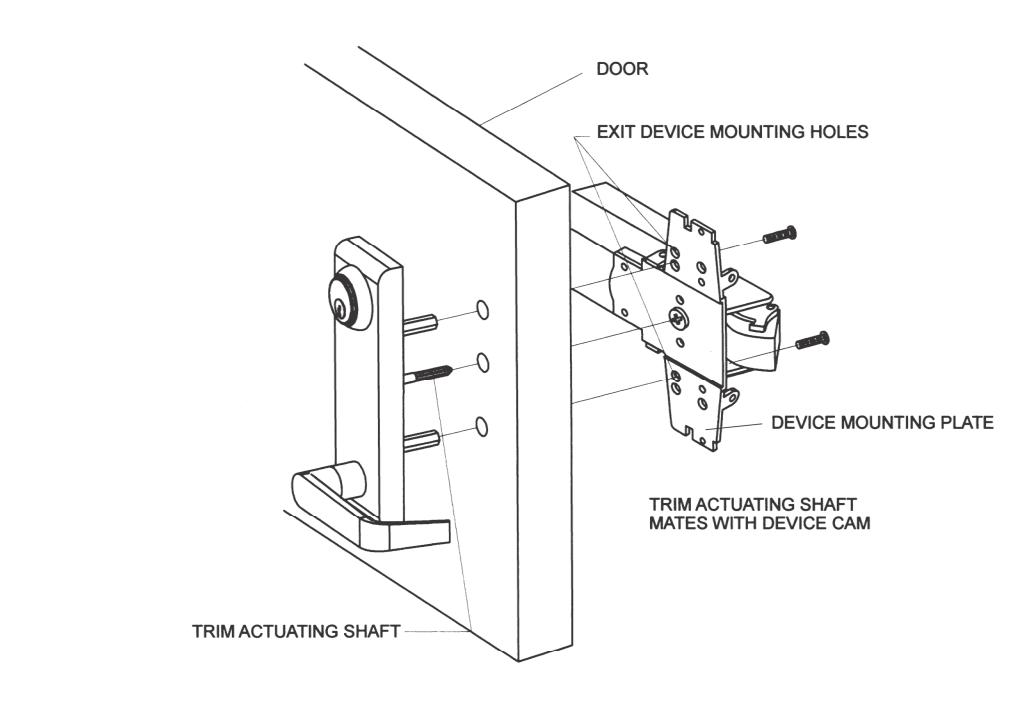
- 4. Mark and drill 1/2" holes for the trim actuating shaft, which mates with the exit device. See exit device instructions for details.
INSTALL ESCUTCHEON TRIM
- 1. Insert trim mounting posts and actuating shaft through door.
- 2. Mate trim actuating shaft with cam on back of the device chassis.
- 3. Fasten the trim from the device mounting plate with provided screws.
- Test installation by operating lever / knob handle or key to verify trim activates exit device.
- 5. Note: Dummy trim is only for pulling door, handle does not rotate.