Detex Advantex 03W Installation Instruction
Open the original PDF document
View PDF


Detex Corporation, 302 Detex Drive, New Braunfels, Texas 78130-3045 830-629-2900 / 800-729-3839 / Fax 800-653-3839 / Text photos only: 830-481-6433 / INTERNET: www.detex.com
INSTALLATION INSTRUCTIONS FOR 03W ADVANTEX TRIM
DWG #: 100717
| Table of Contents | Page |
|---|---|
| Device parts breakdown view & part numbers | 2 |
| Assemble Trim | 2 |
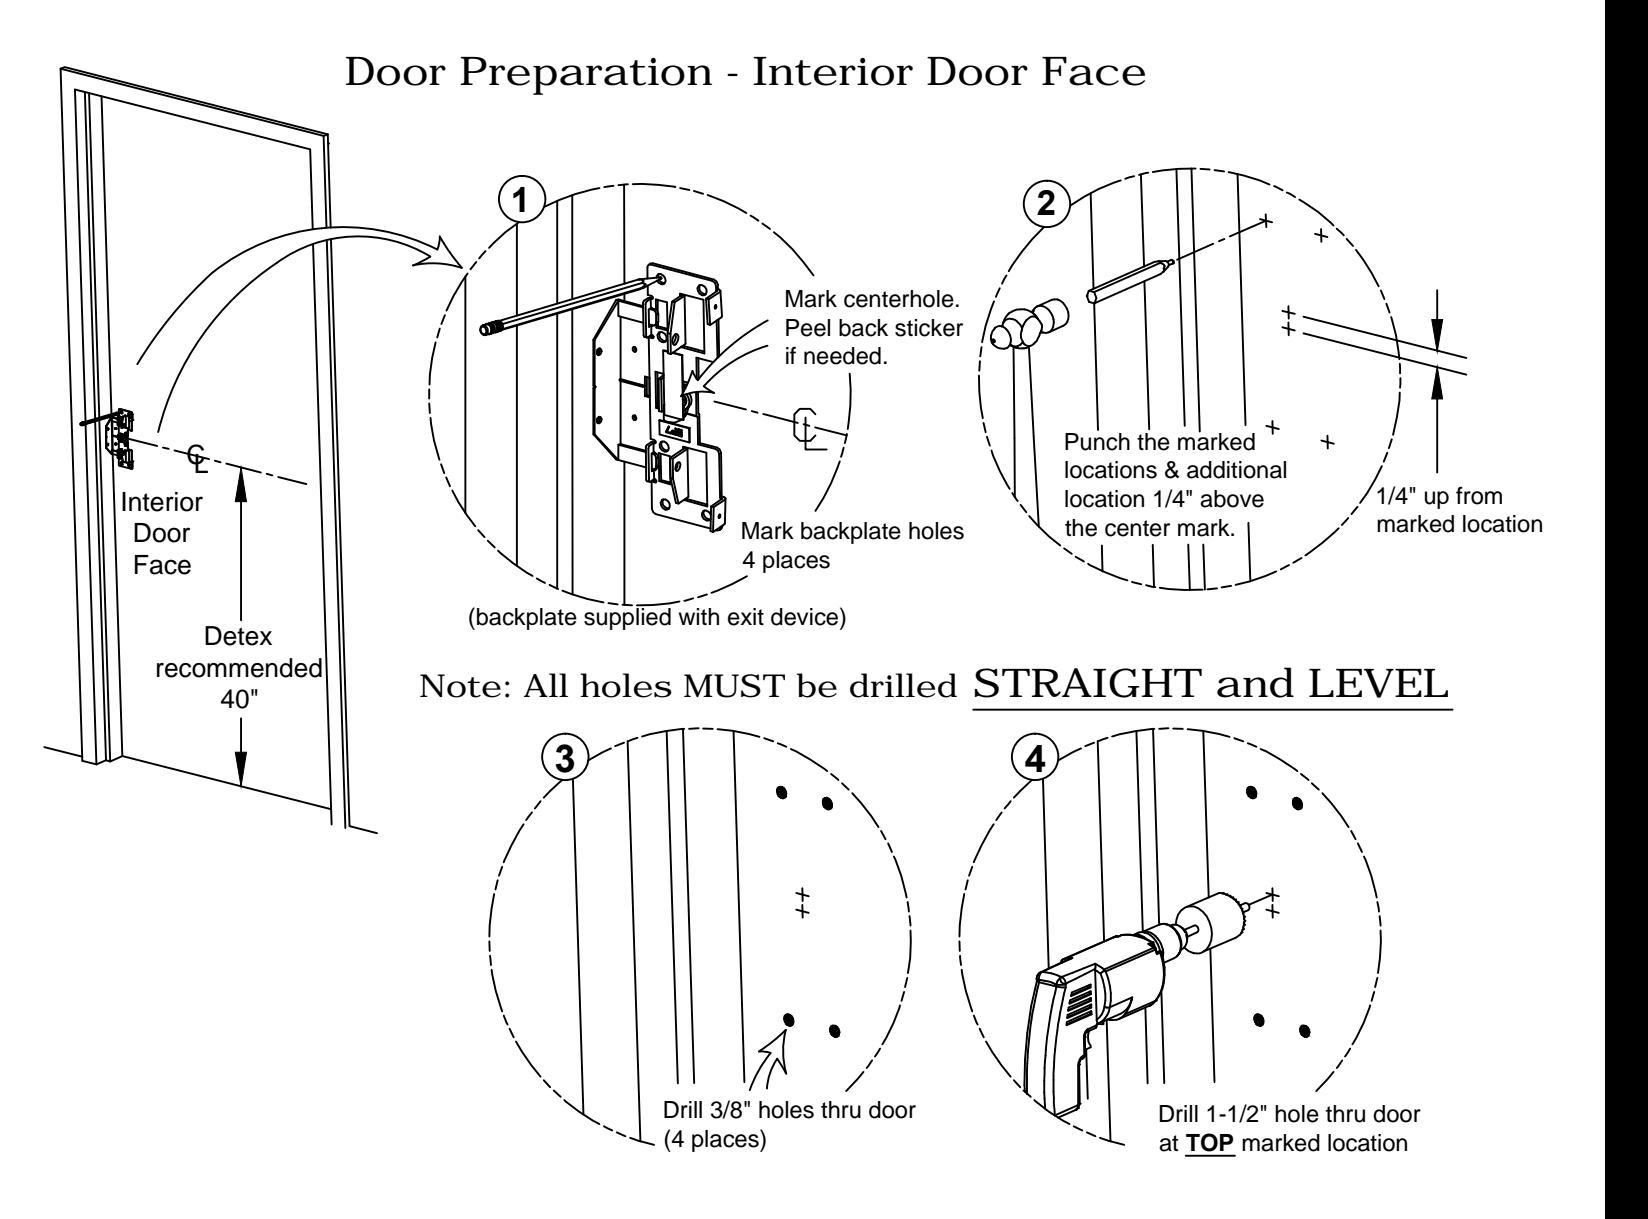
| Door Prep - Interior Door Face | 3 |
| Mark Cylinder Tailpiece Length | 3 |
| Trim Cylinder Tailpiece | 4 |
| Assemble Trim to Door | 4 |
TOOLS AND SUPPLIES
Safety Glasses (Always put on safety glasses prior to beginning installation of unit)
Pencil Center Punch Hammer Drill Motor Drill Bits & Taps Screw Driver (Phillips Drive) Tape Measure
For WARRANTY information, scan code below or go to www.detex.com/warranty
For device installation videos, scan code below or go to www.detex.com/videos


| ITEM | PART NO. | QTY | DESCRIPTION |
|---|---|---|---|
| 1 | 101620-9 | 1 | TRIM PLATE, 03W, BRUSHED STAINLESS STEEL FINISH (630) |
| 2 | ECL-445-X-X | - 1 | CYLINDER, RIM, 5 PIN |
| | - | IC7R-X | CYLINDER, RIM, INTERCHANGEABLE, 7 PIN | |
| 3 | 100752-X | 1 | CYLINDER COLLAR, TALL |
| 4 | 100464-9 | 4 | SEX NUT, 1/4-20 |
| 5 | 100301-1 | 1 | CYLINDER BRACKET, 1" LONG |
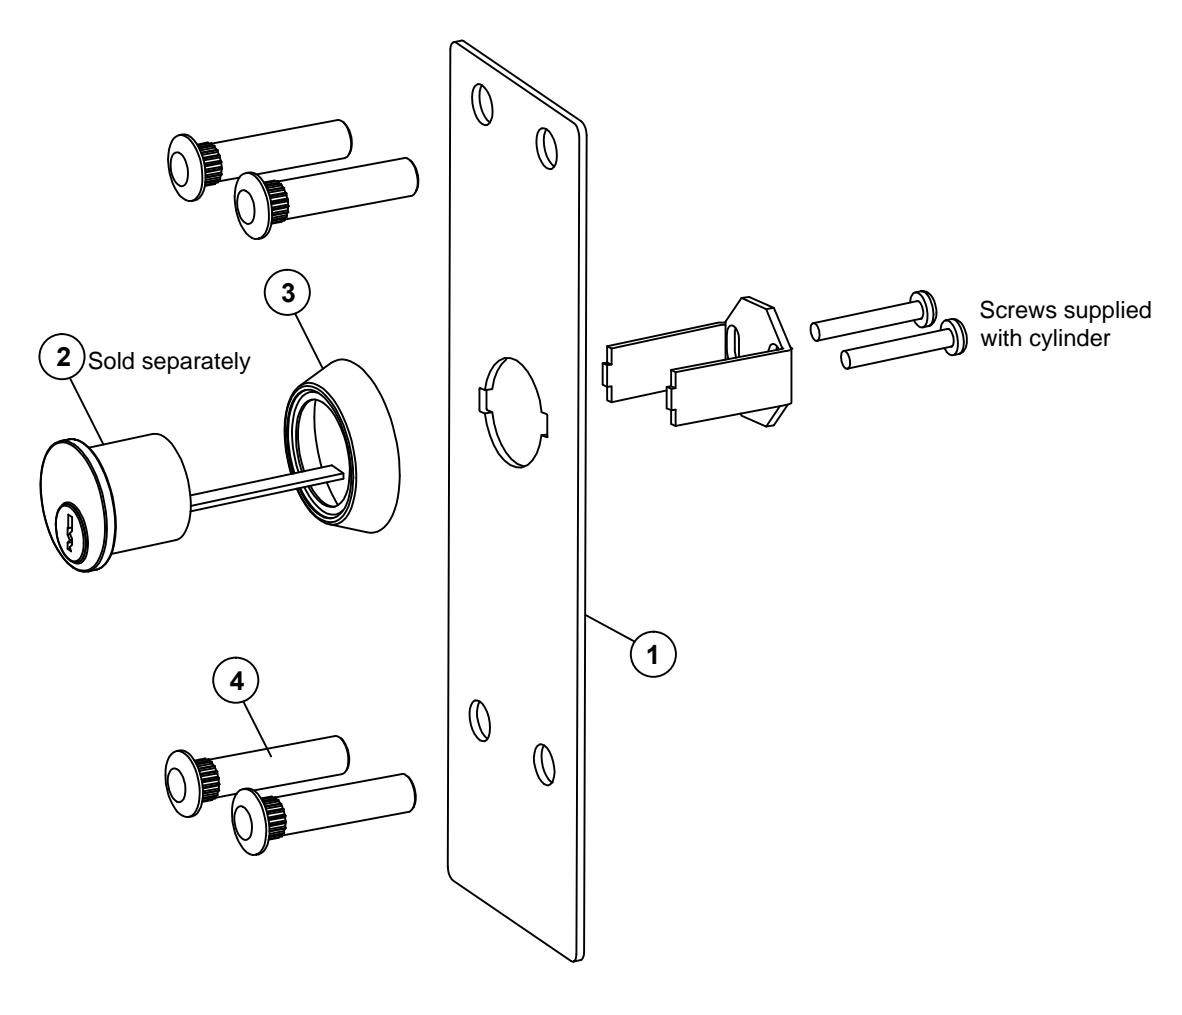
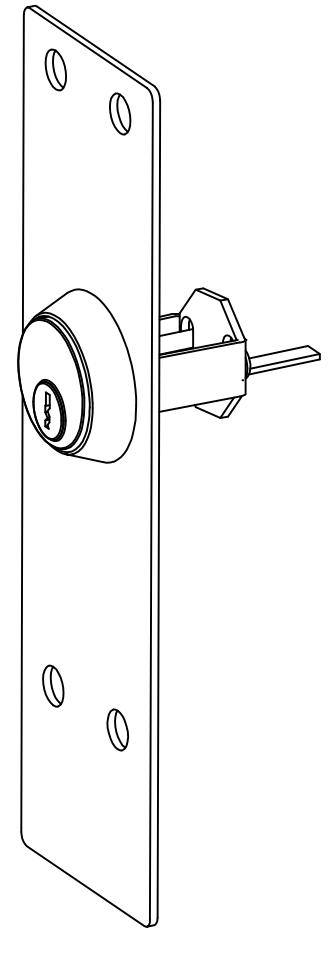
ASSEMBLE THE TRIM:
If not already assembled, assemble as shown at right.
Cut cylinder screws as required.
Mark Cylinder Tailpiece Length
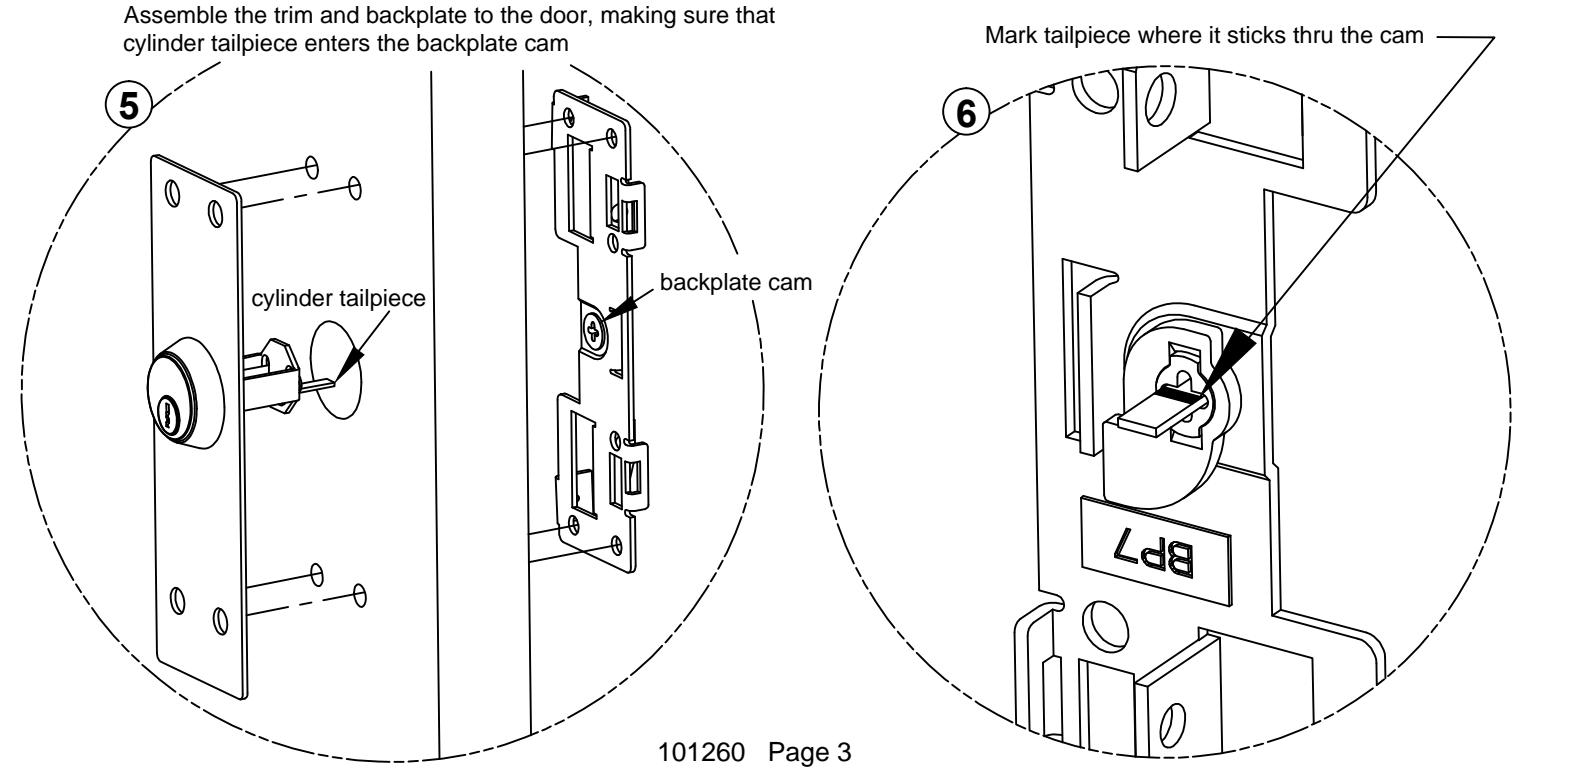
Trim Cylinder Tailpiece
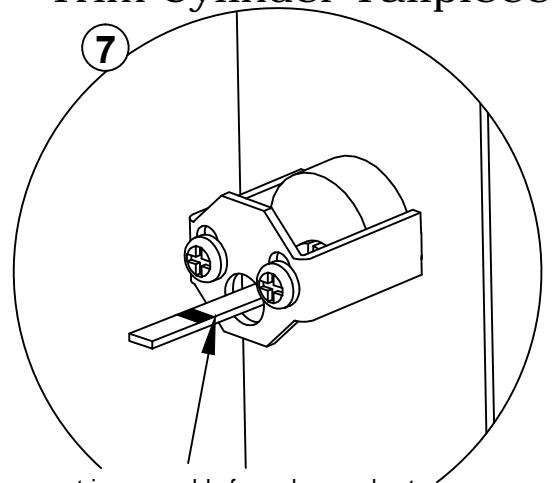
Remove trim assembly from door and cut the tailpiece just inside of the mark.
Caution: Tailpiece must not extend past the cam.

It may be necessary to hammer the sex nuts into the trim plate.

Assemble Trim to Door
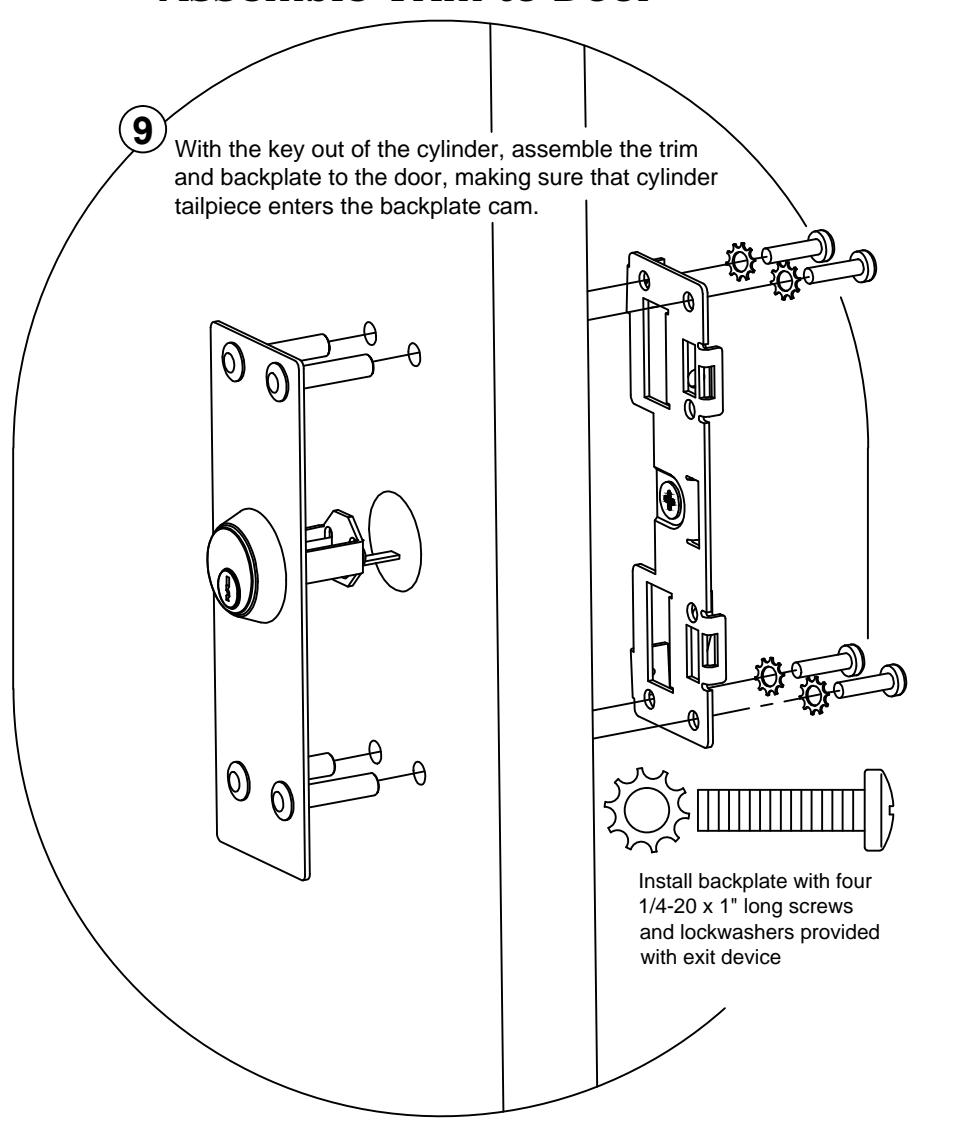
Key should turn freely in both directions when fully assembled to door.
Resume with panic hardware instruction.