Deadbolt Installation
Open the original PDF document
View PDFINSTRUCTIONS FOR INSTALLATION OF SINGLE OR DOUBLE CYLINDER DEADBOLTS AND THE REPLACEMENT OF EXISTING LOCKS
FOR USE ON DOOR THICK 1-9/16" TO 2" (40mm-51mm) TOOLS REQUIRED FOR NEW CONSTRUCTION:
1 philips head screwdriver 1 2-1/8" (54mm) hole saw 1 1" (25mm) drill & 1 chisel
TOOLS REQUIRED FOR REPLACEMENT: 1 philips head screwdriver
1. MARK DOOR
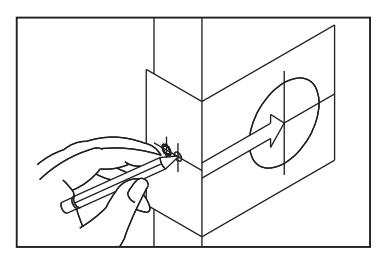
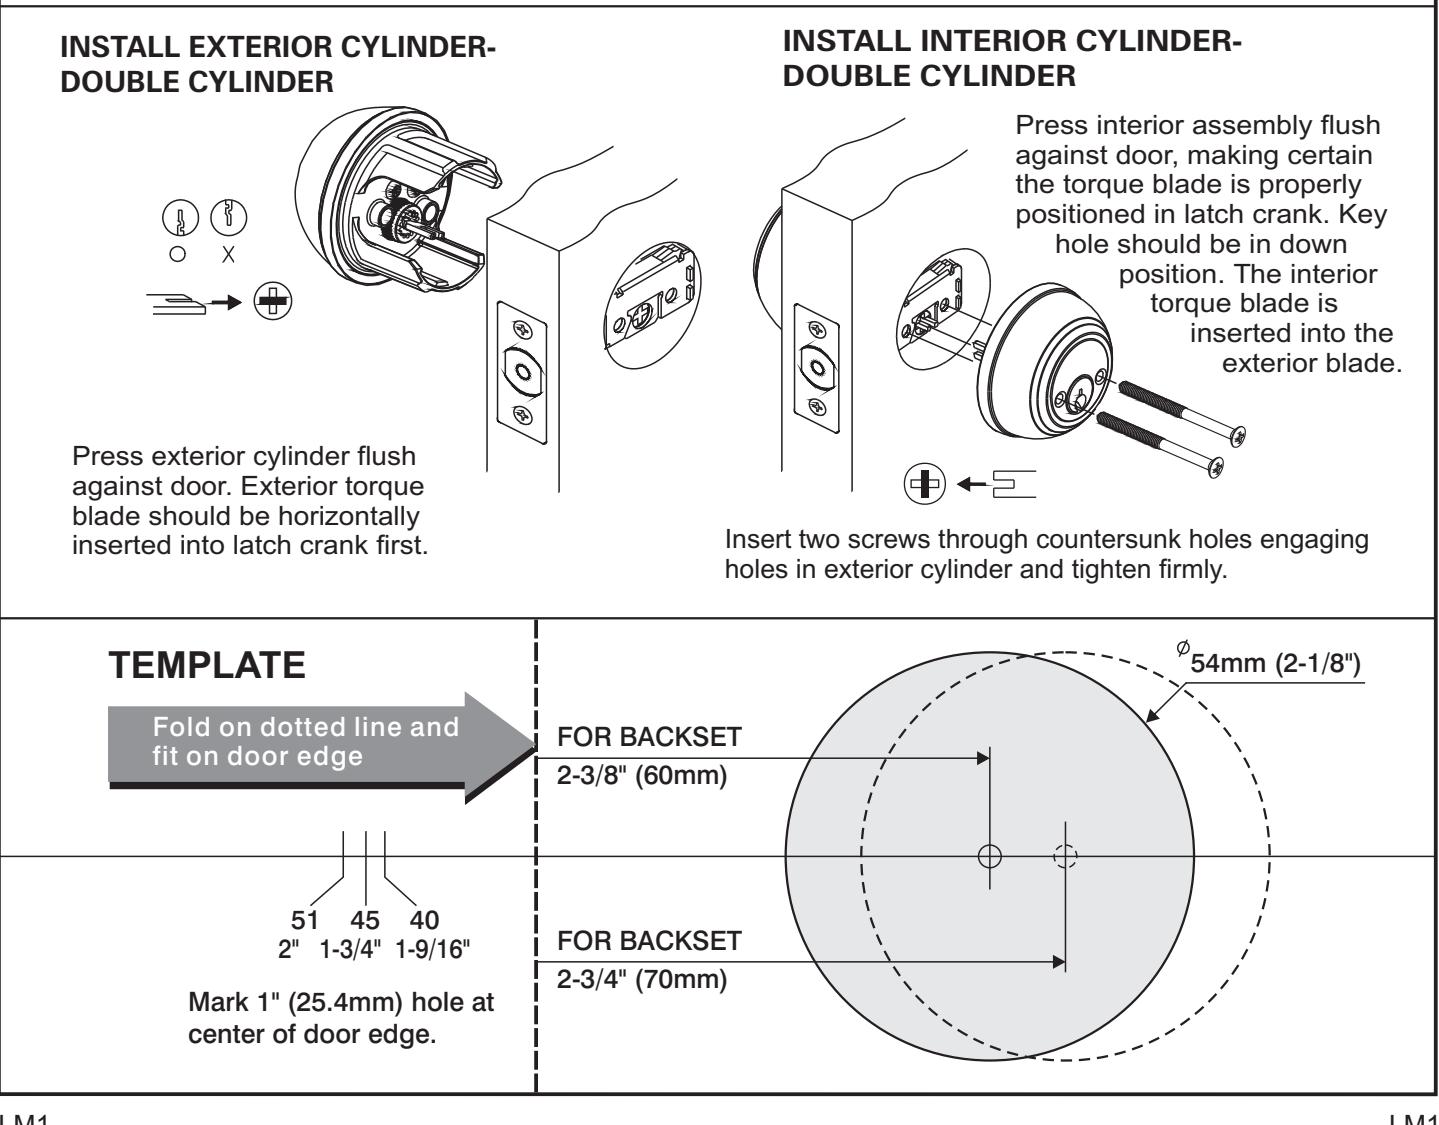
- a. Fold and apply template on high edge of door bevel and mark center of door edge as indicated on template at the desired height from the floor.
- b. Mark center hole on door face through guide on template for either 2-3/8" or 2-3/4" (60mm or 70mm) backset.
NOTE: BACKSET ON DOOR FACE MUST BE SAME AS BACKSET OF YOUR LOCK.
2. DRILL HOLES
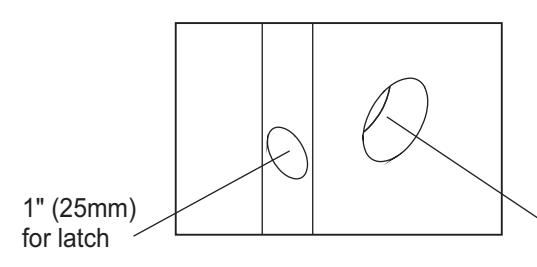
Drill holes as marked.
NOTE: DRILL 2-1/8" (54mm) HOLE FROM BOTH SIDES OF DOOR TO AVOID SPLITTING WOOD.
2-1/8" (54mm) hole for lockset
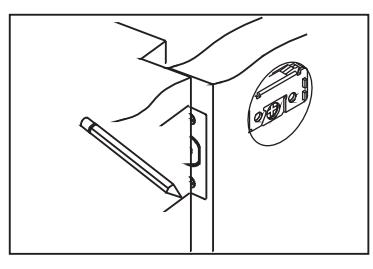
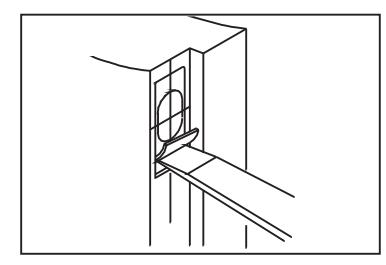
3. INSTALL LATCH
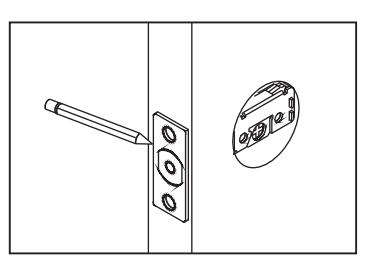
Insert latch in hole, mark outline of faceplate and remove latch.

Chisel 1/8" (3mm) deep or until Insert latch and tighten screws. faceplate flush with door edge.
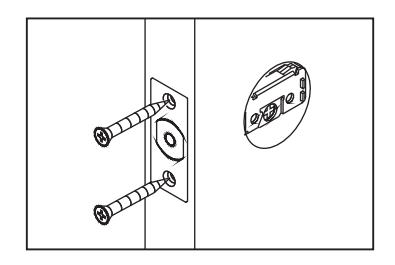
4. INSTALL STRIKE BOX & STRIKE
Close door to mark horizontal center line of strike.
Measure one half of door thickness from door stop and vertically mark center line of strike. Drill aperture which is same with strike box 1-9/64" (29mm) deep at inter section of horizontal and vertical center line of strike. Match screw hole on strike with center lines on jamb. Mark outline and chisel 9/32" (7mm) deep for strike.
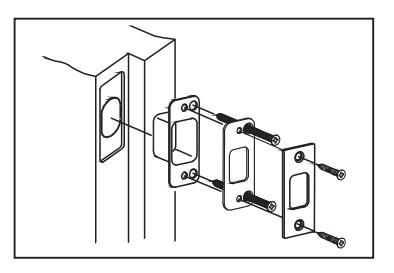
Install strike box and strike and tighten screws.
LM1 LM1
LM1 LM1

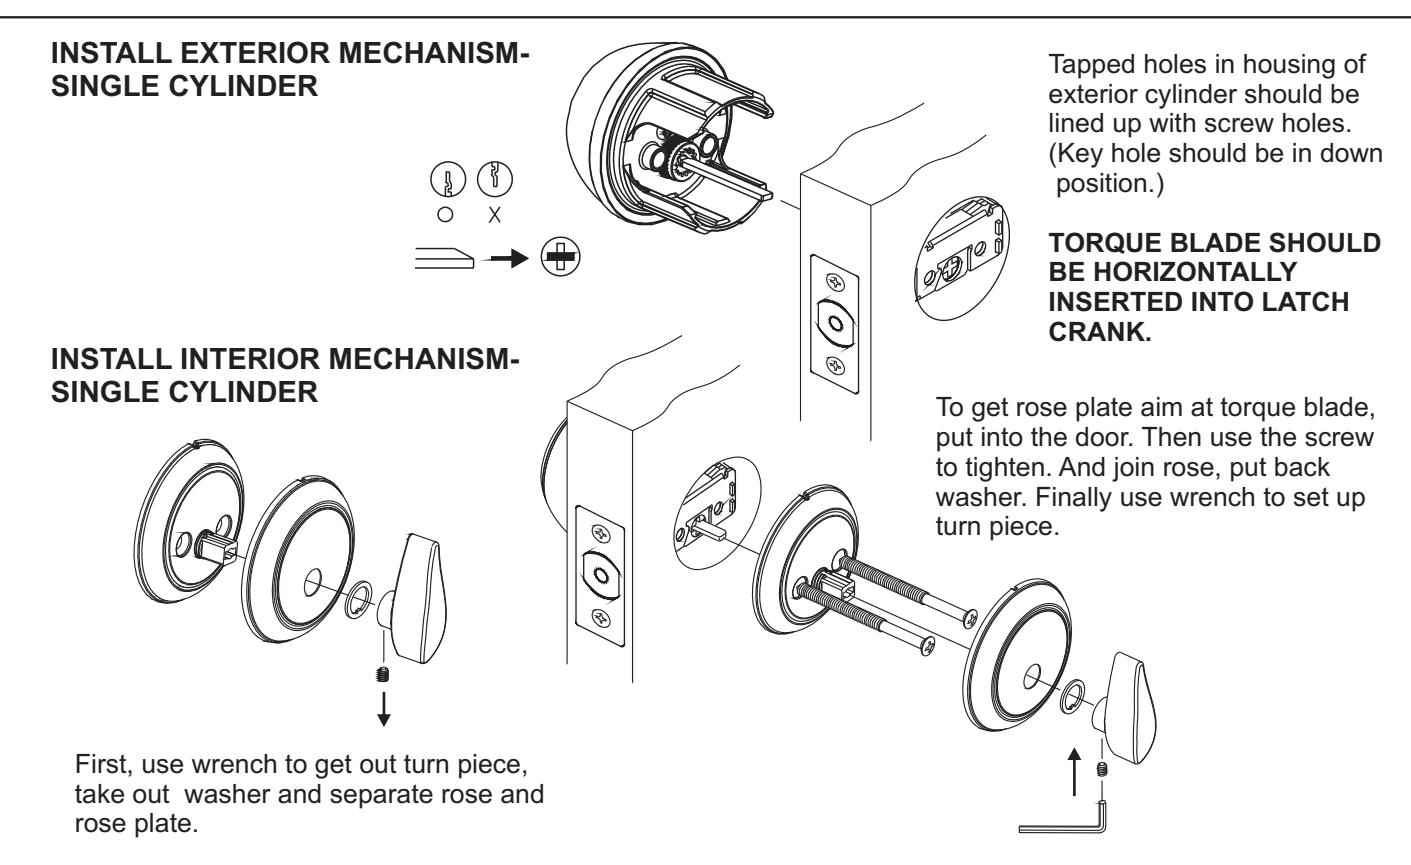
6. INSTALL DOUBLE CYLINDER
LM1 LM1