Corbin Russwin DL4000 Series Mortise Deadlock Installation Instructions
Open the original PDF document
View PDFInstallation Instructions
DL4000 Series Mortise Deadlock
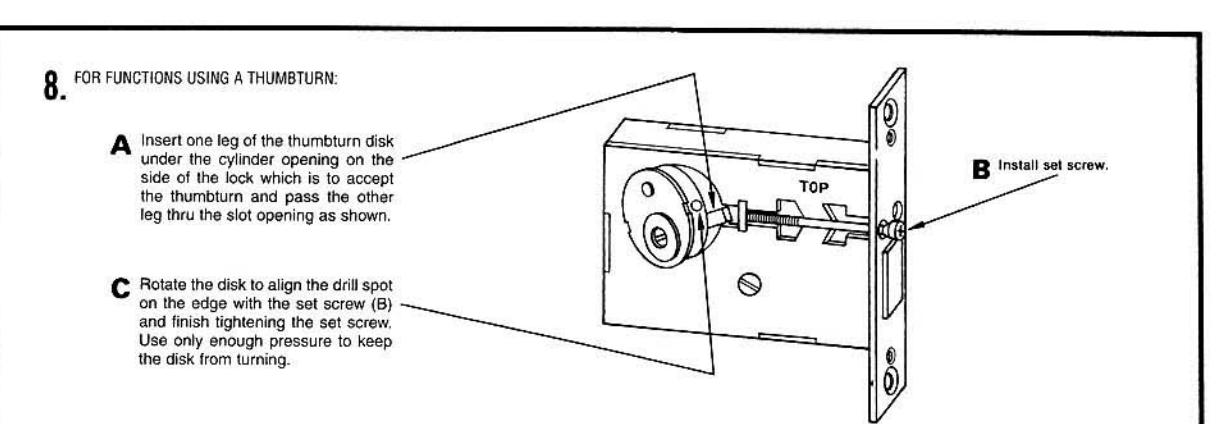
If Thumbturn is not used, disregard those steps pertaining to its application.
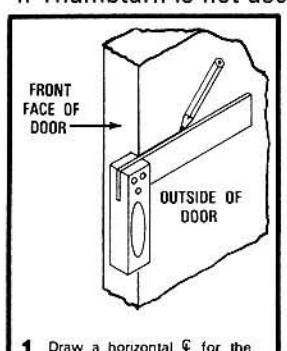
the line on front face of door and draw a Q for
the Thumbturn hole on
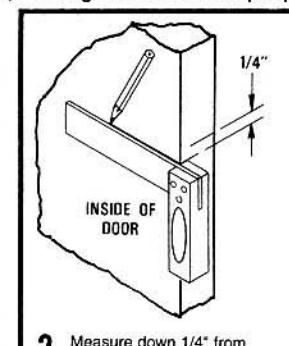
inside of door
3. Mark a point, on both center lines, 2 3/4" from edge of door. Draw a & on front face of door.

Draw a horizontal & for the Cylinder hole at the desired height above finished floor. Extend this line across the front face of door.

Measure 3/4" above the § of the Cylinder hole and square a line across the front face of the door. Draw a second horizontal line 2 5/8" below the first line
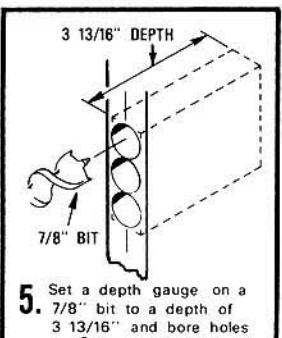
3 13/16" and bore holes on & between the two horizontal lines Chisel the wood remaining to make a rectangular mortise for the Lock Case.
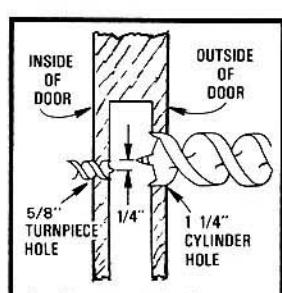
At centers marked in step 3 bore 5/8" Thumbturn hole and 1 1/4" cylinder hole through to mortise.
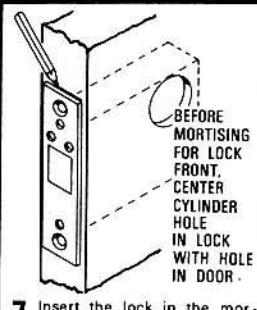
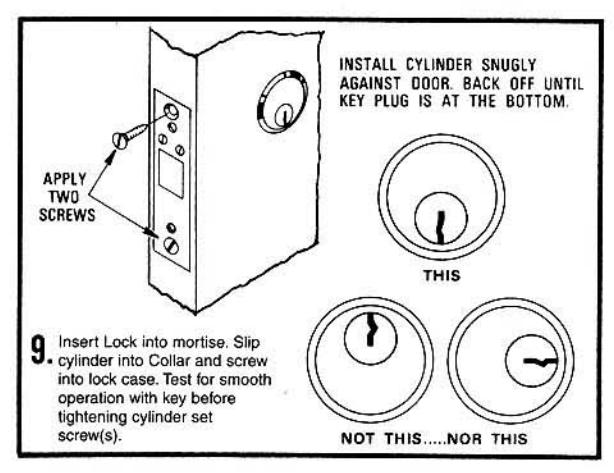
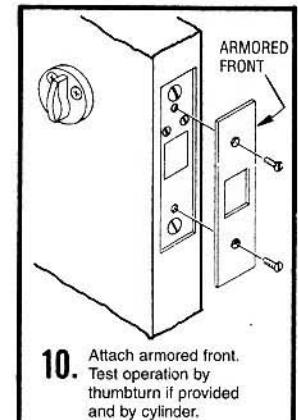
Insert the lock in the mortise. Draw an outline of the perimeter of the Lock Front. Remove Lock from mortise. Chisel mortise 3/16" deep to suit thickness of Lock Front and Scalp.
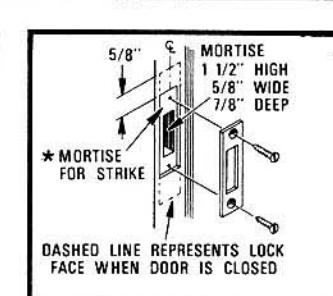
Draw a horizontal line on the jamb where the top of the Lock Front will be when the door is closed Draw a vertical & where center of Lock Front will be. Measure down 5/8" to locate the top of the Strike Trace an outline of the Strike and mortise the jamb for the Bolt and for the Strike.
If wrought box for strike is furnished increase strike mortise as required to accept the box also.

Corbin Russwin Architectural Hardware 225 Episcopal Road Berlin, CT 06037 USA
EN 90 (617999000) Pay 10/00