Corbin Russwin DL3000 Series Deadbolt Locks Installation Instructions_FM35
Open the original PDF document
View PDFInstallation Instructions
ASSA ABLOY
DL3000 Series Cylindrical Deadlock
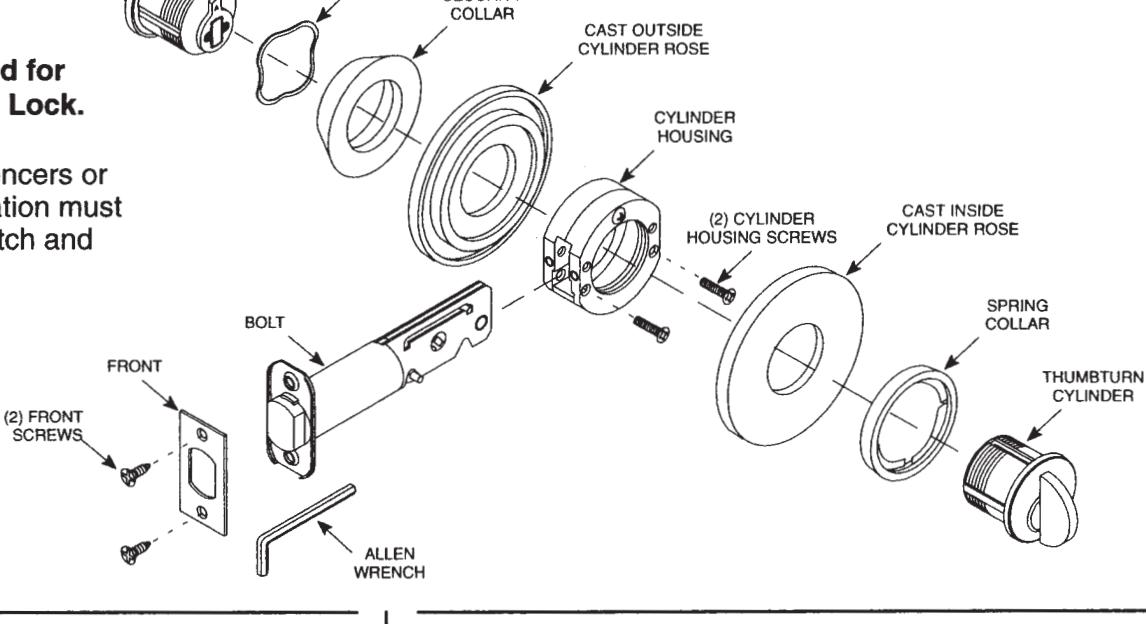
Typical Cylinder and Thumbturn Application

This product can expose you to lead which is known to the state of California to cause cancer and birth defects or other reproductive harm. For more information go to www.P65warnings.ca.gov.
08/2018
KEYED
WAVE
HIGH
Locks will fit doors prepped for Fed. 161 Series Cylindrical Lock.
NOTE: When using door silencers or weather stripping, compensation must be made to ensure proper latch and strike engagement.
Mark Door Using enclosed template mark door at desired height. HIGH EDGE OF DOOR BEVEL MARK FOR 2¹/8" (54 mm) HOLE MARK FOR 1" (25 mm) HOLE
Bore Holes and Mortise for Front
A. Drill 2<sup>1</sup>/<sub>8</sub>" (54 mm) hole through both sides of door where marked.
- B. Drill 1" (25 mm) hole in door edge where marked for bolt. NOTE: 1" (25 mm) bolt hole must be level and perpendicular to the 2¹/s" (54 mm) hole.
- C. Insert bolt in door and mark outline for bolt front. Mortise edge for bolt front.
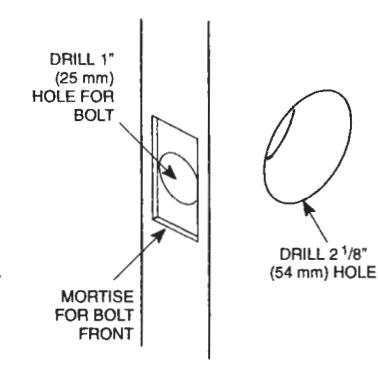
Figure 1
Figure 2
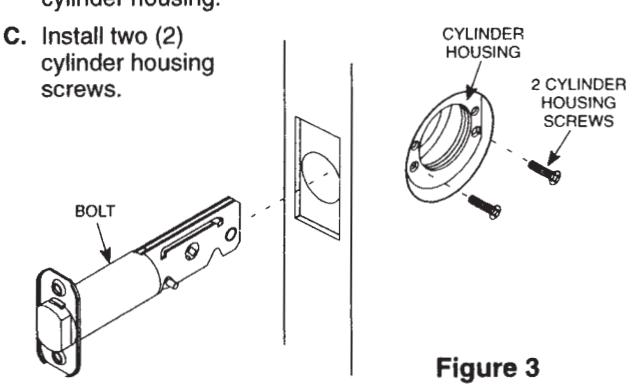
Install Cylinder Housing
- A. Install cylinder housing into 2<sup>1</sup>/<sub>8</sub>" (54 mm) hole.
- B. Insert bolt into 1" (25 mm) bolt hole and on into cylinder housing.
Assemble Thumbturn Cylinder and Spring Collar SPRING COLLAR
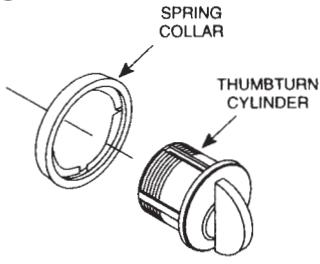
Figure 4
Installation Instructions
DL3000 Series Cylindrical Deadlock
5
Install Thumbturn Cylinder
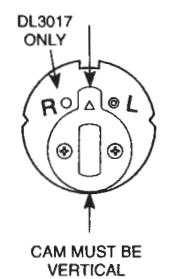
Caution: Cam must be vertical during installation of the thumbturn cylinder. See Figure 5-1.
Do not use thumbturn as a wrench, or cam will become misaligned and result in malfunction of lock.
- A. DL3017 ONLY: Cylinder must be handed before installation. Press small pin firmly into hole in back of cylinder near letter of door hand. For RH and RHR doors, install pin into hole marked R. For LH and LHR doors, install pin into hole marked L. Thumbturn should retract bolt but not project it.
- B. Holding cylinder rose against door, insert thumbturn cylinder and rotate thumbturn to check for proper operation.
- C. Insert Allen wrench along side of bolt and tighten cylinder set screw.

Instail Front
Attach bolt front with two (2) front screws.
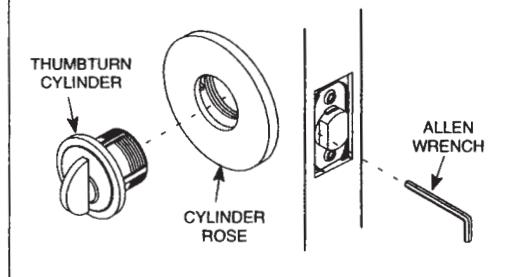
Figure 5-2
6. <sup>%</sup>
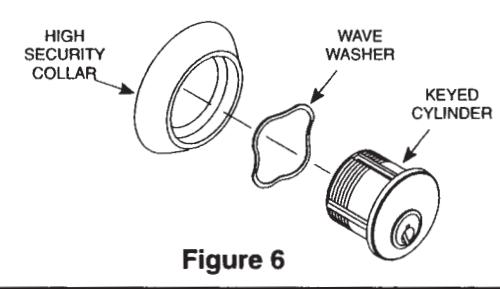
Assemble Keyed Cylinder, Wave Washer and High Security Collar
7.
Install Keyed Cylinder
(Keyed Functions Only)
A. See Figure 7–1. Hold cylinder rose against door. Insert key into cylinder. Pull key out one notch and screw cylinder into housing until it stops. (Use key as wrench.)
Note: Reverse rotation of cylinder until key bow is vertical.
- B. Hold cylinder. Push in key and turn key to operate bolt.
- C. See Figure 7–2. Make sure cylinder lines up on door as shown.
- D. Insert Allen wrench along side of bolt until it engages screw and tighten set screw.

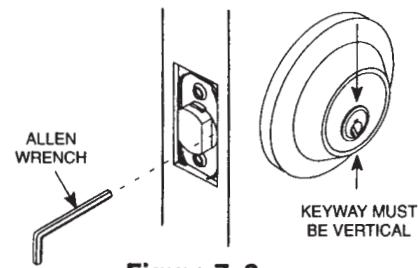
Figure 7–2
2 FRONT

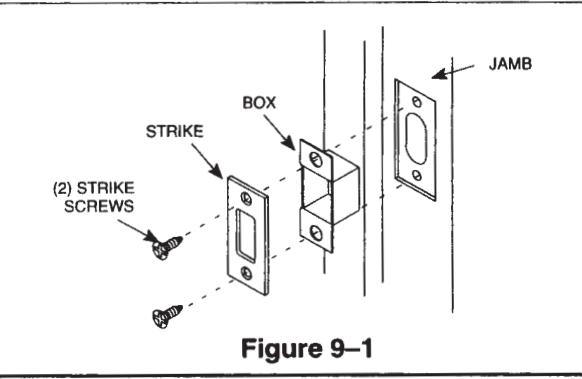
A. Line up strike with bolt and mark outline of strike. Mortise out to depth required.
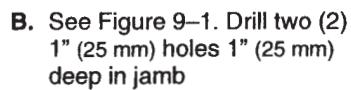
C. See Figure 9–2. Chisel out for box and attach with two (2) strike screws.
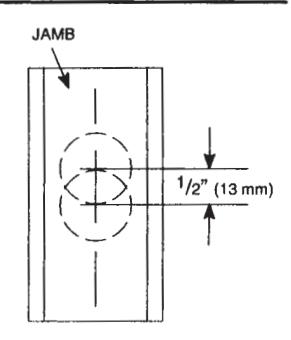
Figure 8
Figure 9-1
In U.S.: Corbin Russwin, Inc. 225 Episcopal Road Berlin, CT 06037 USA Phone: 800-543-3658
Technical Product Support: Phone: 888-607-5703
In Canada: ASSA ABLOY Door Security Solutions Canada 160 Four Valley Drive Vaughan, Ontario, Canada LAK 4T9 Phone: 800-461-3007
ASSA ABLOY is the global leader in door opening solutions, dedicated to satisfying end-user needs for security, safety and convenience.