Converting from VLPKIT to MLRK1-VD
Open the original PDF document
View PDF

VLP SOLENOID REMOVAL
The following instructions show how to successfully remove a solenoid from a VLP device rail and prep it for the installation of the Command Access MLRK1-VD.
Tools Required: #2 Phillips Screwdriver 3/32" Allen Wrench
1 Remove the exit device from its door to disassemble and take out its Rail . Once the solenoid assembly is exposed, remove the (2) Phillips Screws attaching the Solenoid to the Rail .

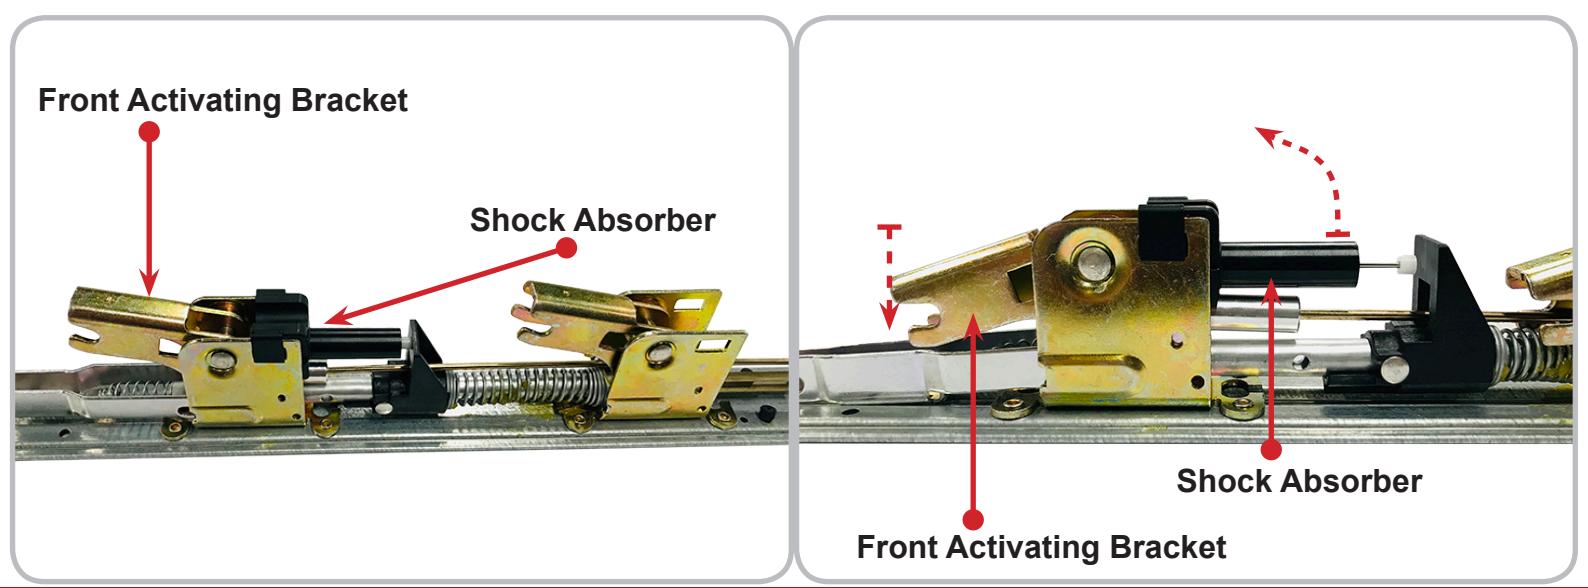
2 Locate the Front Activating Bracket and if a Shock Absorber is present, remove it by pressing down on the Activating Bracket and pulling up on the front of the Shock Absorber.
installation instructions

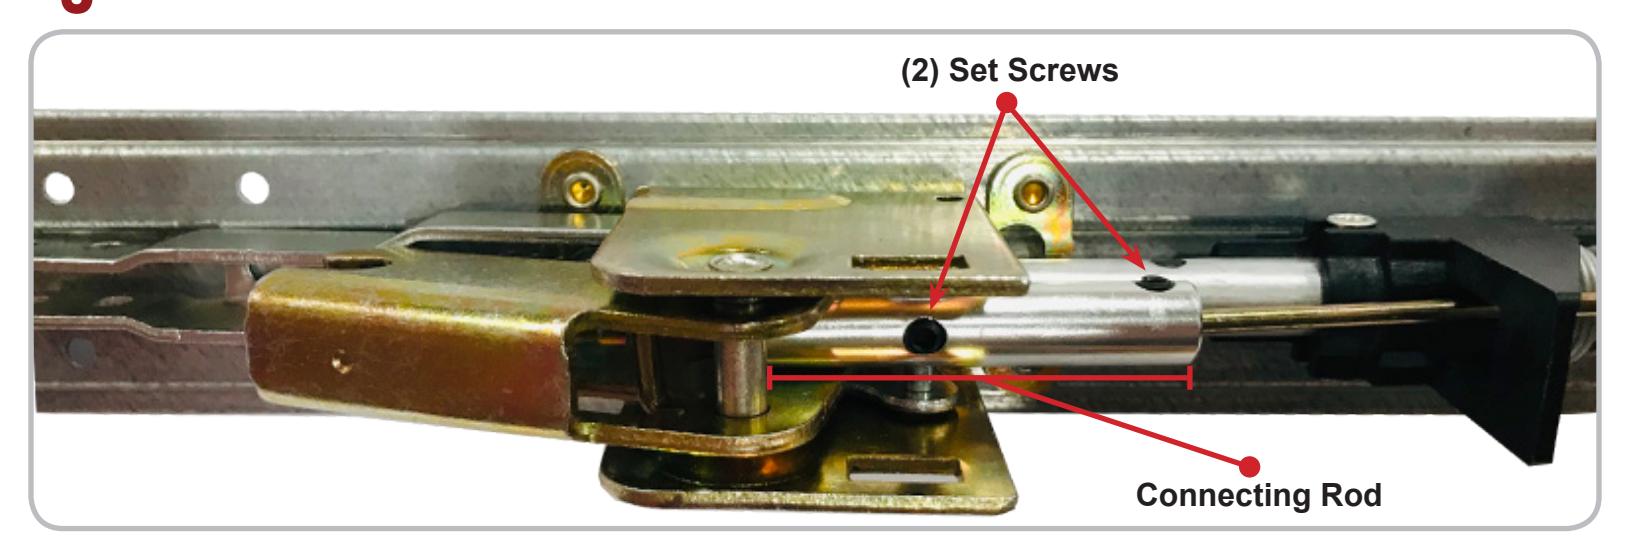
3 Remove (2) Set Screws from the Connecting Rod using a 3/32" Allen Wrench.
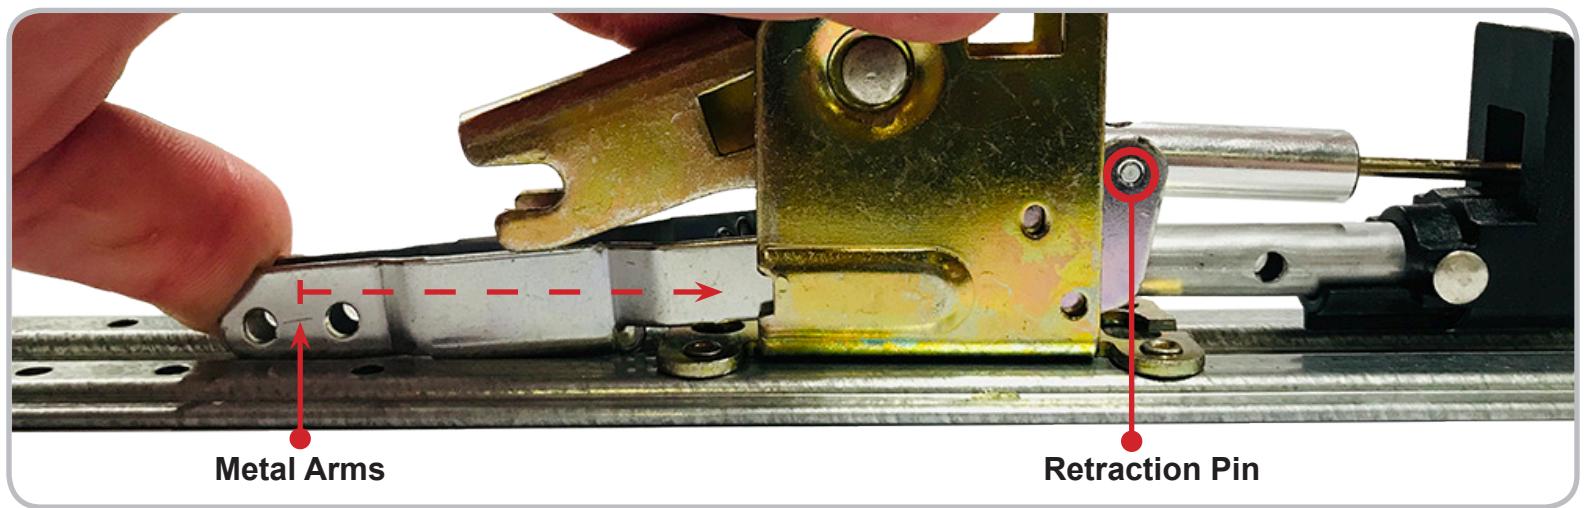
4 Expose the Retraction Pin by pushing backwards on the Metal Arms that connect to the Head Assembly. Then push the pin out to free the Connecting Rod.
5 Unthread the Connecting Rod from the Plunger Rod and remove both pieces.

installation instructions

6.a To know if any additional prep is needed before installing the MLRK1-VD, determine if you have a Non-Fire Rated or Fire Rated device.
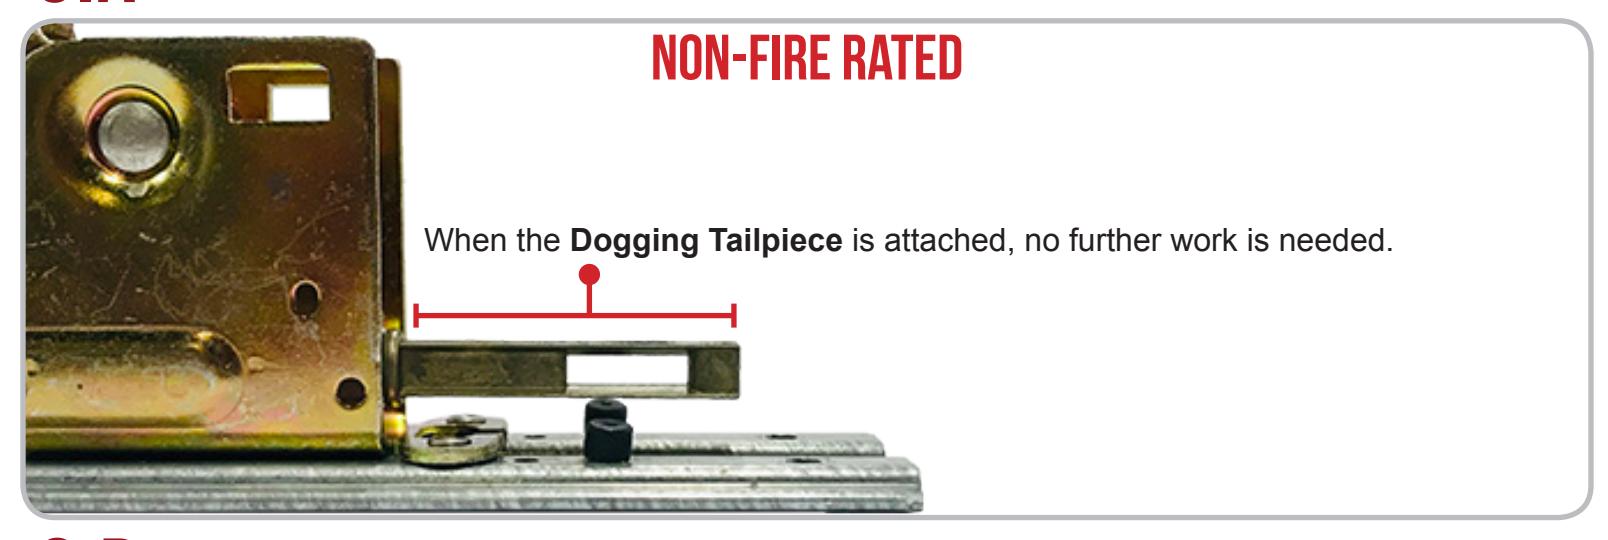
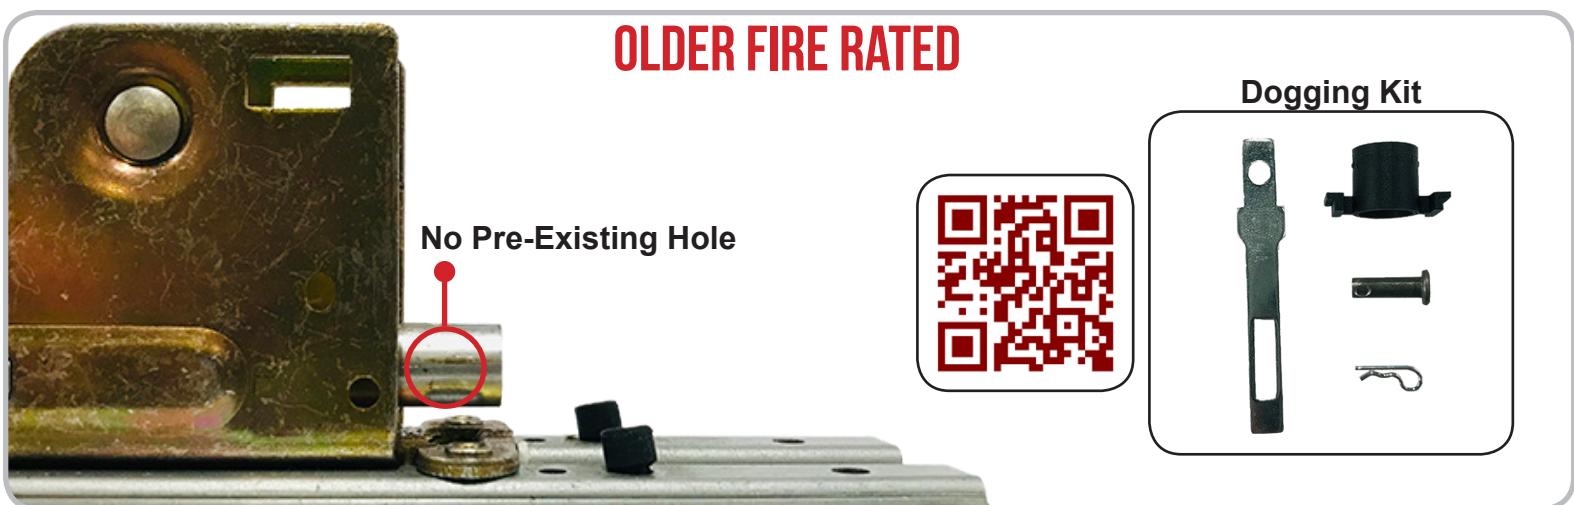
6.b For Fire Rated devices, push down on the Acivating Bracket to expose the Activating Tube. If there is a pre-existing Hole , use the provided Command Access instructions and Dogging Kit .
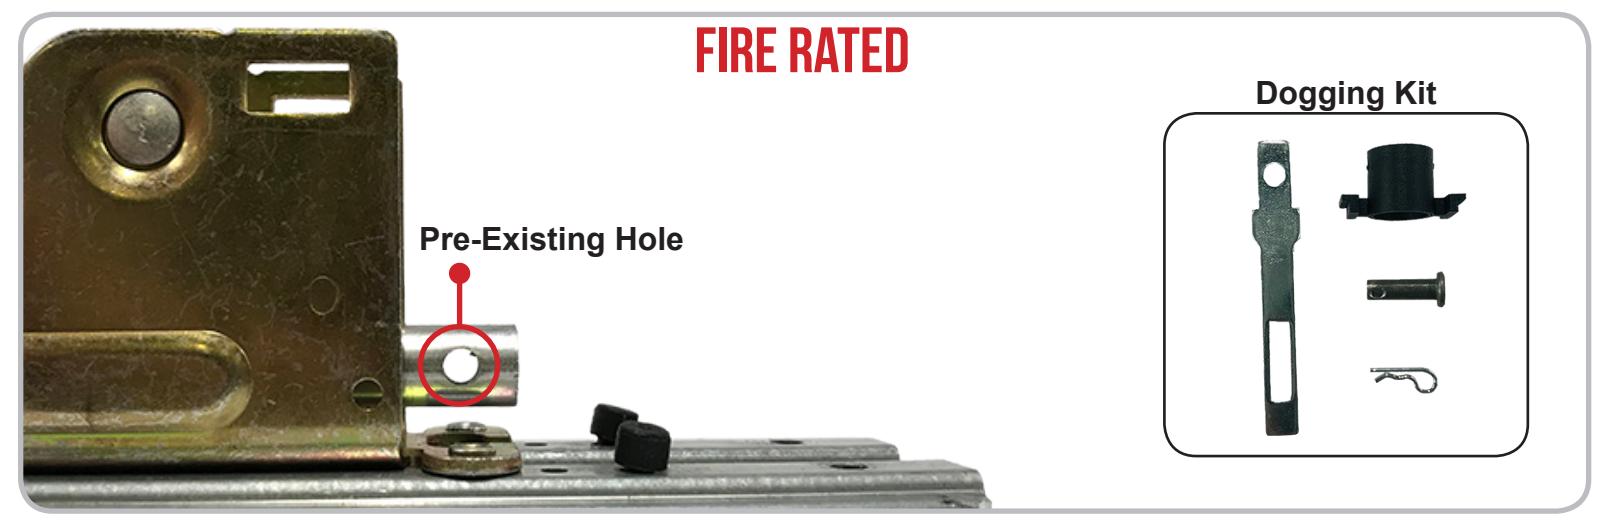
6.c If you have an older Fire Rated device without the pre-existing hole, you will use the provided Command Access Dogging Kit and an install video that can be found by scanning the link below.