Cencon 4.1 Getting Started Guide
Open the original PDF document
View PDFKABA MAS
Cencon® 4.1 Getting Started Guide
Kaba Mas Welcome
Kaba Mas, part of the world-wide Kaba group, is the world's leading manufacturer and supplier of high security, electronic safe locks. Its complete line of self powered, battery, and mechanical locks meets virtually every safe lock requirement. Kaba Mas is dedicated to satisfying end-user needs for security, safety, and convenience. We welcome you to the world of Kaba Mas security and Cencon®.
Manual Conventions
Trademarks
Table Of Contents
The Cencon ® 4.1 Program Package System Requirements Installation Scenarios and Required Processes Before Installing the Cencon Software Software Installation and Setup
Install the Database Client ODBC Driver
Modify the ODBC Connection
Start the Cencon Program Logon to the Cencon System
For Upgrade to New Version of Cencon
Remove Previous Cencon Program
© 1996-2011 Kaba Mas LLC Document Number 2070.127 Rev. E1 07/11 Cencon® 4.1 Getting Started Guide
Manual Conventions
This Cencon Getting Started Guide contains information on the installation and set up of the hardware and software required to manage Cencon users and locks. Some conventions that are followed are:
- The Smart Keys needed for a particular operation will be shown beside the flowcharts that describe the operation.
- The screens shown in the manual that speak to inserting a key in a reader may depict either the use of the 4-port Key Reader in association with the PCI card or the 2-port USB Key Box.
- Input to the PC will be shown in bold type.
- The screen samples may not look exactly as they do on your system depending on which version of the Windows operating system you are using. Some samples in this document are from Windows XP and some are from Windows Vista.
- Highlighted items:
Note
Indicates a point to consider.
Important Note
Indicates information that is very important to know.
Helpful Hint
Indicates a technique or method that works well.
Caution
Indicates the need for care and caution to be observed during a procedure or process.
Warning
Indicates the possibility of loss of data or system integrity.
Before reading the Cencon Getting Started Guide, you should be familiar with basic Windows concepts and techniques. For detailed information, refer to your Windows documentation.
© 1996-2011 Kaba Mas LLC
Document Number 2070.127 Rev. E1 07/11 Cencon® 4.1 Getting Started Guide
Trademarks
The following items are trademarks or registered trademarks of Kaba Mas in the United States and/or other countries.
- Cencon System 2000
- Cencon
- PowerStar Technology
- Smart Key
Adobe and Adobe Reader are registered trademarks of Adobe Systems Incorporated in the United States and/or other countries.
iButton is a registered trademark of Dallas Semiconductor.
Microsoft, Windows, Windows Server are registered trademarks or trademarks of Microsoft Corporation in the United States and/or other countries.
Notice: The information in this manual is subject to change without notice and does not represent a commitment on the part of Kaba Mas. Kaba Mas shall not be liable for technical or editorial errors or omissions contained herein; nor for incidental or consequential damages resulting from the furnishing, performance or use of this material.
© 1996-2011 Kaba Mas LLC Document Number 2070.127 Rev. E1 07/11 Cencon® 4.1 Getting Started Guide
Cencon® 4.1 Getting Started Guide
The Cencon® 4.1 Software Package
The following items are required to implement the Cencon® 4.1 Software:
-
Cencon® 4.1 Server License Kit: (Single Server Option p/n 201190.)
-
Install CD
- Cencon® 4.1 Software (32/64 Bit)
- Cencon Driver Installer (32/64 Bit)
- Cencon Database Setup Utility (32/64 Bit)
- Getting Started Guide (HTML/PDF)
- Software Reference Manual (HTML/PDF)
- Cencon® 4.1 Software Maintenance and Support Agreement (HTML/PDF/DOCX)
- Cencon® 4.1 Single Server License Certificate
- Software Getting Started Guide
- Quick Reference Cards (1 set)
- Cencon Software Maintenance & Support (CSM&S) Agreement Form
- 1 Change Key
-
7 Cencon Smart Keys:
- 2 red SA Keys
- 3 black Logon Keys
- 1 white Clock Set Key (for Gen2 locks)
- 1 grey ReSync Key (for Gen2 locks)
-
Install CD
-
Mode Authorization License(s) (One or more)
- Bank Mode (p/n 201191). Includes 2 green B keys.
- FLM Mode (p/n 201192). Includes 2 blue F keys.
- Route Mode (p/n 201193). Includes 2 yellow R keys.
- Cencon® 4.1 Installation Key (p/n 202202) Orange key programmed for installation. Uniquely coded and tagged per company. Packaged and shipped separately for security reasons.
-
Cencon® 4.1 Dispatch Kit: (p/n 201181)
- Cencon USB Key Box Uniquely coded per company.
- USB cable
FCC Notice

The Cencon Key Box is manufactured by Kaba Mas LLC, 749 W. Short Street, Lexington, KY, 40508, U.S.A., 859-253-4744, HTTP://www.kaba-mas.com. This device complies with Part 15 of the FCC Rules. Operation is subject to the following two conditions: (1) this device may not cause harmful interference, and (2) this device must accept any interference received, including interference that may cause undesired operation.
An Enterprise / Multi-Server License Kit also is available - p/n 201194. This kit option includes all items in the Single Server Option and all 3 Mode Authorization Licenses shown above. A Cencon® 4.1 Enterprise / Multi-Server License Certificate is provided instead of the Single Server License Certificate. The Installation Key and Dispatch Kits are still required for implementation and are still ordered separately.
If you are missing any of the above items, contact Kaba Mas Technical Support at 1 (800) 950-4744.
Optional Order Items:
®
- Cencon 4.1 Software Maintenance & Support Agreement
- Cencon On-Site Training for hands-on lock installation and complete lock and software operation.
- CenTran 4 (XML) Software (p/n 201182)
(See www.KabaMas.com/cencon4 for more information.)
System Requirements
Note
The minimum system requirements identified for Cencon must be met in addition to whatever is required for the PC operating system and the Database Management System. Please refer to the Kaba Mas web site to review the appropriate system requirements at: www.kaba-mas.com/cencon4.
Cencon System Requirements
To use the Cencon program, the following minimum hardware and software requirements must be met:
IBM compatible PC that is capable of running Windows and has an available USB port for the Cencon Key Box.
Note
The Cencon Key Box requires a fully compliant USB 2.0 connection. Some computers, especially laptops and notebooks, may not provide sufficient power for the Cencon Key Box. In these cases it may be necessary to use a powered USB hub to attach the Cencon Key Box. On laptops or notebooks with "power saving" features that turn off USB power, the computer's Operating System (OS) could disconnect from the Cencon Key Box. In this instance, after awakening the computer and Cencon® 4.1 software, unplug and re-plug the USB cable between the computer and the Cencon Key Box.
- 2 GB RAM
- CD-ROM Drive
- Hard Disk Drive with at least 50 megabytes disk space free
Important Note
If you are upgrading from a previous version of Cencon, you should also allow ample disk space for database growth.
-
Windows XP 32 bit Professional (Service Pack 3), Windows Vista 32/64 bit (SP 2), or Windows 7 32/64 bit
- You must be logged into Windows with Admin authority
- Windows Vista 64 bit and Windows 7 64 bit are supported for the Cencon USB Key Box only. The Cencon PCIO card is not supported under the Windows Vista or Windows 7 64 bit operating systems.
-
An installed Database Management System (DBMS) Microsoft SQL Server 2005, SQL 2008, or SQL 2008 R2 (including the SQL Server Express, Standard, or Enterprise Editions.)
- The SQL Server installation does not have to be on the same computer as Cencon. You will need to have a valid ODBC connection to SQL Server for Cencon to use.
- The above computer requirements do not include the requirements for SQL Server. If SQL Server is being run on the same computer as Cencon, then the total requirements will be the requirements of Cencon plus those of SQL Server.
- The requirements of the SQL Server installation will vary depending on the number of locks and users being used by Cencon and the number of Cencon installations connected to that DBMS.
Note
If you do not have an existing Microsoft SQL Server database, you can download a free copy of the latest Microsoft SQL Server Express Edition from the Microsoft web site at http://www.microsoft.com/express/sql/default.aspx You should also download and install the SQL Server Management Studio.
Be sure to read the sections on system requirements and prerequisites. Contact Kaba Mas Technical Support for additional information.
Note
The Cencon database can be installed on a virtual server as long as minimum system requirements for memory and space allocation are met.
© 1996-2011 Kaba Mas LLC Document Number 2070.127 Rev. E1 07/11 Cencon® 4.1 Getting Started Guide
Cencon® 4.1 Getting Started Guide
Installation Scenarios and Required Processes
There are 4 different installation scenarios under which the Cencon® 4.1 Software can be installed. There are unique installation processes for each of the 4 scenarios as follows:
1. New Install
- Contact Kaba Mas to review system requirements and database setup
- Review Software Maintenance Agreement
- Identify Company ID
- Install Cencon USB KeyBox
- Install Cencon USB KeyBox drivers
- If you do not already have a database management system (DBMS), download and install Microsoft SQL Server Express 2008 R2 and SQL Server Management Studio Express.
- Create a Database Client ODBC connection
- Run the Cencon® 4.1 CenconDBSetupUtility to set up the Database
- Install Cencon® 4.1
- Start Cencon® 4.1 Program and Identify Database Connection
- Add Special Supervisor and Supervisor
- Logon to Cencon® 4.1
- Define and Add Regions (if applicable)
- Define and add Bank Branches (if applicable)
- Define and add Customers (if applicable)
- Add additional users
- Customize Authorizations
- Activate Locks
2. Cencon Upgrade to Cencon® 4.1 with Data Imported from Cencon 1.5.x or lower
- Contact Kaba Mas to review system requirements and database setup
- Review Software Maintenance Agreement
- Record Current Authorization Levels
- Install Cencon USB Key Box
- Install Cencon USB Key Box drivers
- If you do not already have a database management system (DBMS), download and install Microsoft SQL Server Express 2008 R2 and SQL Server Management Studio Express.
- Create a Database Client ODBC connection
- Run the Cencon® 4.1 CenconDBSetupUtility to create a Database and import the existing Cencon data
- Install Cencon® 4.1 Program
- Start Cencon® 4.1 Program and Identify Database Connection
- Logon to Cencon® 4.1 Program
- Define and Merge Regional Databases (if applicable)
- Define and add Bank Branches (if applicable)
- Define and add Customers (if applicable)
- Customize Authorization Levels
3. Cencon Upgrade from Version 2.x to 4.1
- Install Cencon USB Key Box
- Install Cencon USB Key Box drivers
- Upgrade database to at least Microsoft SQL Server 2005 (or 2005 Express) if at a previous version
- Install Cencon® 4.1 Program
- Run the Cencon® 4.1 CenconDBSetupUtility to convert the existing database to the Cencon® 4.1 configuration
- Logon to Cencon® 4.1 Program
- Define and Merge Regional Databases (if applicable)
- Define and add Bank Branches (if applicable)
- Define and add Customers (if applicable)
- Customize Authorization Levels
4. Cencon® 4.1 Upgrade from Version 3.0 or 3.1
- Install Cencon USB Key Box
- Install Cencon USB Key Box drivers
- Upgrade database to at least Microsoft SQL Server 2005 (or 2005 Express) if at a previous version
- Run the Cencon® 4.1 CenconDBSetupUtility to convert the existing database to the Cencon® 4.1 configuration
- Install Cencon® 4.1 Program
- Logon to Cencon® 4.1 Program
- Define and Merge Regional Databases (if applicable)
- Define and add Bank Branches (if applicable)
- Define and add Customers (if applicable)
- Customize Authorization Levels
© 1996-2011 Kaba Mas LLC
Document Number 2070.127 Rev. E1 07/11 Cencon® 4.1 Getting Started Guide
Cencon® 4.1 Getting Started Guide
Before Installing the Cencon Software
Important Note
It is required that you contact Kaba Mas Technical Support at 1(800) 950-4744 before installing or upgrading the Cencon software to review minimum system requirements and database setup (including upgrading the database from a previous version of Cencon), and to perform data validity checks on any current Cencon data.
Review Software Maintenance Agreement
A hard copy of the Cencon Software Maintenance & Support Agreement has been included in the software package. It is recommended that you review the Maintenance Agreement at this time. You also have the option to view and print the Maintenance Agreement when you install the software, and you can also review the Maintenance Agreement online at www.kaba-mas.com\cencon4.
Company ID
WARNING
Identify Company ID
During the installation process, you will be required to enter a unique four-digit Company ID. If you are a branch of a larger company, this ID must be identical to that used for all other Cencon installations by your company. YOU MUST determine what the four-digit number is before you begin the installation process. Once chosen and input into the system, you should record and secure the Company ID since the number becomes encrypted and cannot be changed.
Important Note
Locks that have been initialized in a different company's system can only be activated in your company's system after having been "shelved" in their original system.
© 1996-2011 Kaba Mas LLC Document Number 2070.127 Rev. E1 07/11 Cencon® 4.1 Getting Started Guide
Cencon® 4.1 Getting Started Guide
Software Installation and Setup
Complete the following steps to install the software:
- 1. Logon to the PC system as a user with Local Admin (or higher) rights in order to successfully install the software.
- 2. Verify that your Windows operating system is at the latest service level. (See your Window's Help and Support function if you need assistance with this.)
Caution
Be extremely cautious in bringing the Windows operating system to the latest service level. With the release of Windows 7, running a Windows Update on a Windows Vista system will update the operating system to Windows 7.
Important
Always run Windows Update to ensure that your system is up to date before installing the Cencon software. The Cencon software requires the .NET 4 framework to be installed on your system. This can be automatically installed by running Windows Update. If your system is not up to date or the .NET 4 framework is not properly installed, the Cencon software will not operate correctly.
3. Check the PC Date and Time Properties (date, time, time zone, DST adjustment setting) from the Control Panel to ensure accuracy. Adjust, if necessary, before proceeding.
Note
It is strongly recommended that you close all other applications before installing the Cencon software. It is also recommended that you review the Cencon Reference Manual before installing the software.
- 4. If you have a previous version of Cencon installed, you should ensure that data has been archived in accordance with the customer archive requirements and then backup the current Cencon database.
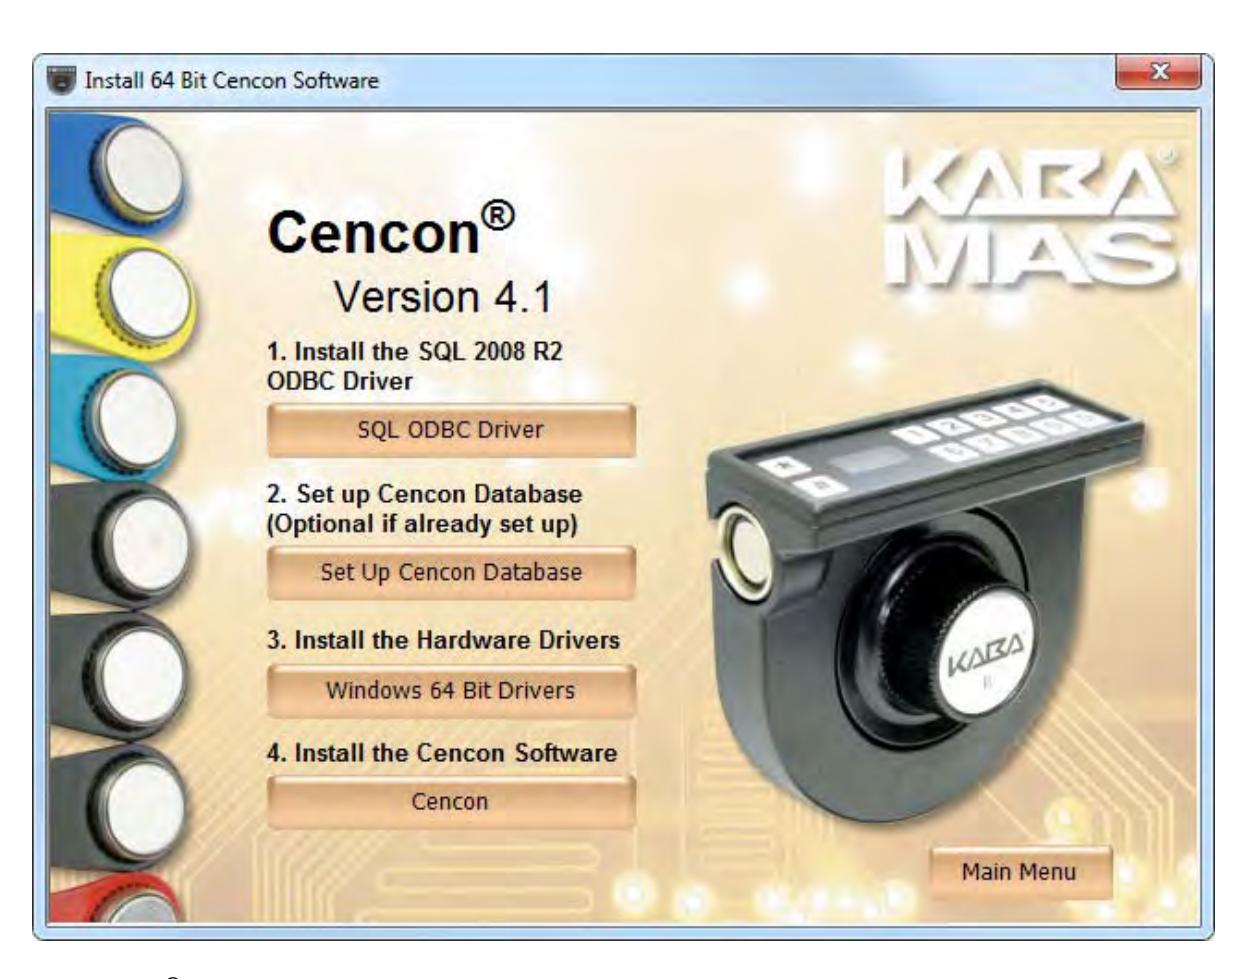
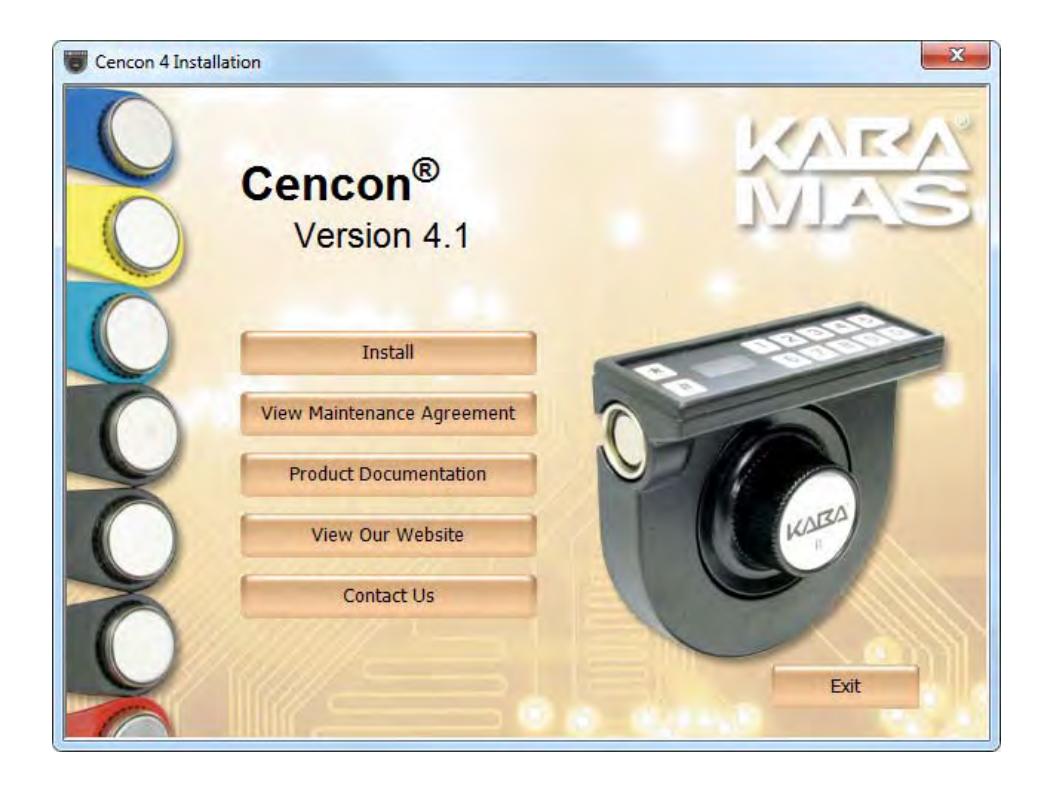
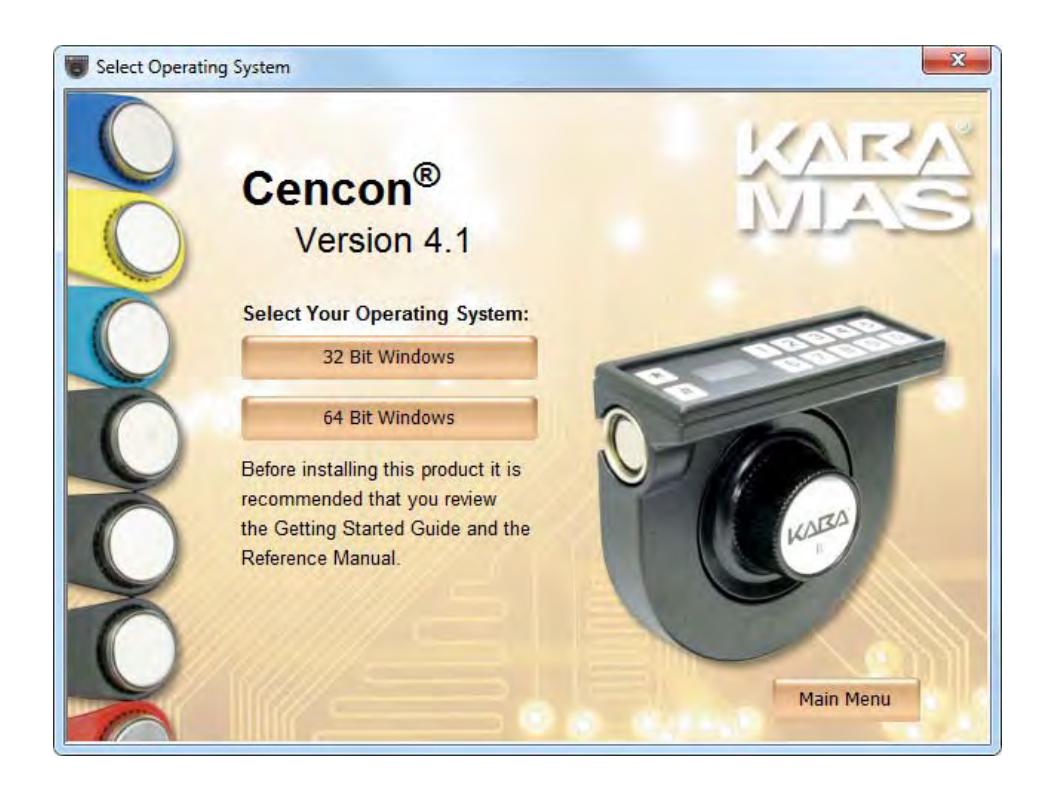
- 5. Insert the Cencon® 4.1 Install CD in your computer CD-ROM / DVD / BluRay drive. If you have autorun enabled on your system, the Cencon® 4.1 Installation screen will be displayed. Otherwise, double click Autorun.exe from the Cencon® 4.1 Install CD root directory, and the Cencon® 4.1 Installation screen will be displayed. The Cencon Version 4.1 Software Installation dialog is loaded and the Main Menu is displayed:
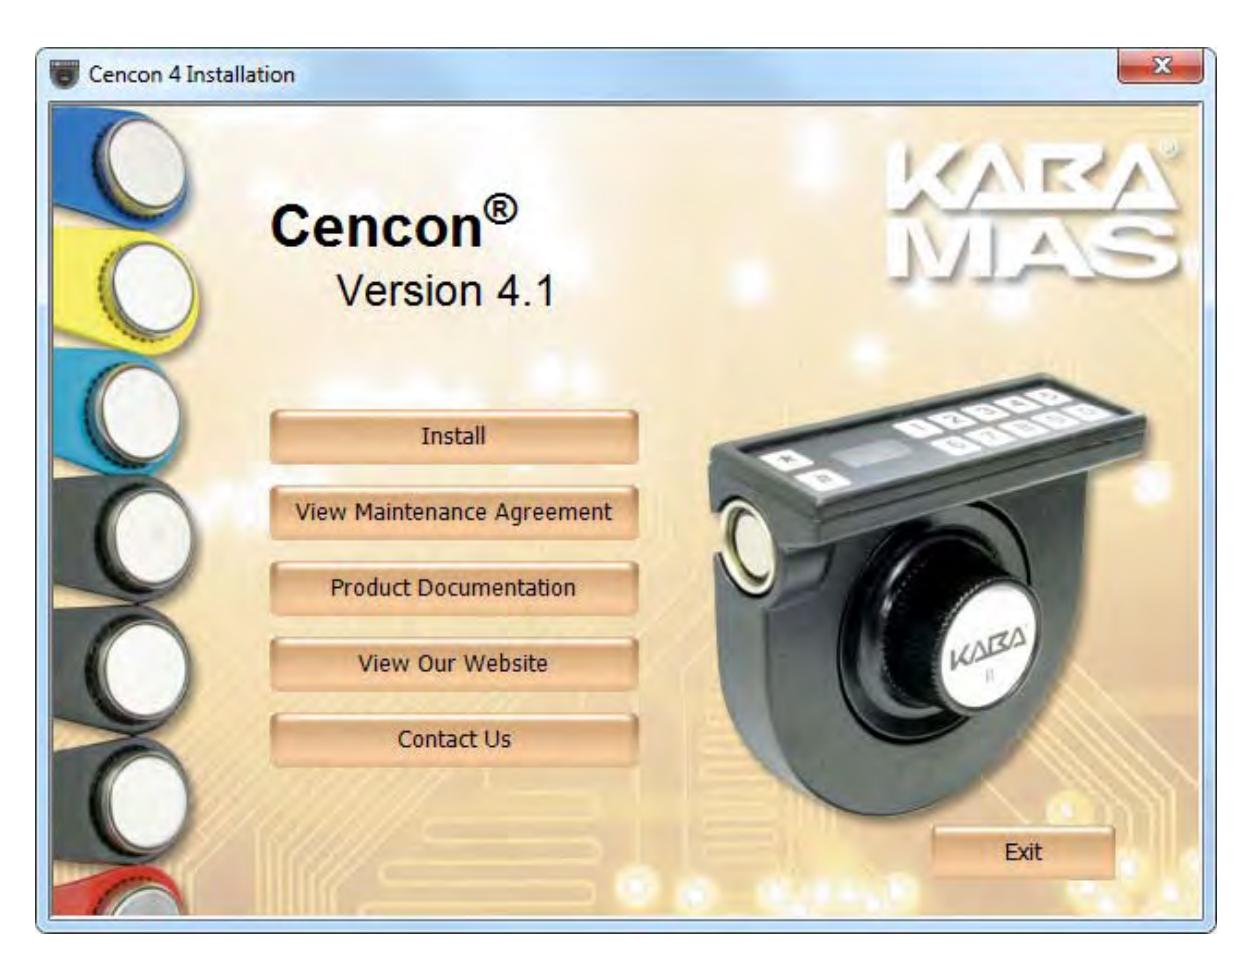
6. From the Main Menu, click on the Install button. The first software installation screen is displayed:
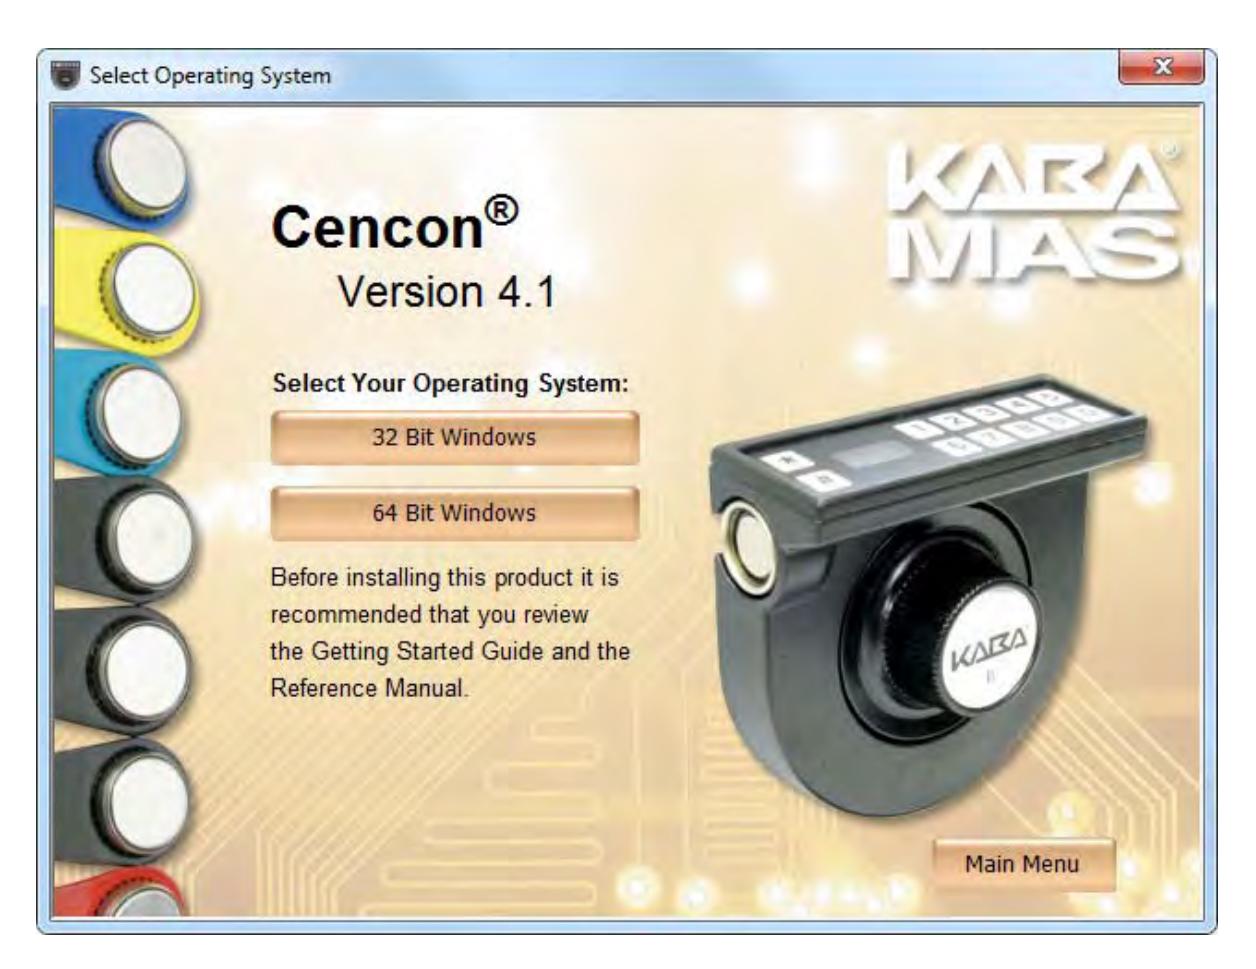
Different drivers and software are required depending on whether you are running the 32 bit or the 64 bit version of Windows. If you need help determining which version of Windows you are running, visit: http://support.microsoft.com/kb/827218 .
7. Press the button corresponding to your operating system (the following screen samples are for a 64 bit system):
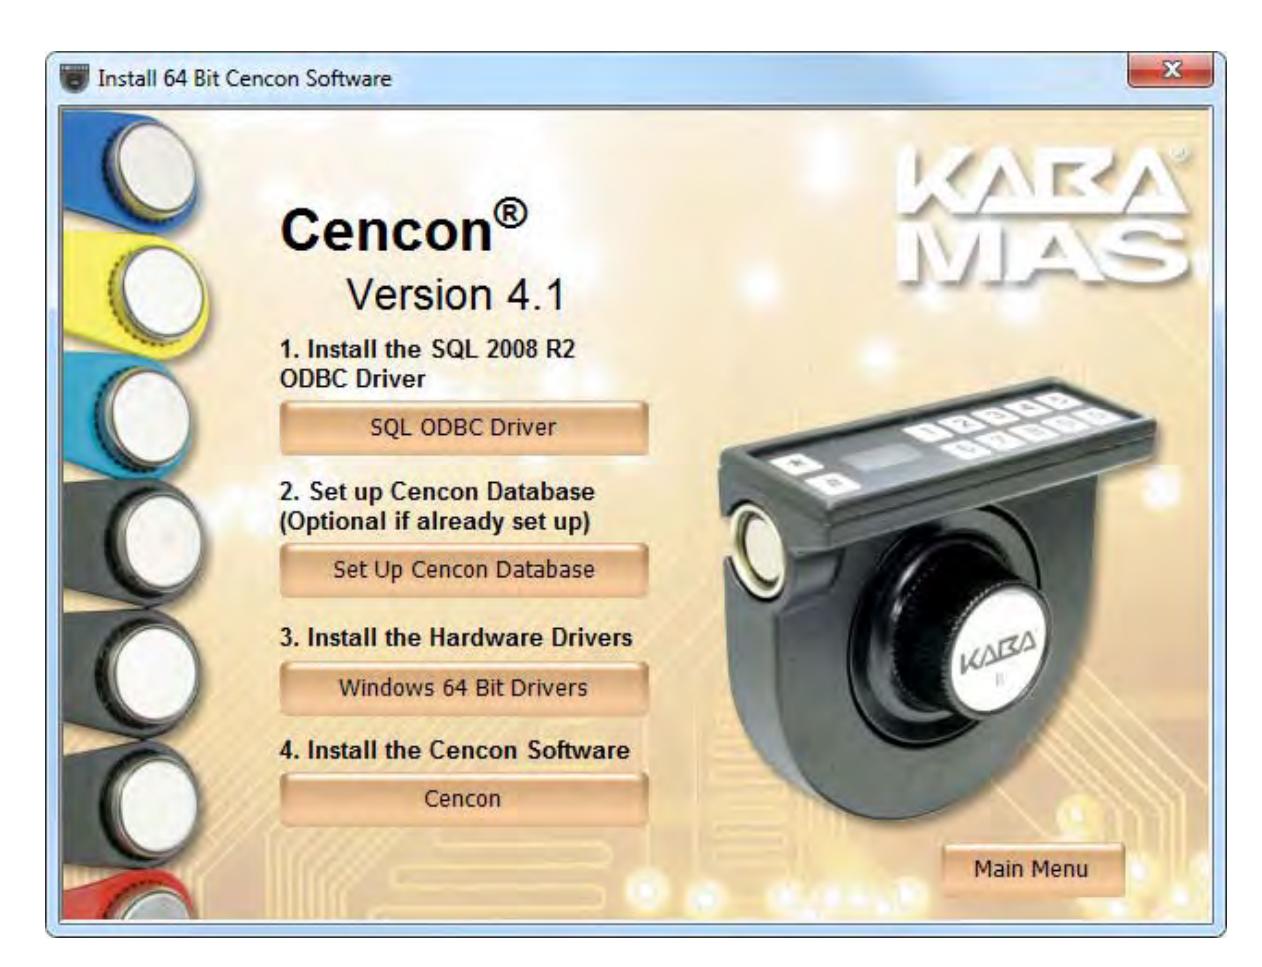
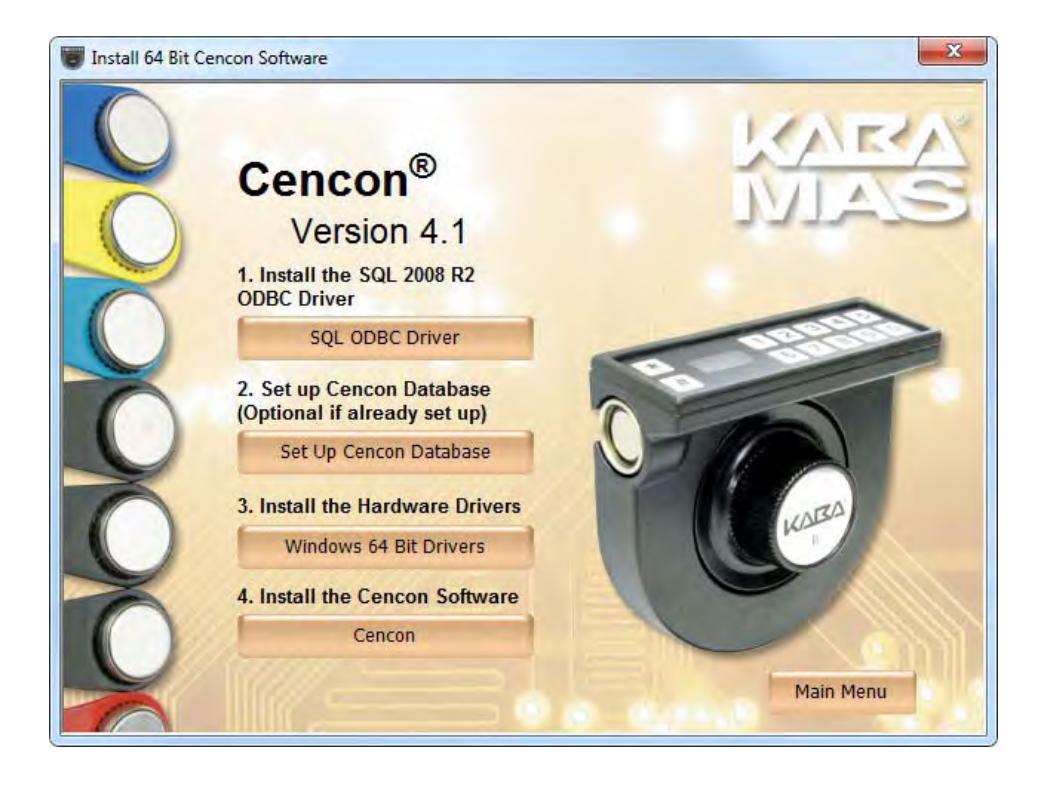
8. Install the SQL 2008 R2 ODBC Driver
First, install the SQL ODBC Driver on your system if you have not already done so. This SQL ODBC Driver is the SQL Server Native Client 10.0 driver as released with Microsoft SQL Server R2. Using the default SQL ODBC Driver available with Windows will result in slow performance. It is recommended to use the most recent SQL ODBC Driver released by Microsoft. If you have a more recent SQL installation from Microsoft than SQL Server R2, then you should use that SQL ODBC Driver. To install the provided SQL ODBC Driver released with Microsoft SQL Server R2, select the SQL ODBC Driver button.
9. Install the hardware drivers
Cencon® 4.1 supports both the Cencon PCIO based key readers and the new Cencon Key Boxes. The Cencon PCIO based key readers are supported on 32 bit versions of Windows only.
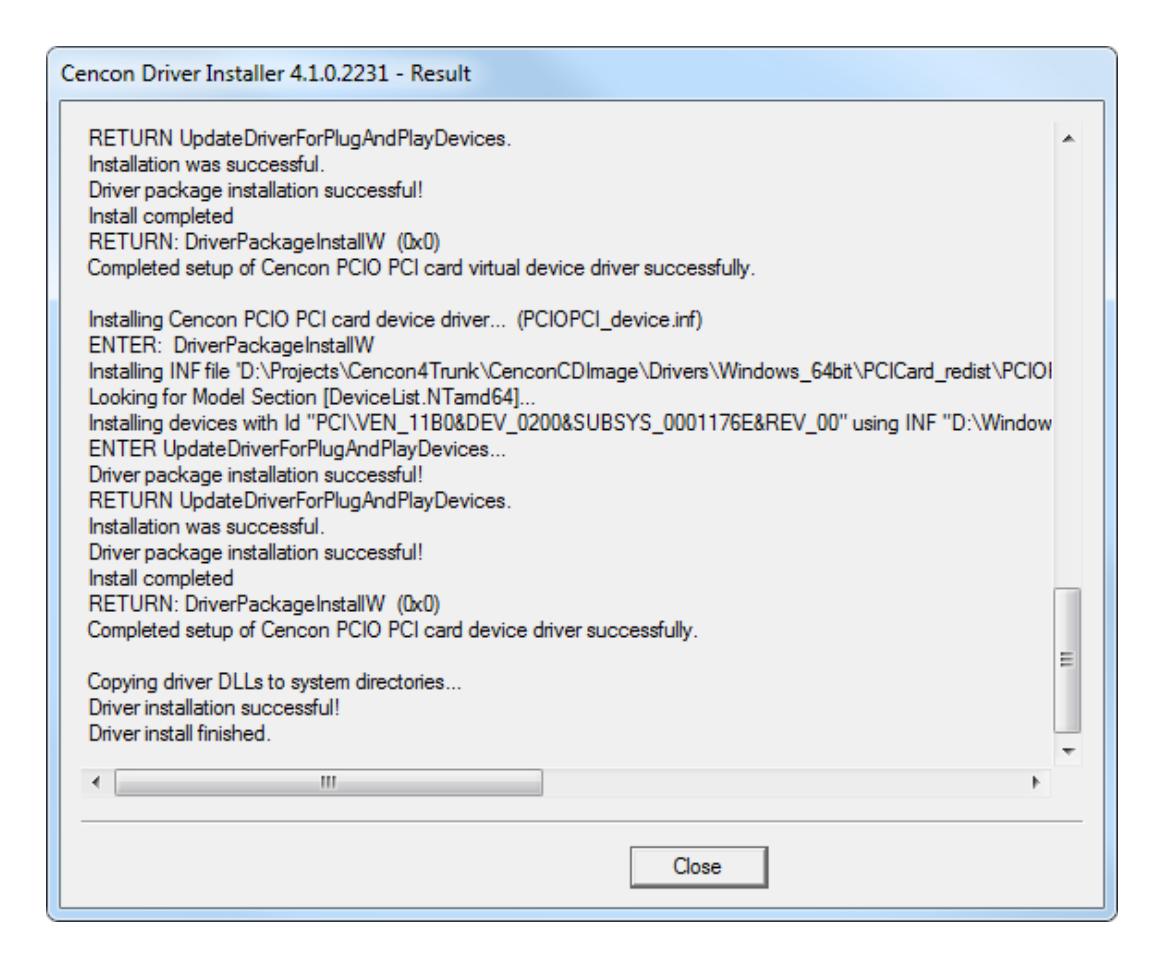
Click the Windows Drivers button to install the appropriate hardware drivers using the Cencon driver installation utility:
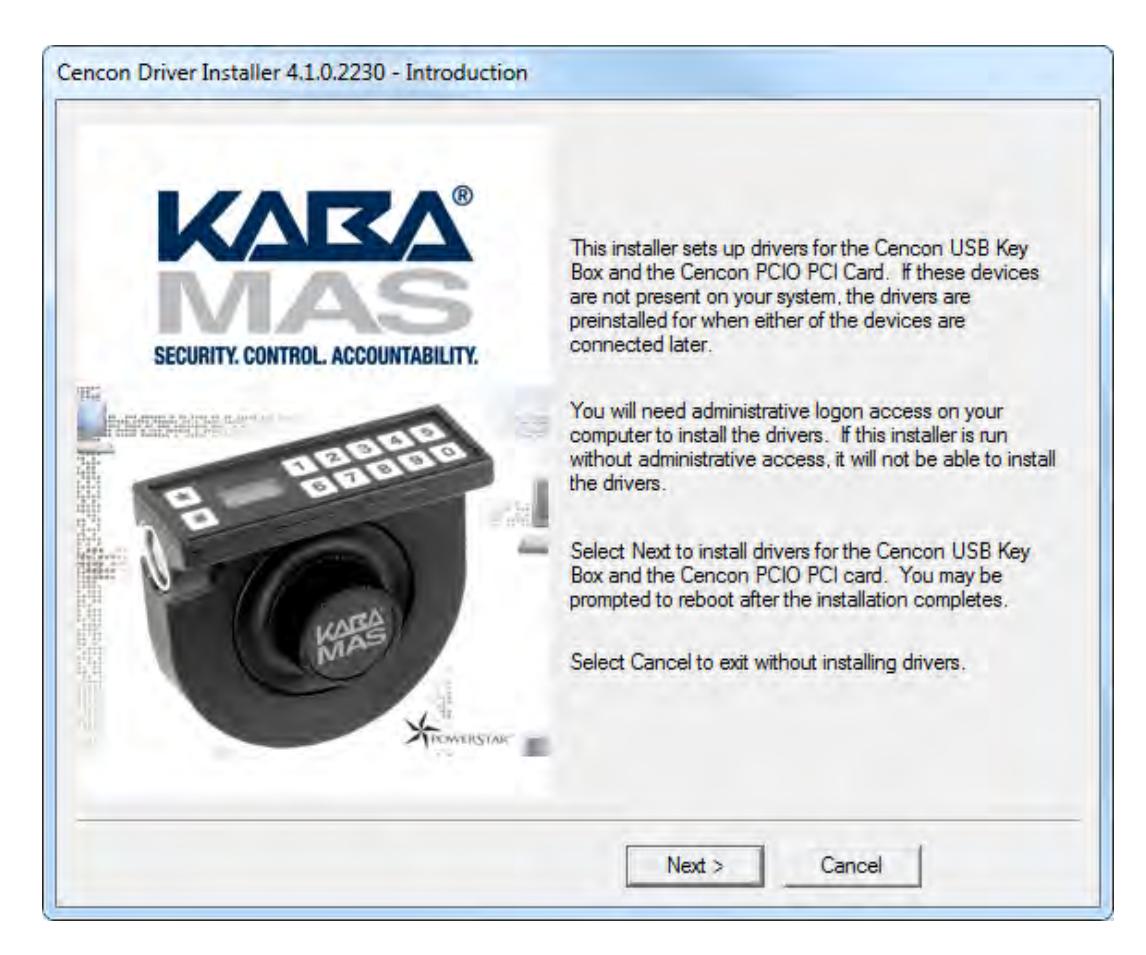
The driver installation utility generates detailed status information and does not require user input. The completed driver installation display:
10. Install the Cencon® 4.1 Program
Complete the following steps to install the software:
a. From the Install Software Menu click the Cencon button.
The Cencon® 4.1 Setup Wizard screen is displayed. The Setup Wizard is a Windows program that will take you through the rest of the setup process. Once completed, you will be returned to the Cencon Version 4.0 Install Program screen.
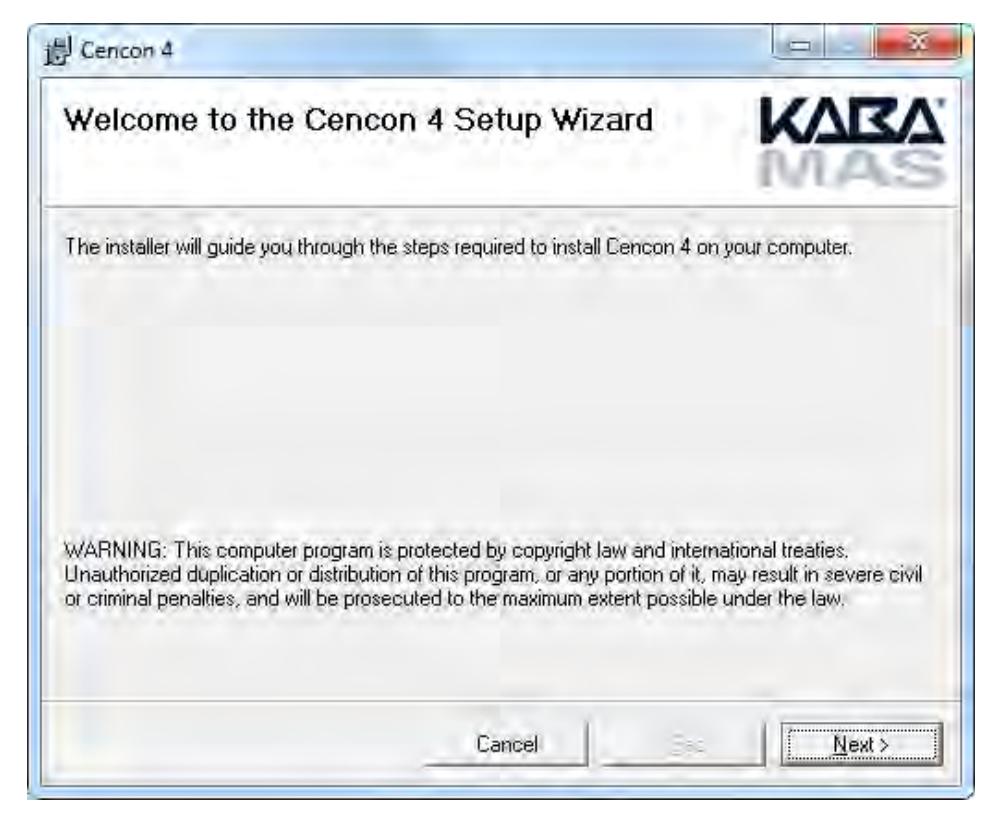
b. Click on Next > to continue with the installation. The Software License Agreement acceptance screen is displayed.
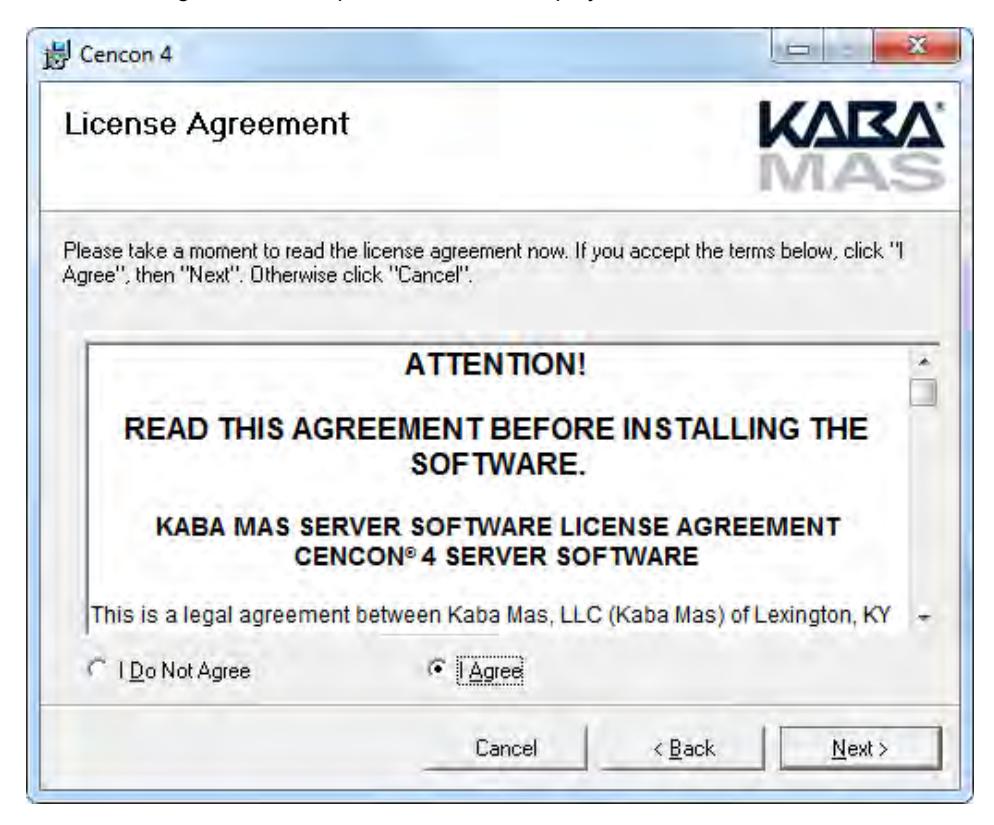
c. Read the Software License Agreement, select "I Agree", and then click on the Next > button to continue. The Select Installation Folder window is displayed to allow you to select the program folder to which the Cencon® 4.1 programs will be added.
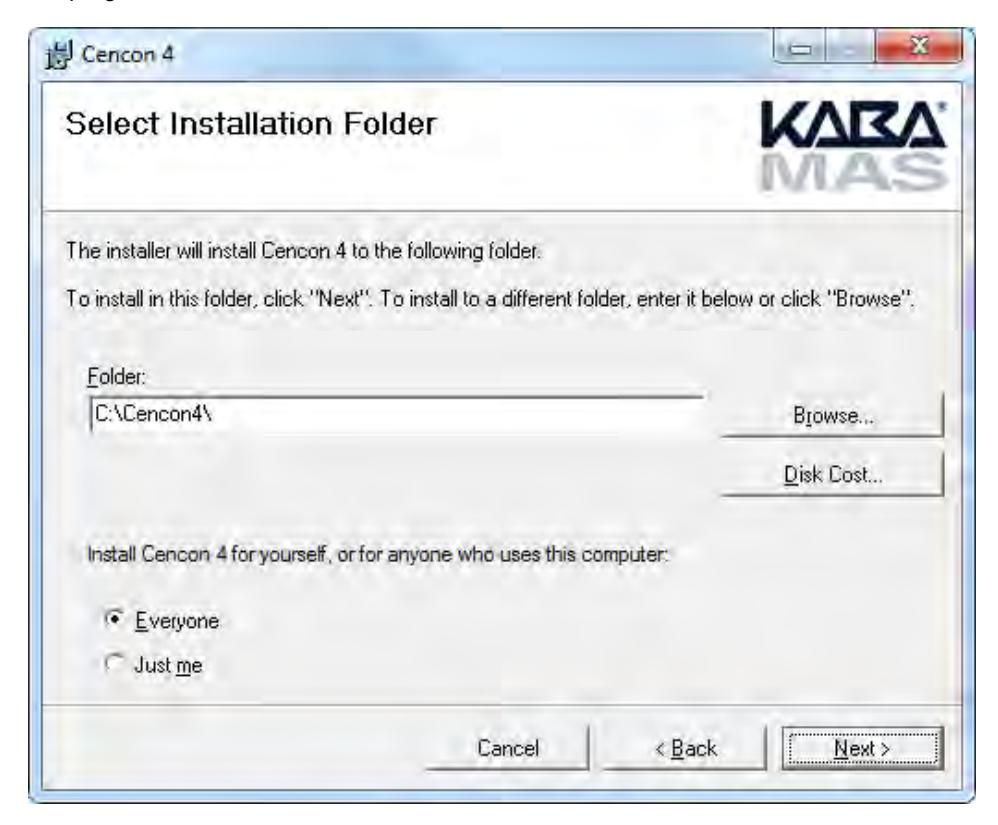
Installation Directory
The default installation directory is shown. It is recommended that you install the software to the default folder (i..e., Cencon4.) If you want the Cencon® 4.1 software installed in another directory, click on the Browse button and select the new path.
It is strongly recommended that you not change the installation directory to c:\Program Files on Windows Vista and above.
d. Click on the Next > button to add the programs to the designated folder.
The Confirm Installation screen is displayed:
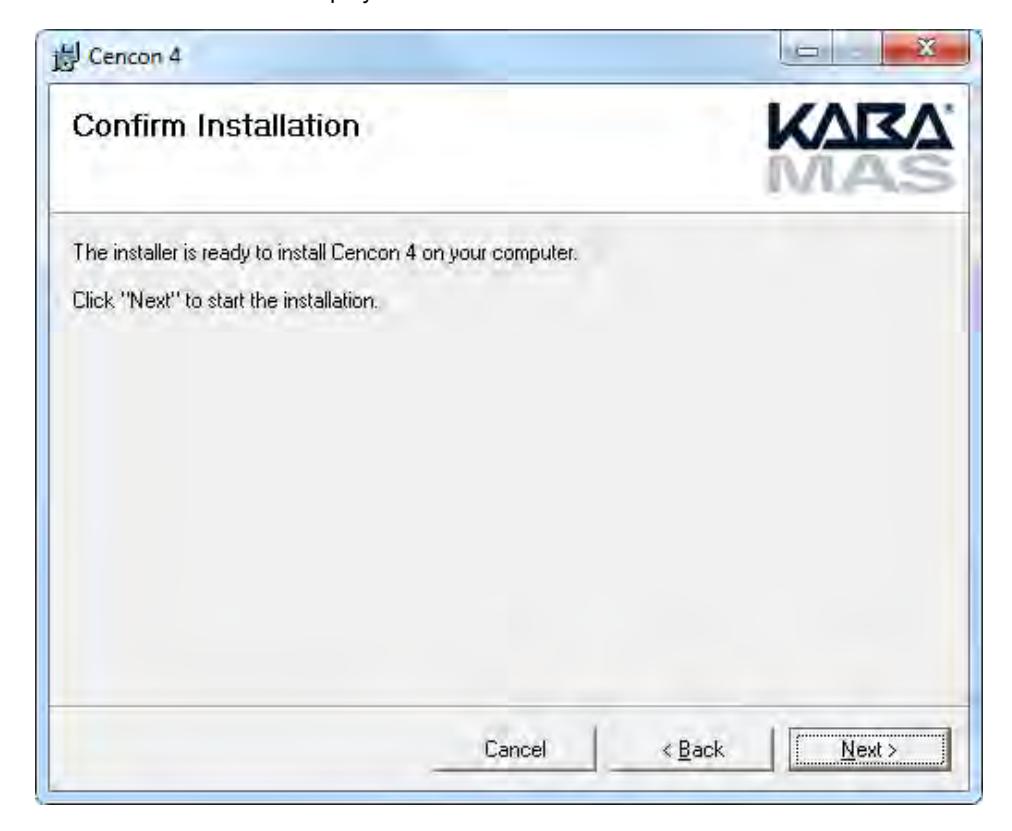
e. If there is anything you wish to change, click on the < Back button. Otherwise, click on Next > to install the program with the designated settings.
The Installing Cencon® 4.1 screen displays an indication of the installation progress.
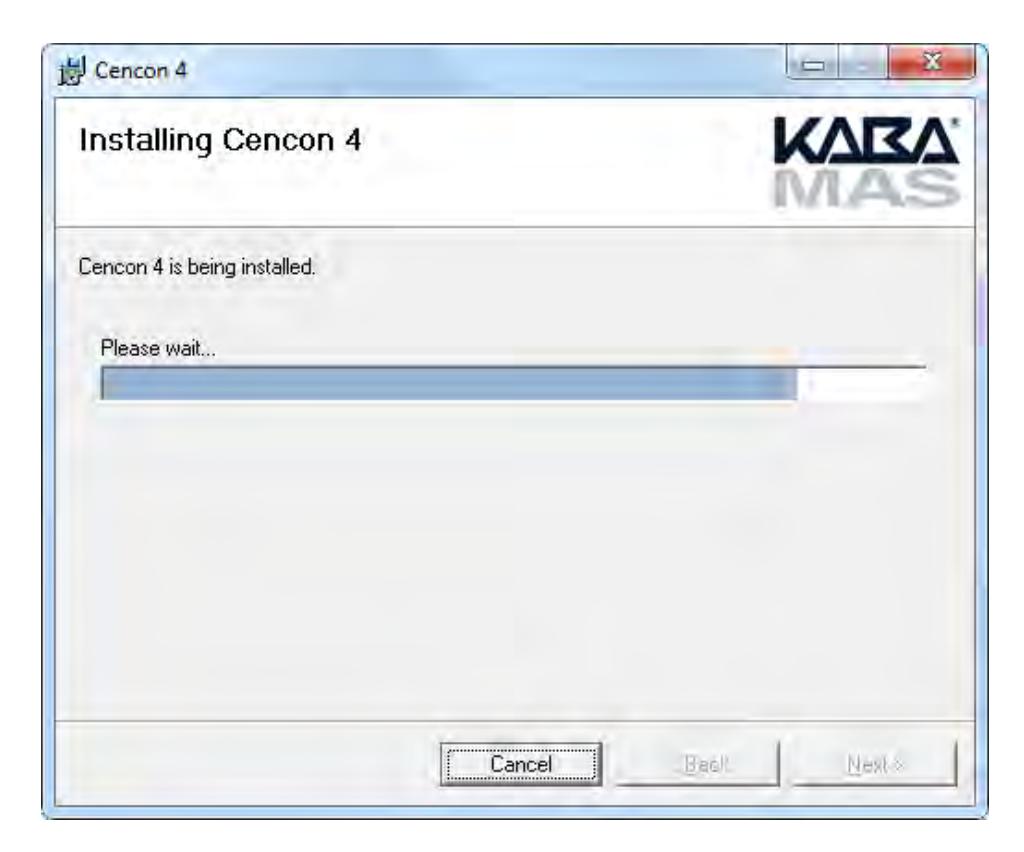
f. Click on the Next > button to continue.
The Installation Complete screen is then displayed indicating that the Cencon® 4.1 program has been successfully installed:
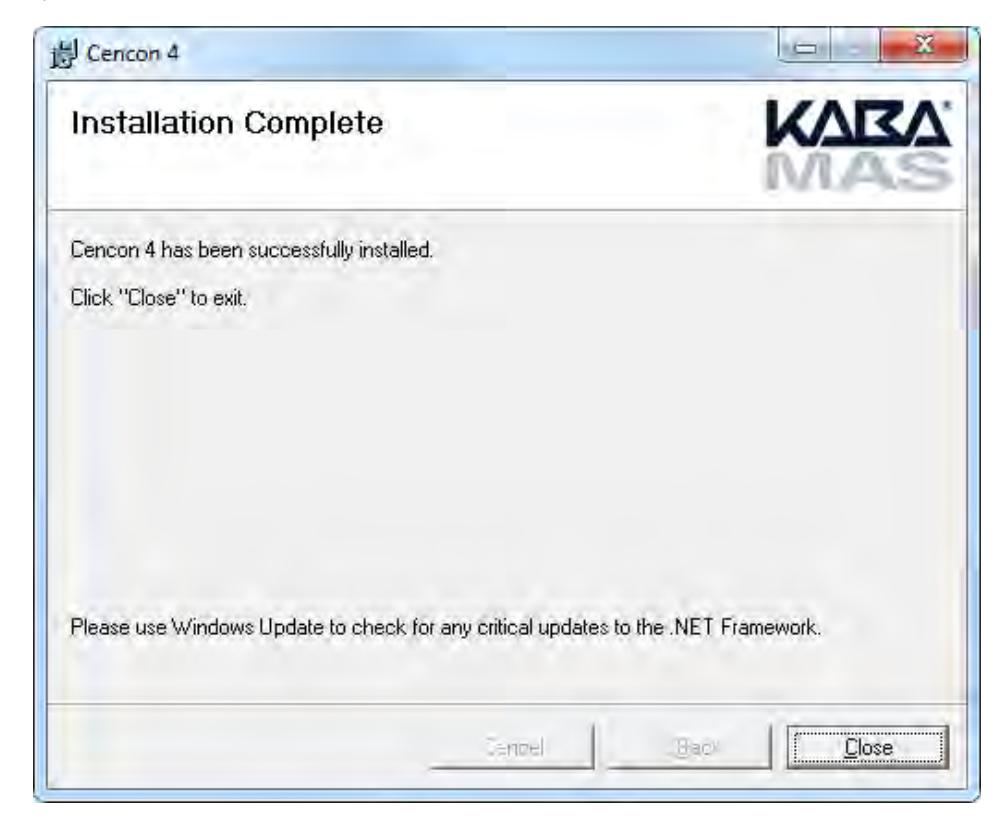
g. Click on the Close button to return to the Software Install screen.
© 1996-2011 Kaba Mas LLC Document Number 2070.127 Rev. E1 07/11 Cencon® 4.1 Getting Started Guide
Cencon® 4.1 Getting Started Guide
Install the Database Client ODBC Driver
Note
If you are upgrading a previous version of Cencon, you should already have an ODBC connection. You have the option to skip ahead to the section titled Database Preparation ; however, due to differences between the previous connection type and the new Native Client connection, it is highly recommended that you go ahead and create a new ODBC connection for maximum efficiency of data handling.
Each DBMS has an ODBC driver that must be installed on the system that is going to be running Cencon. It is possible that this system is the same one that is running the DBMS, or the DBMS may be on a server.
The administrator is required to install the ODBC driver for the DBMS being used with Cencon and to configure it to connect to the Cencon database that has been set up.
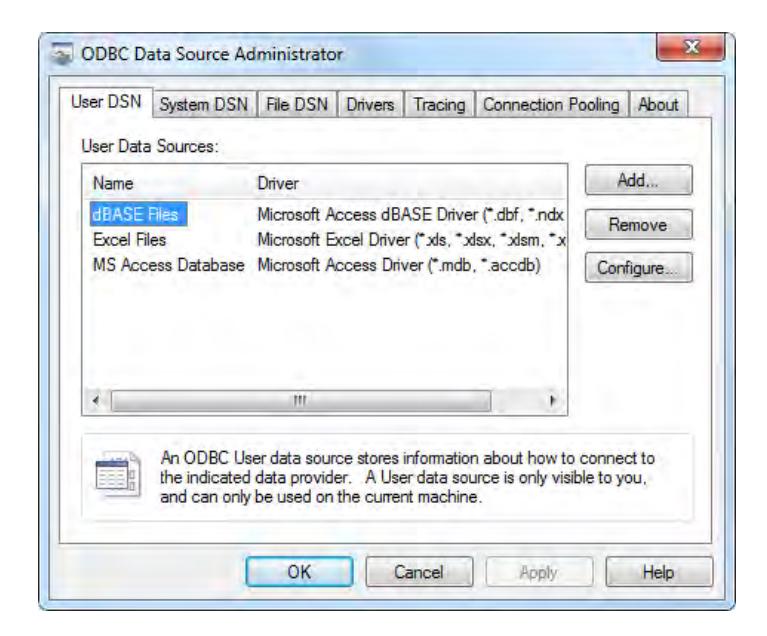
1. From the Windows Start button, select Control Panel, Administrative Tools, and finally, Data Sources (ODBC). This opens the Windows ODBC Data Source Administrator window:
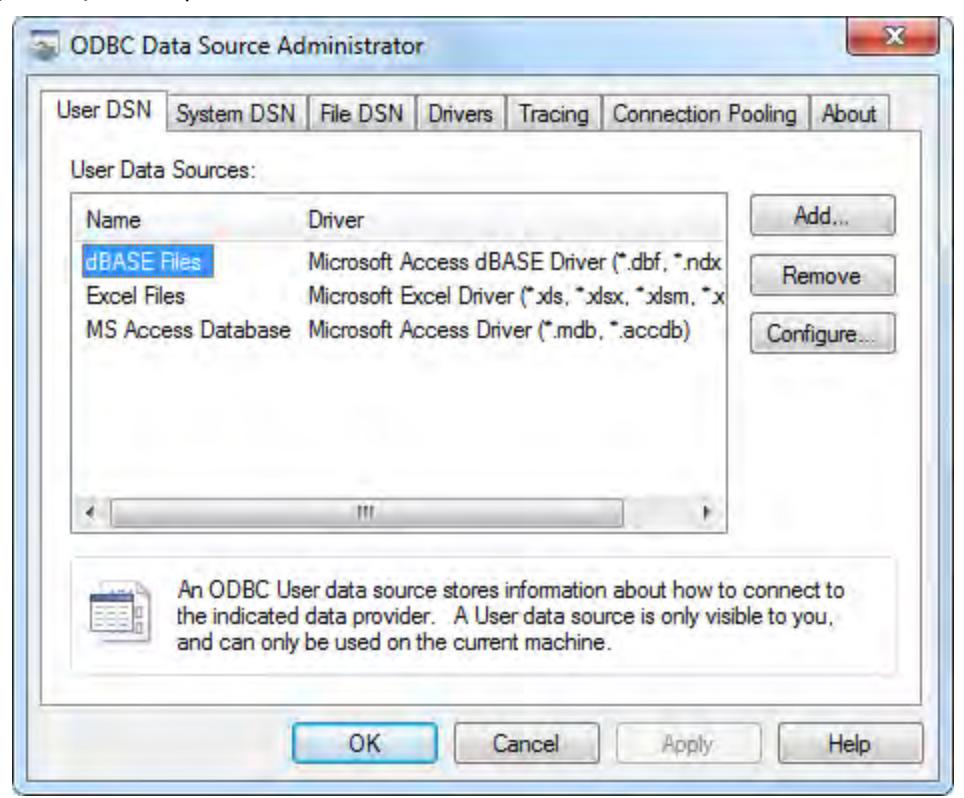
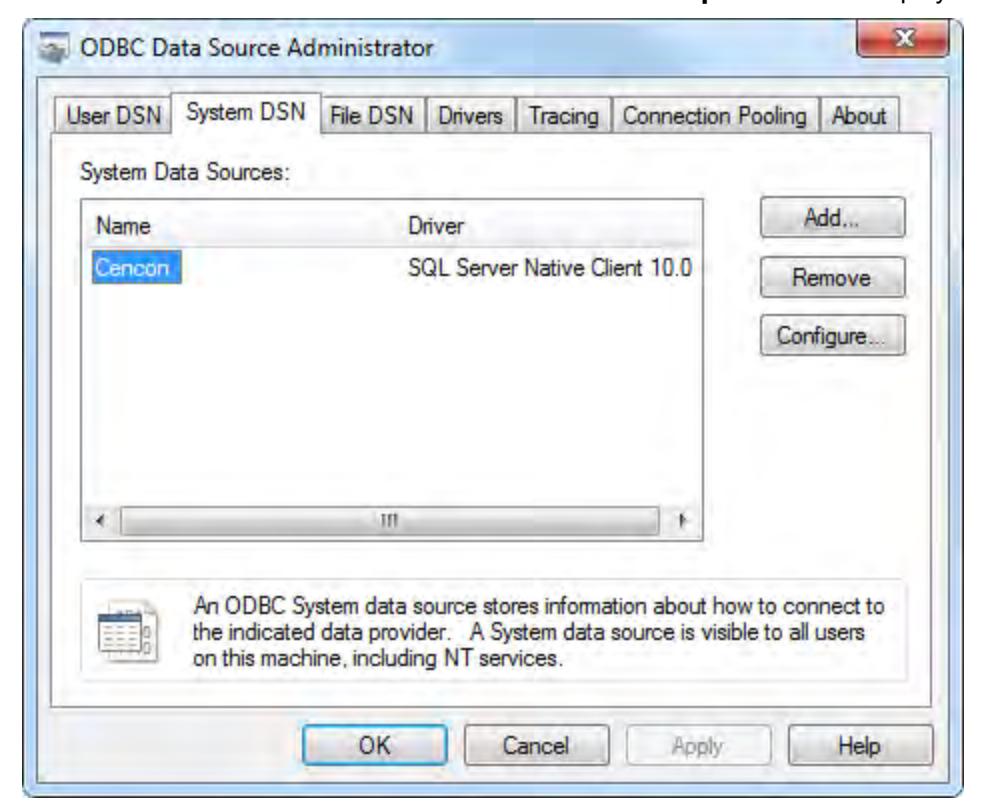
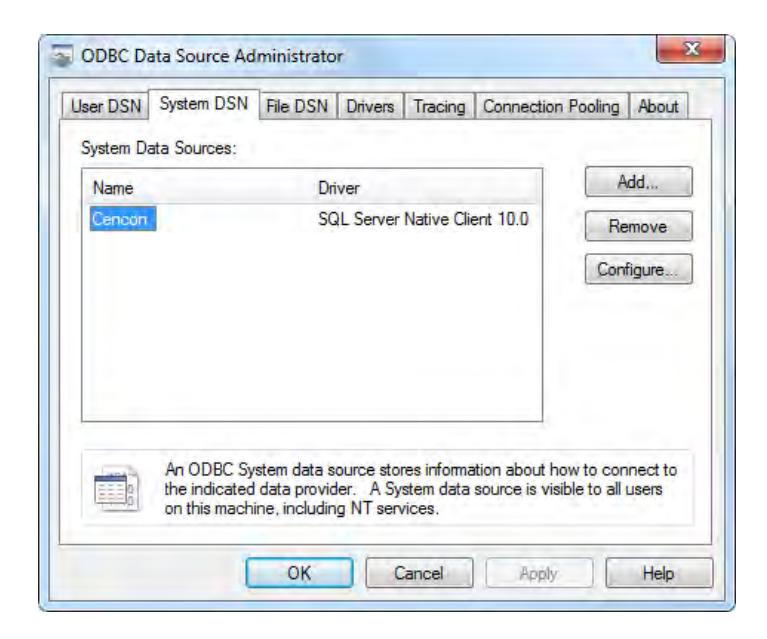
2. From the ODBC Data Source Administrator window, select the System DSN tab:
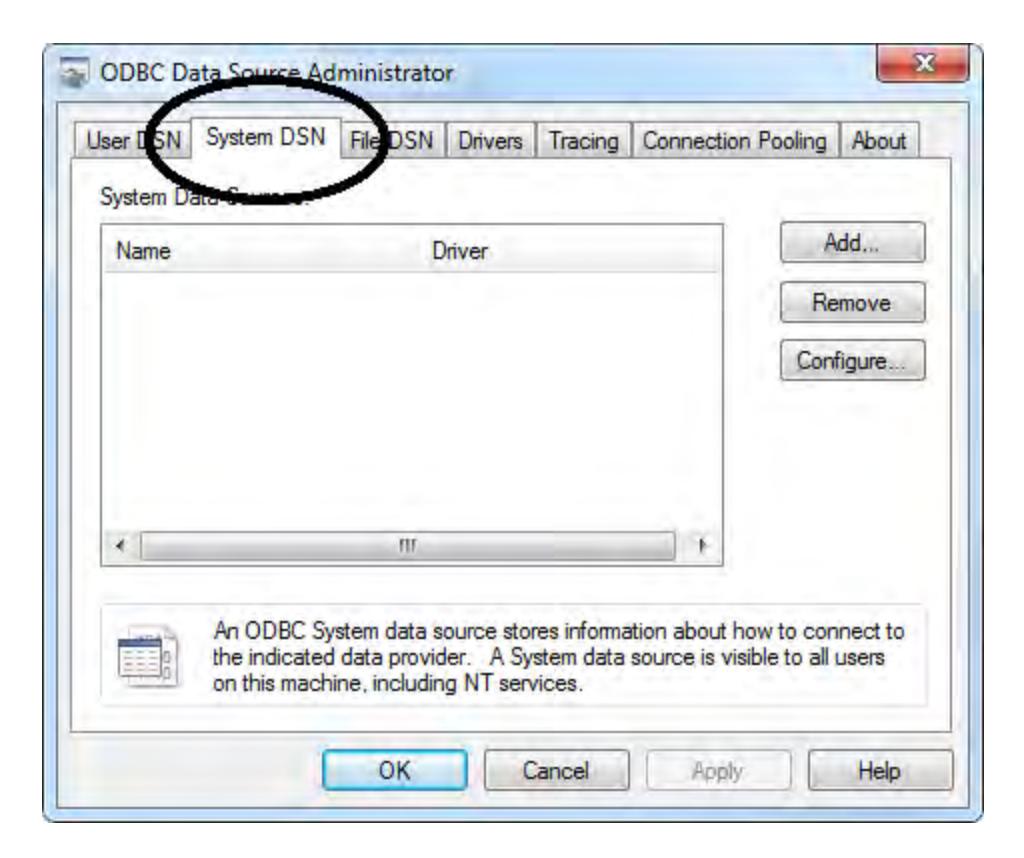
This selection displays a listing of existing system data source names.
3. To create a new data source for the Cencon connection (including the server and the default database), click on the Add button. The Create New Data Source screen is displayed. This selection displays a listing of drivers for data sources:
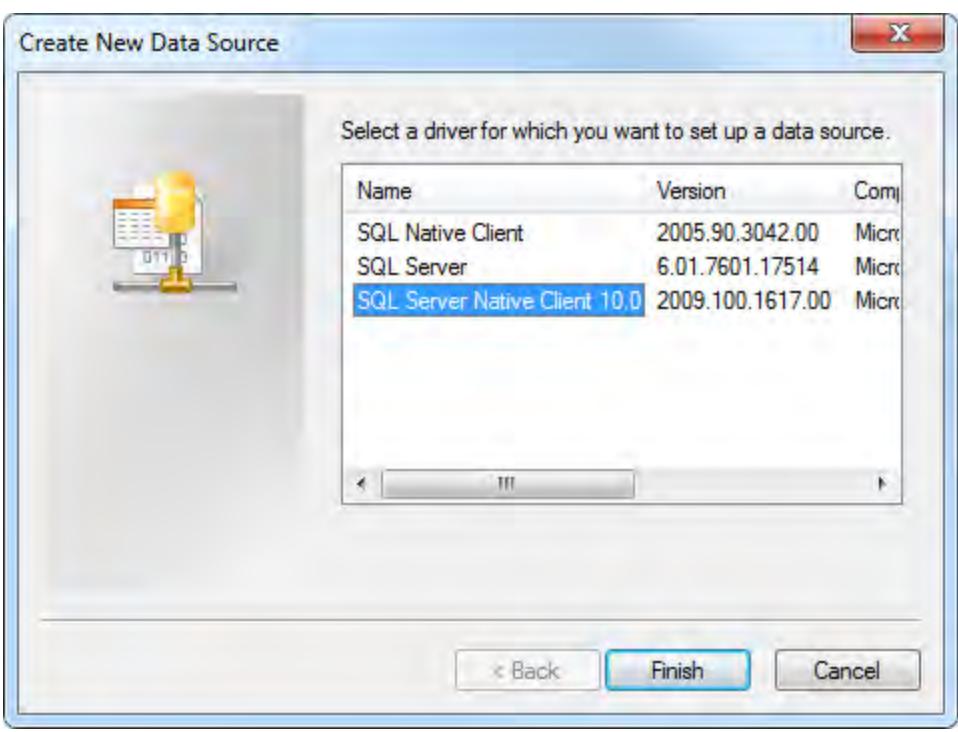
4. Select the driver for SQL Server Native Client 10.0 and click on Finish If the SQL Server Native Client 10.0 driver is not available, you can install it from the Cencon Software Install screen. The SQL Server driver will work but usually provides slower data transfer. It is strongly recommended to use the
up to date SQL driver.
The Create A New Data Source to SQL Server screen is displayed:
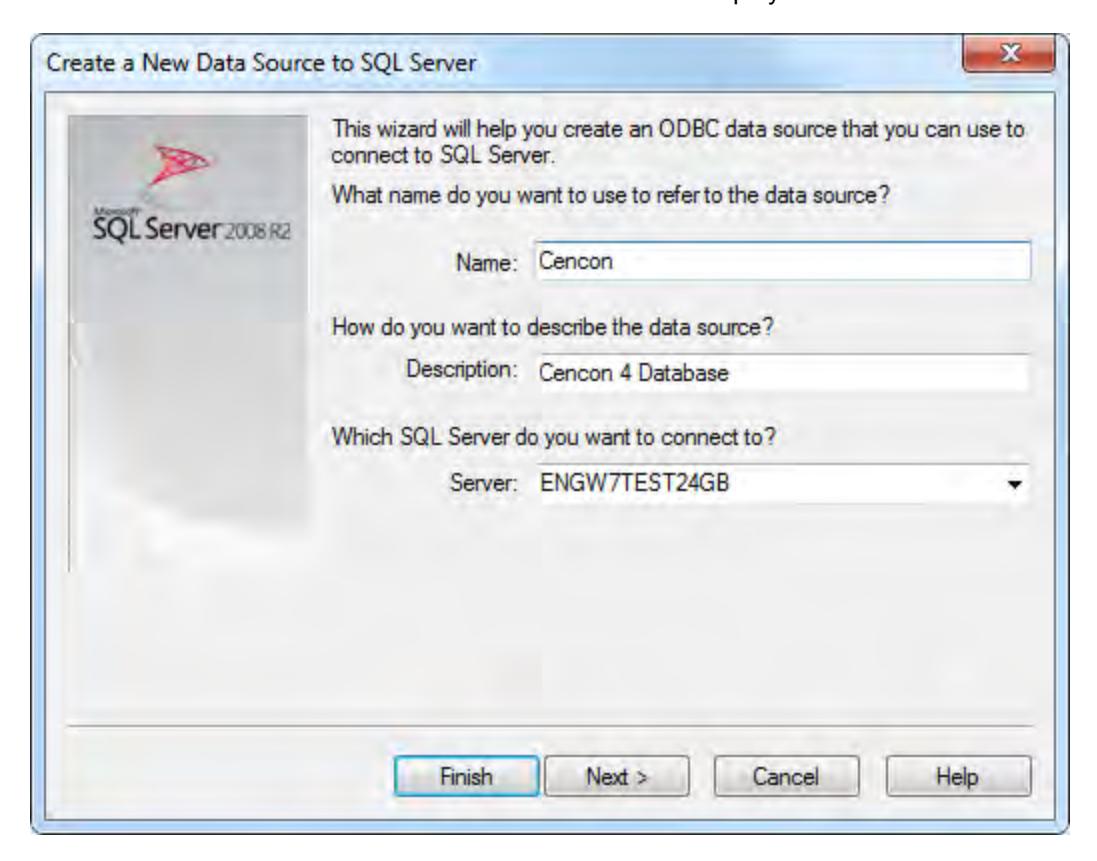
- 5. Enter the name for your new data source.
- 6. Enter a description of the new data source.
- 7. Enter the name of the SQL Server computer and instance to which the data source will connect for Cencon processing.
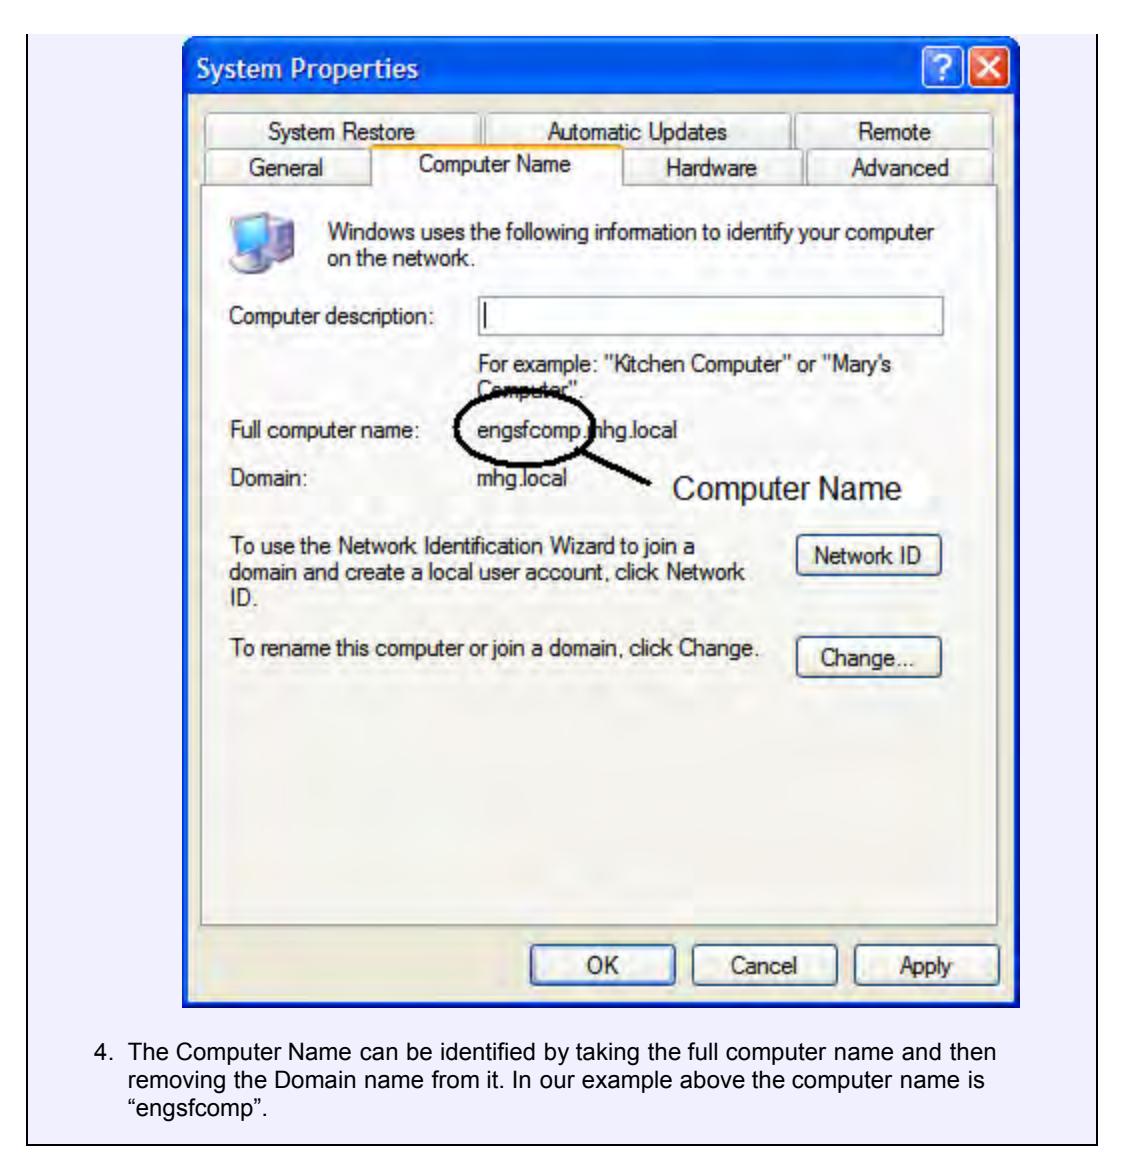
Example If the default instance was selected for a SQL Server Express 2005 data source, the entry for the server should be Computer Name\SQLEXPRESS. To determine your computer's name: 1. Select and right click on the My Computer icon from your desktop (or from Folders.) 2. Select the Properties menu item. The System Properties screen is displayed. 3. Click on the Computer Name tab.
8. Click on Next > to display the Microsoft SQL Server DSN Configuration screen:
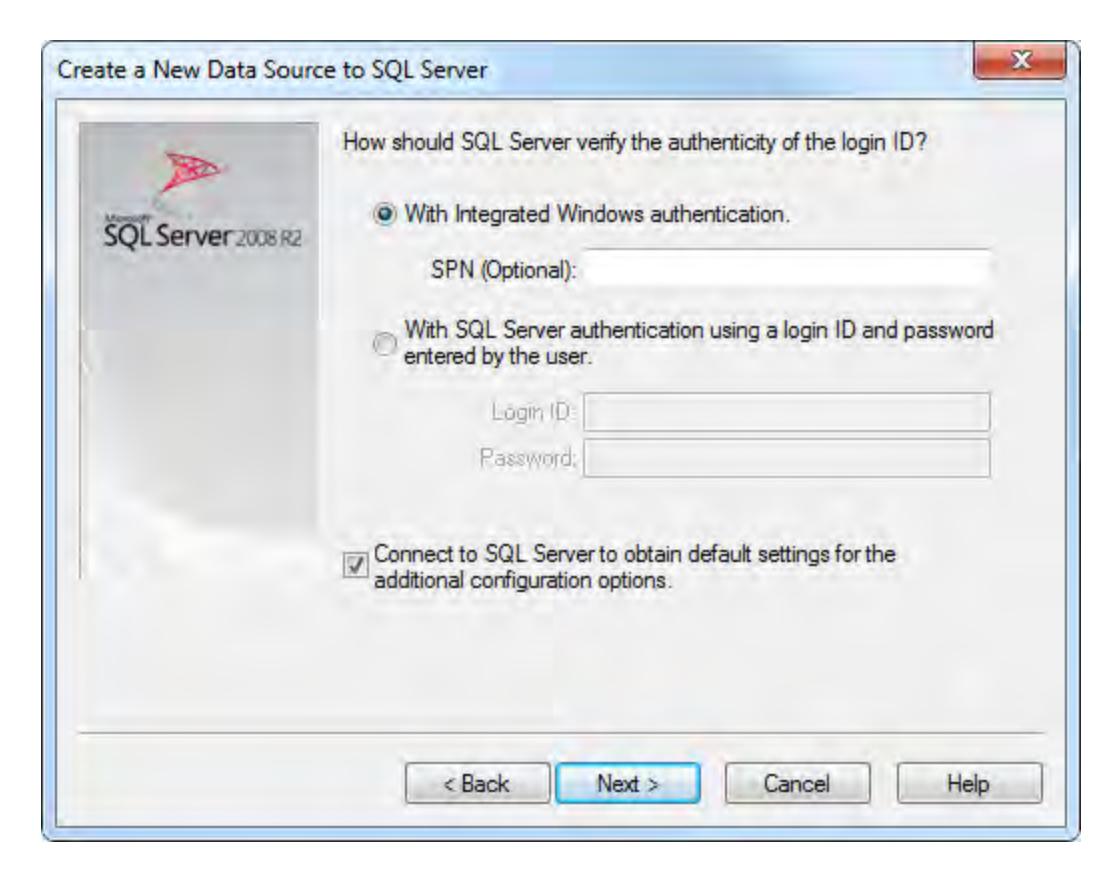
- 9. Select the desired method of authentication.
- 10. Ensure that the checkbox for accessing SQL Server to obtain other default settings is checked.
- 11. Click on Next> to continue to the DSN Configuration:
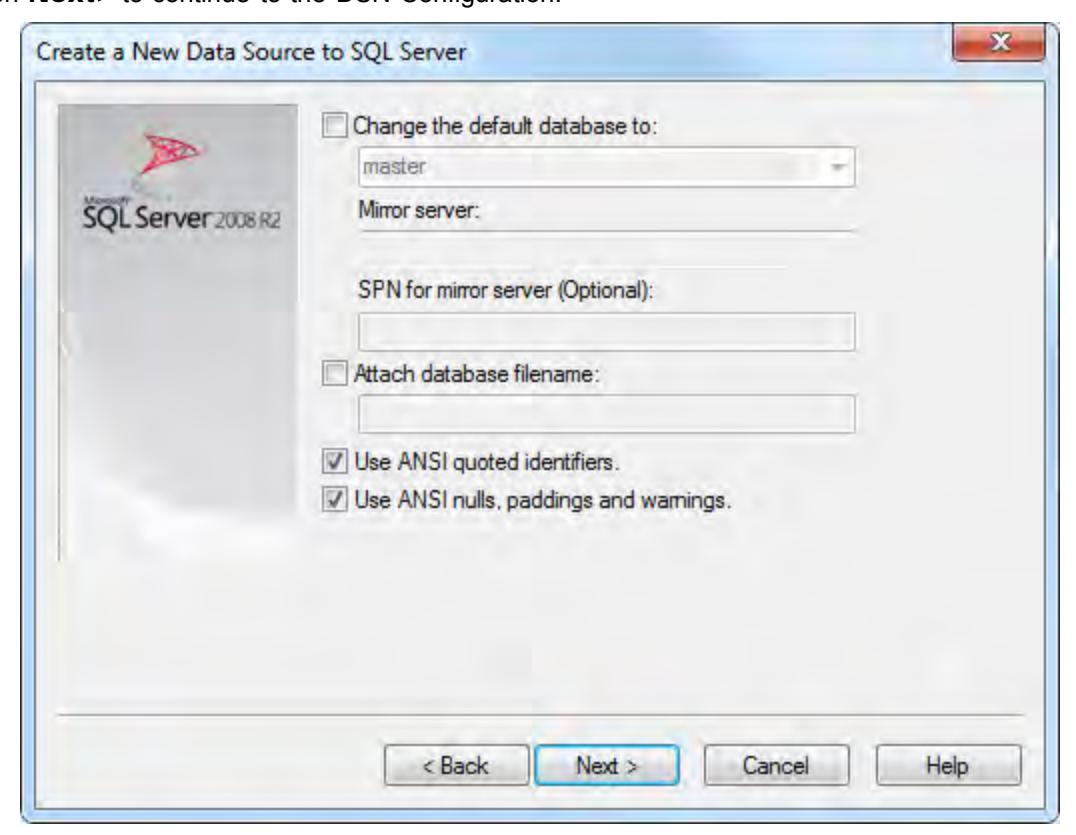
The default database should be left as "master" for the time being. Once you have created the database, you will be instructed to return to this location to change the default database to the name of the new database.
12. Click on Next > to continue. The next screen of the DSN Configuration is displayed:
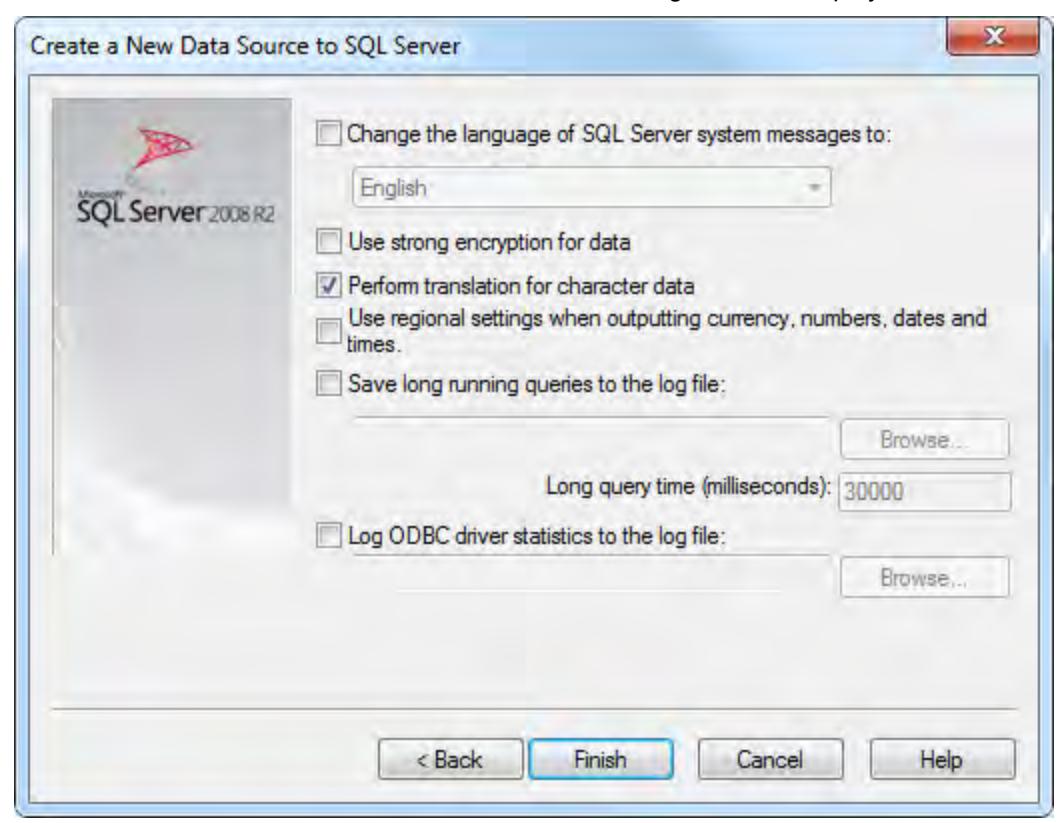
13. Click on Finish to continue. The ODBC Microsoft SQL Server Setup screen is displayed:
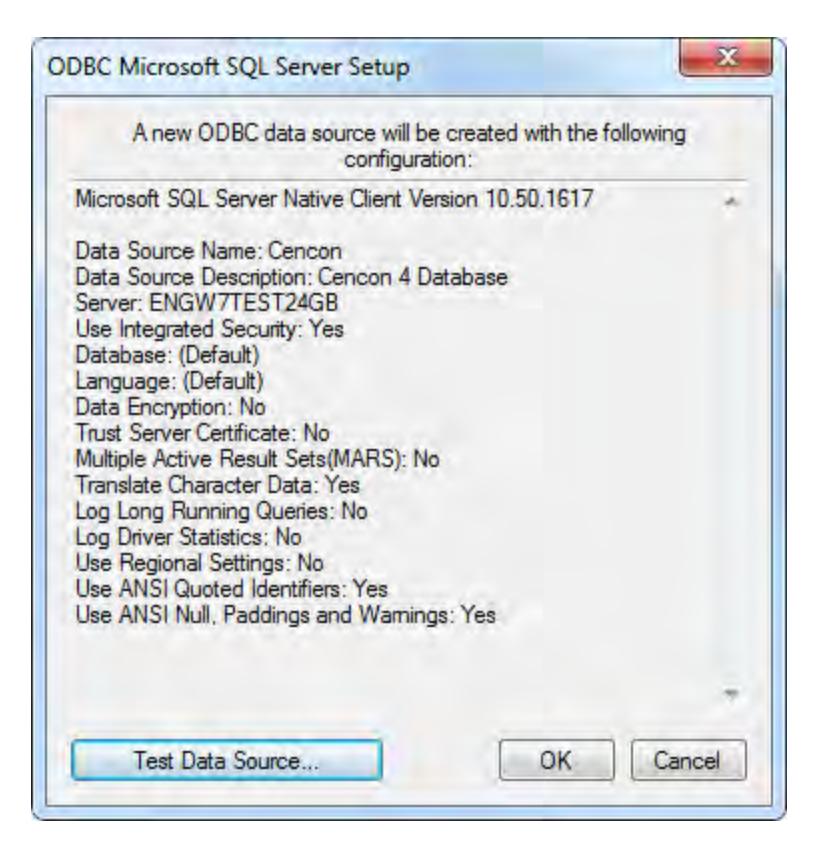
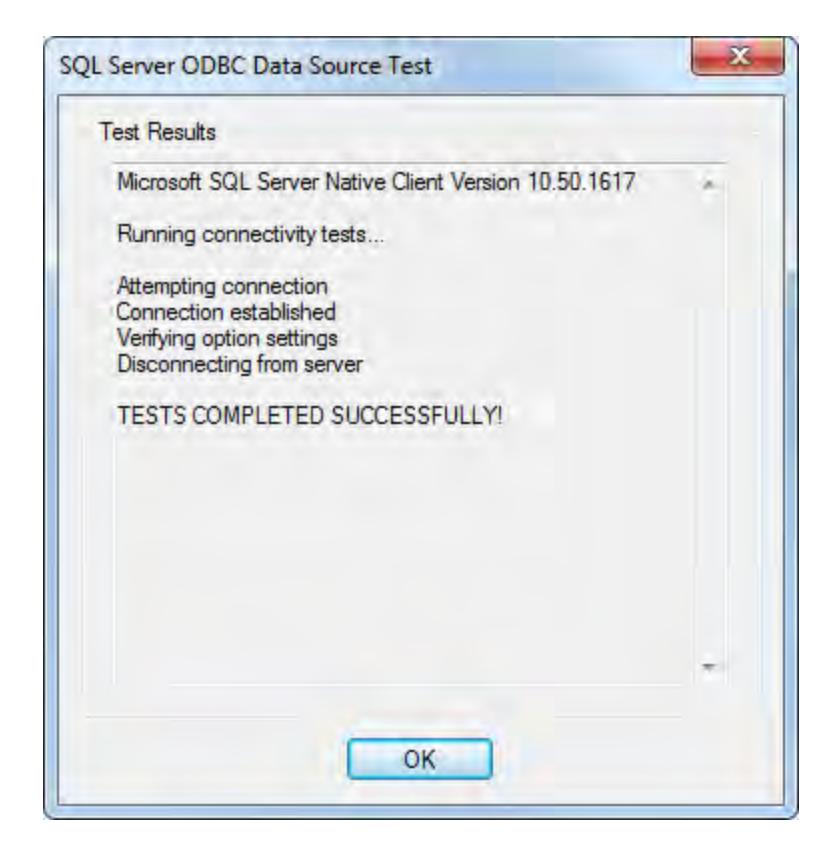
14. You should test the ODBC connection to ensure that it is good by clicking the Test Data Source button.
The SQL Server ODBC Data Source Test screen is displayed and will report the results of the test:
15. Click on OK to continue. The ODBC Microsoft SQL Server Setup screen is redisplayed.
16. Click on OK to continue to complete setup of the new ODBC data source.
The ODBC Data Source Administrator screen is redisplayed with the new data source reflected in the System DSN list:
© 1996-2011 Kaba Mas LLC Document Number 2070.127 Rev. E1 07/11 Cencon® 4.1 Getting Started Guide
Cencon® 4.1 Getting Started Guide
Database Preparation
Note
Refer to the Kaba Mas web site to review the appropriate database setup procedures at: www.kaba-mas.com/cencon4.
Set Up the Database
Important Note
Contact Kaba Mas Technical Support regardless of whether you are importing/converting data from a previous installation or doing a new installation.
The Cencon Database Setup Utility is provided to create and initialize or update a Cencon database on your database server. The Setup Utility is configured as a 'Wizard' type of user interface. It is found on the Cencon® 4.1 Install CD and can be accessed by running it from the via the Start menu.
Warning
If you are importing data from a previous system and you had previously defined software authorizations for your logon users, the old authorization settings will be deleted in the import process. Record your current authorization settings before importing the data to the new database. Since the Cencon® 4.1 software uses role based operations as the new method to control access to software functions, you will have to use/create new role based user authorizations (using the new version of the software) that are based on the old individual software authorization settings.
Important
The Cencon Database Setup Utility should be run after the Cencon prerequisites have completed (see Step 8 under Software Installation and Setup) .
Important
Always run Windows Update to ensure that your system is up to date before installing the Cencon software. The Cencon software requires the .NET 4 framework to be installed on your system. This can be automatically installed by running Windows Update. If your system is not up to date or the .NET 4 framework is not properly installed, the Cencon software will not operate correctly.
1. Insert the Cencon® 4.1 Install CD in your computer CD-ROM / DVD / BluRay drive. If you have autorun enabled on your system, the Cencon® 4.1 Installation screen will be displayed. Otherwise, double click Autorun.exe from the Cencon® 4.1 Install CD root directory, and the Cencon® 4.1 Installation screen will be displayed.
2. Select the Install button from the Cencon® 4.1 Installation screen. The Cencon® 4.1 Installation screen will display the option of what operating system version you want to install. There are two options: 32 Bit Windows or 64 Bit Windows.
3. Next, select the version of operating system you have from the Cencon® 4.1 Installation screen. The installation screen for Cencon® 4.1 for your version of the Windows operating system will be displayed. The example here is displaying the installation screen for 64 Bit Windows.
4. First, install the SQL ODBC Driver on your system if you have not already done so. This SQL ODBC Driver is the SQL Server Native Client 10.0 driver as released with Microsoft SQL Server R2. Using the default SQL ODBC Driver available with Windows will result in slow performance. It is recommended to use the most recent SQL ODBC Driver released by Microsoft. If you have a more recent SQL installation from Microsoft than
- SQL Server R2, then you should use that SQL ODBC Driver. To install the provided SQL ODBC Driver released with Microsoft SQL Server R2, select the SQL ODBC Driver button.
- 5. You will need to configure an ODBC connection to the database instance of Microsoft SQL Server you are using. You can follow the instructions in the section Install the Database Client ODBC Driver .
- 6. Once you have configured the SQL ODBC Driver and connection to your database, you will next need to set up your Cencon database on database instance of Microsoft SQL Server you are using. Click on the Set Up Cencon Database button on the installation screen for Cencon® 4.1.
The first window of the Cencon Database Setup Utility is displayed:
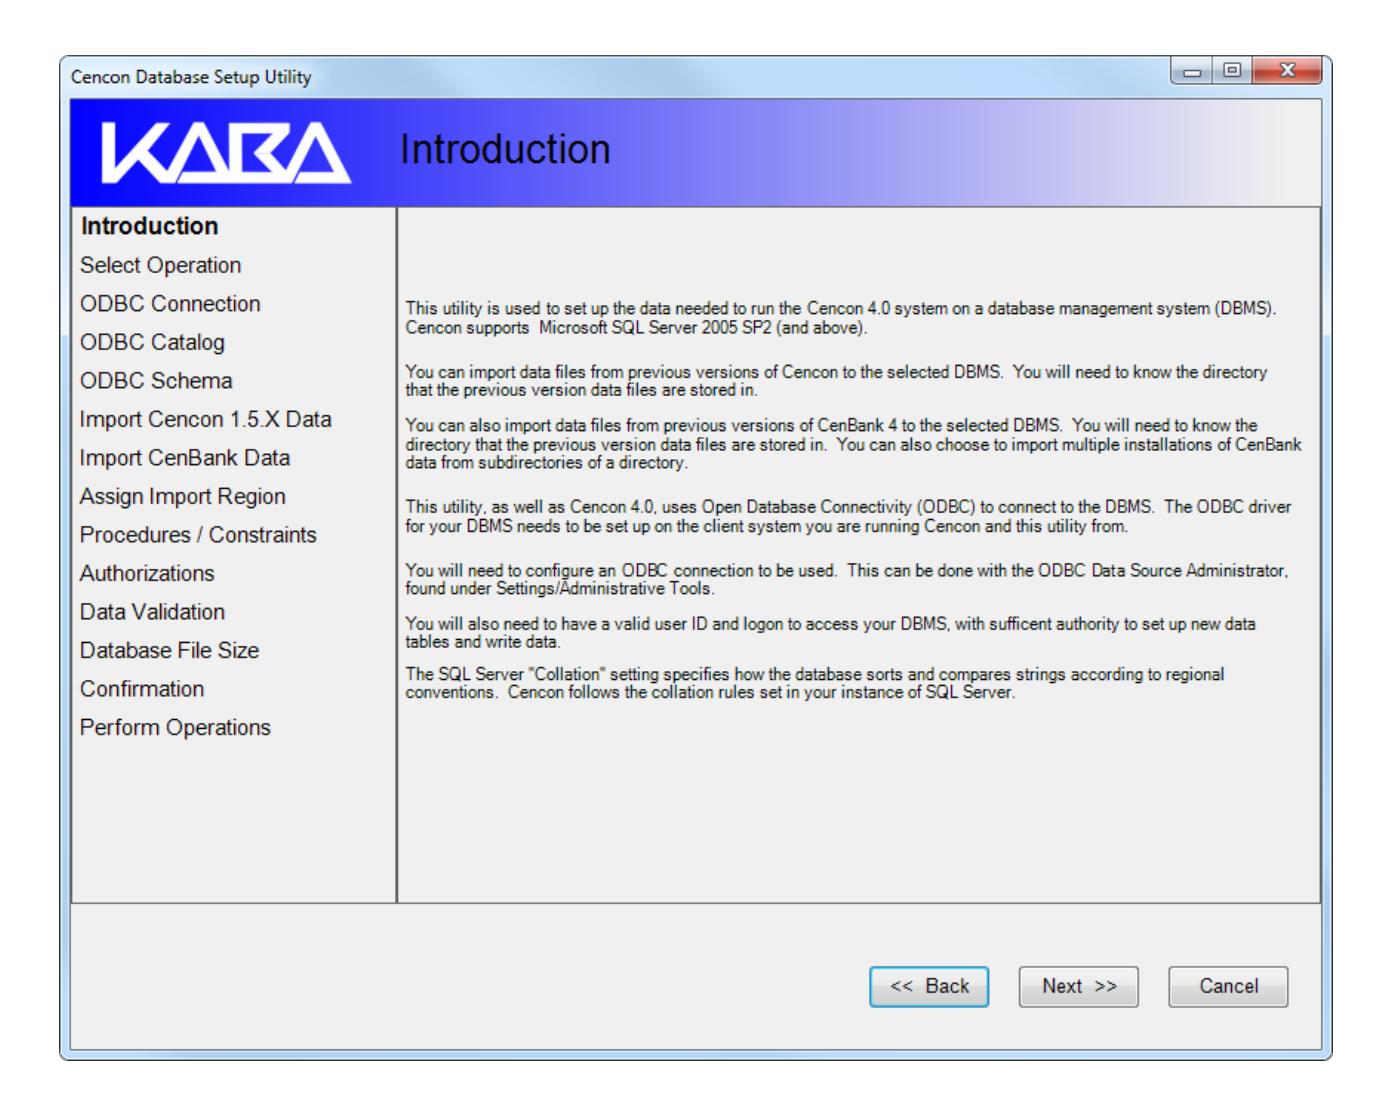
7. Click on Next >> to continue to the Select Operation window:
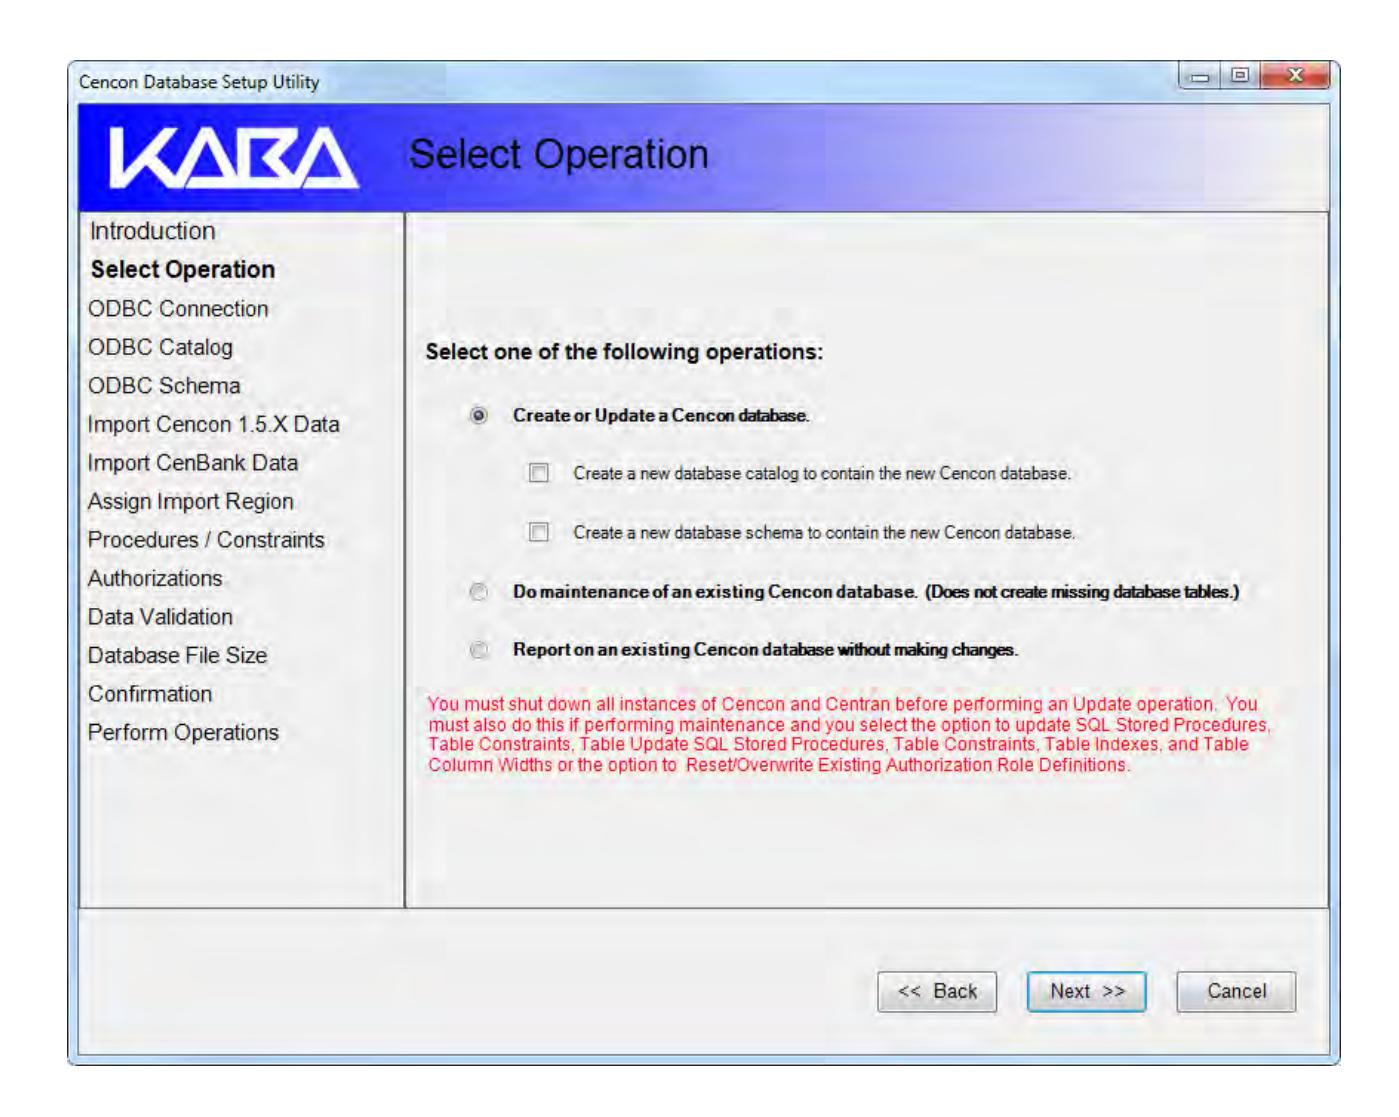
The Cencon Database Setup Utility requires an ODBC connection to the database that Cencon® 4.1 is going to be using (this was initialized in the previous section). It can be used to set up a new blank database, set up a database and import data from a previous version of Cencon, or update and verify the format of a prior version of a Cencon® 4.1 database. The items in the left column of this form are highlighted as you progress through this setup process. Note that you will not stop at all of the items depending on which functions you select as you proceed some may be performed automatically and some may be skipped.
If you are setting up a new database, check the "Create a new database catalog to contain the new Cencon database". Select "Create a new database schema to contain the new Cencon database" if specified by your database administrator (not normally required).
8. Make the desired selection and click on Next >> to go to the select ODBC Connection window:
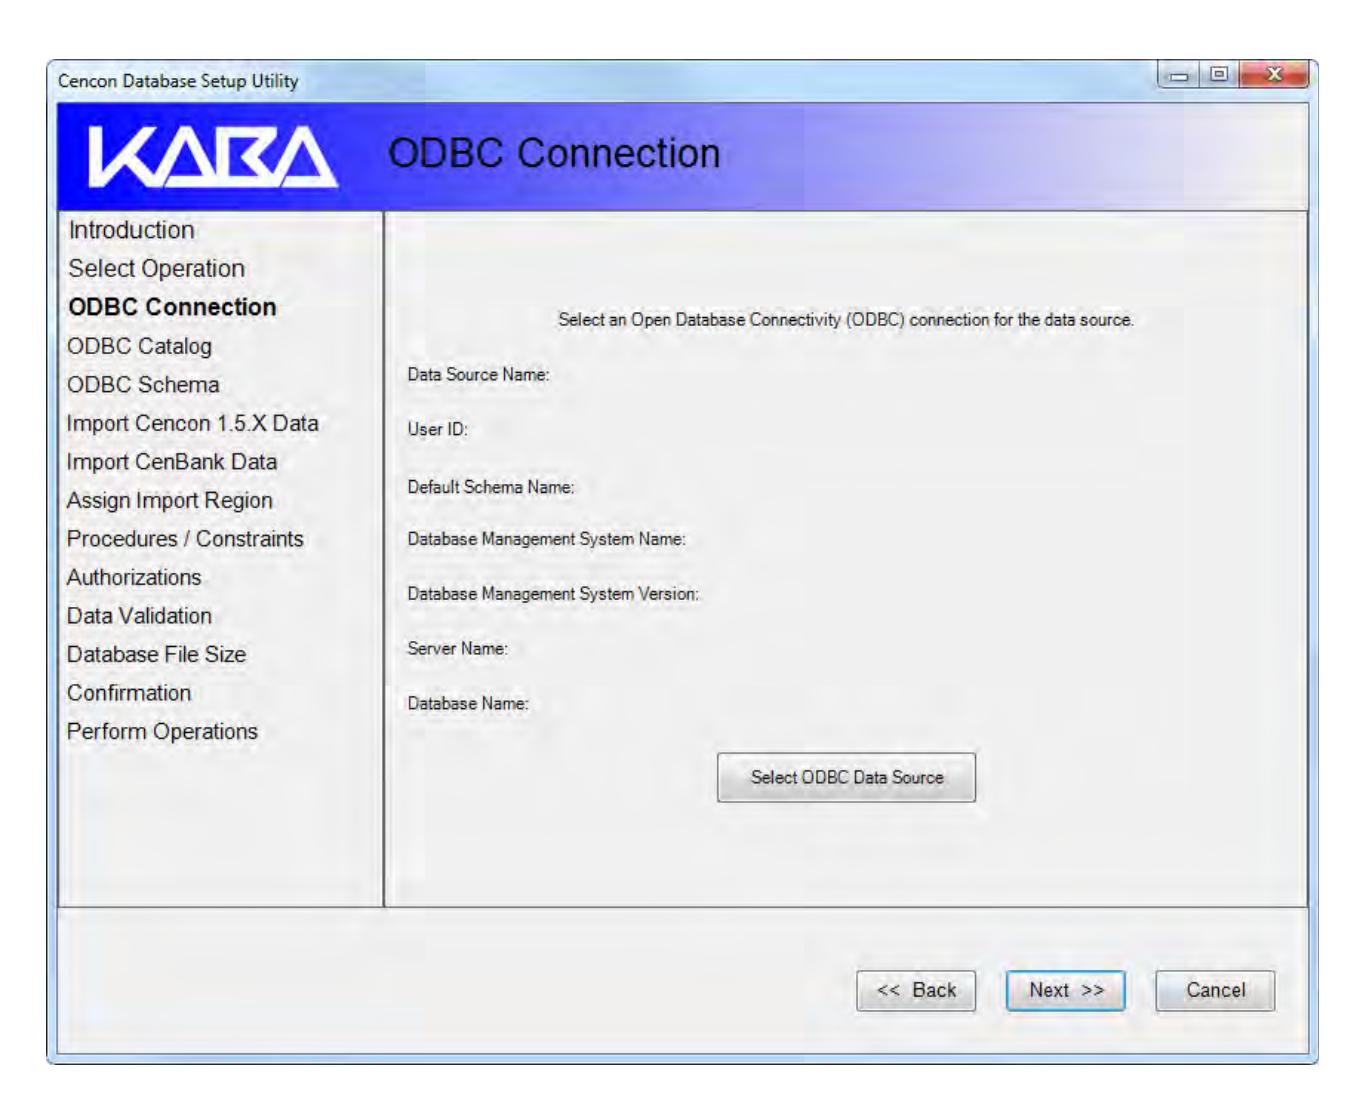
9. Click on the Select ODBC Data Source button to continue to the Select ODBC Connection for Data Source screen:
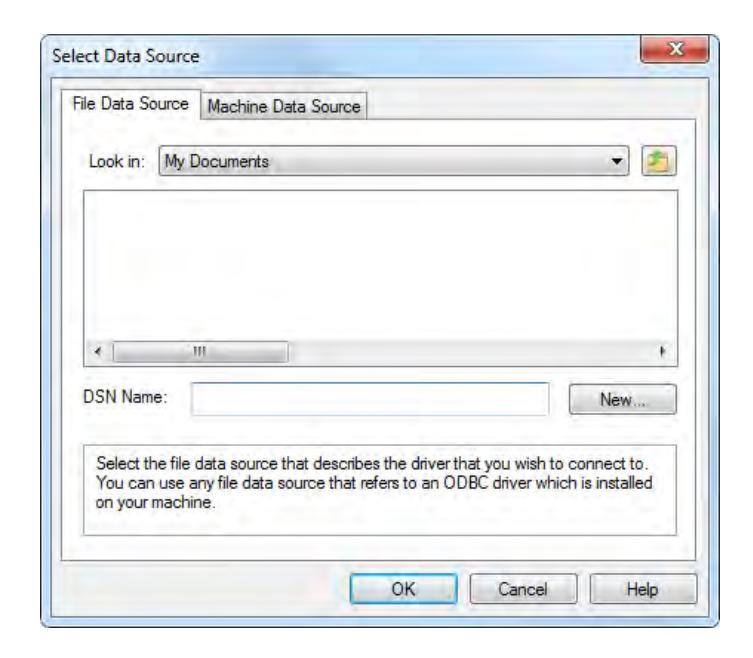
10. Click on the Machine Data Source tab to select the ODBC data source to be used. This selection displays a listing of existing data source
names:
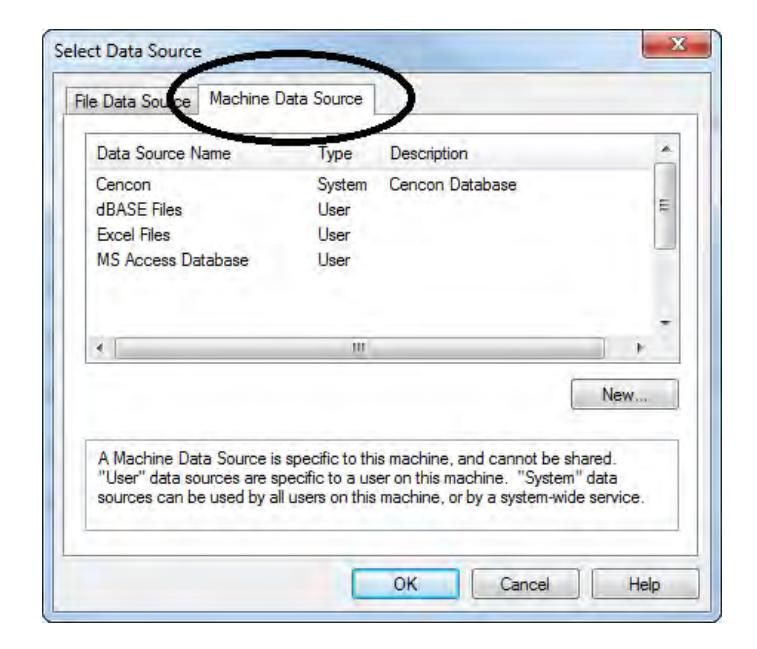
11. Select the Data Source for the database to be created and click on OK. The SQL Server Login prompt window is displayed.
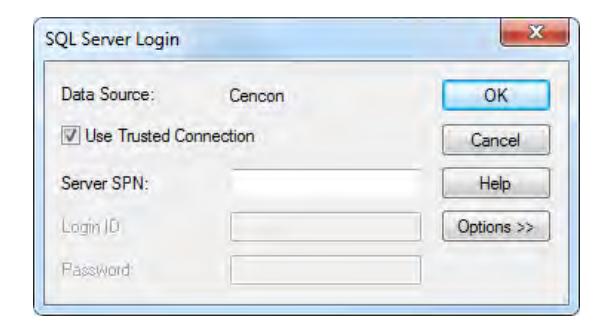
Note
If SQL Server authentication was selected when defining the data source, you will also be prompted to enter the password.
12. Click on OK to continue. The next screen displays a summary of your database connection settings:
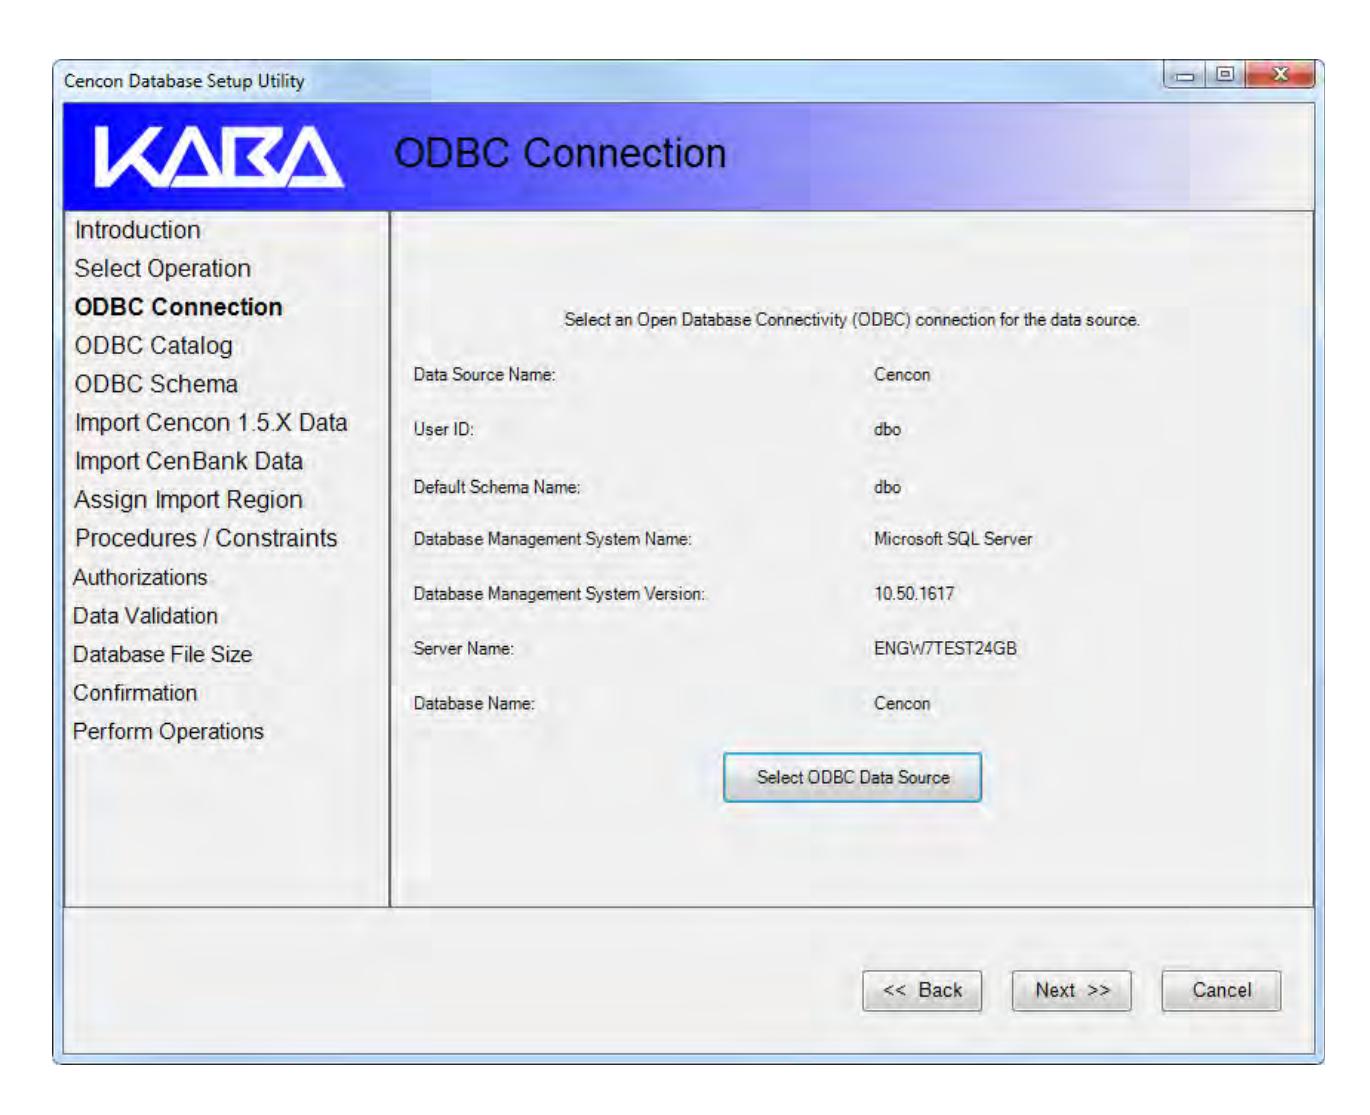
13. Click on Next >> to continue.
If you are creating a new Cencon database (you checked the "Create a new database catalog to contain the new Cencon database" option previously), the Create ODBC Catalog screen is displayed, allowing you to name your Cencon® 4.1 database.
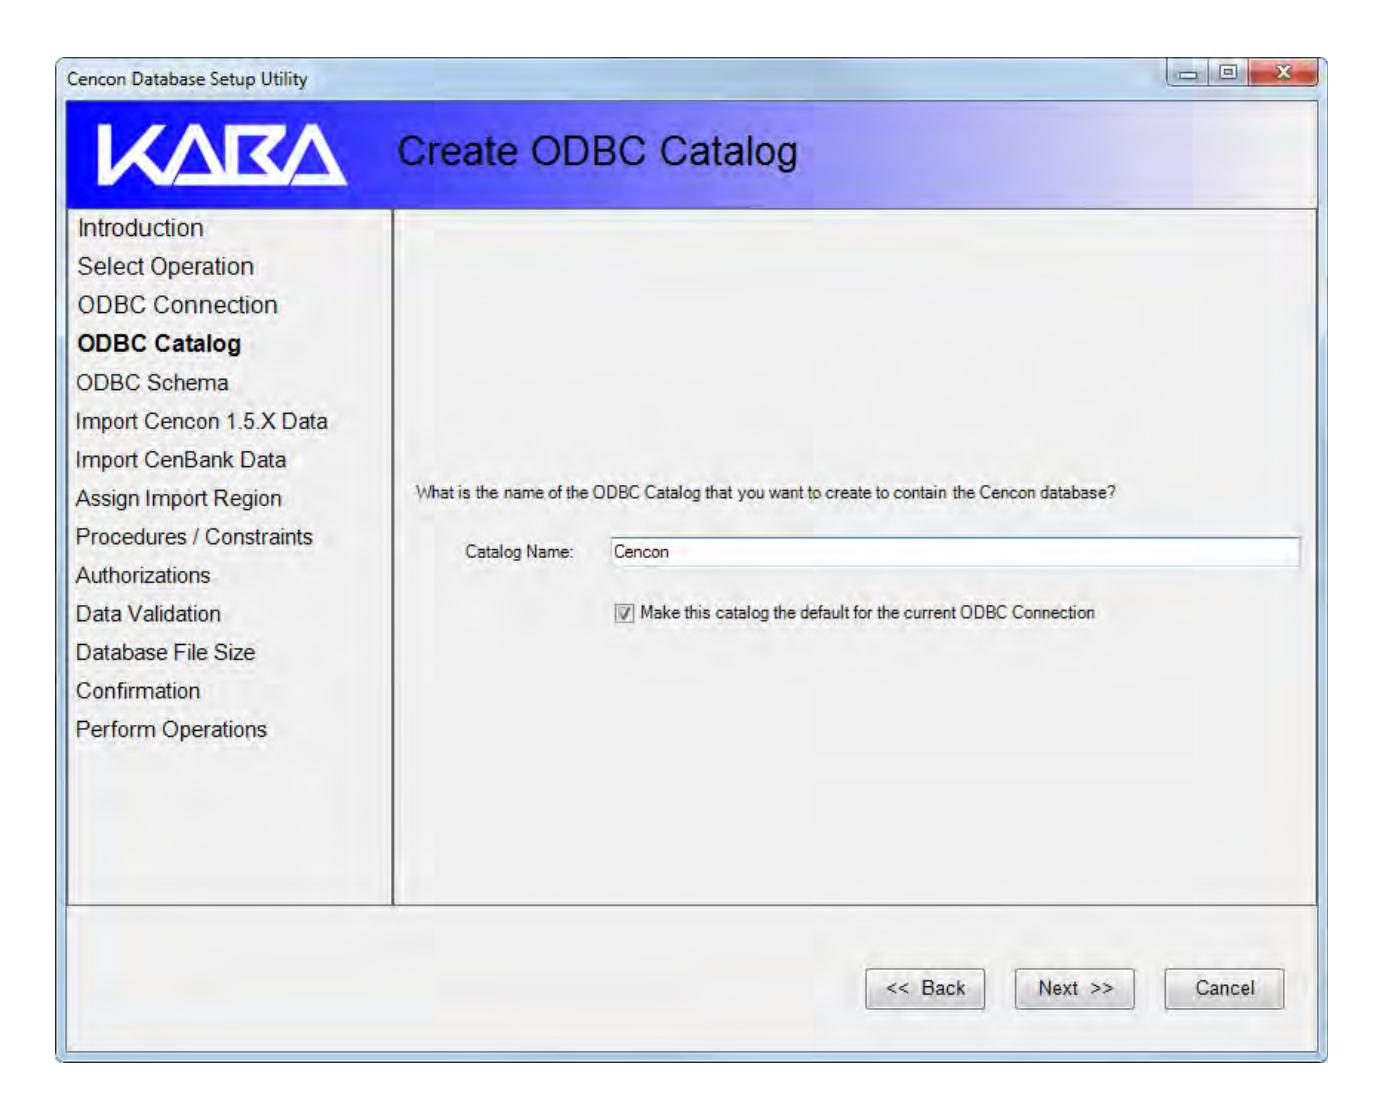
By default, when you create a new catalog (database) in the Cencon Database Setup Utility, the ODBC connection will be updated to use the new catalog as its default catalog. To keep this update from occurring, uncheck the Make this catalog the default for the current ODBC connection box.
If you did not check the "Create a new database catalog to contain the new Cencon database" option, the Select ODBC Catalog screen is displayed instead.

If a database administrator has already set up the database that is to be used and has configured it under the ODBC connection, then you you can use the ODBC connection default catalog under CenconDBSetupUtility. If not, then you need to specify and possibly create the catalog (database) to use.
If you need to use an existing catalog other than the default, uncheck the Use selected ODBC connection default catalog box and enter the name of the catalog (database) where the Cencon files are stored or are to be stored.
14. Click on Next >> to continue to the Select ODBC Schema screen.
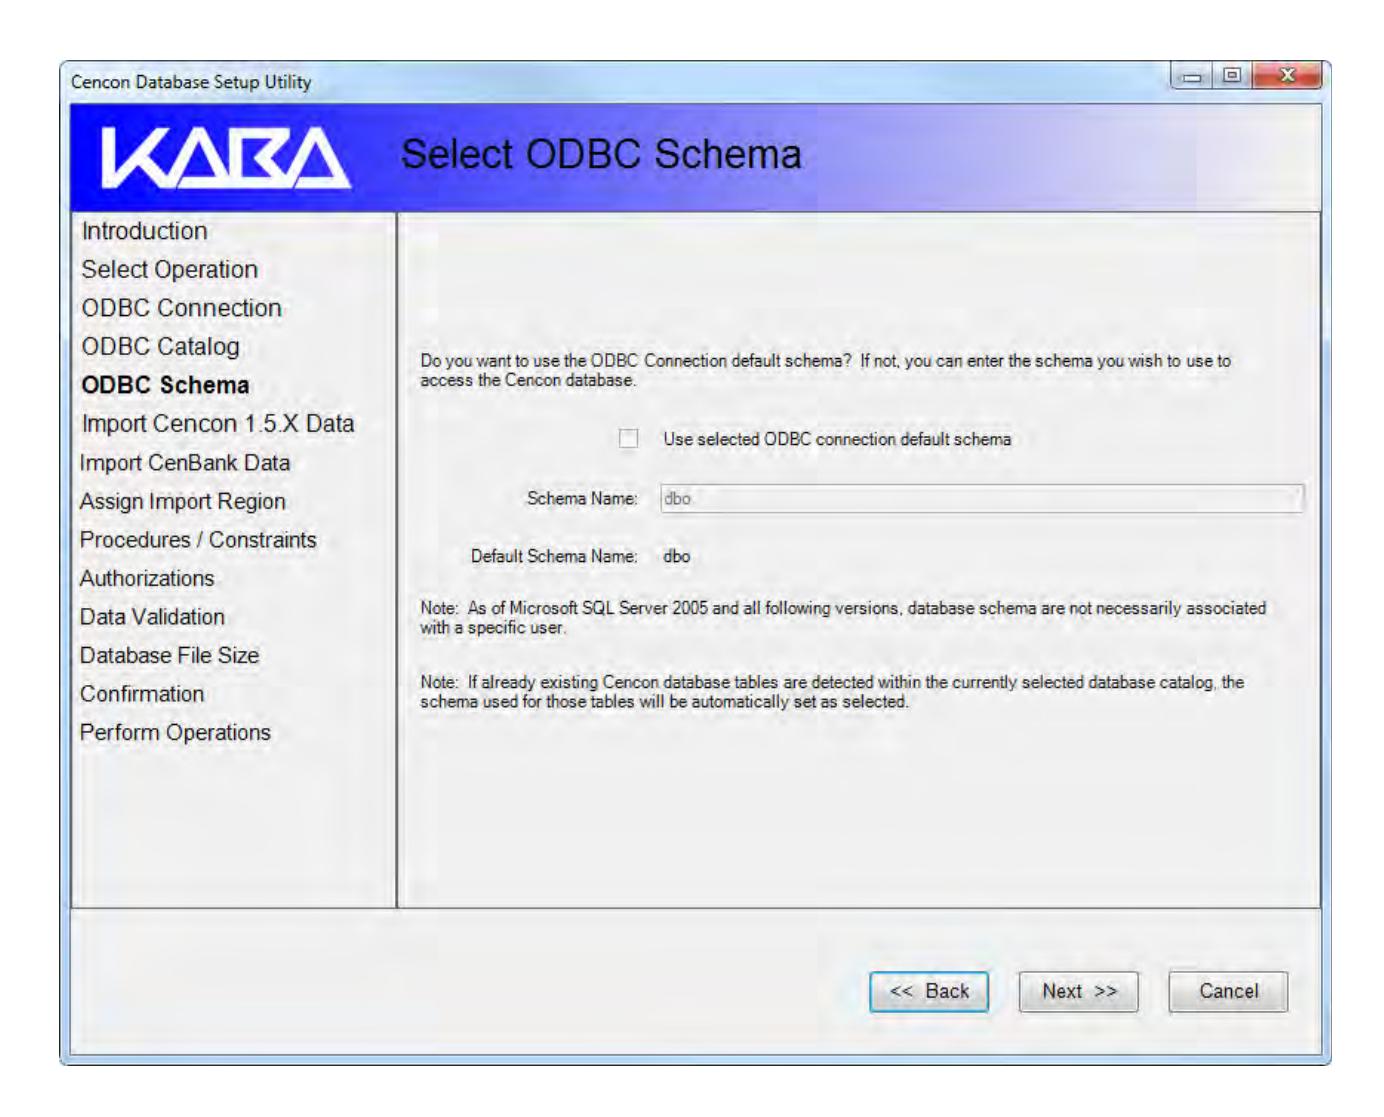
A Schema Name is used to categorize or separate data tables within a database catalog. It is recommended to use the default schema of dbo. If you need to use a schema other than dbo, uncheck the Use selected ODBC connection default schema box and enter the name of your schema.
Note
If Cencon database tables are detected by the CenconDBSetupUtility within the currently selected database catalog, it will automatically fill in the appropriate schema those tables are assigned to. The CenconDBSetupUtility will not allow a different schema to be selected if Cencon database tables are already present under a schema.
15. Click on Next >> to continue to the Import Cencon 1.5.X Data screen.
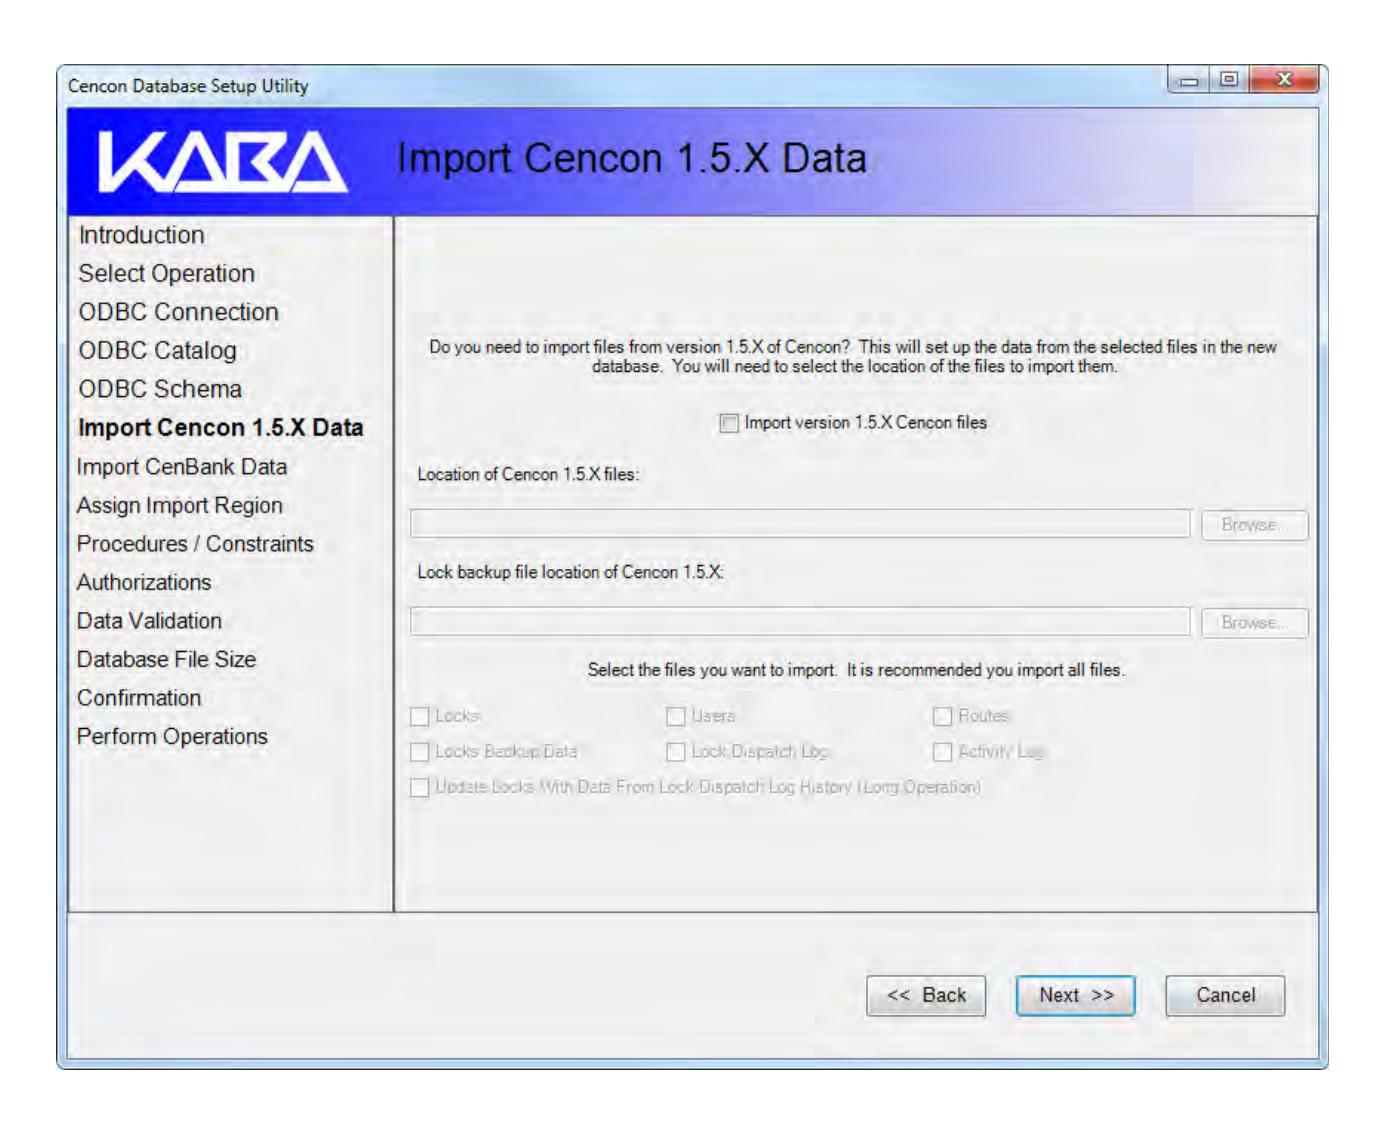
This screen may be used if you are upgrading from a version of Cencon earlier than 2.0. It allows you to import the Cencon 1.5.X data files into the Cencon® 4.1 database.
16. Click on Next >> to continue to the Import CenBank screen.
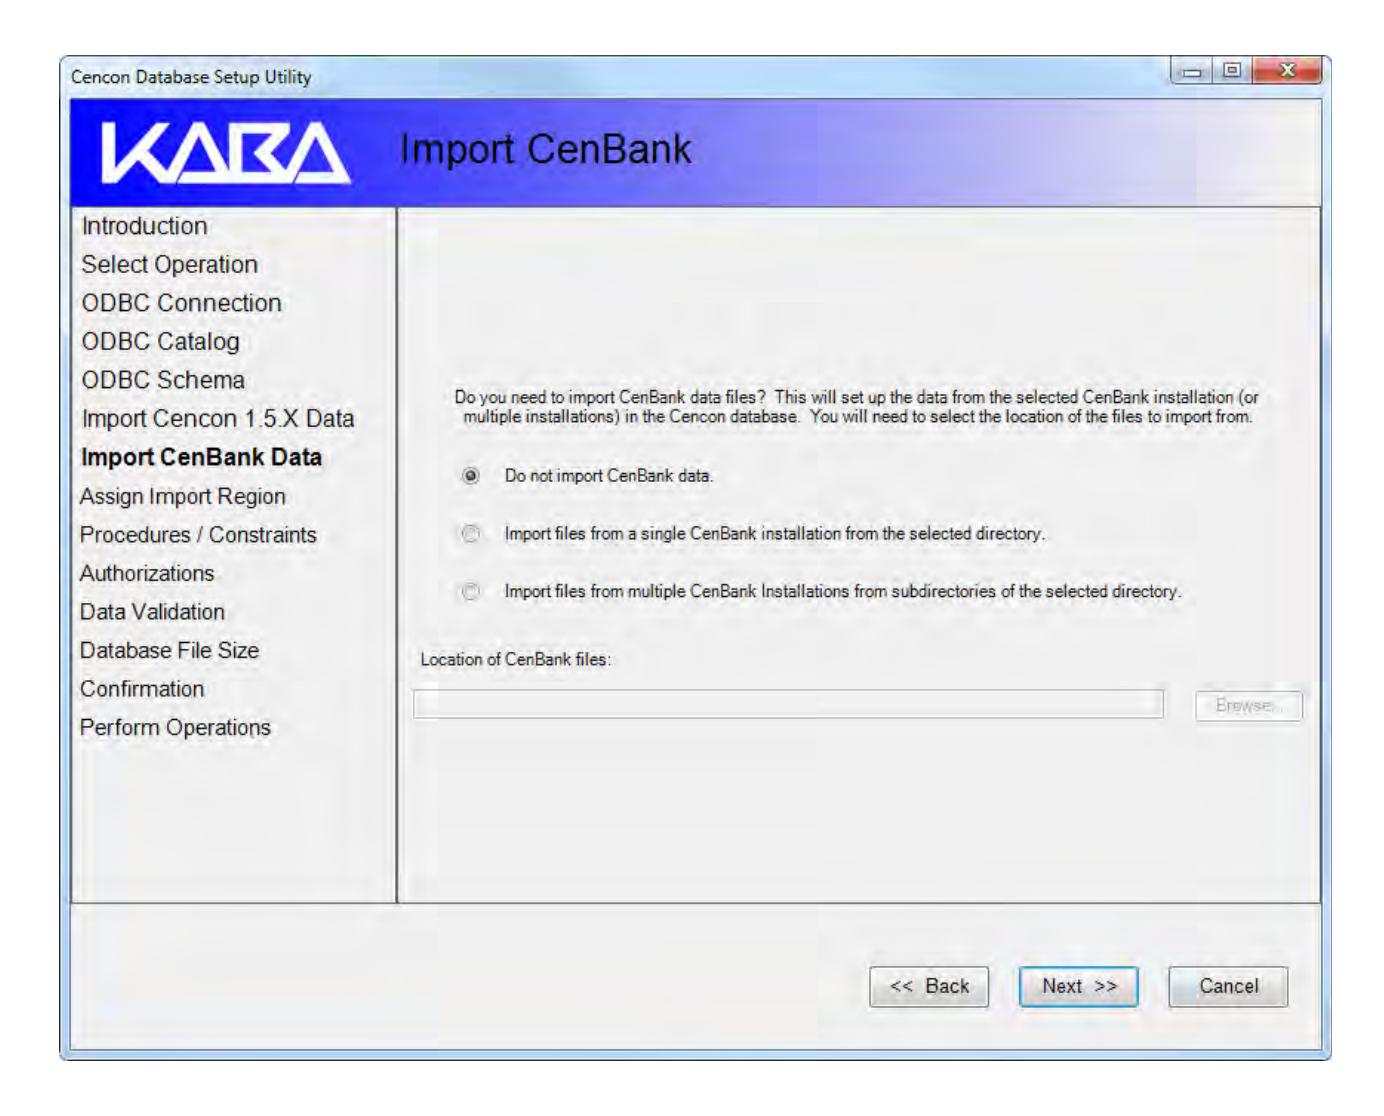
This window is used if you are importing data from CenBank to Cencon® 4.1 Bank Mode. It allows you to import the CenBank data files into the Cencon® 4.1 database. Select the appropriate button for your installation scenario. The option you choose will determine the next screen that appears when you click on Next >> to continue.
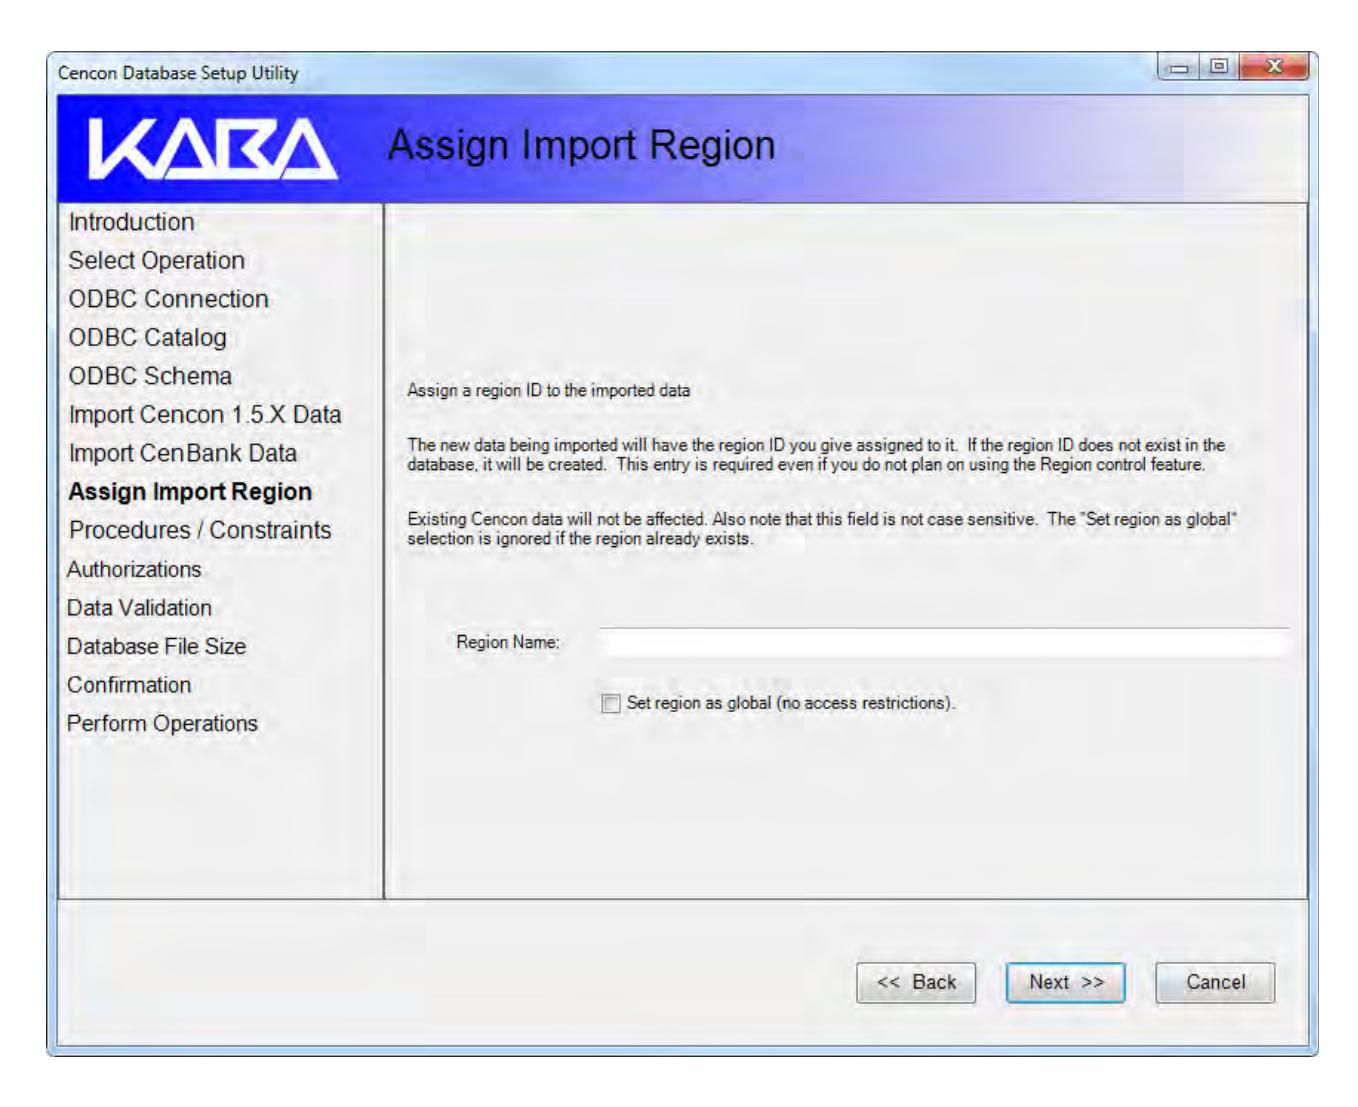
17. If you are importing legacy data from a previous version of Cencon or CenBank software, you will be required to enter a region name to use to assign to the imported data. This is to assist with management of the imported locks and users.
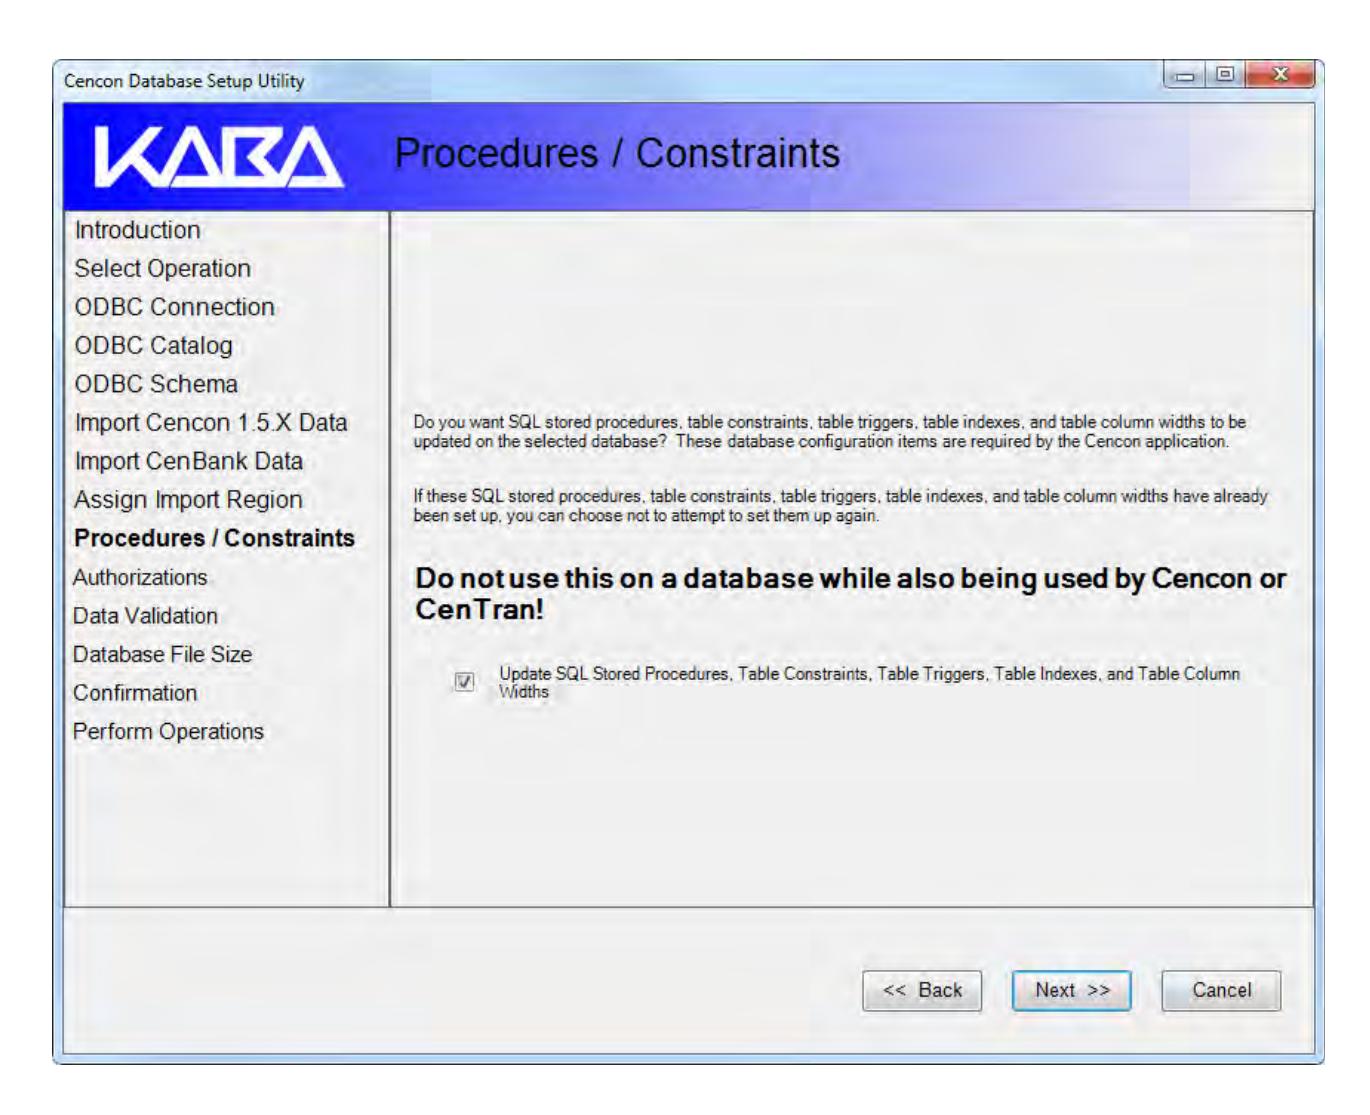
18. Click on Next >> to continue to the Procedures / Constraints window.
This operation updates the procedures and constraints on a Cencon database. The default is for this operation to be performed. If you are setting up a new Cencon database, you must have this operation selected.
If you are updating an existing Cencon database from a previous version of the Cencon software you must also have this operation selected.
If you are importing data or performing data validation on a Cencon database that is fully up to date, then this operation is optional. If you are importing data into a Cencon database that is also currently in use by Cencon / Centran, you will need to have this operation turned off.
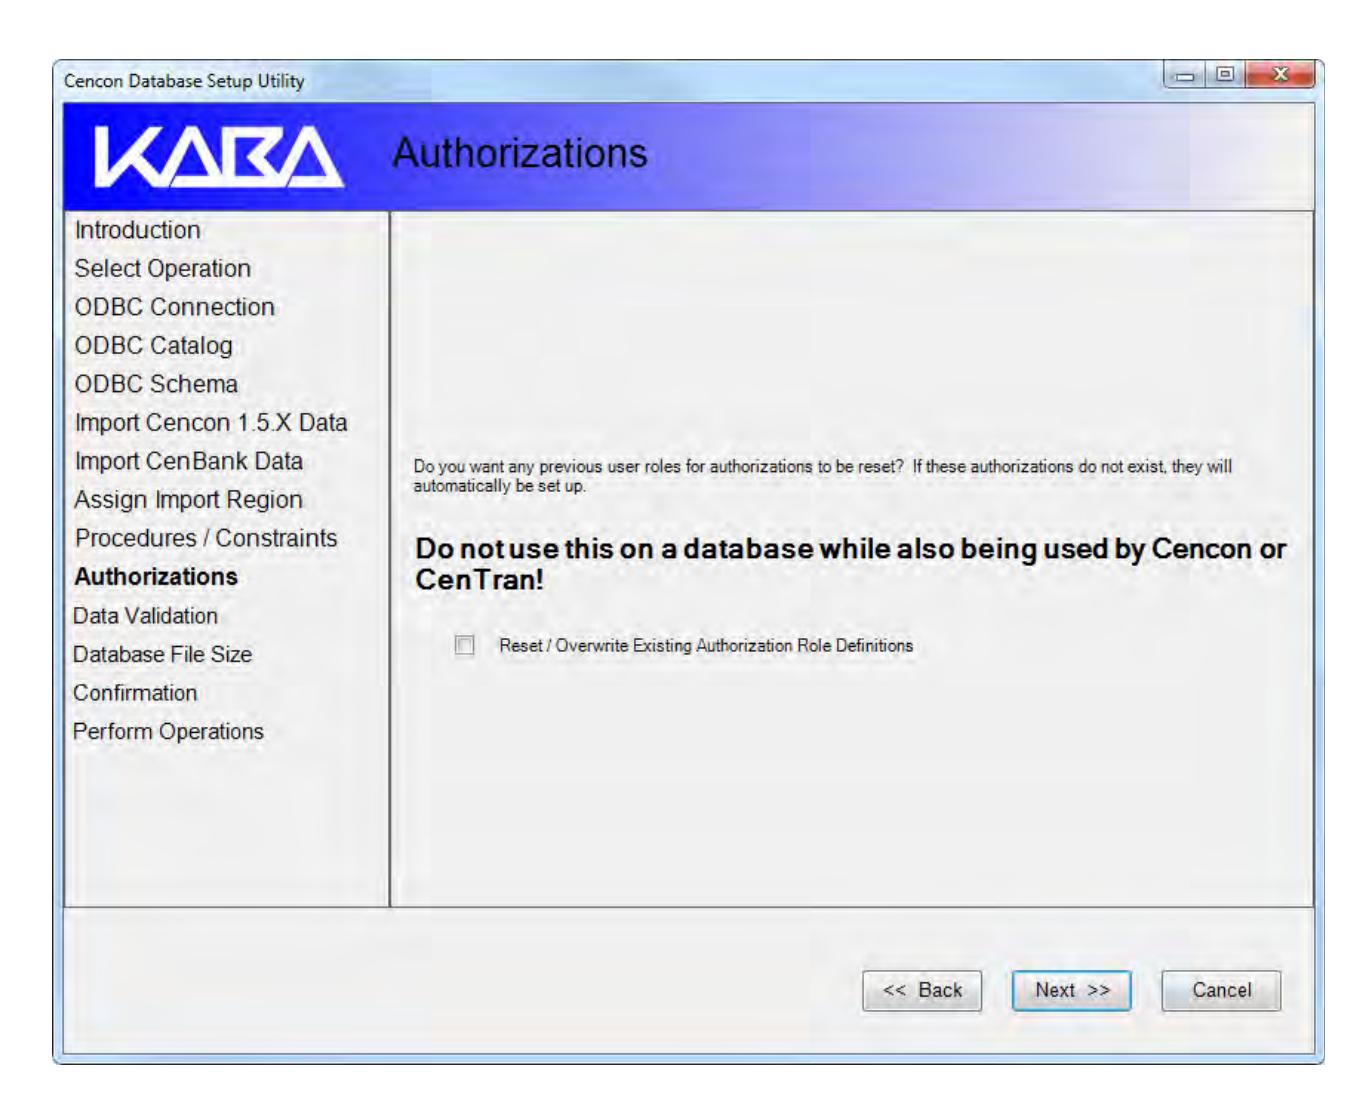
19. Click on Next >> to continue to the Authorizations window.
This operation resets the authorizations for all users within an existing Cencon database to default. This is used if the authorizations defined within a Cencon database have become corrupt, or if the custom settings made for authorizations need to be reset.
If you are setting up a new Cencon database or the authorization are missing, then the authorizations within the Cencon database will be automatically set up.
You should not use this operation on a Cencon database that is also currently in use by Cencon / Centran. It is recommended that you halt Cencon / Centran usage while making setup changes to a Cencon database.
20. Click on Next >> to continue to the Data Validation window.
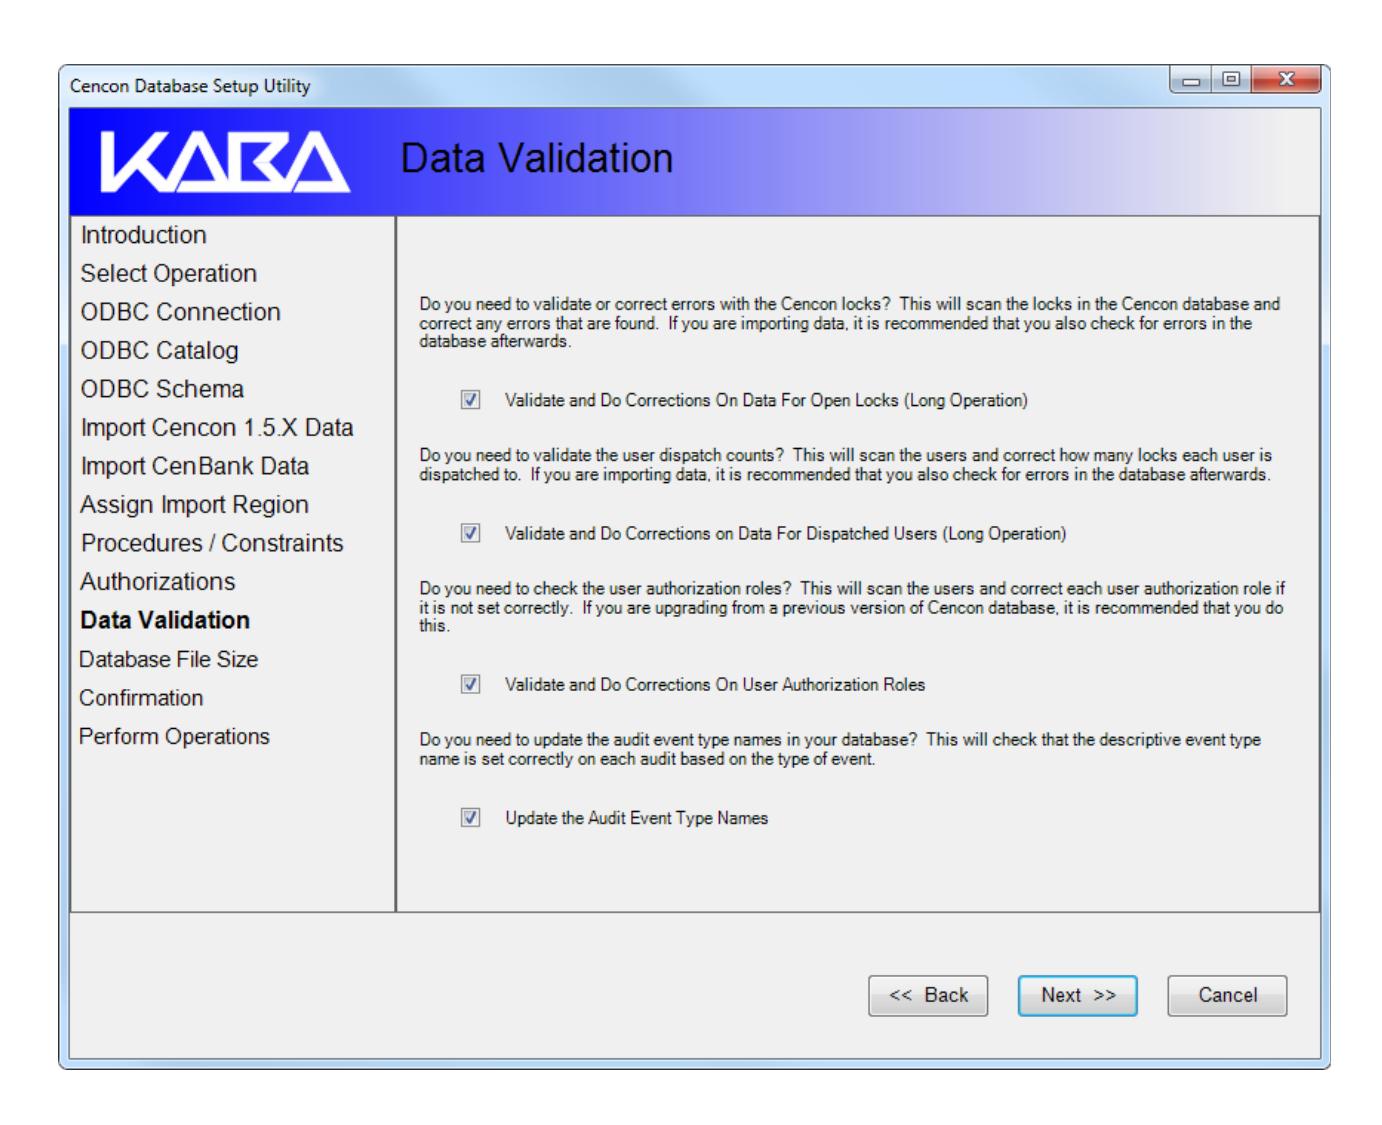
The Data Validation window is useful for identifying and correcting data errors in the existing Cencon data. It is recommended that you perform this operation.
21. Click on Next >> to continue to the Database File Size window.
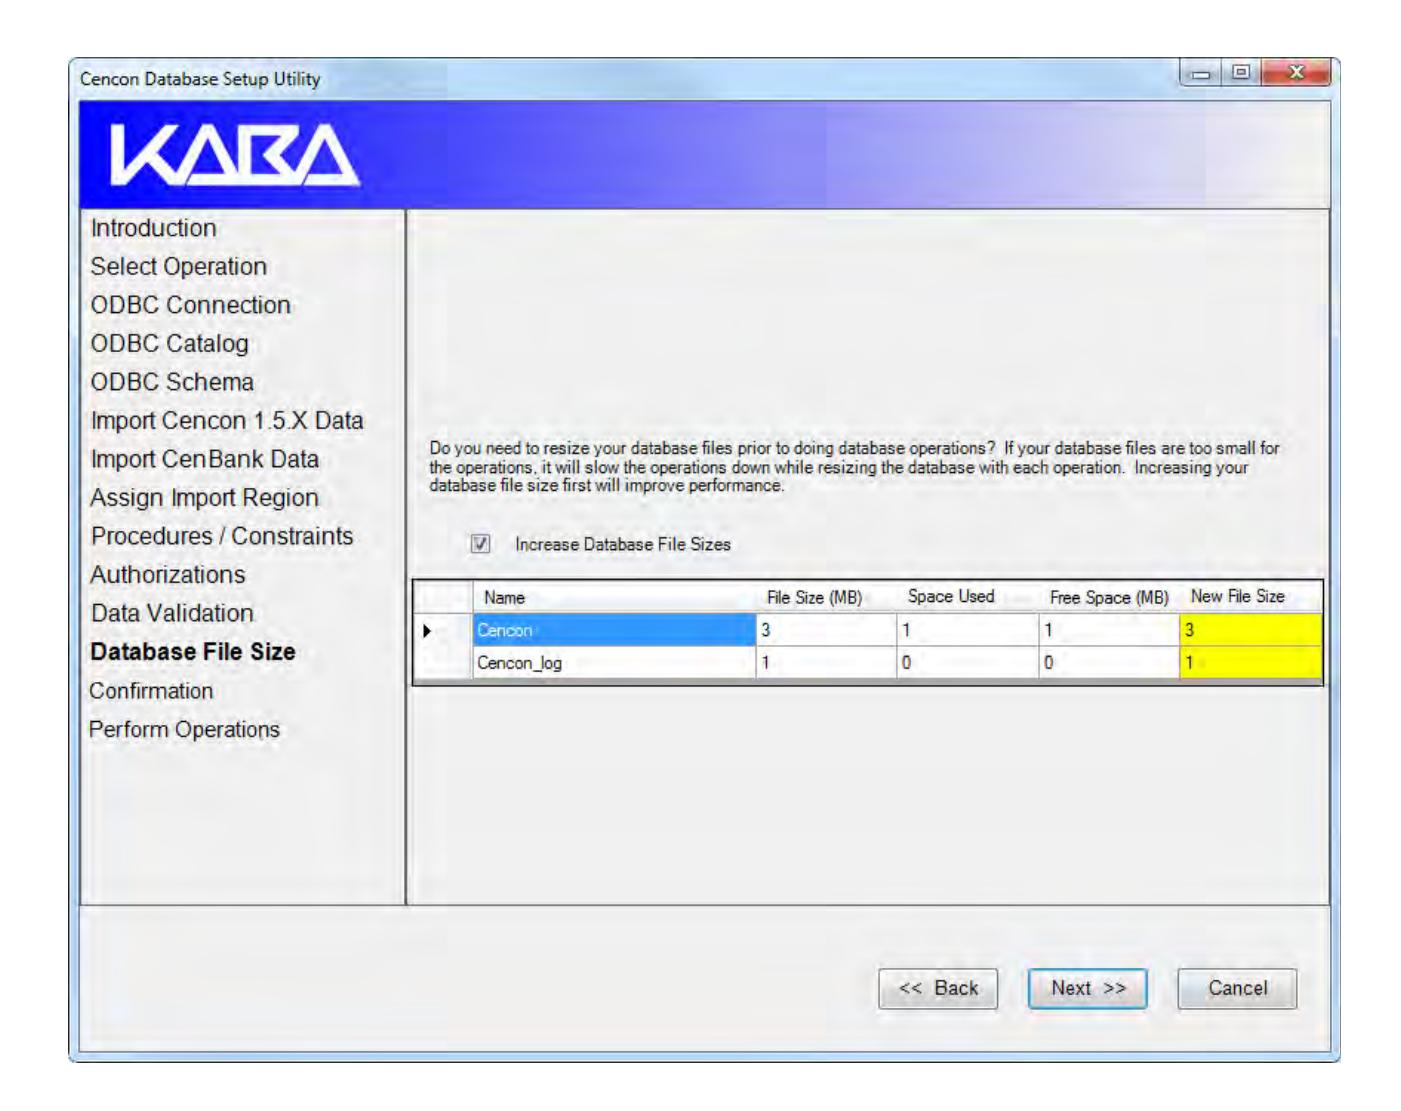
The Database File Size window is used to allocate additional space to the files used by the Cencon database prior to starting operations. If you are updating a large Cencon database, or importing a large amount of legacy data from previous versions, the operations will be greatly slowed if the database files have to be reallocated several times. Expanding the files large enough to accomdate the operations you want to perform ahead of time will allow the operations to complete faster.
22. Click on Next >> to continue to the Confirmation screen for an Operation Summary:
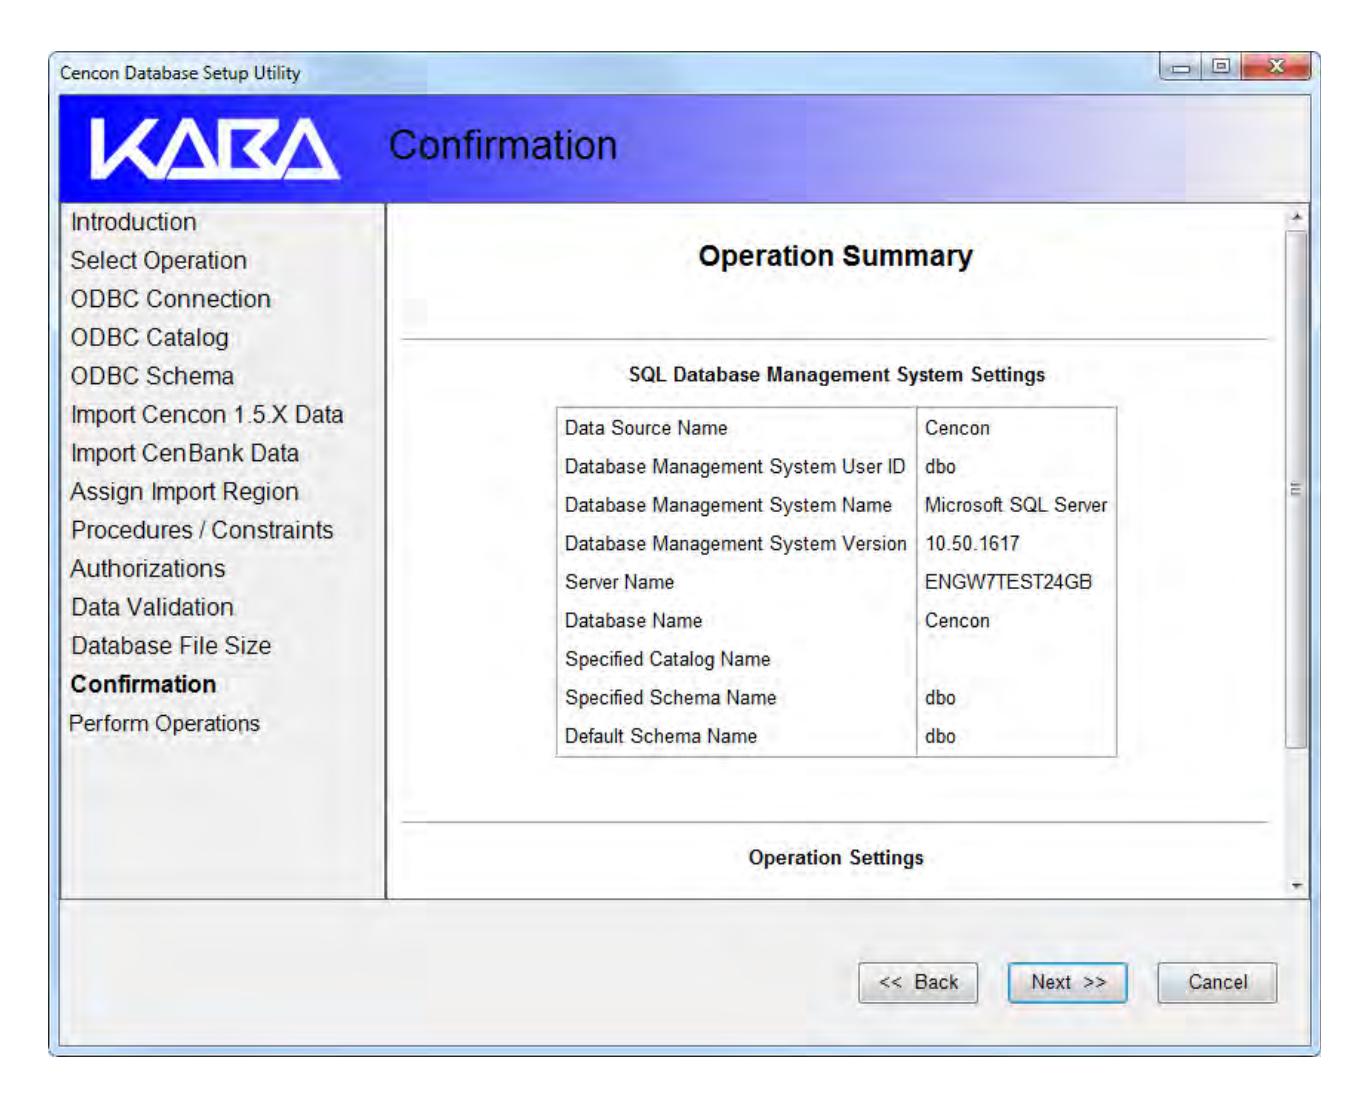
This window allows you to review the operations you have selected for the Cencon Database Setup Utility to execute.
23. Review the parameters to ensure that they are correct and click on Next >> to continue to set up all tables, views, and stored procedures required by Cencon® 4.1. The only data placed into the tables will be an initial entry in the configuration table and a default set of user authorizations.
A running log of operations and results is displayed as the setup proceeds. The administrator can save this to a text file for review by clicking on the Save icon.
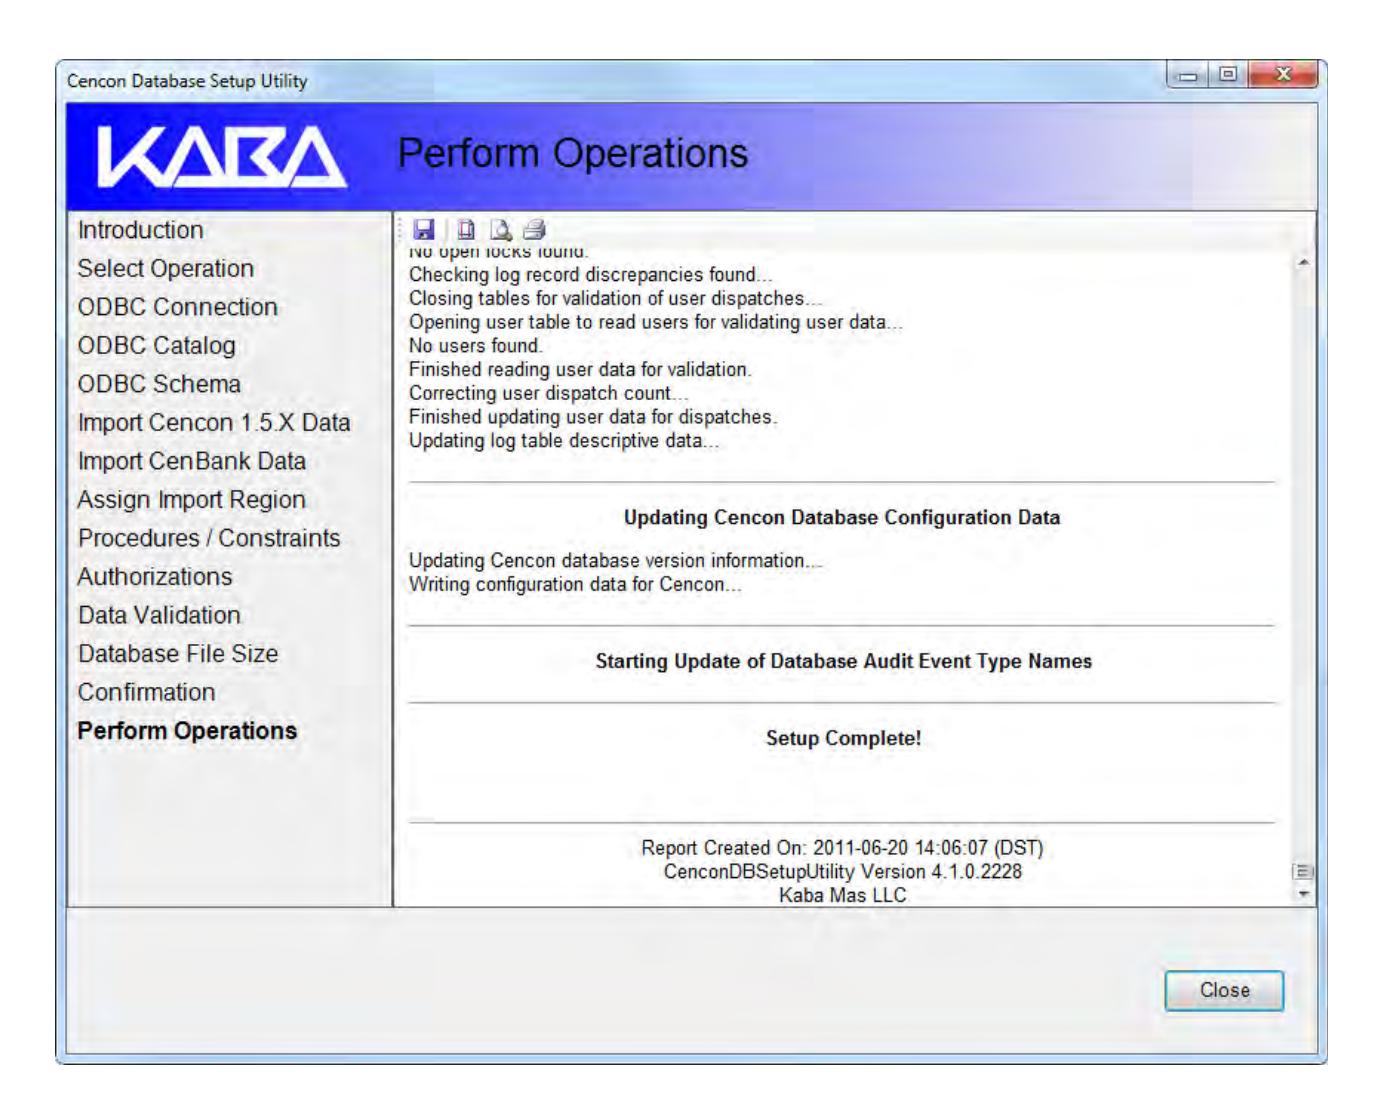
24. Click on Close to complete the database setup.
Modify the ODBC Connection
If you have just created a new database, you must now return to the ODBC Data Source Administrator to change the default database for the ODBC connection. It must be changed to the name of the database that you created using the Cencon Database Setup Utility. In our example the database name is Cencon.
1. From the Windows Start button, select Control Panel, Administrative Tools, and finally, Data Sources (ODBC). This opens the Windows ODBC Data Source Administrator window:
2. From the ODBC Data Source Administrator window, select the System DSN tab:
This selection displays a listing of existing system data source names.
- 3. Select your new Cencon data source and click the Configure button to access the Microsoft SQL Server DSN Configuration window.
- 4. Click Next > two times to access the window which allows you to change the default database:
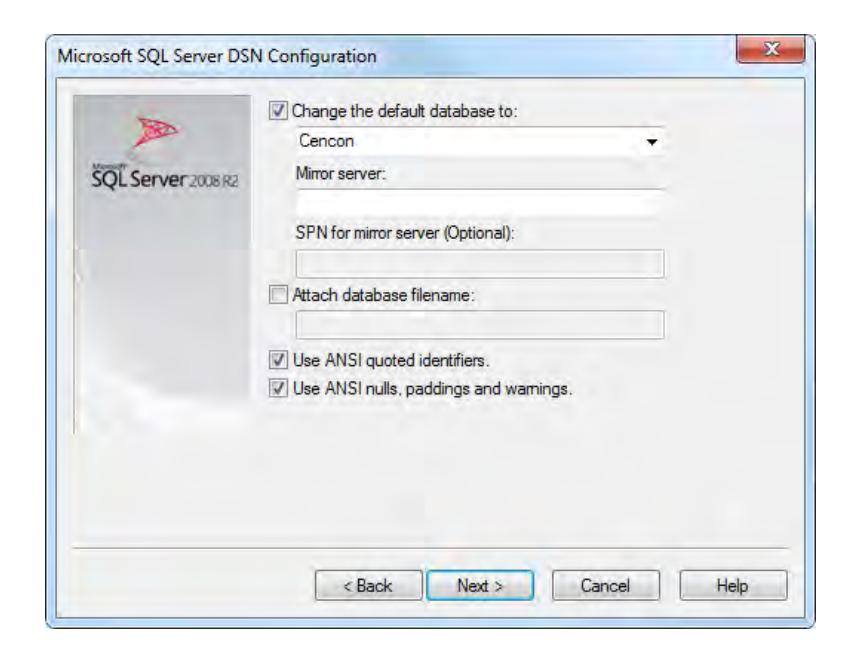
- 5. Check the box "Change the default data base to:" and select your Cencon database in the selection box.
- 6. Click Next > and then Finish to complete the process.
© 1996-2011 Kaba Mas LLC Document Number 2070.127 Rev. E1 07/11 Cencon® 4.1 Getting Started Guide
Cencon® 4.1 Getting Started Guide
Start the Cencon® 4.1 Program
To start the Cencon® 4.1 program:
- 1. Select the Start icon from the Windows task bar.
- 2. Select the Programs menu item.
- 3. Select the Cencon menu item and then the Cencon® 4.1 icon:

Initial Cencon® 4.1 Startup screen:
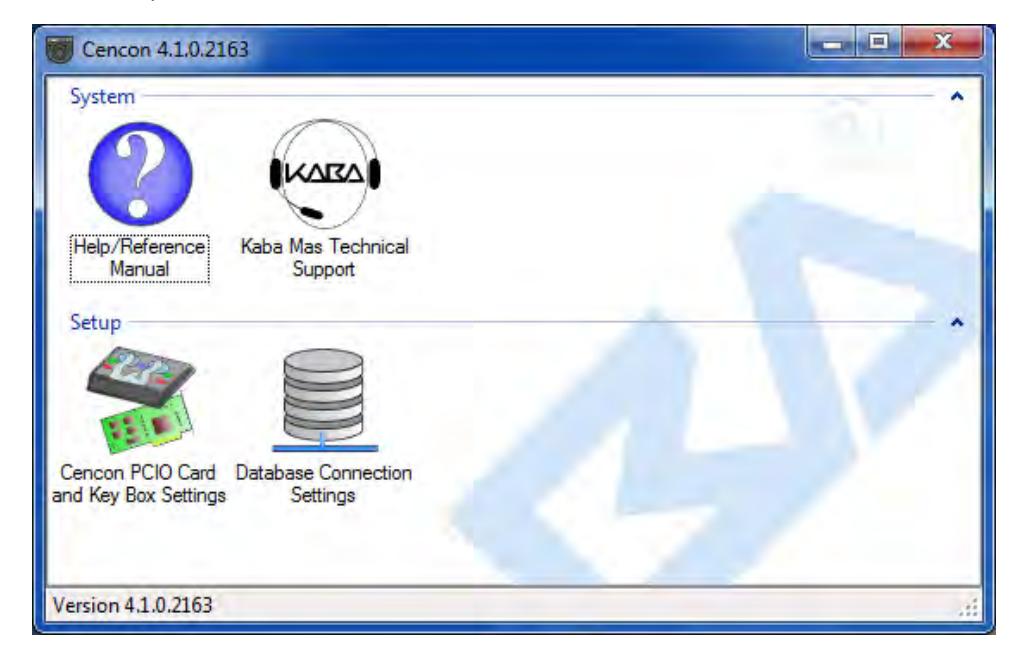
4. If you are going to use the Cencon USB Key Box, the first task is to initialize it. Verify that the Cencon USB Key Box is plugged into any USB port on your computer and select Cencon PCIO Card and Key Box Settings to display the Configuration Settings screen.
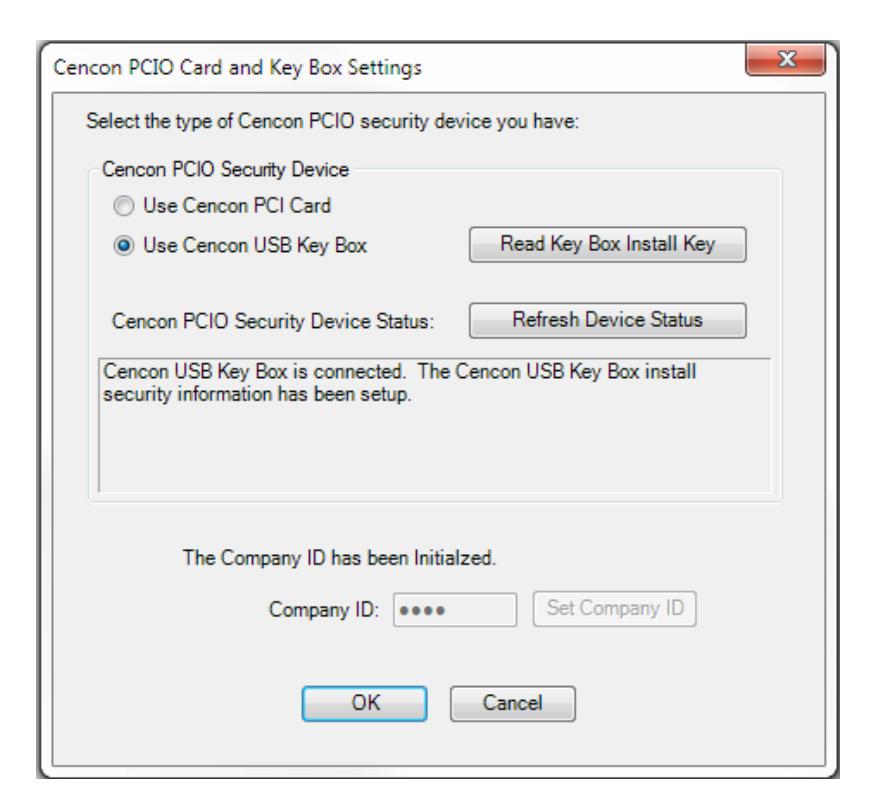
- 5. Ensure that the Use Cencon USB Key Box radio button is selected.
- 6. Enter your Company ID.
The value entered for this field can be any complex four-digit number you wish to identify your company. You should choose a number that is, in some way, meaningful to your company. Record the Company ID and store it in a secure place.
Warning:
Record the Company ID and store it in a secure place. Once this ID is set, it becomes encrypted and it cannot be changed. If you are a branch of a larger company, you must enter the Company ID that has already been chosen for your company. If you are planning to activate locks from a remote PC, the Company ID must be the same on all systems involved in the process.
7. Insert the Orange Install Key into the right Key Box reader position (the green LED on the right should be blinking) and press the Read Key Box Install Key button. The following message indicates successful initialization:
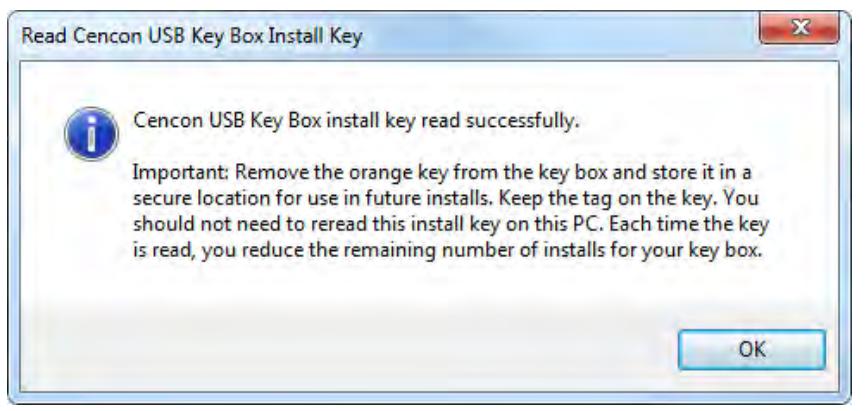
Important Note:
Remove the Key Box Install Key and store it in a safe place. You must have this key and the information on the attached key tag if you ever need to reinstall the Cencon Key Box or order replacement parts. You have a limited number of installs associated with the Key Box Install Key.
8. Select Database Connection Settings to access the dialogs which allow you to identify the appropriate Cencon
database.
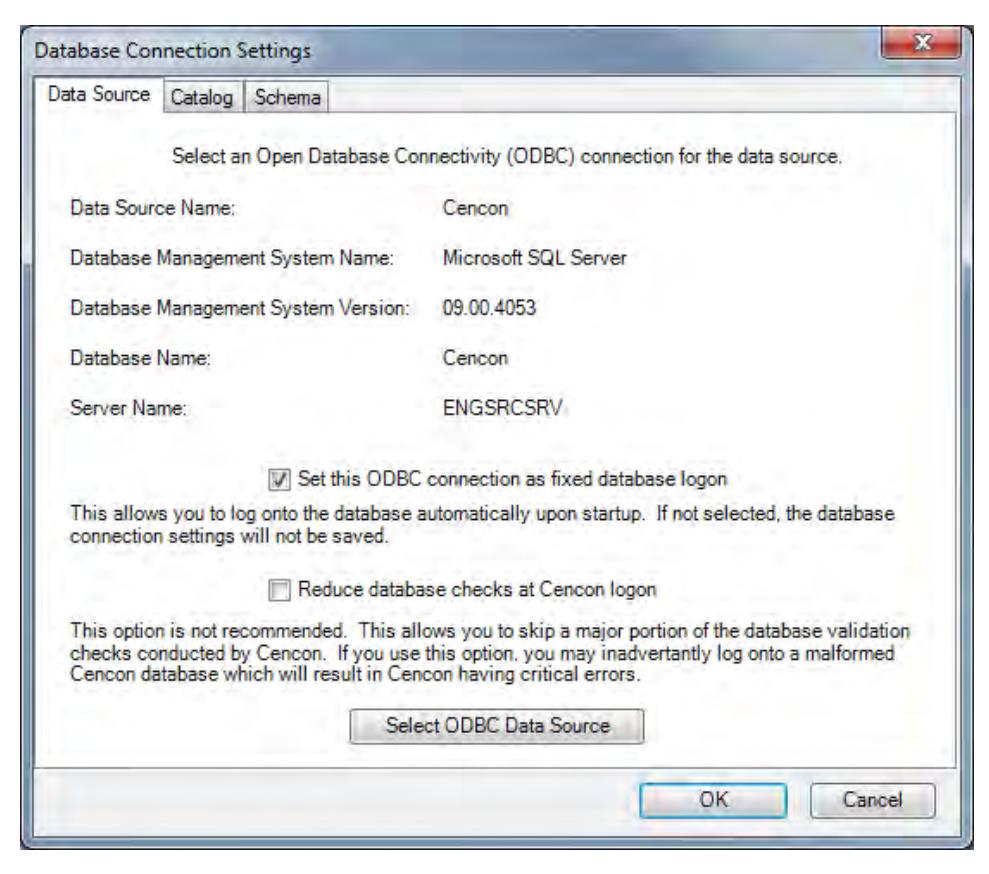
If the input field for Set this ODBC Connection as fixed database logon is checked, Cencon remembers the database connection for the next time the program is loaded.
- 9. Select the button labeled Select ODBC Data Source to select the ODBC connection for the database to be used with the Cencon® 4.1 system.
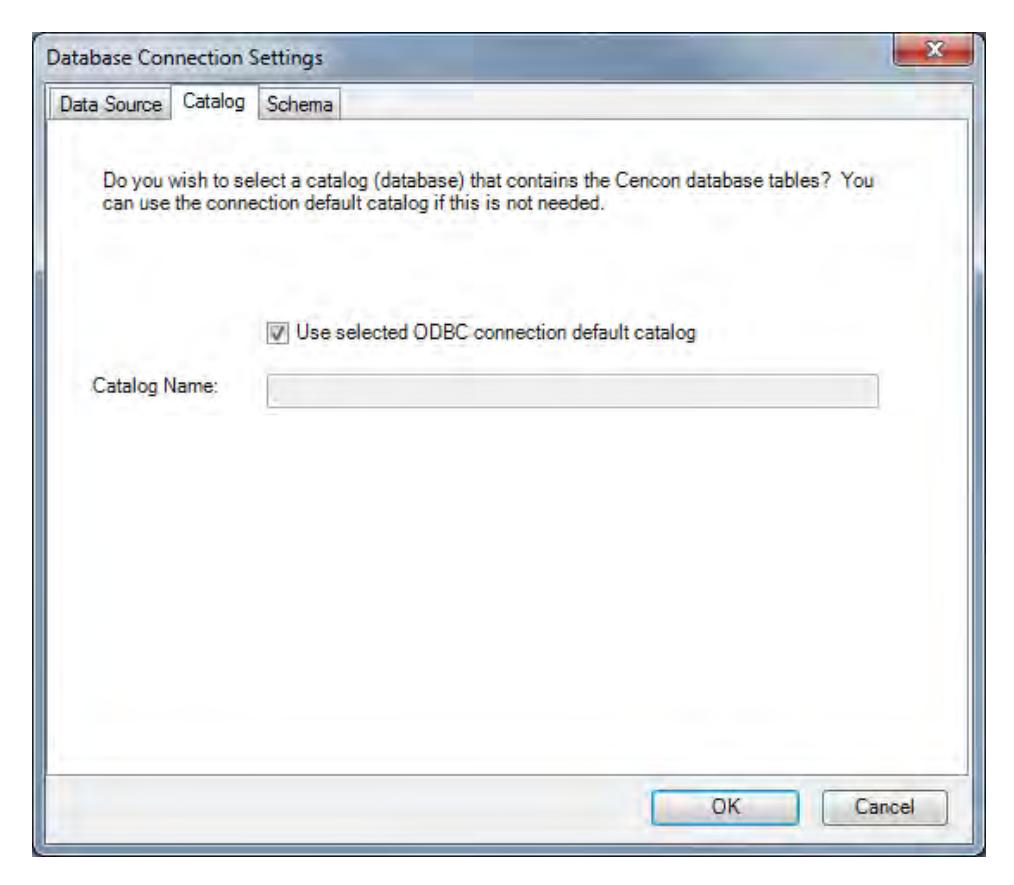
- 10. Select the Catalog tab if you need to modify the database catalog name:
11. Select the Schema tab if you need to modify the database schema:
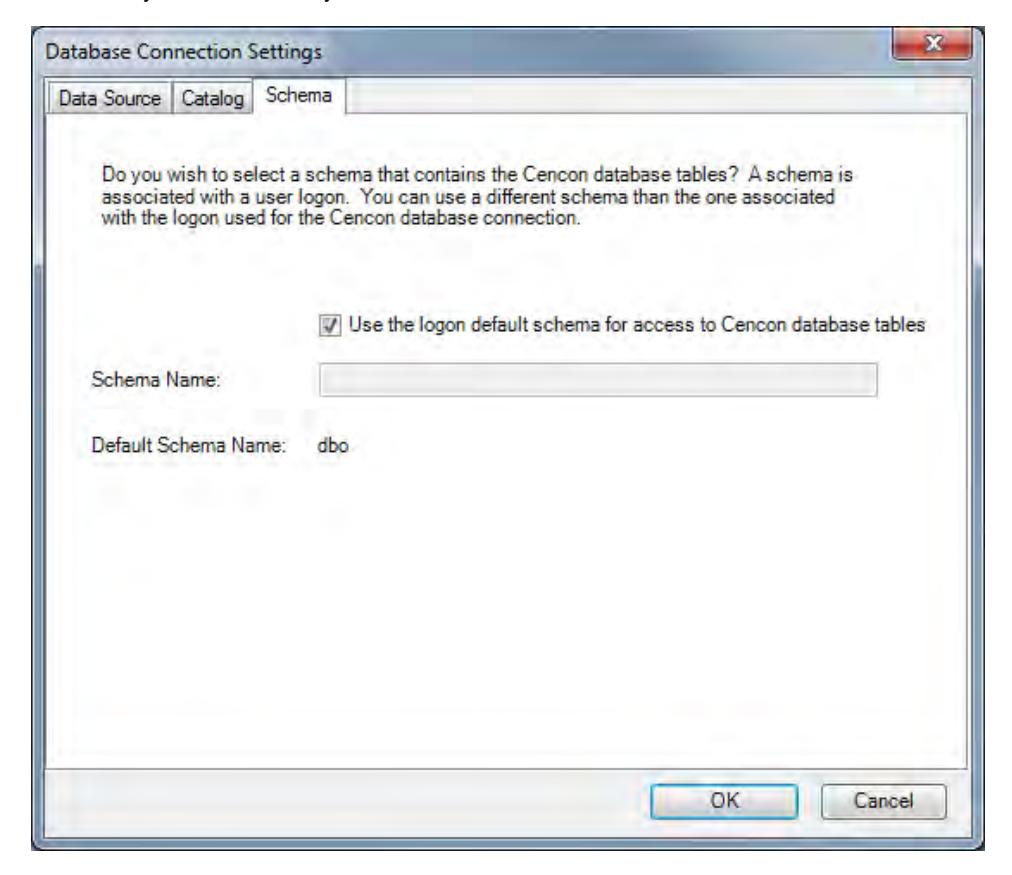
If using the default schema of "dbo" with one of the versions of Microsoft SQL Server, (i.e. Microsoft SQL Server 2005, 2008, 2008 Express, etc) you do not have to update the schema name.
12. The following window is displayed when a database is successfully identified:
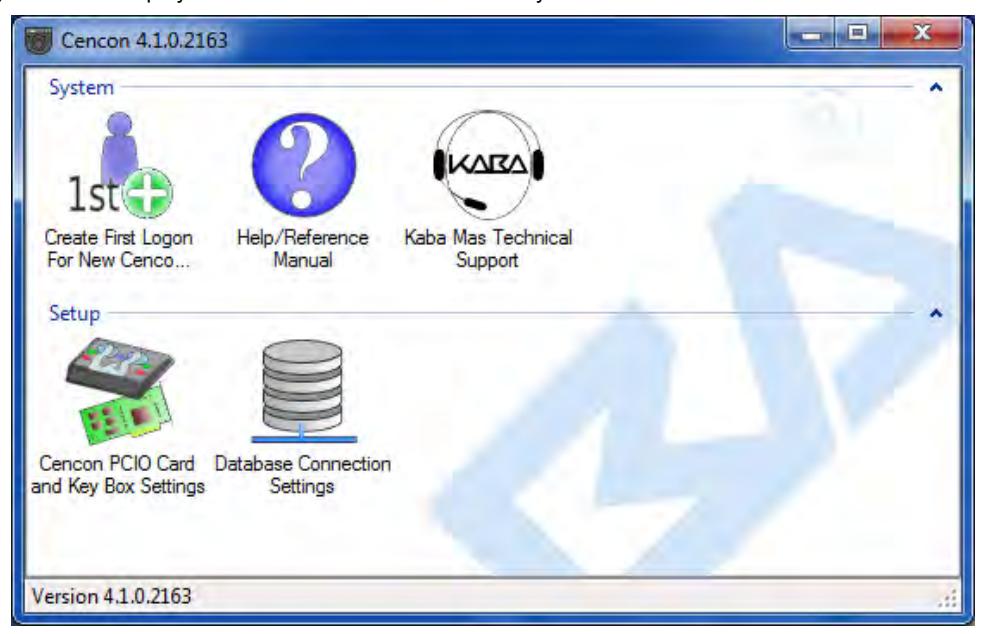
13. Some initialization information must be entered before using Cencon for the first time. Select the Create First Logon for New Cencon Installation icon to start the setup wizard which will walk you through this process:
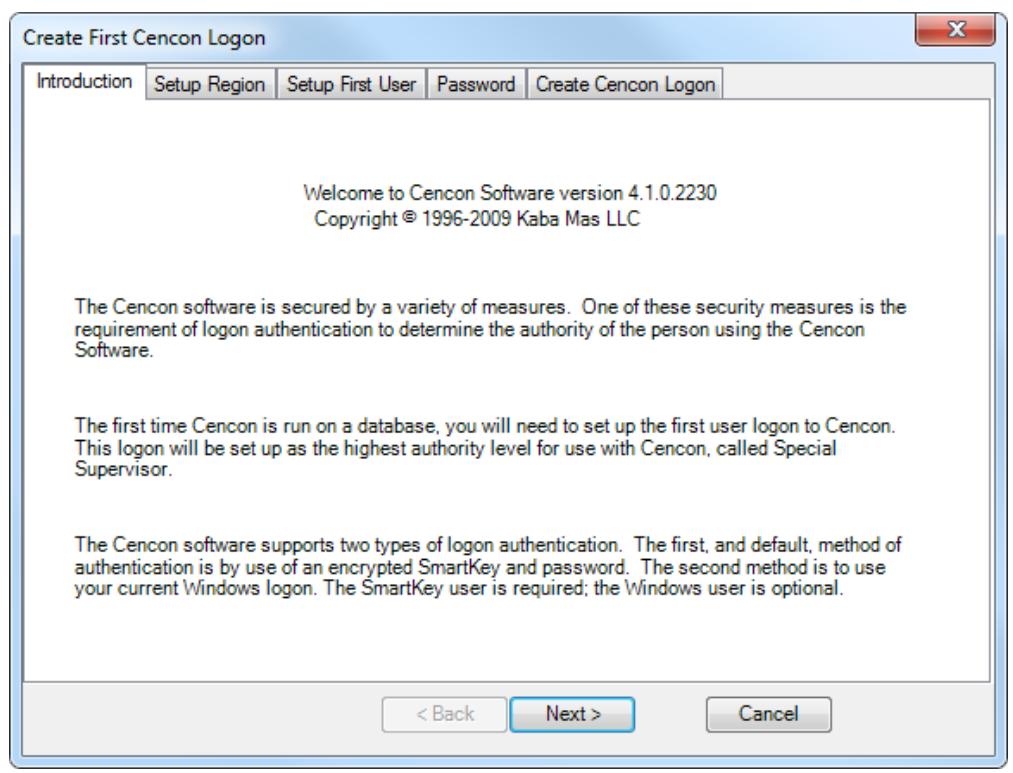
14. Click on Next > to continue.
The Setup Region tab allows you to set up the Region Control feature. The Region Control feature allows the grouping of users, locks, and routes into specific regions. Global data access can be given to some users while data access can be limited for other users to only the users, locks and routes in a specific region. Note that this screen does not activate the Cencon region control feature - it defines a global region and assigns it to the initial user in case the region feature is activated at a later time.
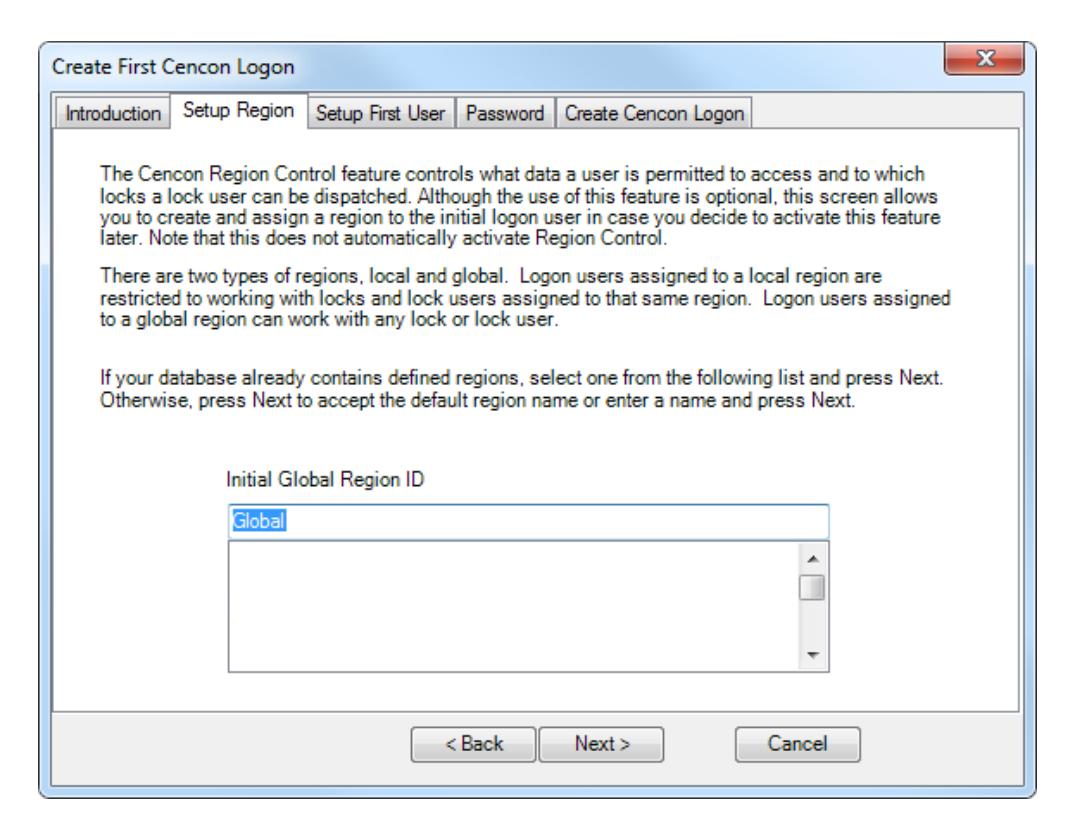
- 15. Follow the instructions on the screen to Add an initial region.
- 16. Click on Next > to continue:
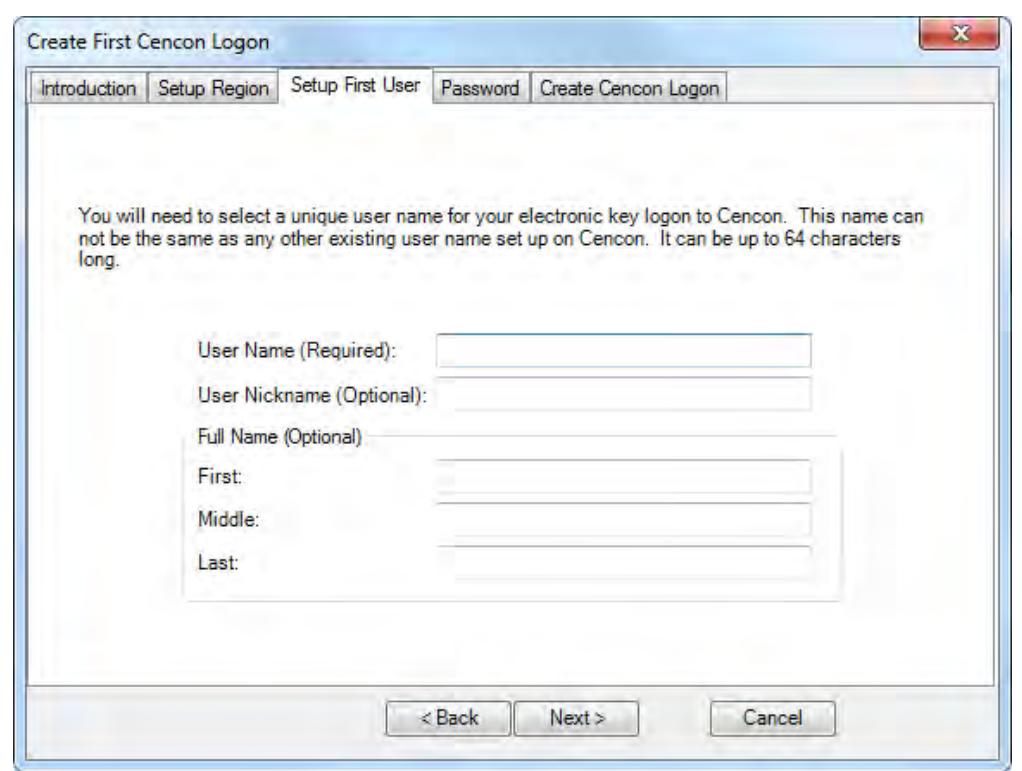
Note
Suggested User IDs: User IDs are very critical in the Cencon System. They can be up to sixty-four (64) characters in length. However, if you are using CenTran in conjunction with your Cencon system, you need to consider that the CenTran User ID field is limited to 20 characters. Using "Bill" as a user ID is valid, however, you may have more than one "Bill" in your organization. Using "98709003" as a user ID is also valid but may get confusing. Additionally,
in dispatching a person we know as "Bill" using the number "98709003" as the user ID can also be confusing. It is suggested that user IDs be alpha or alphanumeric. It is also suggested that you use "Nicknames". For example, a user can be identified as "FLM1" and use "Bill N" in the Nickname field. Another example could be a user identified as "Tom1" and use "Flemming" (last name) in the Nickname field. Spaces are allowed in ID fields so "Bill Jones" is valid. However you choose to identify users, some thought should be given to it before you begin. Case sensitivity will apply if it has been selected in SQL Server as a requirement for the database.
17. Follow the instructions on the screen to create an initial user. Keep in mind that this field may be case sensitive (depending on the SQL Server settings) and recognizes spaces as well as characters.
Caution
Nicknames can be up to sixty-four (64) characters in length. However, if you are using CenTran 3.x (and below) in conjunction with your Cencon system, you need to consider that the CenTran Nickname field is limited to 10 characters. The CenTran 4 XML schema allows the use of longer names.
18. Click on Next > to enter the password for the user.
Note
User Passwords are case sensitive and can be up to sixty-four (64) characters in length. Since the User Passwords for Software Users (black SS, S, and D keys) are used as logon passwords for the software, they should be kept secret.
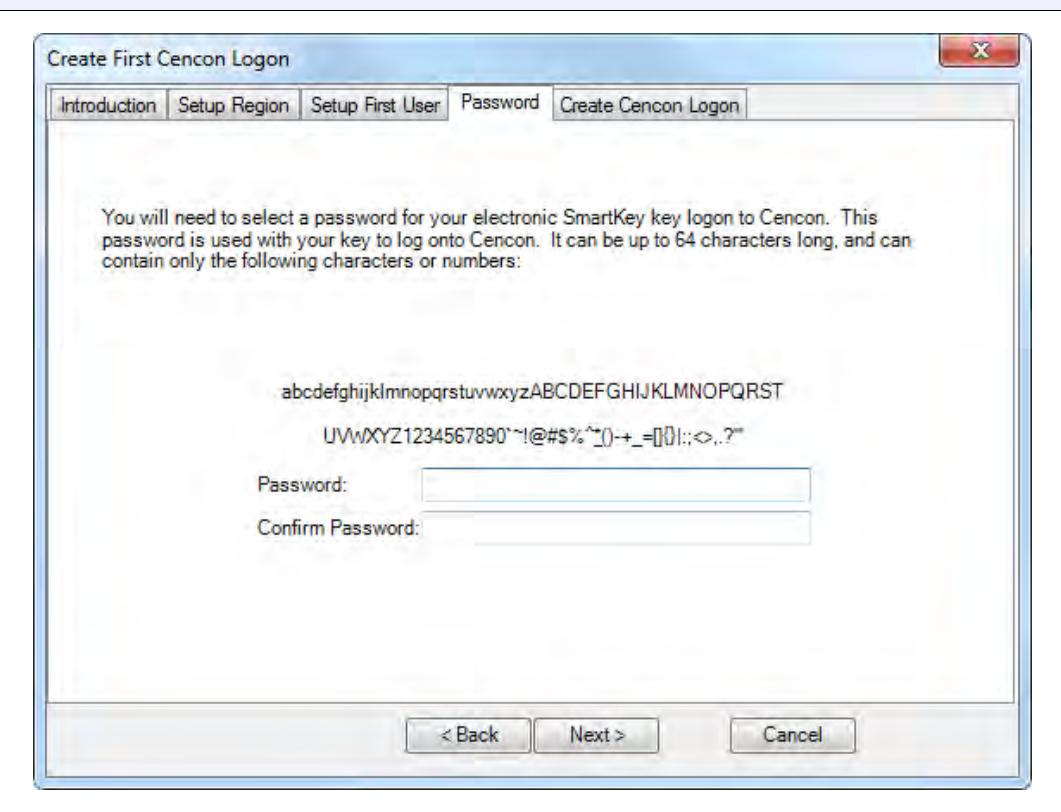
19. Enter a password (and the confirmation) and click on Next >.
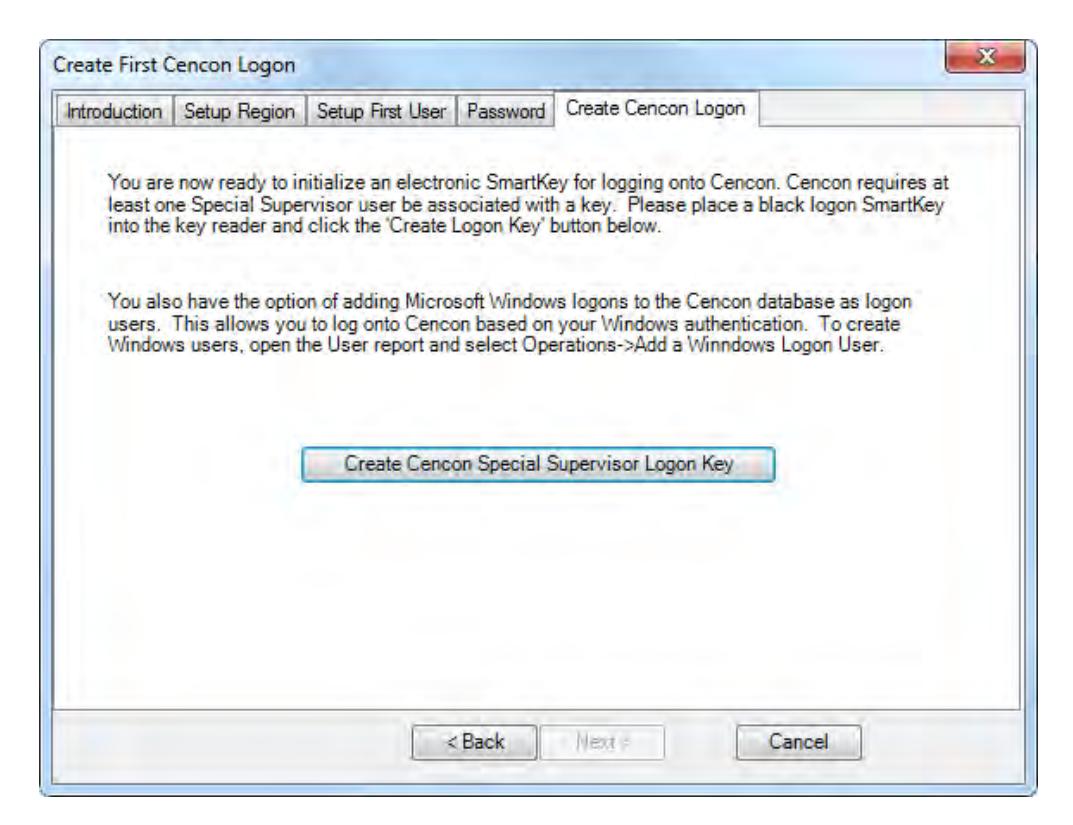
20. Place a black logon type key into the right hand position of the Cencon Key Box (note the blinking green LED). Follow the instructions on the screen for creating a user key and optional Windows logon. Press the Finished button when the users have been created.
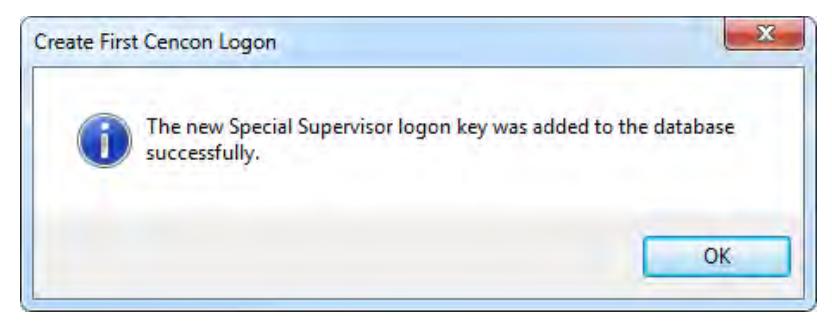
- 21. Click OK and then Finished to complete the start up process.
- 22. Press Finished to end this part of the start up process.
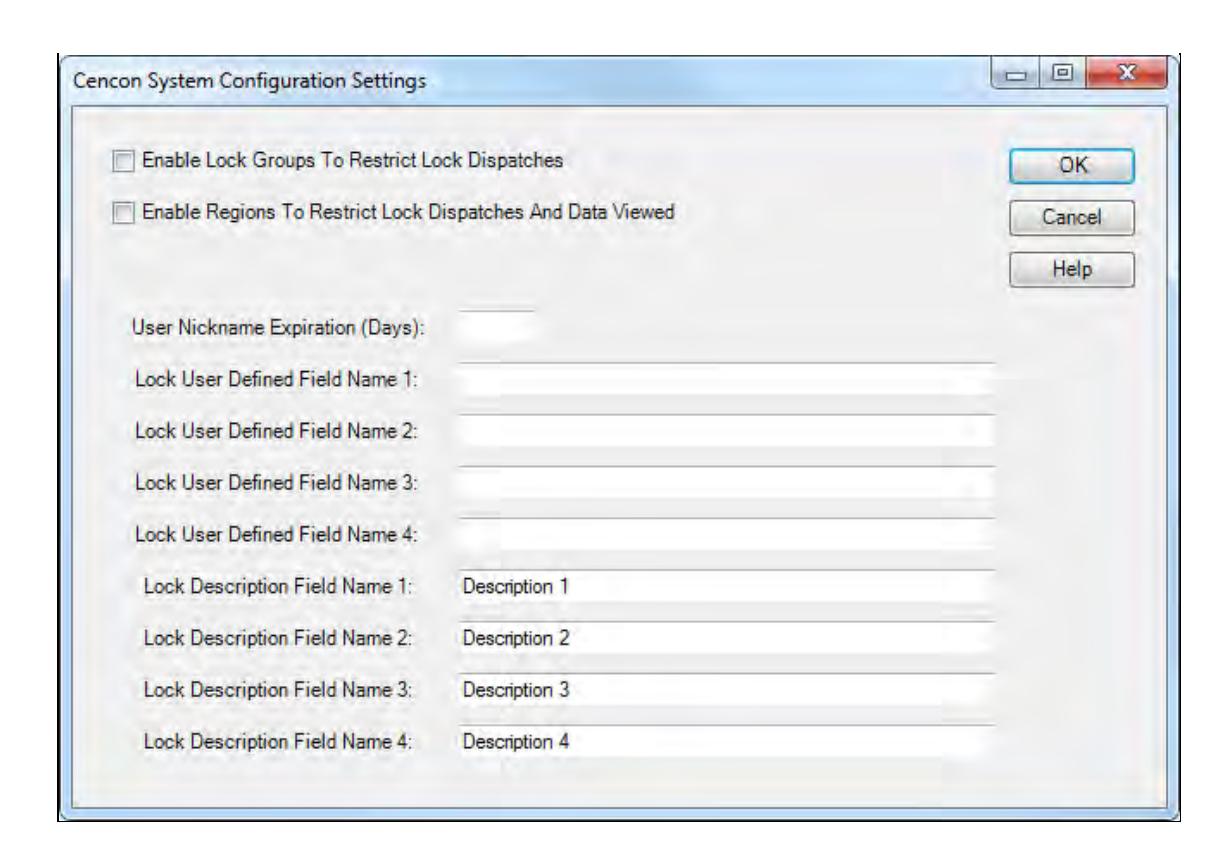
- 23. You are next given the opportunity to configure settings which affect all users of your Cencon installation. See the Cencon Reference Manual for details. You can return to this function at any time by selecting the Change Configuration Settings icon on the main screen.
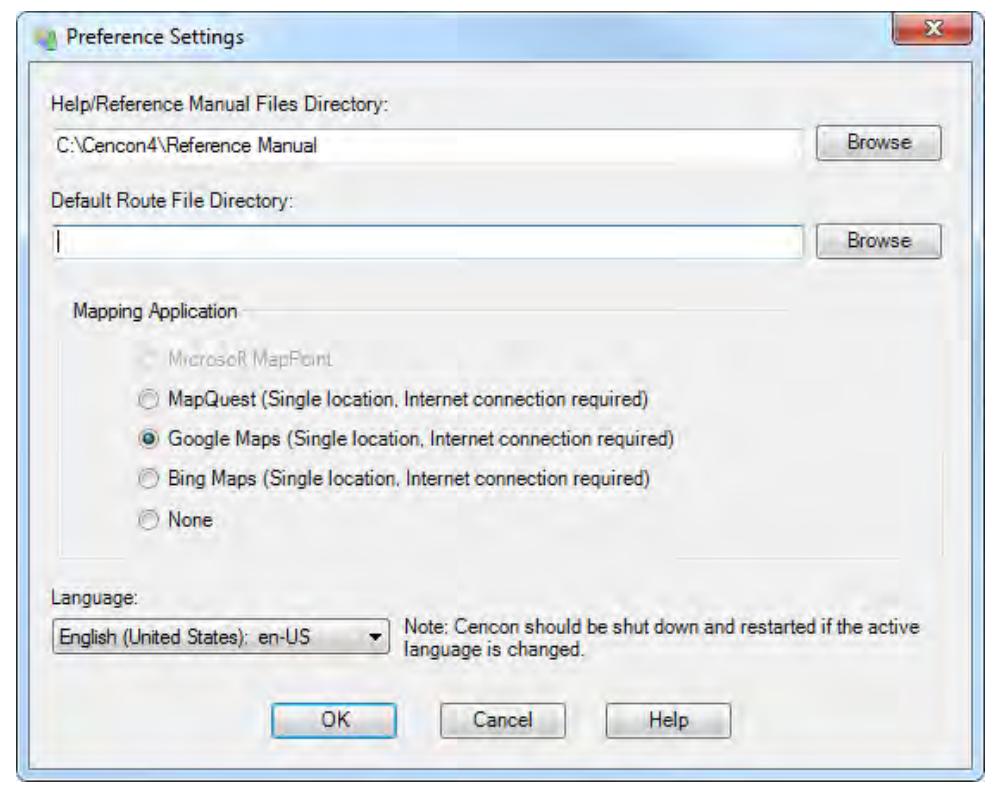
24. Finally, you can set preferences which apply to the current PC. See the Cencon Reference Manual for details. You can return to this function at any time by selecting the Change Preferences icon on the main screen.
Cencon® 4.1 Getting Started Guide
Logon to the Cencon® 4.1 System
The Cencon® 4.1 startup window controls access to configuration settings and logon:
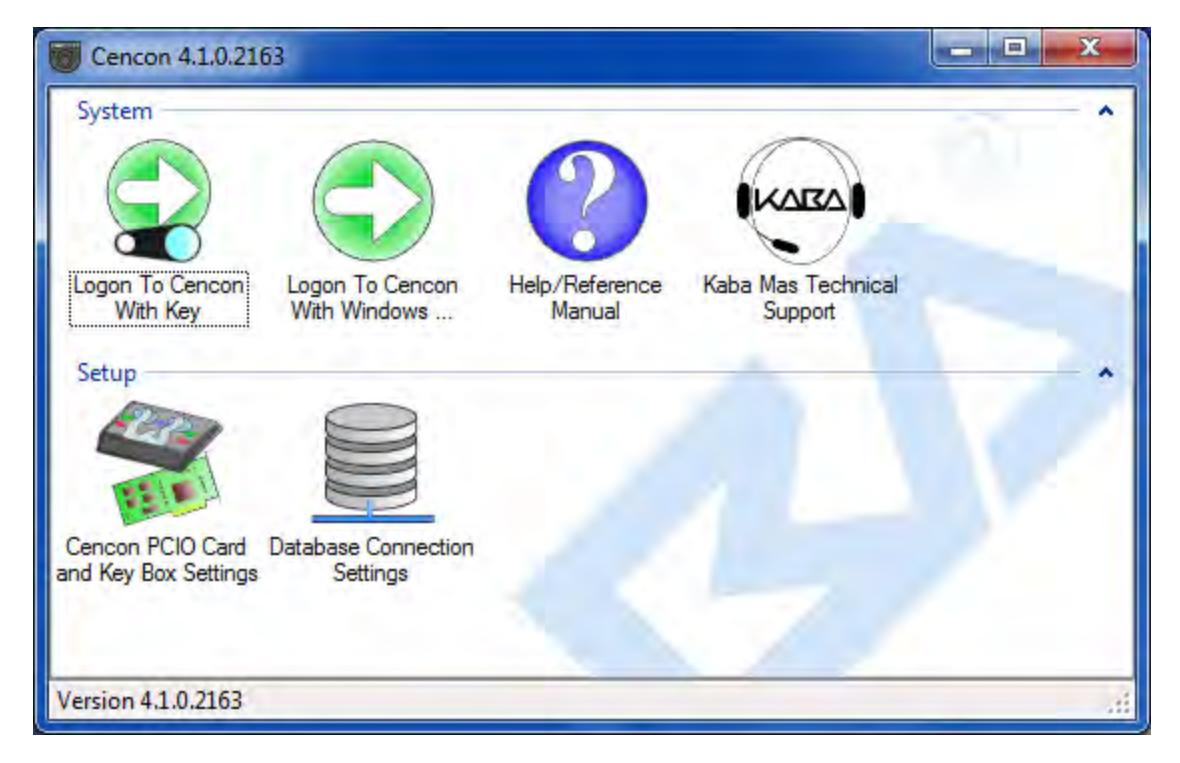
Cencon allows a user to logon using either an authorized Special Supervisor, Supervisor, or Dispatcher key.
Note Key Box : Place the logon key in the left key position. PCIO Key reader: Place your logon key only in position 0, 1 or 2.
To logon using a key, select Logon to Cencon with Key. If the key is recognized as valid, enter the password as requested.
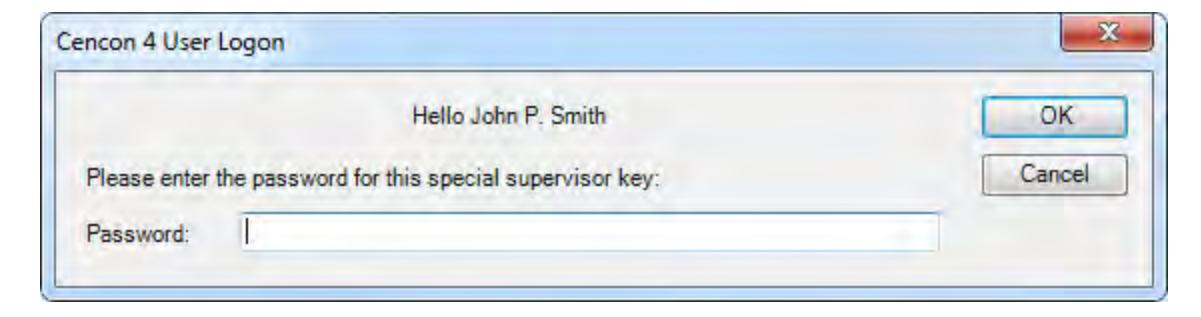
Remember that this field is case sensitive and recognizes spaces as well as characters.
Note
You cannot logon to the system using a nickname, or a user ID. You must use the password specified for the key in the key reader. The key in the key reader identifies the user trying to log onto the
Cencon® 4.1 System.
Hint
If a window is displayed indicating that the User ID doesn't pass authority check, first check to make sure that the appropriate key is in the reader and that the reader is properly connected.
After a successful logon, the Cencon® 4.1 Main Menu window is displayed. Some of the items in the below window may not be displayed on your system depending on your user authority settings.
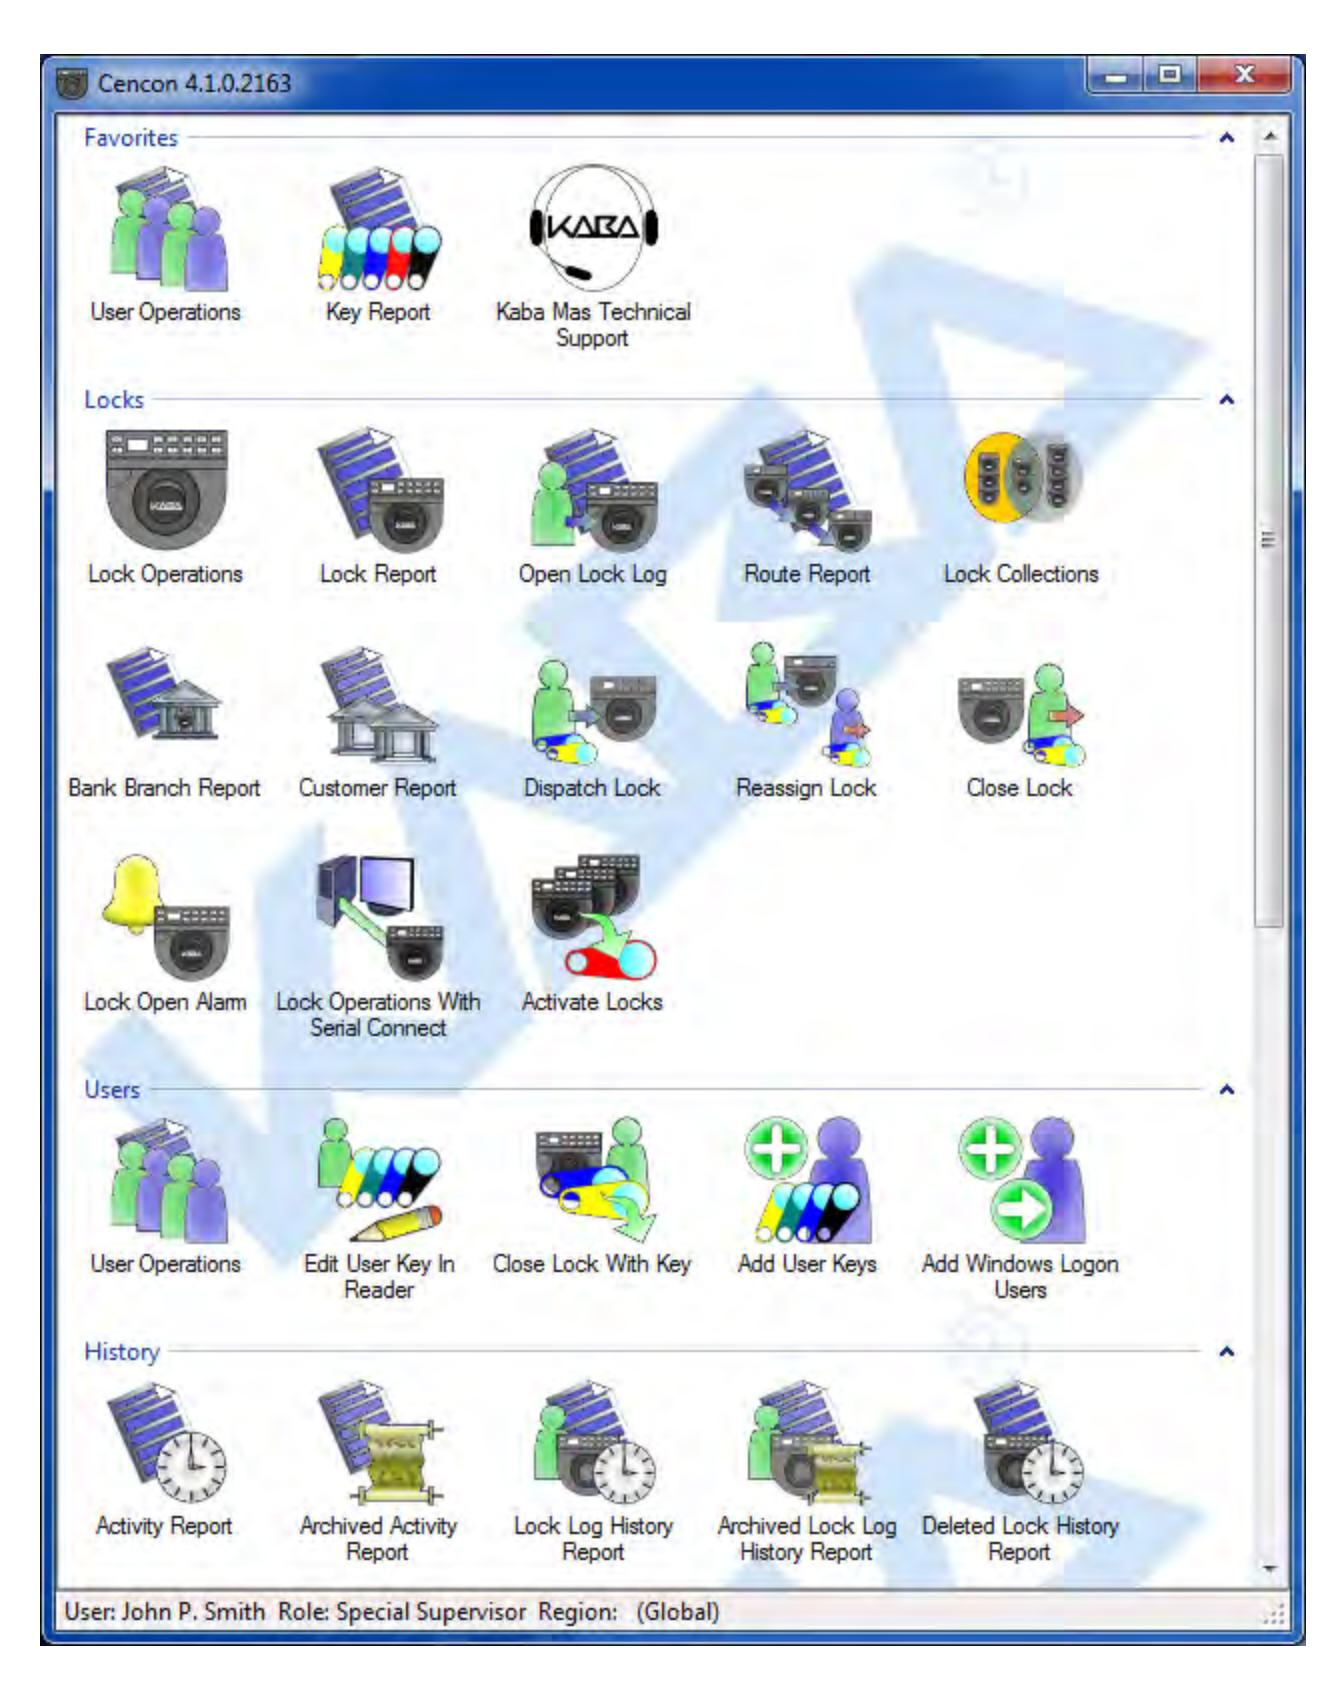
The Status Bar is located at the bottom of the Cencon Main Menu screen. Prior to logon, this area displays the Cencon software version information. After logon, this bar displays the name of current logged on user, their assigned role, and region information (if region control is active).
Cencon® 4.1 Getting Started Guide
Prepare System for Operation
Before Creating Users and Activating Locks...
Depending on how you are using Cencon, certain information must be predefined so that it is available for selection during the process of creating users and activating locks. This data includes:
- Bank Branches: If you are going to create any Bank users or locks, you must first define the Bank Branches to which they will be assigned using the Bank Branch Report.
- User Types: If want to assign a customized authorization role to any new users, you need to create the new user roles before creating the users. See User Authorization for more information.
- Region Definitions: If you are going to use Region control, you should first define your regions using the Region Report.
- Customer ID: If you are going to assign a Customer ID to your users or locks, you should first define the Customers using the Customer Report.
For New Install of Cencon
The following activities must be performed to prepare the Cencon for operation.
- 1. Add appropriate FLM, Route, and Bank users
- 2. Activate Locks
Please refer to the Cencon Reference Manual (Document # 2071.127), found on the Cencon® 4.1 Software Installation CD, for detailed instruction.
The Cencon Reference Manual
The Cencon® 4.1 Reference Manual is best viewed in your web browser as a normal web page. It can be accessed by pressing the Help button on the main Cencon Window.
You can also open the Cencon® 4.1 Reference Manual by selecting Start → All Programs → Cencon® 4.1 → Cencon® 4.1 Reference Manual.
If you want to print the current page of the manual, select File → Print on you web browser.
If you want to print the entire Reference Manual or this Getting Started Guide:
- 1. Insert the Cencon® 4.1 Install CD into the appropriate drive of the PC.
- 2. Browse to the Documents\Reference\Pdf directory.
- 3. Double click on the PDF version of the reference manual. The PDF version of the reference manual will be displayed in Adobe Acrobat reader.

4. Select the Print icon from the Adobe Acrobat Reader tool bar.
Note If your printer has duplexing capability, you may want to select that as a Print option for the Reference Manual.
Remove Previous Cencon and Cenbank Software
If you had a previous Windows based version of the Cencon software installed and have now upgraded to Cencon® 4.1, you should at some point remove the old version of the
software. It is recommended that you ensure the upgrade to the new Cencon® 4.1 software completed successfully and that all old data has been brought successfully into the new database before you remove the old software.
Note
Removal of the previously installed program will not affect any currently existing data files.
Complete the following steps to remove the previous Cencon programs (this example shows the removal of Cencon 3.0/3.1):
- 1. Select the Start icon in the lower left of the Windows screen.
- 2. Next select the Control Panel icon. The Control Panel Window is displayed:
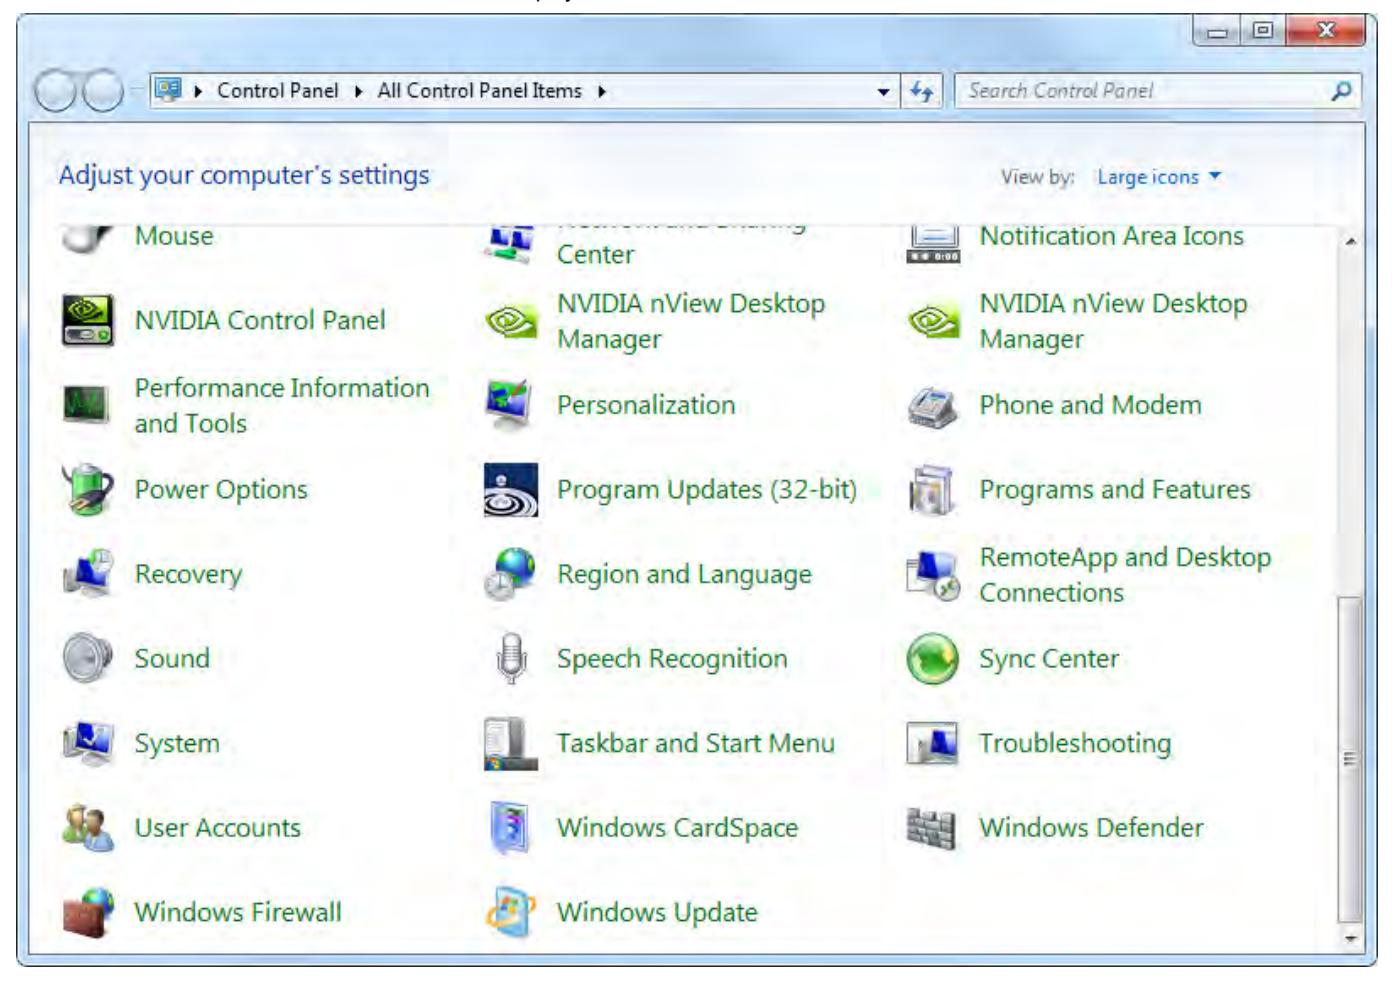
3. Click on the Programs and Features icon. The Programs and Features window is displayed:
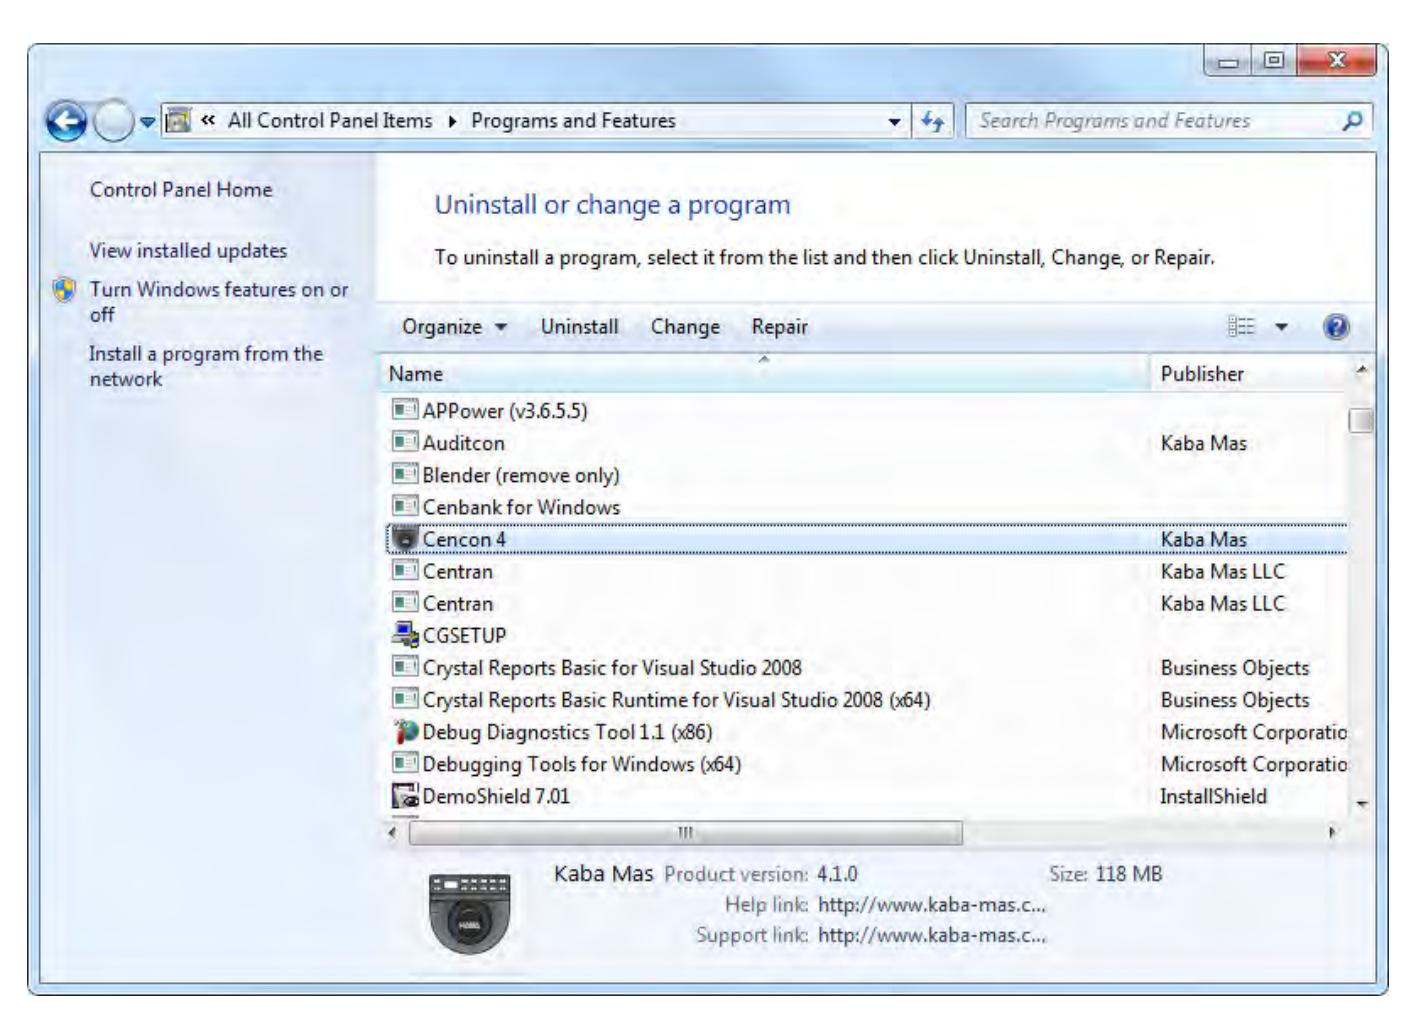
4. Select Cencon 4 in the program list and click on Uninstall button on the tool bar.
Note Removing the currently installed Cencon application and all of its components will not affect any currently existing database information.
A confirmation dialog will appear:

- 5. Click on the Yes button to continue.
- 6. The Cencon® 4.1 software program will be removed from the list.
© 1996-2011 Kaba Mas LLC Document Number 2070.127 Rev. E1 07/11 Cencon® 4.1 Getting Started Guide