CenTran Version 4 Getting Started Guide
Open the original PDF document
View PDFCenTran Version 4 Getting Started Guide KABA MAS
Kaba Mas Welcome
Kaba Mas, part of the world-wide Kaba group, is the world's leading manufacturer and supplier of high security, electronic safe locks. Its complete line of self powered, battery, and mechanical locks meets virtually every safe lock requirement. Kaba Mas is dedicated to satisfying end-user needs for security, safety, and convenience. We welcome you to the world of Kaba Mas security and the Cencon lock.
Manual Conventions
Trademarks
Table Of Contents
Before Installing the CenTran Software
Software Installation and Setup
Start Monitoring for Transactions
Logoff of the CenTran 4 Program
Prepare System for Daily Operation
Remove Previous CenTran Program
Manual Conventions
This CenTran Getting Started Guide contains information on the installation and set up of the hardware and software required to manage locks. Some conventions that are followed are:
- The Smart Keys needed for a particular operation will be shown beside the flowcharts that describe the operation.
- The screens shown in the manual that speak to inserting a key in a reader may depict either the use of the 4-port Key Reader in association with the PCI card or the 2-port USB Key Box.
- Input to the PC will be shown in bold type.
- The screen samples may not look exactly as they do on your system depending on which version of the Windows operating system you are using. Some samples in this document are from Windows XP, some are from Windows Vista, and some are from Windows 7.
- Highlighted items:
Note
Indicates a point to consider.
Helpful Hint
Indicates a technique or method that works well.
Caution
Indicates the need for care and caution to be observed during a procedure or process.
Warning
Indicates the possibility of loss of data or system integrity.
Before reading the CenTran Getting Started Guide, you should be familiar with basic Windows concepts and techniques. For detailed information, refer to your Windows documentation.
Trademarks
The following items are trademarks or registered trademarks of Kaba Mas in the United States and/or other countries.
- Cencon System 2000
- Cencon
- PowerStar Technology
- Smart Key
Adobe and Adobe Reader are registered trademarks of Adobe Systems Incorporated in the United States and/or other countries.
iButton is a registered trademark of Dallas Semiconductor.
Microsoft, Windows, and Windows Server are registered trademarks or trademarks of Microsoft Corporation in the United States and/or other countries.
Notice: The information in this manual is subject to change without notice and does not represent a commitment on the part of the Kaba Mas. Kaba Mas shall not be liable for technical or editorial errors or omissions contained herein; nor for incidental or consequential damages resulting from the furnishing, performance or use of this material.
CenTran Version 4.1 Getting Started Guide
The CenTran Version 4.1 Package
The CenTran 4.1 implementation package includes:
- The CenTran Version 4.1 Install CD, Version 4.0.0
- CenTran 4.1 Getting Started Guide
- CenTran 4.1 XML Programming Manual (Included on Install CD in electronic format)
- CenTran 2 Programming Guide (Included for legacy CenTran use on Install CD in electronic format)
If you are missing any of the above items, contact Kaba Mas Customer Service at 1(800) 950-4744
CenTran 4.1 System Requirements
To use the CenTran program, the following minimum hardware and software requirements must be met:
IBM compatible PC that is capable of running Windows and has an available USB port for the Kaba Mas USB Key Box.
Note
The Cencon Key Box requires a fully compliant USB 2.0 connection. Some computers, especially laptops and notebooks, may not provide sufficient power for the Cencon Key Box. In these cases it may be necessary to use a powered USB hub to attach the Cencon Key Box. On laptops or notebooks with "power saving" features that turn off USB power, the computer's Operating System (OS) could disconnect from the Cencon Key Box. In this instance, after awakening the computer and CenTran 4 software, unplug and re-plug the USB cable between the computer and the Cencon Key Box.
- 2 GB RAM
- CD-ROM Drive
- Hard Disk Drive with at least 50 megabytes disk space free
Important Note
If you are upgrading from a previous version of Cencon and CenTran, you should also allow ample disk space for database growth.
-
Windows XP 32-bit Professional (Service Pack 3), Windows Vista 32/64-bit (SP 2) or Windows 7 32/64 bit.
- You must be logged into Windows with Admin authority
- Windows Vista 64-bit and Windows 7 64-bit are supported for the Cencon USB Key Box only. The Cencon PCIO card is not supported under the Windows Vista 64-bit operating system.
-
An installed Database Management System (DBMS) Microsoft SQL Server 2005, SQL 2008, or SQL 2008 R2 (including the SQL Server Express, Standard, or Enterprise Editions.)
- The SQL Server installation does not have to be on the same computer as CenTran. You will need to have a valid ODBC connection to SQL Server for CenTran to use.
- The above computer requirements do not include the requirements for SQL Server. If SQL Server is being run on the same computer as CenTran, then the total requirements will be the requirements of CenTran plus those of SQL Server.
- The requirements of the SQL Server installation will vary depending on the number of locks and
users being used by Cencon and CenTran and the number of Cencon and CenTran installations connected to that DBMS.
Note
If you do not have an existing Microsoft SQL Server database, you can download a free copy of the latest Microsoft SQL Server Express Edition from the Microsoft web site at http://www.microsoft.com/express/sql/default.aspx You should also download and install the SQL Server Management Studio.
Be sure to read the related Microsoft information on system requirements and prerequisites for these components. Contact Kaba Mas Technical Support for additional information.
Note - The screens shown in the CenTran Software manuals were captured on a Microsoft Windows XP, Windows Vista, or a Windows 7 system. Your screens may look slightly different.
Important Note
CenTran 4.1 also requires an operational Cencon 4 system and associated database, either locally or on a network accessible computer. It is not compatible with previous versions of Cencon System 2000 software.
PC Hardware Installation
Note
The Cencon Key Box is not included with the CenTran 4.1 program package and must be purchased separately if not already installed on your PC system. See the Cencon 4.1 Getting Started Guide for Key Box installation instructions.
Important Note
Running the Cencon 4.1 software and the CenTran 4.1 software concurrently on a PC system is not recommended.
Before Installing the CenTran 4.1 Software
Warning
If you have not already contacted Kaba Mas Customer Service at 1(800) 950-4744 in preparation for your installation of CenTran 4.1, you must do so at this time to review minimum system requirements and database setup for your installation of CenTran 4.1, and to perform data validity checks on any current Cencon data.
Warning
During the CenTran 4.1 installation process, you will be required to enter a unique four digit Company Number/ID. If you are a branch of a larger company, this ID must be identical to that used for all other Cencon and CenTran installations by your company. It is helpful to determine what the four-digit number is before you begin the installation process.
CenTran Version 4.1 Getting Started Guide Software Installation and Setup
Complete the following steps to install the software:
- 1. Check the PC Date and Time Properties (date, time, time zone, DST adjustment setting) from the Control Panel to ensure accuracy. Adjust, if necessary, before proceeding.
- 2. Ensure that no other programs are running.
- 3. If you have a previous version of Cencon installed, you should ensure that data has been archived in accordance with the customer archive requirements and then backup the current Cencon database.
- 4. Insert the Cencon 4.1 Install CD in your computer CD-ROM / DVD / BluRay drive. If you have autorun enabled on your system, the Cencon 4.1 Installation screen will be displayed. Otherwise, double click Autorun.exe from the Cencon 4 Install CD root directory, and the Cencon 4.1 Installation screen will be displayed.
The Cencon Version 4.1 Software Installation dialog is loaded and the Main Menu is displayed:
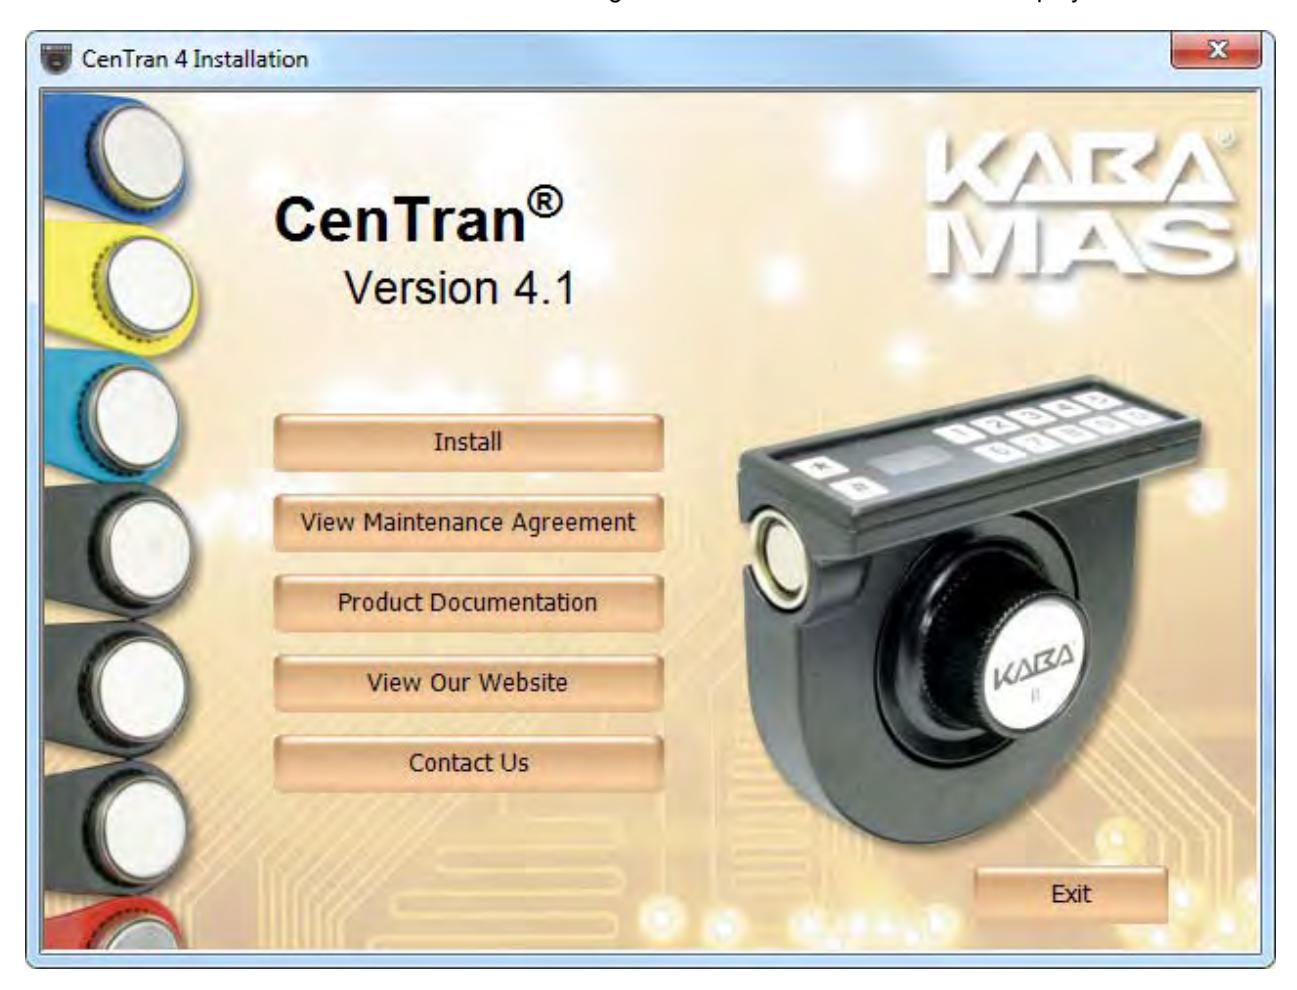
5. From the Main Menu, click on the Install button.
The CenTran 4 Software Installation operating system selection page is displayed:
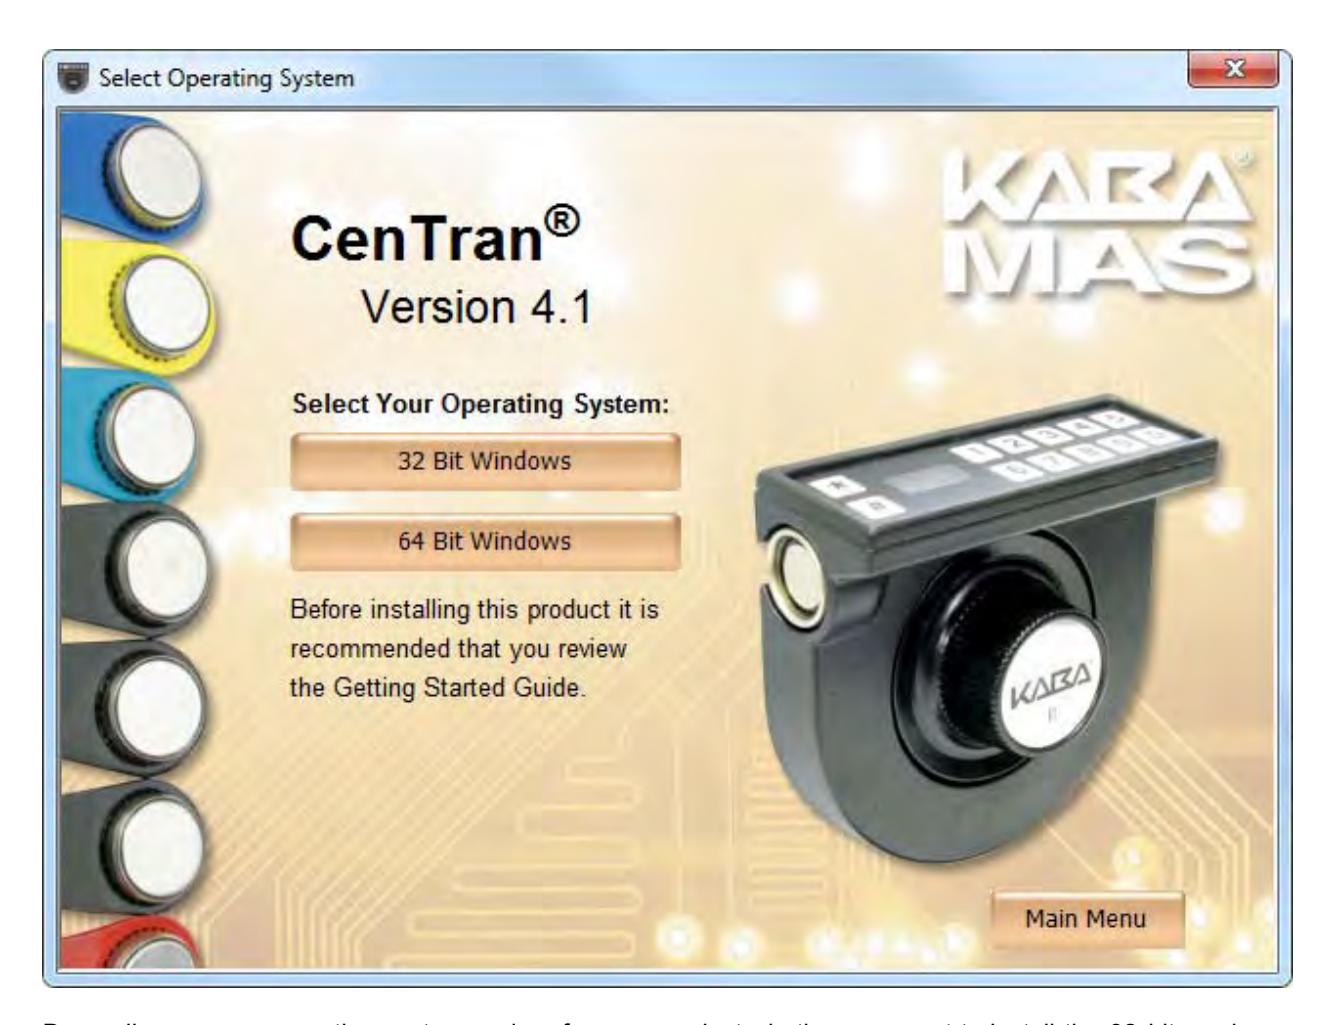
Depending on your operating system and preferences, select whether you want to install the 32-bit version of CenTran, or the 64-bit version of CenTran. If you are using a 32-bit version of Microsoft Windows, then you can only install the 32-bit version of CenTran. If you are using a 64-bit version of Microsoft Windows, then you can install either the 32 or 64-bit version of CenTran.
6. Depending on your selection, either the 32 or 64-bit CenTran install page is displayed:
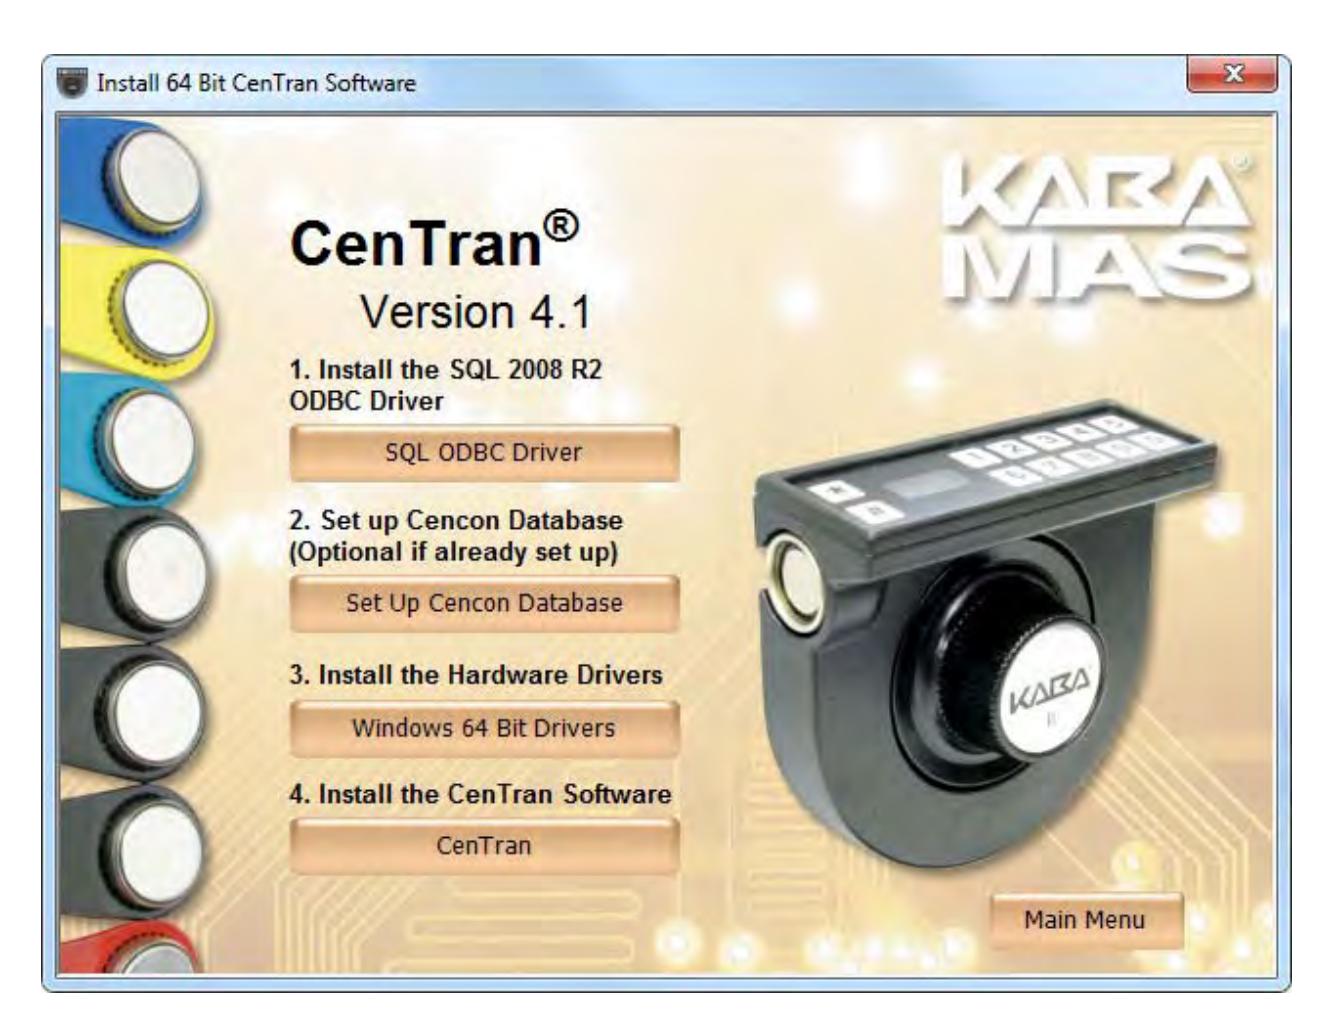
You will now need to install the SQL 2008 R2 ODBC Driver for CenTran. Click on the SQL ODBC Driver button.
7. You will now need to install the device drivers for the Cencon USB Key Box. Click on the Windows Drivers button.

The introduction screen to the driver installer will be displayed. Follow the instructions displayed by the driver installer to set up the drivers for the Cencon USB Key Box.
8. Next, click on the CenTran button on the CenTran install page.
The "Welcome to the CenTran Setup Wizard" screen is displayed. The installer is a Windows program that will take you through the rest of the setup process:
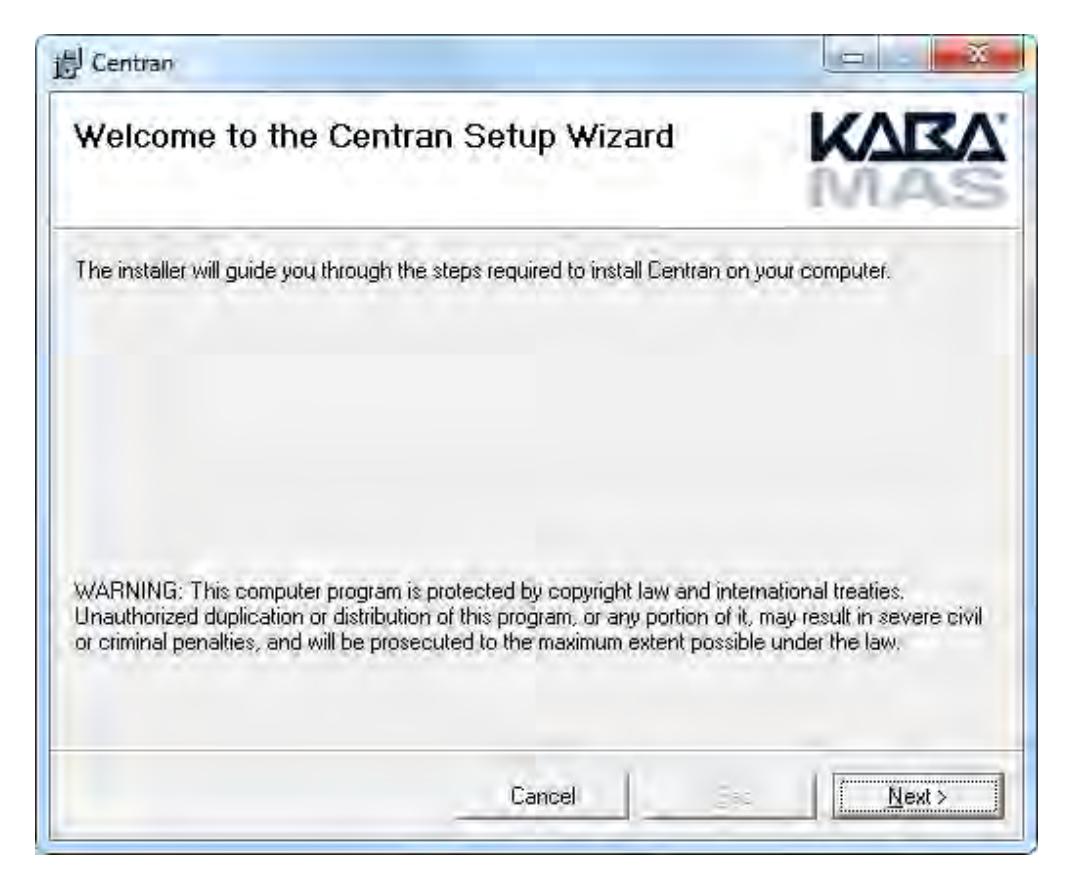
Click on Next> to continue with the installation.
9. The Software License Agreement acceptance screen is displayed.

Read the Software License Agreement and then click the I Agree button followed by the Next> button.
10. The Destination Folder window is displayed to allow you to select the program folder to which the CenTran 4 program will be added.
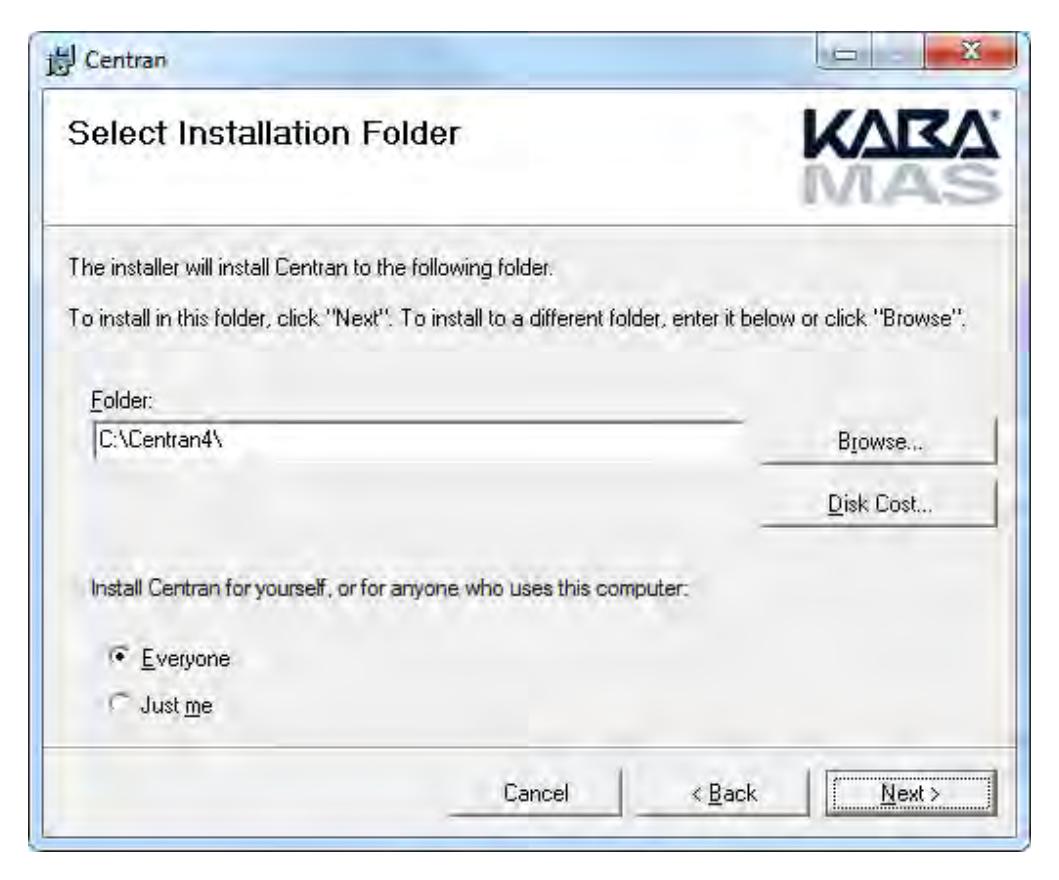
Note: The default installation directory is shown. If CenTran 4 is already installed on your system, it is recommended that you install CenTran 4 to a new directory. If you want the CenTran 4 software installed in another directory, click on the Browse button and select the new path.
Click on the Next> button to add the programs to the designated folder.
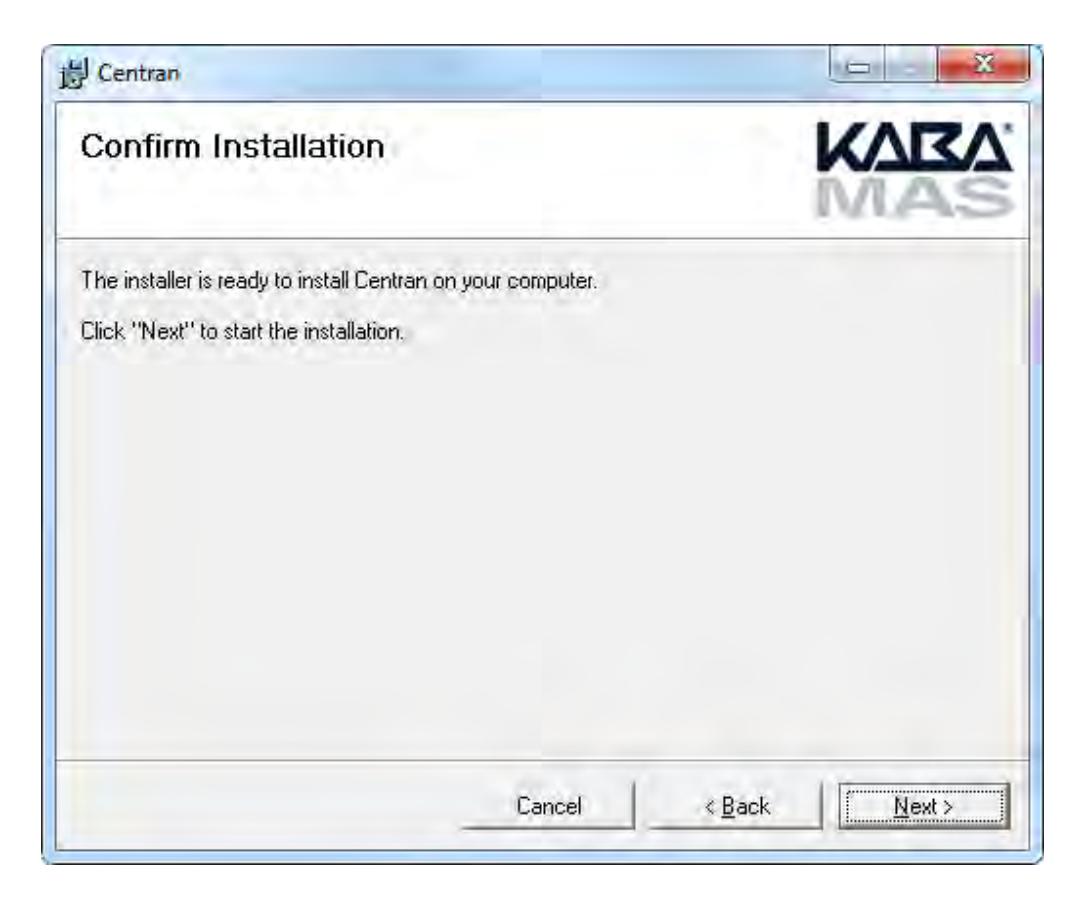
11. Confirm Installation - If there is anything you wish to change, click on the <Back button. Otherwise, click Next> to install the program with the designated settings.
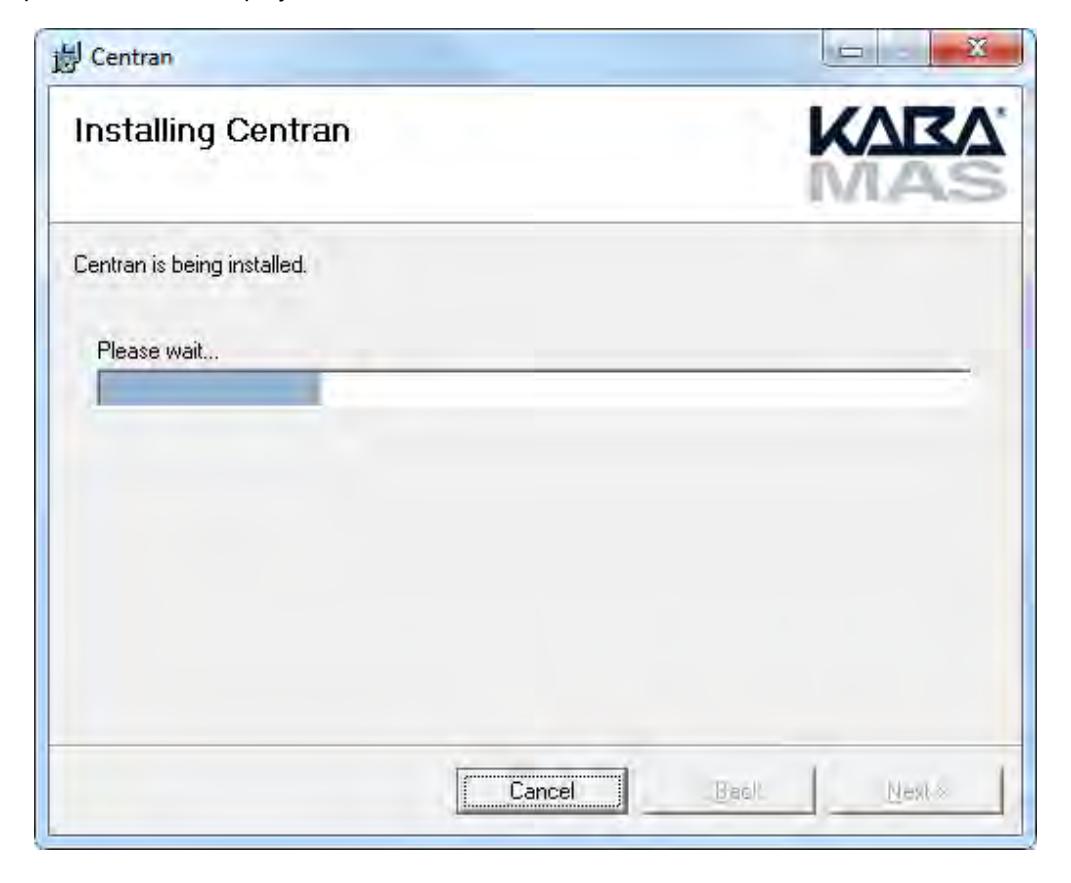
The Setup Status screen displays the status of the installation.
The installation Complete screen is then displayed indicating that the CenTran 4 program has been successfully installed.
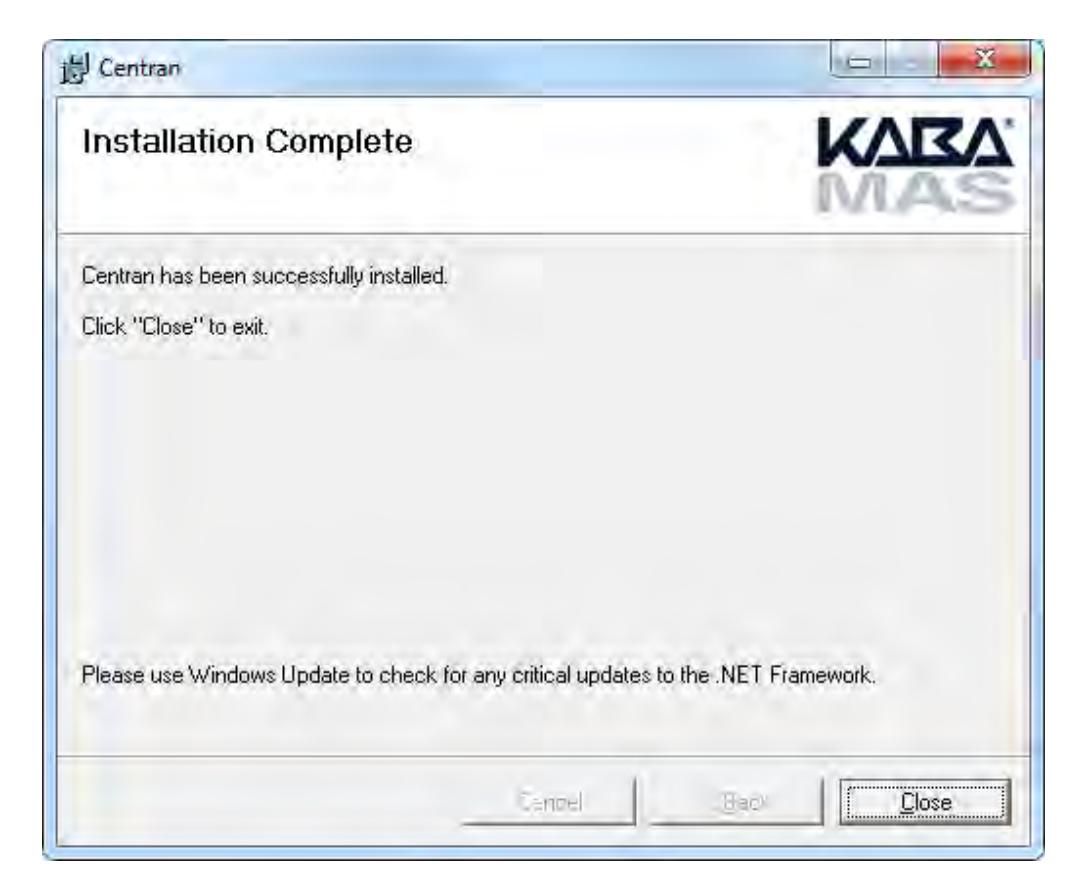
Click Close to complete the installation process.
CenTran Version 4.1 Getting Started Guide
Start the CenTran Program
To start the CenTran program, select CenTran 4 from the Windows Start menu or double click on the CenTran 4 icon on your desktop.
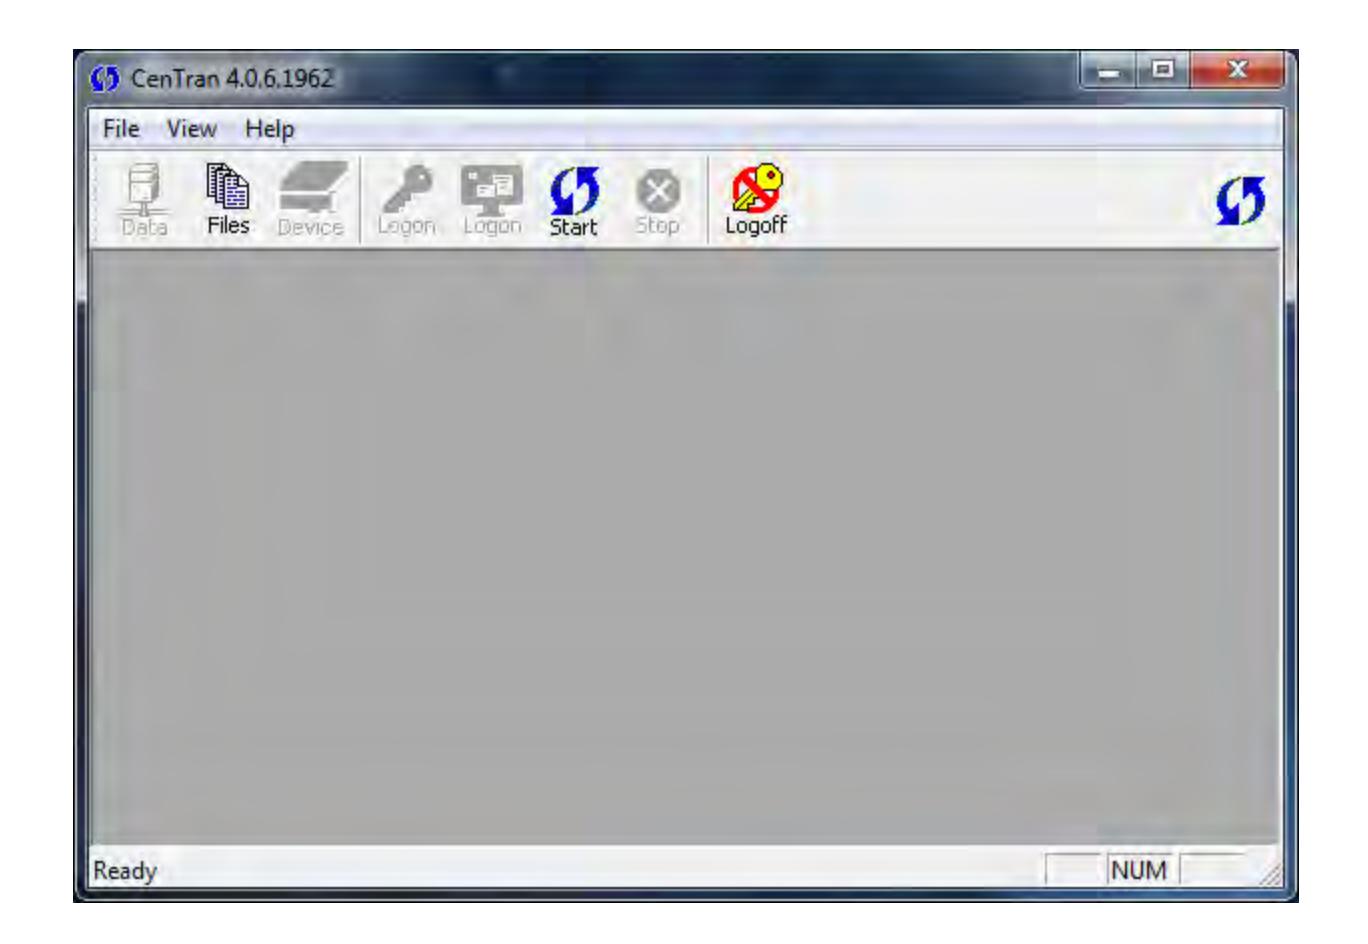
Initial CenTran Start up screen:
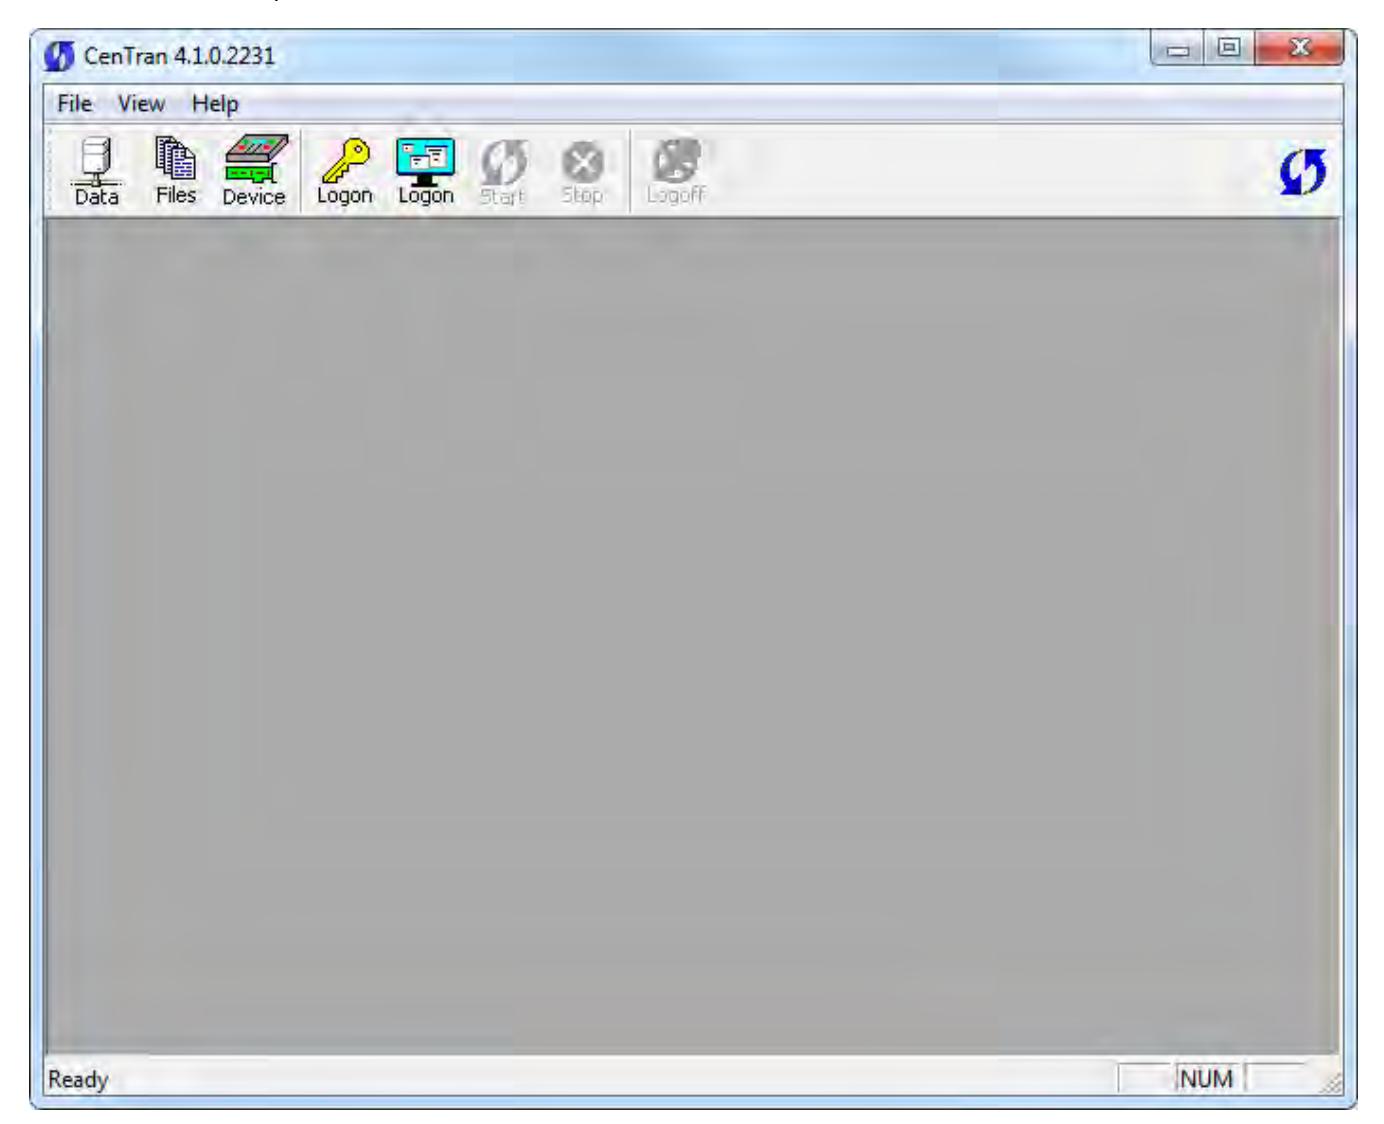
Menu Bar
The Menu Bar displays the available menu options. Some of these options are also available from the Toolbar. The menus available from the CenTran 4 Menu Bar are listed below. Some of these menus are not available until a user has logged on to the CenTran 4 system.
File
Access database settings, define file locations and attributes, logon/logoff, start/stop transaction monitoring, create new report windows, print and save reports, and exit the CenTran software.
View
Hide or Activate the Toolbar and Status Bar.
Help
Display the CenTran basic program information, version number and copyright, access the CenTran Reference Manual, or open the Kaba Mas Technical Support web page.
You can select an option on the Menu Bar by either positioning the mouse pointer on the option name and clicking the left mouse button one time or by using the shortcut keys underlined on the option's label. For example, for the option label Files, you can select the option by pressing the Alt and F keys at the same time (Alt + F).
Tool Bar

The Tool Bar is located directly below the menu bar and displays the icons for accessing various CenTran functions. You can select an icon on the toolbar by positioning the mouse pointer on the icon and clicking the left mouse button one time. The available toolbar icons are pictured and described below:
- Data Define the CenTran Database Settings
- Files Define the CenTran File Settings for File Locations and Names of Files
- Device Select the attached security device (PCIO card or Cencon USB Key Box)
- Logon Logon to the CenTran System using the key in the Cencon Key Box
- Logon Logon to the CenTran System using the current Windows logon user.
- Start Start Monitoring for Transactions and Show Report Data
- Stop Stop Monitoring for Transactions
- Logoff Logoff from the CenTran System
Status Bar
The Status Bar is located at the bottom of the CenTran window. The right side of this bar displays the state of the Num Lock, Caps Lock, and Scroll Lock keys. The left side displays the current status (i.e. "Ready"). If the mouse is over one of the Tool Bar icons, the left side displays a brief description of its function.
Note: If a Menu Bar option or Toolbar icon is displayed in gray or is not displayed at all, the item is not available at that point in time.
Data
Before logging on to the CenTran System, you must identify the database connection. This will allow connection to the proper Cencon database.
1. Select the Data icon from the Toolbar.
The CenTran Database Settings screen is displayed starting with the Data Source tab.
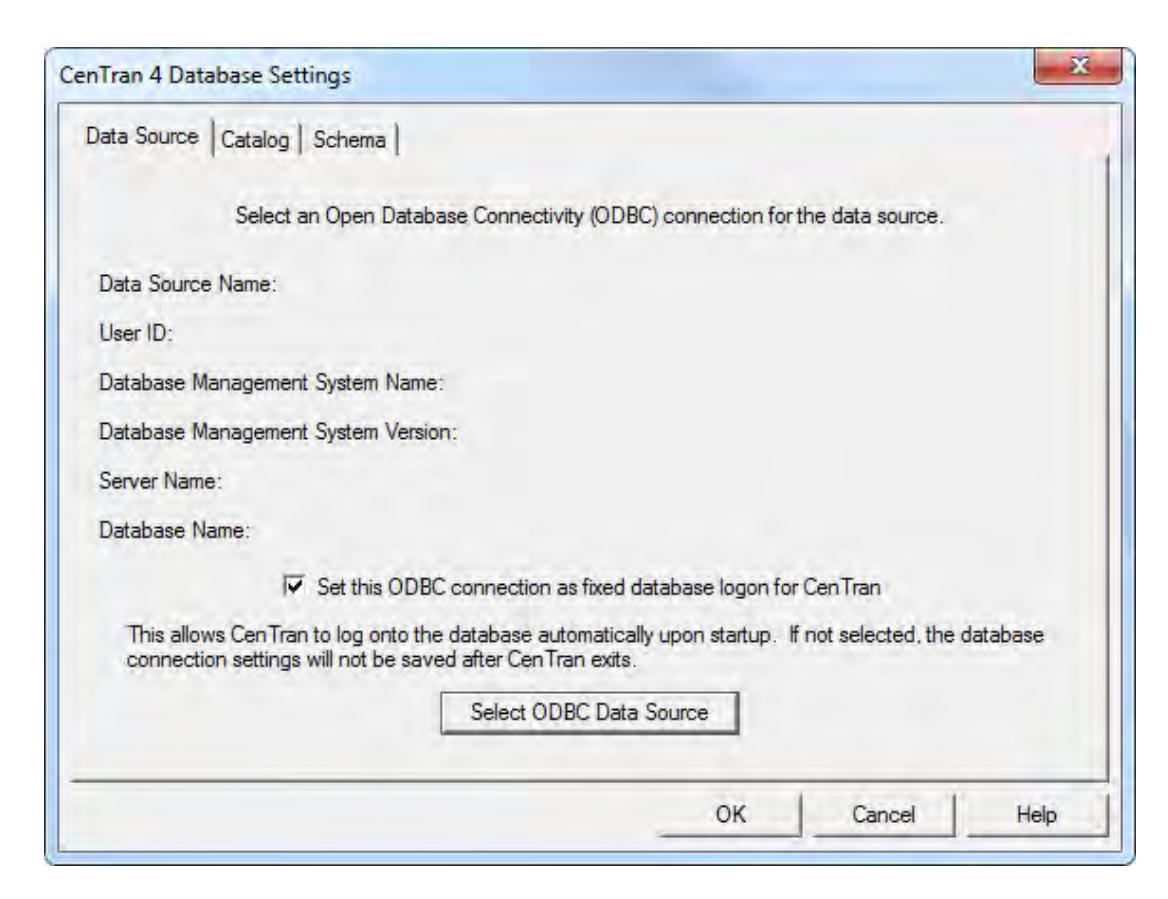
An ODBC connection is required for the database that CenTran is going to be using.
Note: This ODBC connection must be the same as defined for the Cencon 4 database.
2. Select the ODBC Data source to be used. This must be the same data source as is being used for the Cencon 4 system. A valid logon to the database will be required.
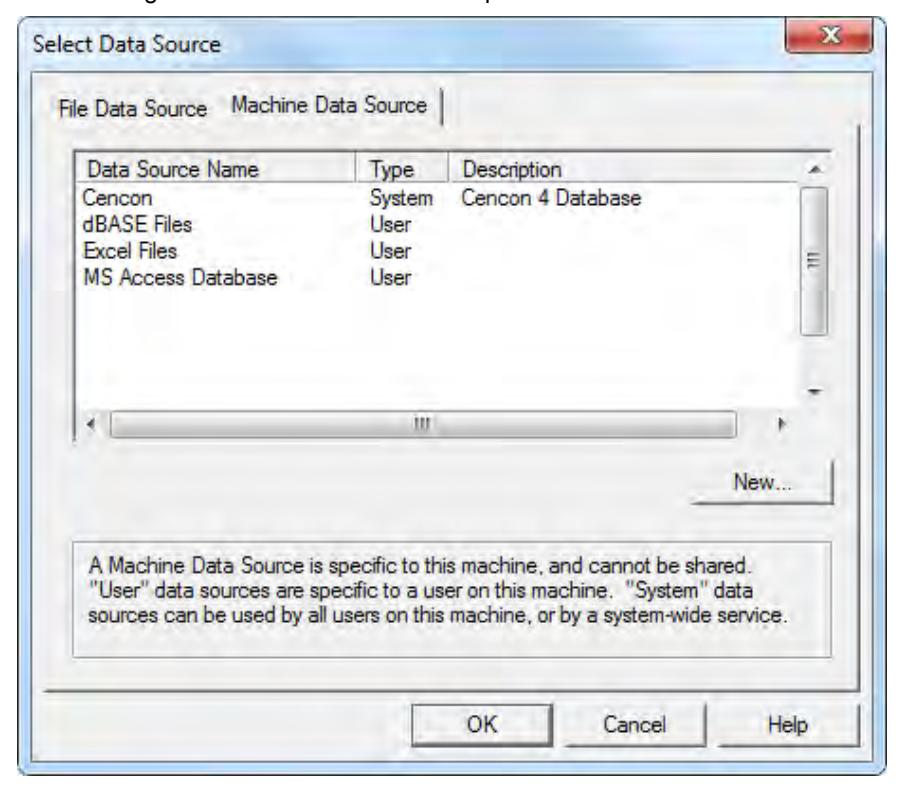
Note: The options displayed at this point will vary depending on the DBMS to which it will connect.
Files
To start the CenTran 4 System, you must identify the locations of the files that the CenTran program will be processing.
1. Select the Files icon from the Toolbar.
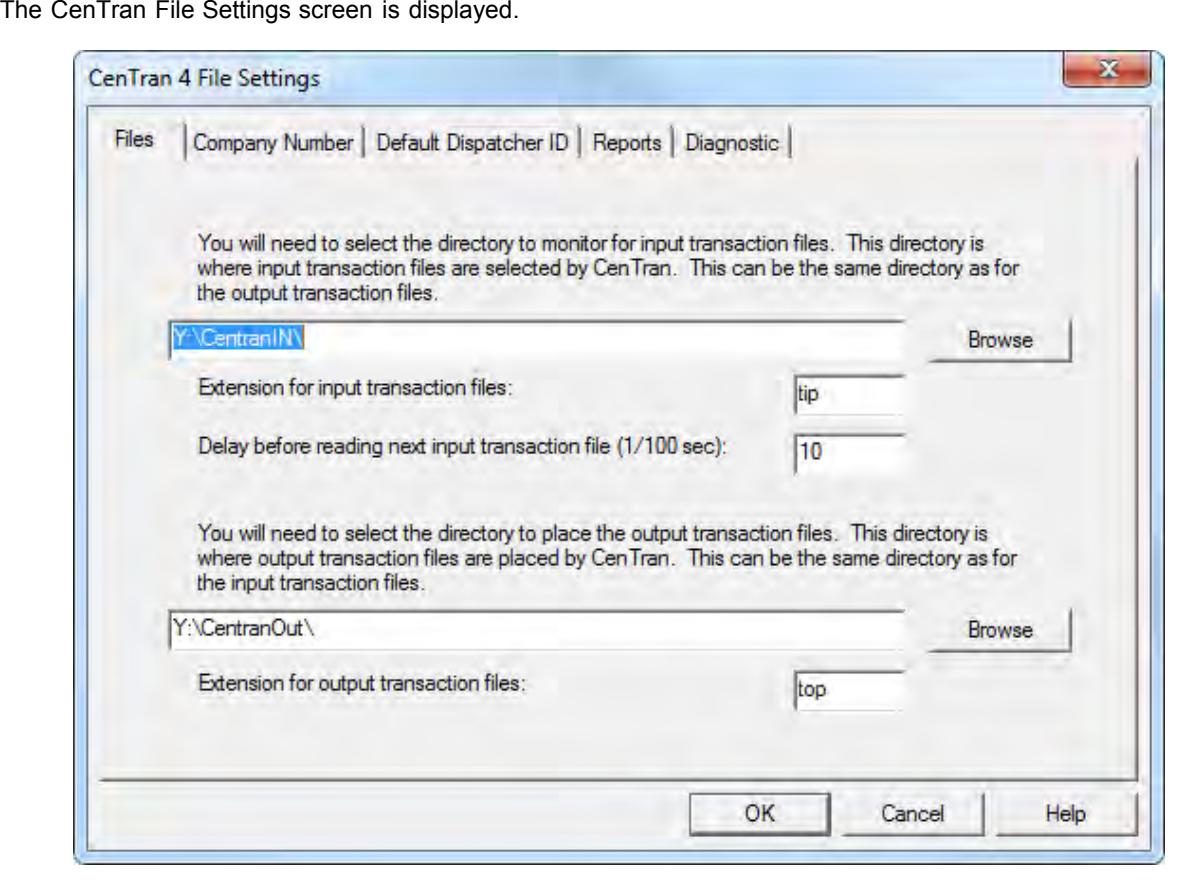
This pane of the database settings dialog allows you to define the names of the directories and files that CenTran monitors for processing transactions.
This option allows you to modify the files configuration for the transaction processor.
Note Centran 4.1 has been validated against the SuperSpeed RamDisk Plus software. This software allows you to use a ram disk as the file location used for transferring Centran transaction files. This improves performance and speed of transferring Centran transaction files, and eliminates hard drive wear from transferring Centran transaction files. This software is available at http://www.superspeed.com/desktop/ramdisk.php. SuperSpeed RamDisk is a Microsoft Certified software.
-
2. Enter the data for the following fields in the Files pane of the screen:
- Input Directory The input directory is the directory where CenTran reads transactions being sent to it. It looks in this directory for files representing lock transactions to be processed. The Browse button adjacent to this field displays a directory dialog for choosing the input directory.
- Input File Extension The input file extension defined here is the file extension CenTran looks for when attempting to find transaction input files in the input directory that has been identified. If an input file extension is not set, then the CenTran 4 program will attempt to read any file placed in the input directory.
Delay Before Reading Next Input Transaction - The delay before reading next input transaction file setting is intended to allow a delay after detecting a file and before reading it. It is possible for an error in reading the input file to occur if it has not been completely written to the input directory yet. This delay allows the write of the input file to complete before the CenTran program reads the file. This delay begins when a transaction file is detected in the input directory by CenTran.
- Output Directory The output directory is the directory where CenTran places the output files containing the results of processed transactions. This directory can be the same directory as the one used to contain input files. If the two directories are the same, then the files must have different extensions assigned. The Browse button adjacent to this field displays a directory dialog for choosing the output directory.
- Output File Extension The output file extension is the file extension placed by CenTran at the end of output file names. The file names will be the same as the input file names, except for the file extension. If an output file extension is set, then that extension will be placed at the end of output files produced by CenTran.
- 3. Click on the Company Number tab.
The Company Number screen is displayed.
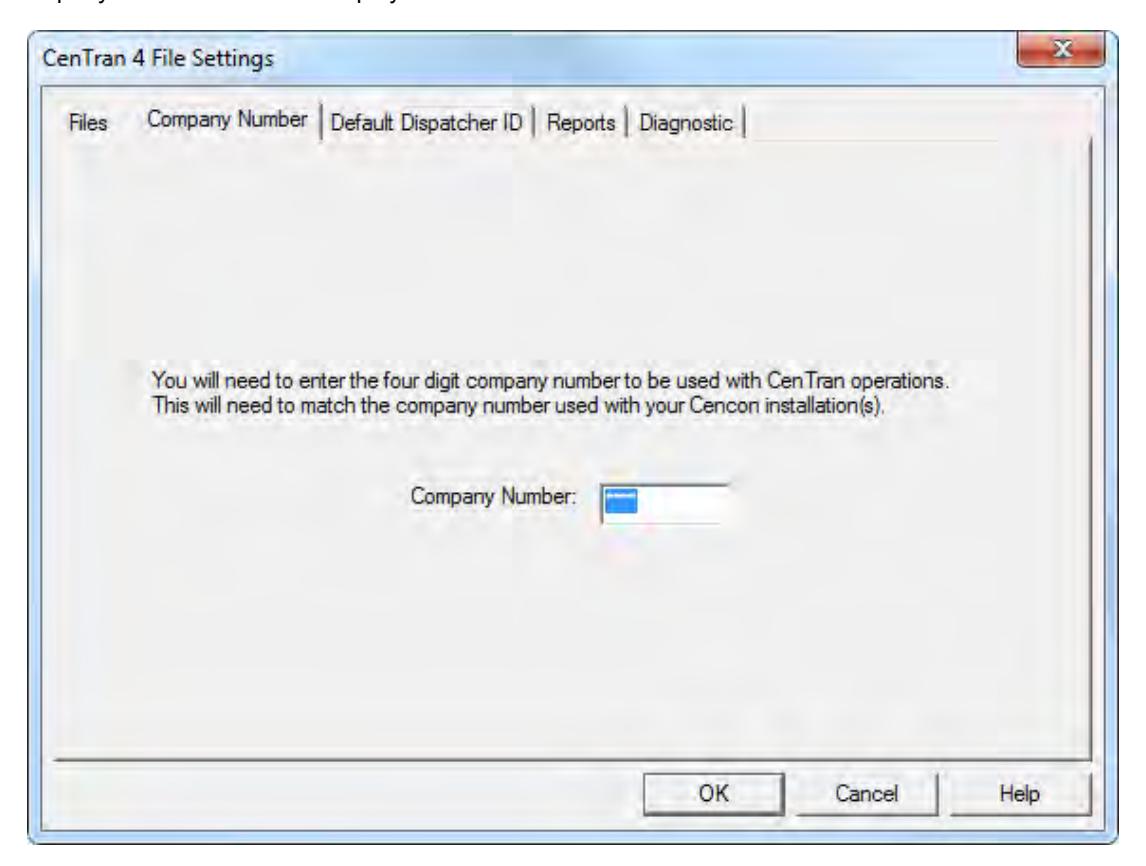
This pane of the file settings dialog allows you to enter the company number used by CenTran.
Company Number - The value entered for this field should be the four-digit number that is used to identify your company. The company number is a number selected for setting up locks with Cencon.
Caution: The company number entered for the CenTran system must be the same as the Company ID used with Cencon. If you are a branch of a larger company, you must enter the Company ID that has already been chosen for your company. If you are planning to activate locks from a remote PC, the Company ID must be the same on all systems involved in the process.
4. Click on the Default Dispatcher tab.
The Default Dispatcher pane of the screen is displayed.
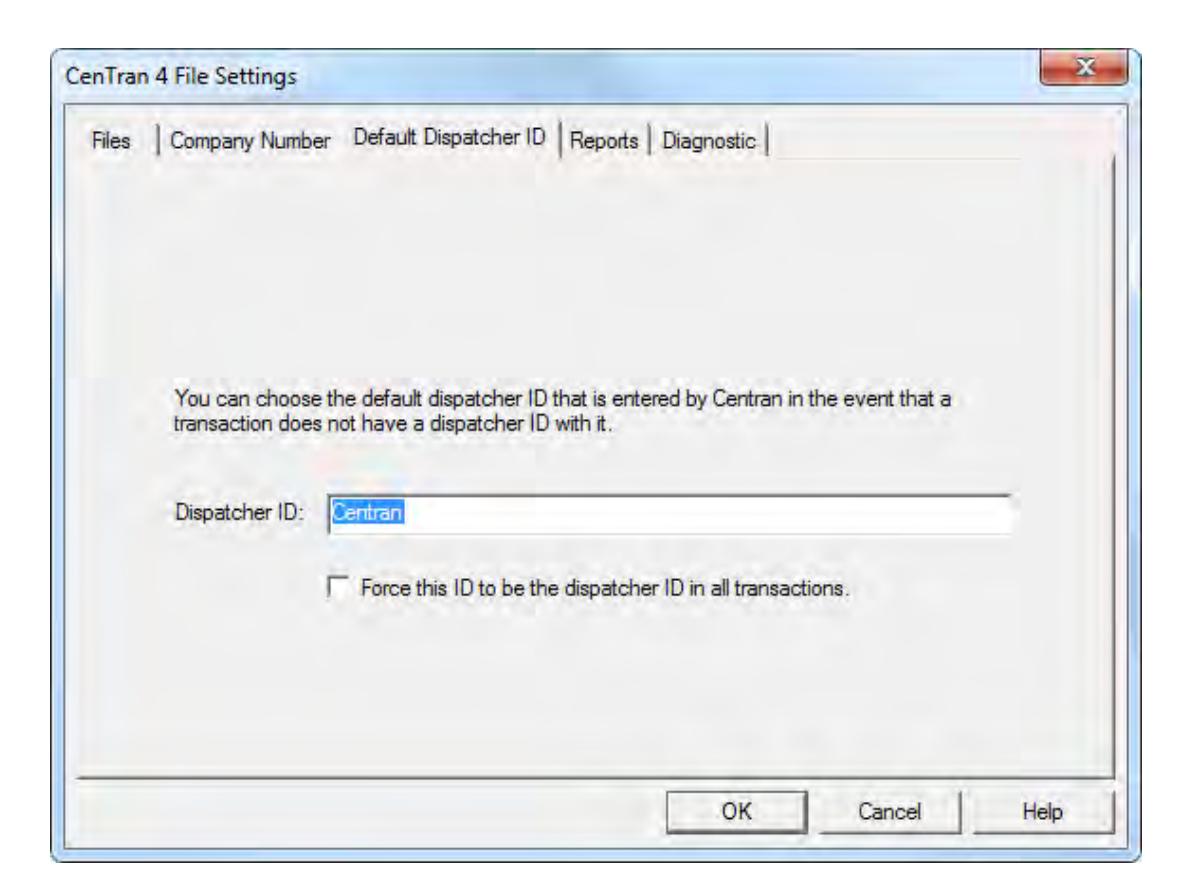
Enter the name of the dispatcher to be used by CenTran for the case in which a transaction does not specify a dispatcher.
5. Click on the Reports tab.
The Reports pane of the screen is displayed.
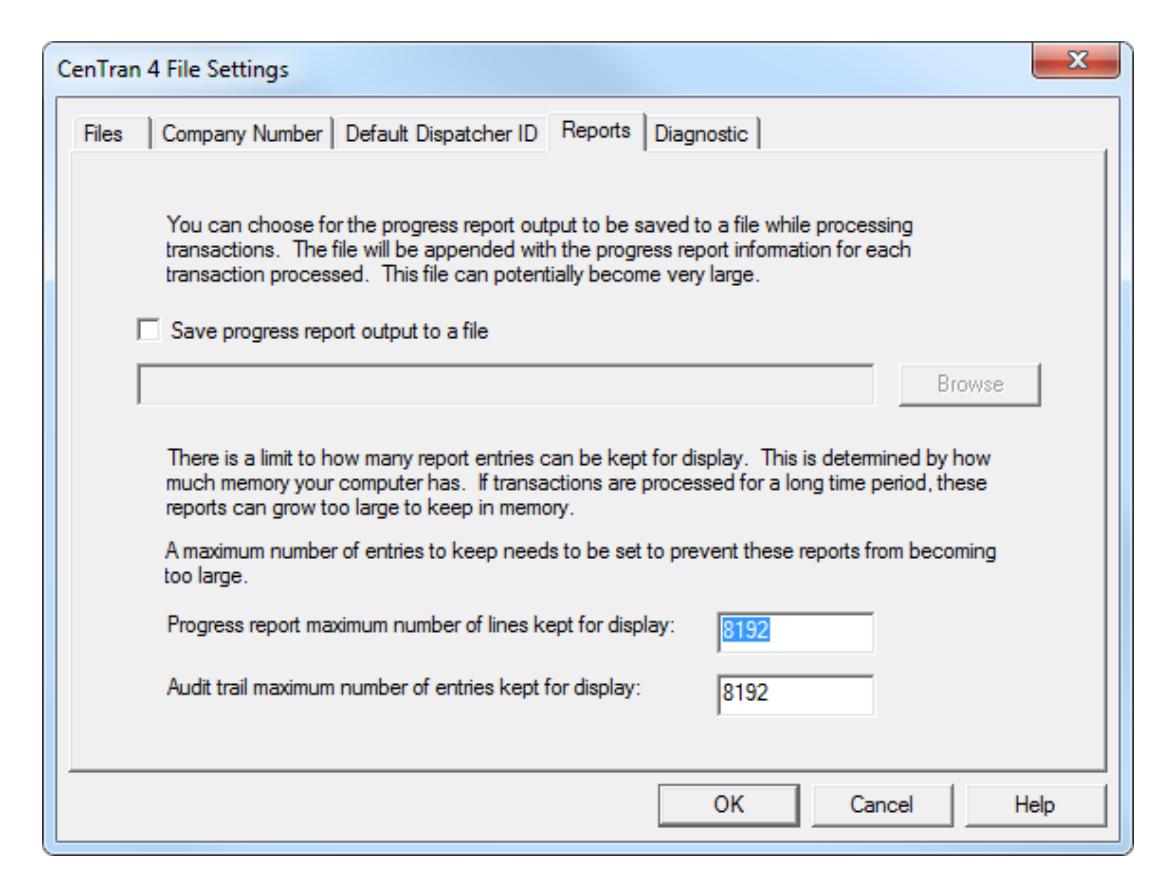
This pane of the file settings dialog allows you to configure reports generated by CenTran. CenTran has provision for two reports that cover the status of transaction processing. These are the CenTran Activity Report and the Progress Report.
Enter the data for the following fields in the Reports pane of the screen:
Save Progress Report Output to a File - The Progress Report displays details of CenTran processing transactions. Information about errors encountered while processing transactions will be displayed here. The option to save the Progress Report data to a file causes CenTran to continuously append the Progress Report output to a file. This allows a long term record of any errors, etc, encountered by CenTran while processing transactions. This file can become very large, but can be limited by the maximum number of lines value. (See the following input field.) The browse button adjacent to this field displays a dialog to select the name and directory for the Progress Report file.
Note: There is a slight performance impact on CenTran when the option to save the Progress Report to a file is selected.
- Progress Report Maximum Number of Lines The Progress Report maximum number of lines kept for display setting limits the size of this report. If the number of lines grows beyond this value, the oldest lines are deleted to make room for new ones. This report can be printed or saved as text.
- Audit Trail Maximum Number of Entries The CenTran Activity Report displays the activity log events that have been created by CenTran processing transactions. Only the events created by the current CenTran installation will be recorded. It does not reflect the entire contents of the activity log stored on the database, or events created by other running installations of Cencon. The audit trail maximum number of entries kept for display setting limits the size of this report. If the number of entries grows beyond this value, the oldest entries are deleted to make room for new ones. This report can be printed or saved as text, tab delimited, or comma delimited.
- 6. Click on the Diagnostic tab.
The Diagnostic pane of the screen is displayed.
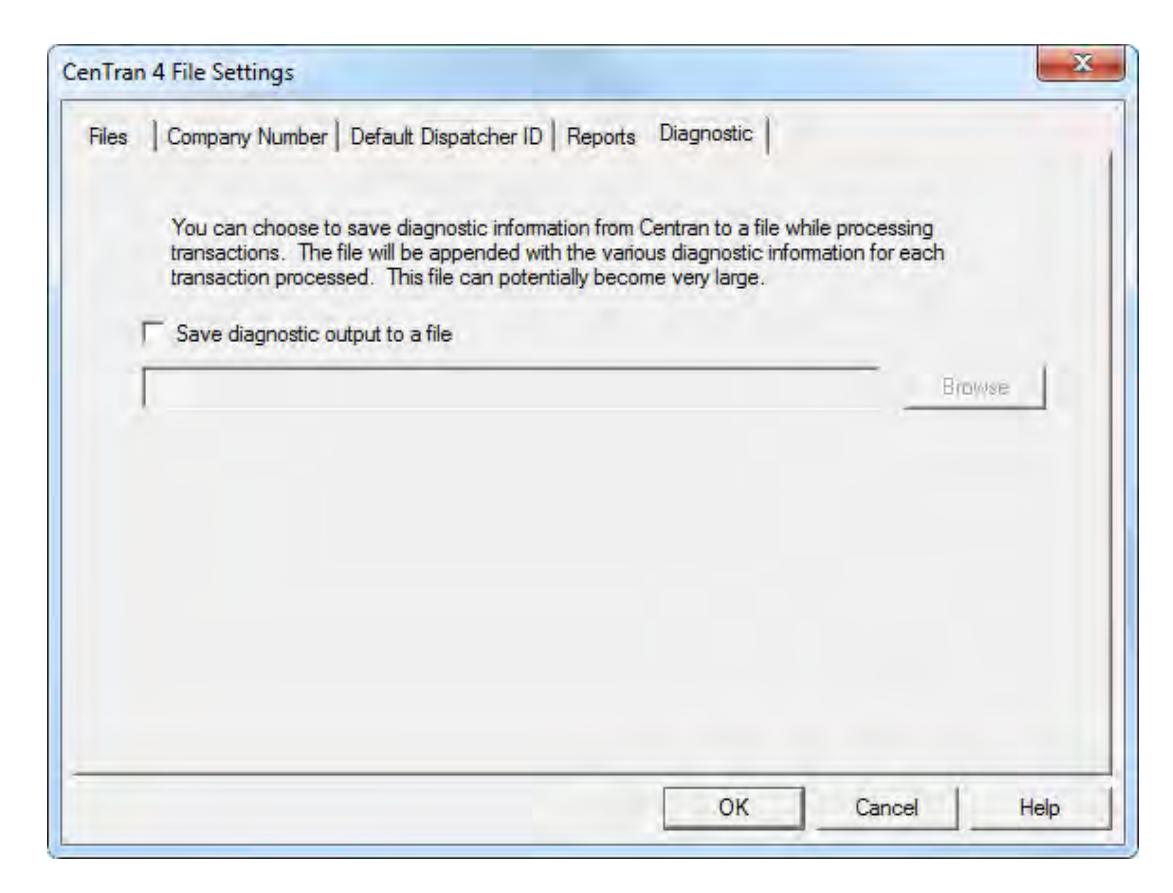
This pane of the file settings dialog allows you to configure a diagnostics output file. This file records each transaction that CenTran processes as well the time and system memory status. This option should be turned off unless you are needing to troubleshoot CenTran, as it slows down performance.
Device
To use the Cencon USB Key Box, you first have to set up your system to be able to access it. Verify that the Cencon USB Key Box is plugged into any USB port on your computer and select Device to display the Device Configuration Settings screen:
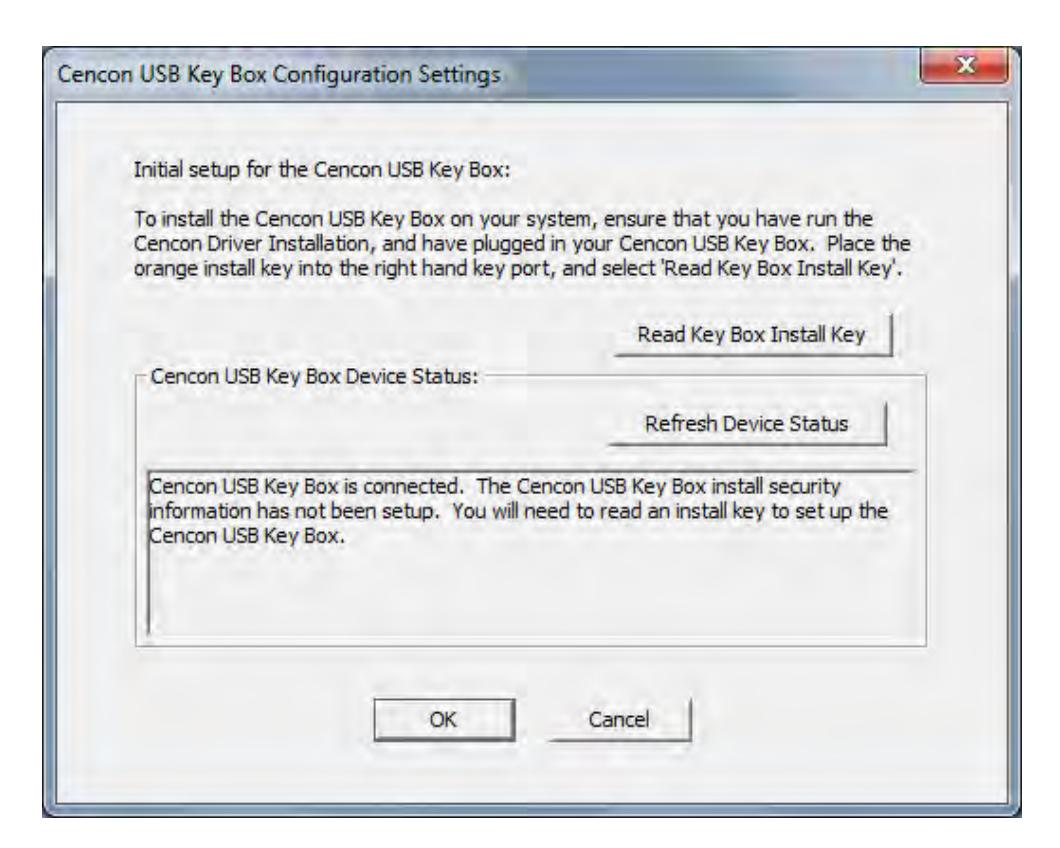
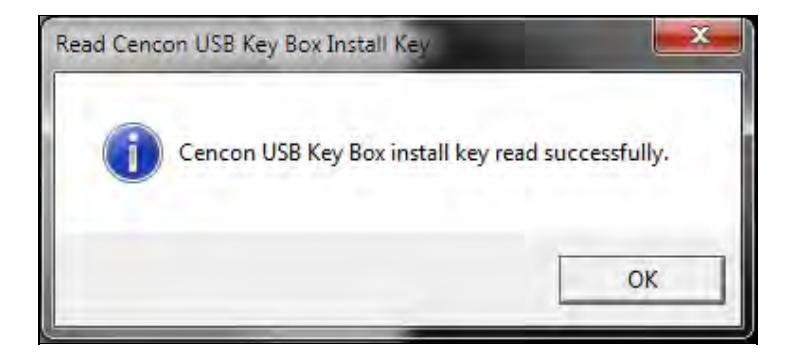
If the message area indicates that the install security information has not been set up (as in the example above), insert the Orange Install Key into the right Key Box reader position (the green LED on the right should be blinking) and press the Read Key Box Install Key button. The following message indicates successful initialization:
Important Note:
Remove the Key Box Install Key and store it in a safe place. You must have this key and the information on the attached key tag if you ever need to reinstall the Cencon Key Box or order replacement parts. You have a limited number of installs associated with the Key Box Install Key.
CenTran Version 4.1 Getting Started Guide
Logon to the CenTran Software
Note: To start the CenTran System, a valid user authorized for dispatching capabilities must exist in the Cencon 4.1 system.
CenTran allows a user to logon using either an authorized Special Supervisor, Supervisor, or Dispatcher key. Additionally, a user may logon using their authorized Windows logon password.
Note Key Box : Place the logon key in the left key position. PCIO Key reader: Place your logon key only in position 0, 1 or 2.
To logon using a key, select logon icon with the image of the key. If the key is recognized as valid, enter the password as requested:
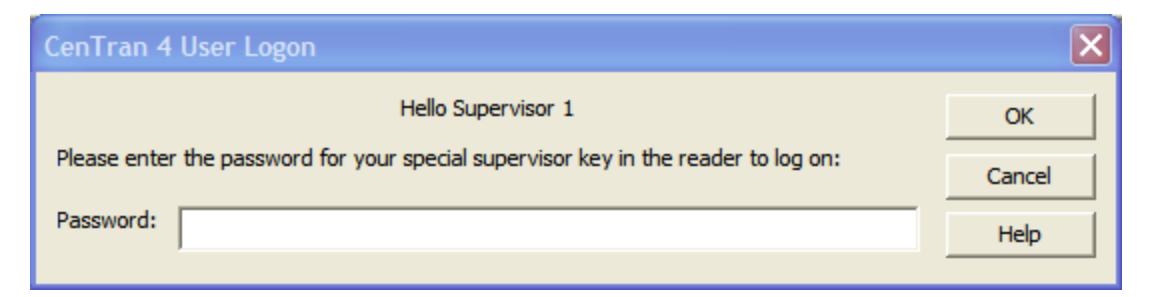
Remember that this field is case sensitive and recognizes spaces as well as characters.
Note
You cannot logon to the system using a nickname, or a user ID. You must use the password specified for the key in the key reader. The key in the key reader identifies the user trying to log onto the CenTran System.
Hint
If a window is displayed indicating that the User ID doesn't pass authority check, first check to make sure that the appropriate keys are in the reader and that the reader is properly connected.
To logon using a Windows Logon password, select the logon icon with the image of the computer screen. Note that the Windows user name must already be set up as a user within Cencon (in the same manner as a user key).
After a successful logon, the available icons for the CenTran Main Menu will be refreshed, showing the available icons and menus.
© 1996-2011 Kaba Mas LLC Document Number 2076.039 Rev. D1 07/11 CenTran 4 Getting Started Guide
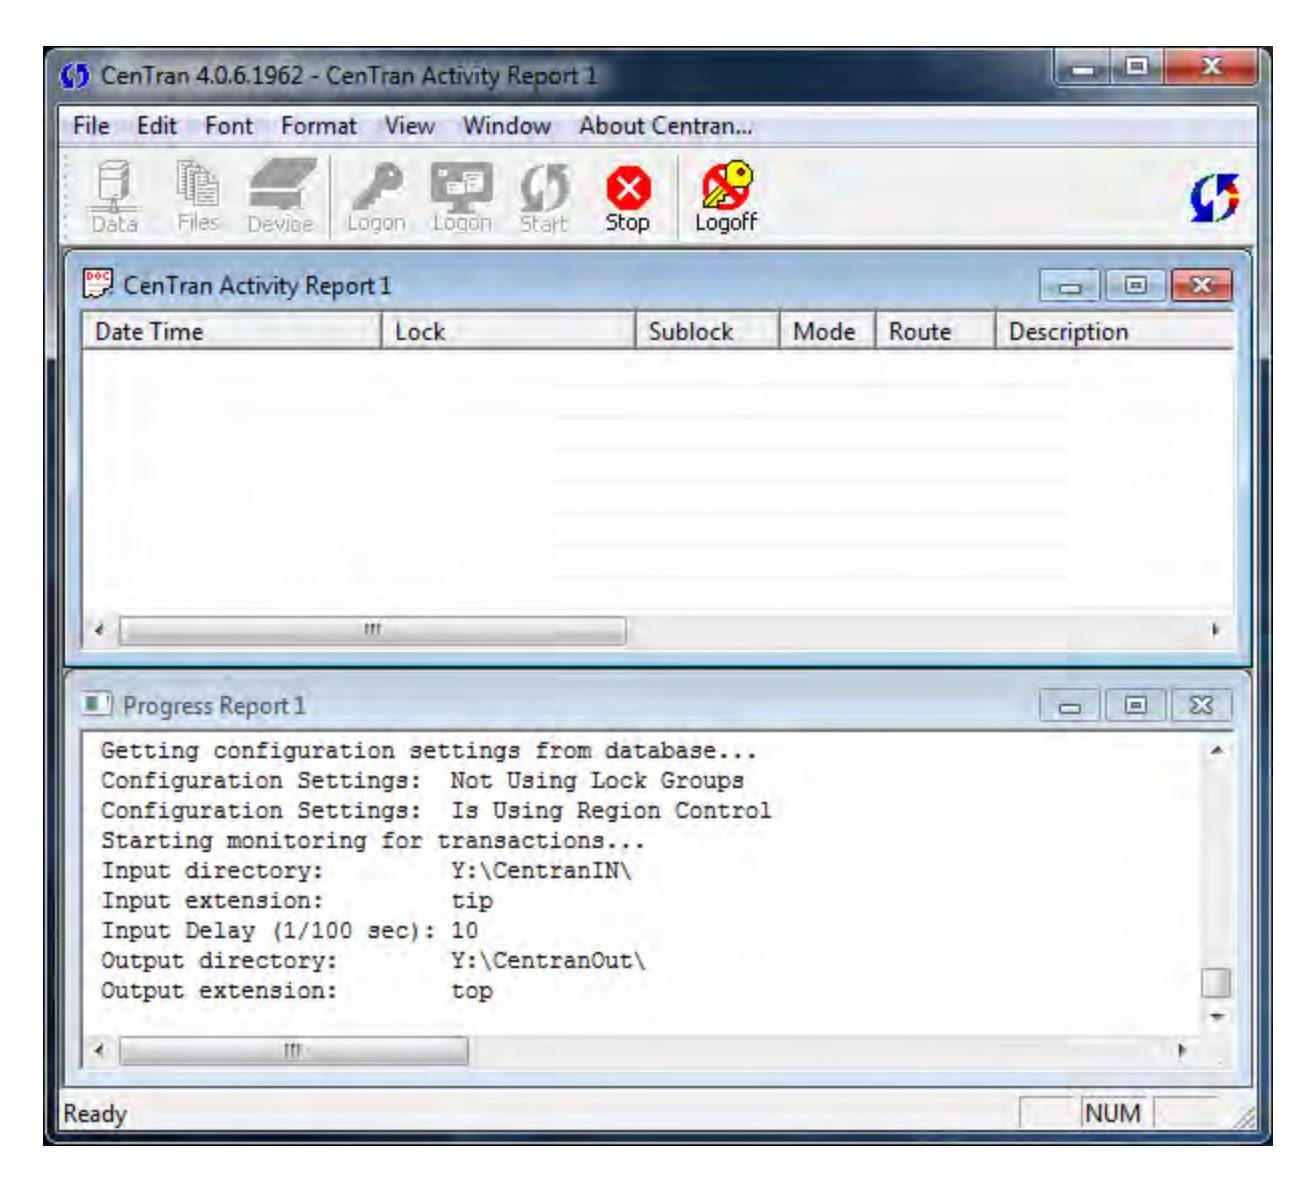
CenTran Version 4 Getting Started Guide Start Monitoring for Transactions
This option allows you to initiate monitoring for Input Transaction files.
Select the Start icon from the tool bar.
The CenTran Main Menu screen is refreshed and opens two new windows, one for the CenTran Activity Report and one for the Progress Report.
The "Monitoring Transactions" icon on the far right of the Toolbar space also changes to a flashing icon, indicating that the program is now monitoring for transactions.
Note
When a valid user is logged on, an option can be set from the File Menu to enable the software to automatically start processing transactions as soon as it is loaded and stop processing when the software is exited. This serves as an alternative method to manually initiating and terminating the processing of transactions.
Additional Menu Bar options are also added at this time. These additional menus (Edit and Font) are added primarily for the user to work with the Report data.
Note that only transactions which change data are displayed. Other activities such as simple queries are not shown.
Report data can be saved to a file or files using the Save and Save As option from the File Menu at any time while transactions are being processed. The file extension for the Progress Report should be set to ".txt" while the file extension for the CenTran Activity Report can be any of the available types that are found in the dropdown menu for the "Save as type".
Helpful Hint
When saving Report Data to a file, you should use a file name that identifies that Report data as a unique set of data. For example, the Progress Report could be saved at the end of the day as the file name of "Progress Report Sept 30 2009.txt".
If you close the Report windows during this time, you can create new Report windows using the New Activity Report and New Progress Report options from the File Menu.
Stop Monitoring for Transactions
Click on the Stop icon.
The CenTran Main Menu screen is refreshed to show the available Toolbar icons Menu Bar options, and the "Monitoring Transactions" icon on the far right side of the Toolbar space will stop flashing.
Logoff of the CenTran 4 Software
Click on the Logoff icon.
The CenTran Main Menu screen is refreshed to show the available icons.
Helpful Hint
Note: You can Logoff of the system and leave the monitoring of the transactions active.
CenTran Version 4 Getting Started Guide
Prepare System for Daily Operation
Transaction exchange must be defined and an interface must be established between your dispatching system and the CenTran system before the CenTran system can become functional. The following activities must be performed to prepare the system for daily operation.
- 1. Define Transaction File Extensions and Location
- 2. Establish Program Interface for Transaction Exchange
Please refer to the CenTran for Windows XML Programming Guide, found on the CenTran Software Installation CD, for detailed instruction on transaction definition.
To view the programming guide, Select Start -> All Programs -> CenTran 4->XML Programming Guide
Remove Previous CenTran for Windows Software
If you have a previous Windows based version of the CenTran software installed, you should at some point remove the old version of the software. It is recommended that you ensure the upgrade to the new CenTran software completed successfully and that all old data has been brought successfully into the new database before you remove the old software.
Helpful Hint
Removal of the previously installed program will not affect any currently existing data files.
Complete the following steps to remove the previous CenTran for Windows program:
- 1. Select the Start icon in the lower left of the Windows screen.
- 2. Next select the Control Panel icon. The Control Panel Window will be displayed.
- 3. Click on the Add/Remove Programs icon. The Add/Remove Programs Properties window will be displayed.
- 4. Select the CenTran software in the Install/Uninstall software list and click on the Remove button.
- 5. The Windows Installer window will appear with a prompt to make sure that you want to remove the CenTran program.
- 6. Click on Yes to remove the program. The Maintenance Complete screen will be displayed to indicate the progress of the remove operation.
- 7. The CenTran software program will be removed from the list.
- 8. Select Close from the File menu list to close the Control Panel window.