CX-93M-12LS Manual
Open the original PDF document
View PDF

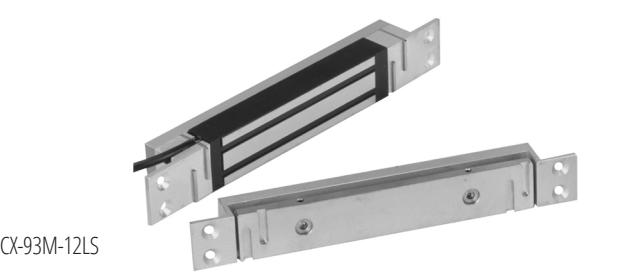
CX-93M-12LS Electromagnetic Shear Lock
INSTALLATION INSTRUCTIONS
THIS PACKAGE INCLUDES
#8 x 8" Self Tapping Screws M5 x 8 Flatwashers
SPECIFICATIONS
|
Shear Holding
Force |
Up to 1200lbs. (545kg) | |
|---|---|---|
| Voltage Input | 12VDC / 24VDC | |
| Current Draw | 310mA / 180mA | |
|
Lock and
Armature Gap |
5/64" (2mm) | |
|
Operating
Temperature |
-4°F to 122°F
(-20°C to +50°C) |
|
|
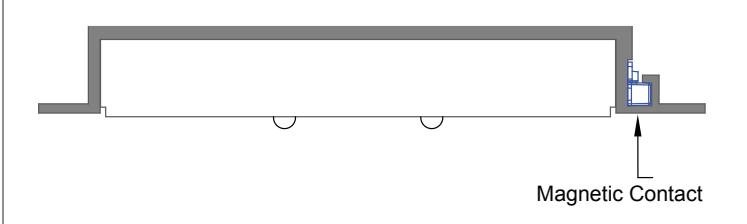
Door Monitor
Contact Rating |
0.5A @ 28V DC | |
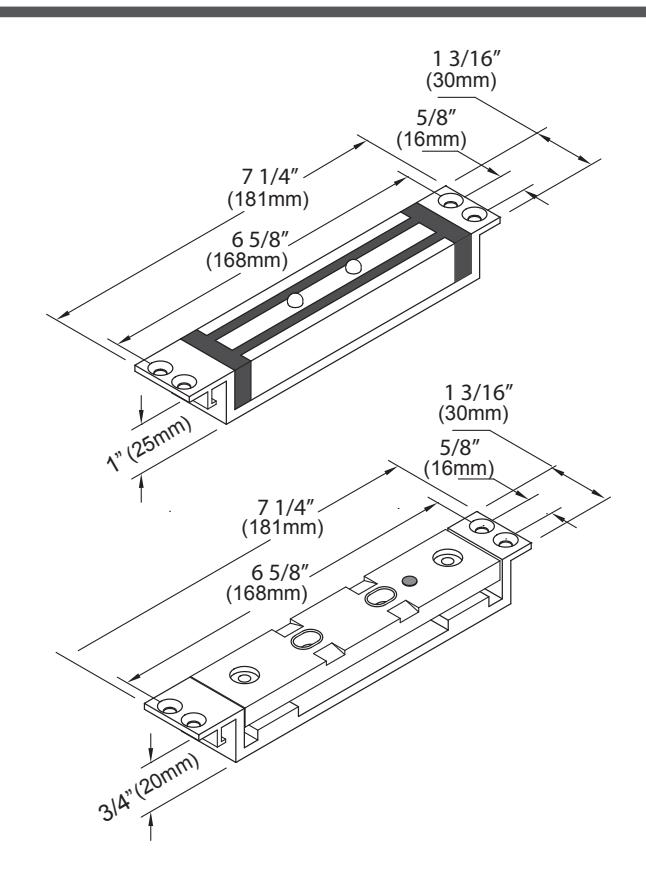
| Lock Dimensions |
7 1/4" L x 1 3/16" W x 1" D
(181mm x 30mm x 25mm) |
|
|
Armature
Dimensions |
7 1/4" L x 1 3/16" W x 3/4" D
(181mm x 30mm x 20mm) |
|
IMPORTANT NOTICE:
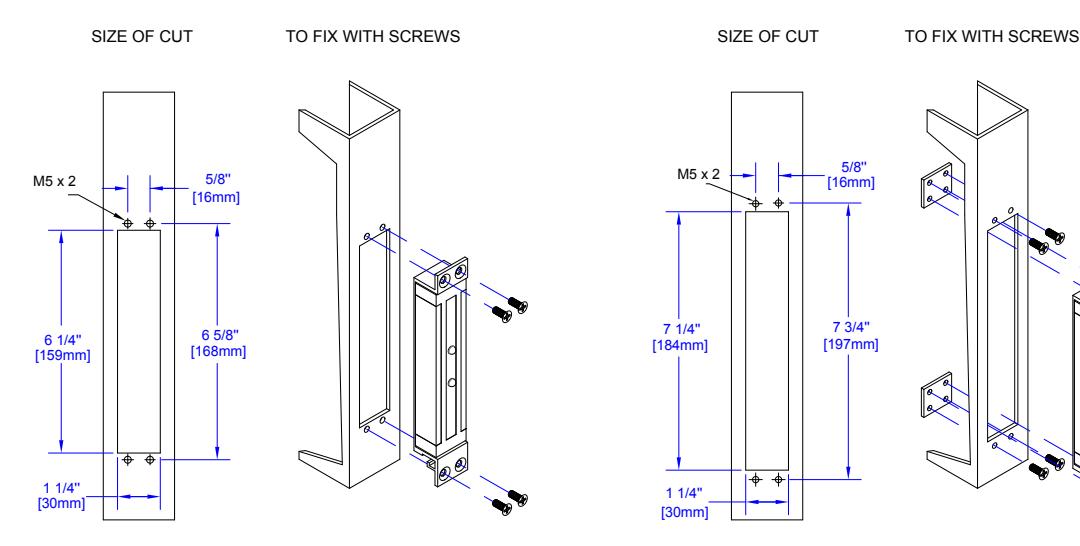
- 1. Open pocket hole for armature plate in the door frame using the sticker template provided.
- 2. Attach the armature plate to the door with the hardware provided to right.
- 3. With the door closed, mark the door frame at the edge of the armature in order to properly align the electromagnet to the armature.
- 4. Mortise a hole in the door frame for the lock (7 1/4"L x 1 3/8"W x 1"D)
BASIC INSTALLATION CONCEPT & ACCESSORIES
Electromagnetic Shear Lock Diagram
Assembled Armature Plate Horizontal Diagram
GENERAL INSTALLATION STEPS AND MAINTAINANCE:
- 1. Mark a center line on the door header frame, where the assembled armature is to be installed.
- 2. Cut and drill according to the size of the mounting bracket.
- 3. Connect wiring according to wiring instruction shown below; then mount the shear lock and assembled armature onto the door frame and door.
- 4. For a wider gap between the door & door frame, use steel flat washers to adjust the gap between lock and armature.
- 5. Connect the power wires according to the instructions and test the system.
- 6. It is recommended to apply a light coat of silicon lubricant to the mating surfaces on a monthly basis to prevent rust.
Magnet Installation Drawing

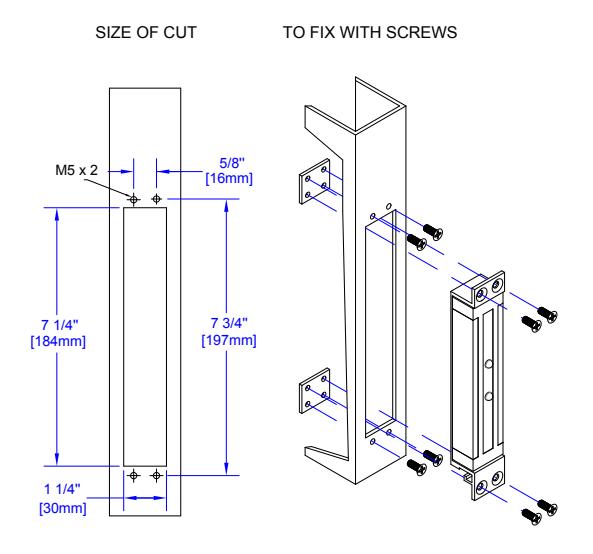
MAGNET INSTALLED ON DOOR FRAME WITH MOUNTING PLATES
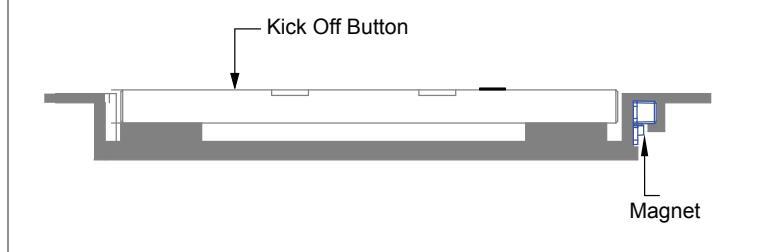
Armature Installation Drawing
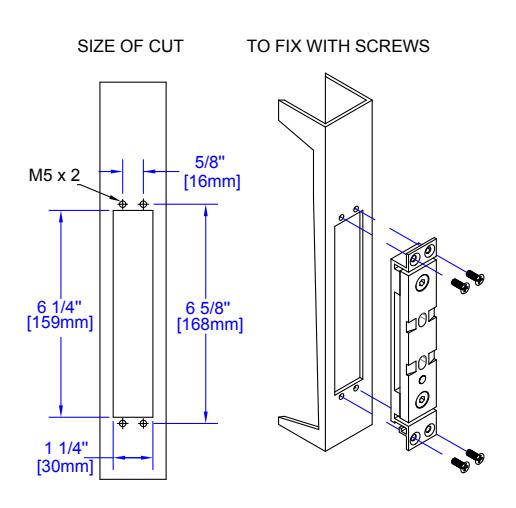
ARMATURE INSTALLED ON DOOR WITHOUT MOUNTING PLATES
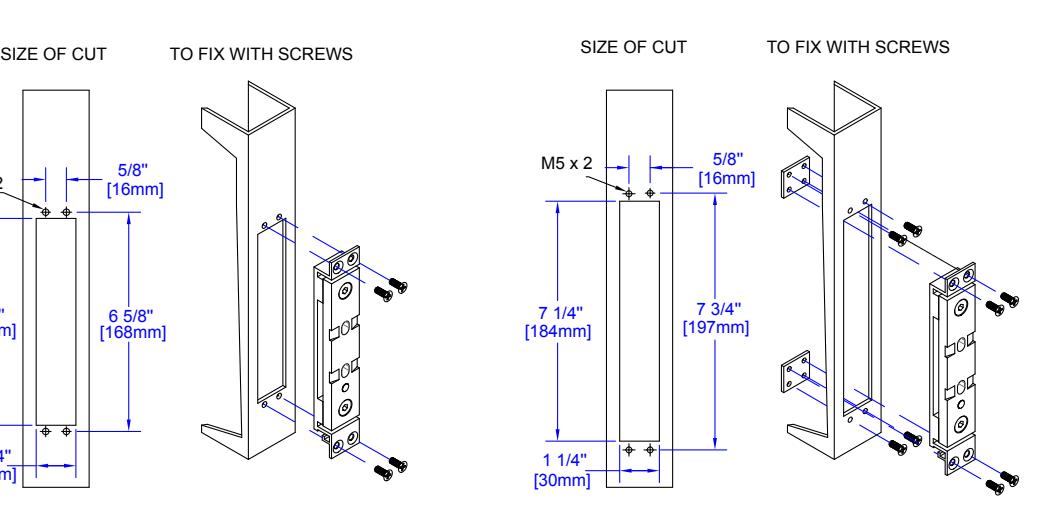
ARMATURE INSTALLED ON DOOR WITH MOUNTING PLATES
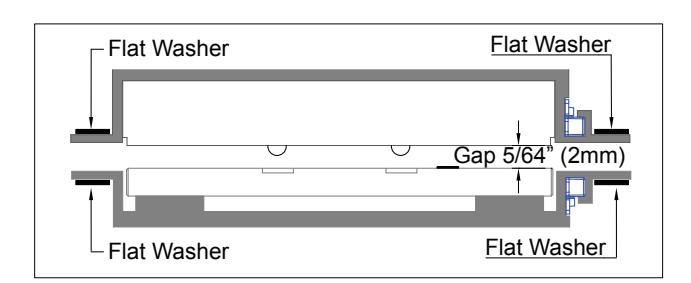
NOTE: Flat washers are only used to adjust armature magnet when the door frame has more than a 5/64" (2mm) gap.
| Time | SW1 | SW2 |
|---|---|---|
| 3 | ON | ON |
| 6 | ON | OFF |
| 9 | OFF | ON |
| 12 | OFF | OFF |

Set the jumper position according to the power input before turning ON the power.