CX-1015 Manual
Open the original PDF document
View PDF


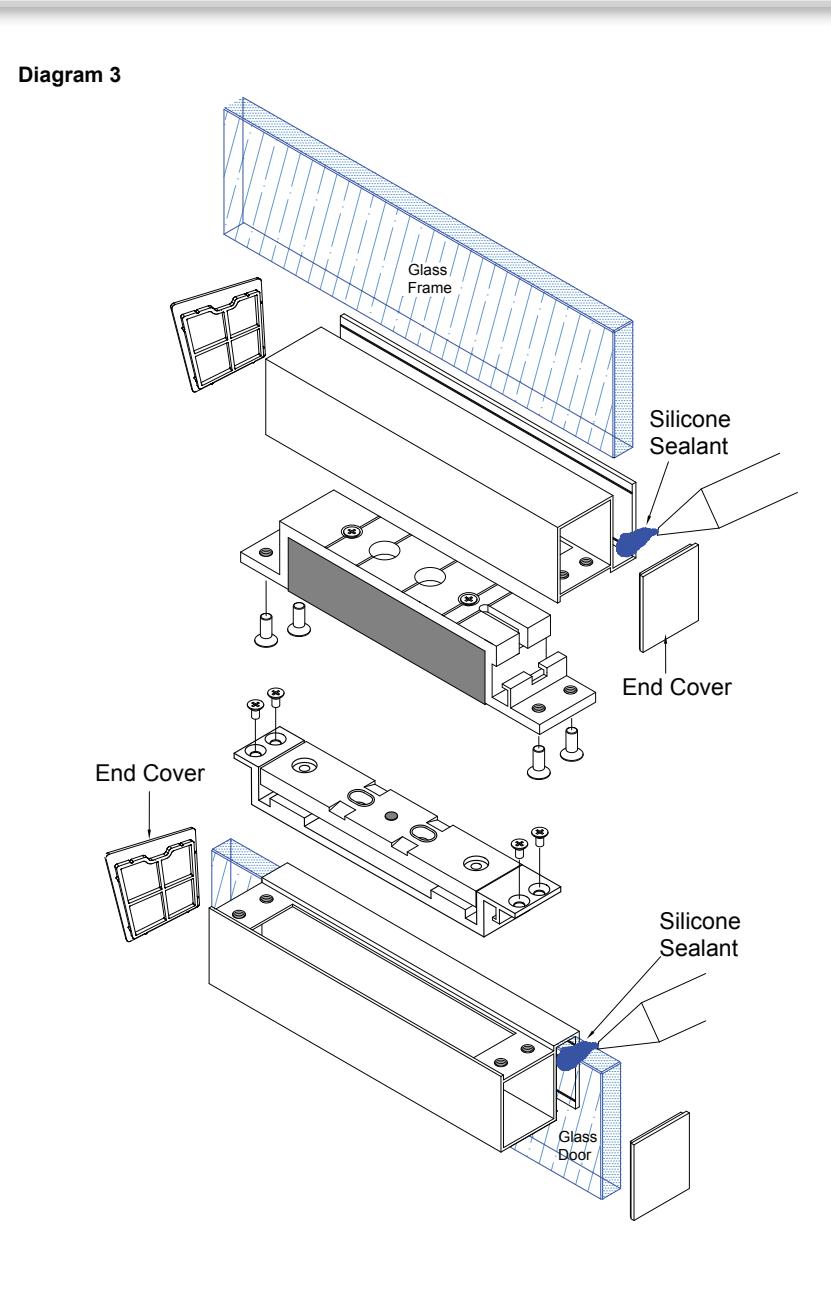
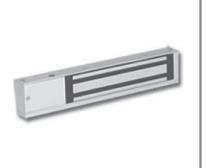
CX-1015 Shear Lock 1/2" (12.7mm) Glass Door Bracket
Installation Instructions
This Package Includes:
1 - Maglock bracket
4 - End Caps
1 - Armature bracket
8 - M5.8 x 12mm Phillips Screws
General Installation Method
General Installation Steps & Maintenance
- 1. Allocate an area on the door frame for the shear lock bracket to be installed.
- 2. For frameless glass door application:
- 2.1 Open a wire hole on the top or side of the CX-1015 bracket
-
3. Fixing in the End Cover.
- 3.1 Inject silicone sealant into the CX-1015 bracket as shown in diagram 3 before mounting on the glass frame. (* Clean all the overflow silicone from the bracket perimeter)
- 3.2 Temporarily tape the bracket, to prevent it from dropping, while the silicone fully cures to glass frame.
- 3.3 Install the shear lock onto the mounting bracket
-
4. Fixing bracket on the Glass door:
- 4.1 Make sure the bottom bracket is aligned with the top bracket of the shear lock location
- 4.2 Fixing in the End Cover
- 4.3 Inject silicone sealant into the CX-1015 bottom bracket as shown in diagram 3 before mounting on the glass door.
- 4.4 Install the Armature Plate on the bottom bracket which is attached to the glass door
- 4.5 Make sure the gap between the armature plate surface and shear lock is 5/64" (2mm) distance.

Frameless Glass Door Application

Specifications

CX-1015 Shear Lock 1/2" (12.7mm) Glass Door Bracket


Push Buttons Keypads Strikes Magnetic Locks Key Switches Relays & Timers Access Control

5502 Timberlea Blvd., Mississauga, ON Canada L4W 2T7
www.camdencontrols.com Toll Free: 1.877.226.3369

File: CX-1015 ManualR1.indd Revised: 06/02/2018 Part No.: 40-82B215