CD CDC Installation and Template
Open the original PDF document
View PDFFL1 FL1
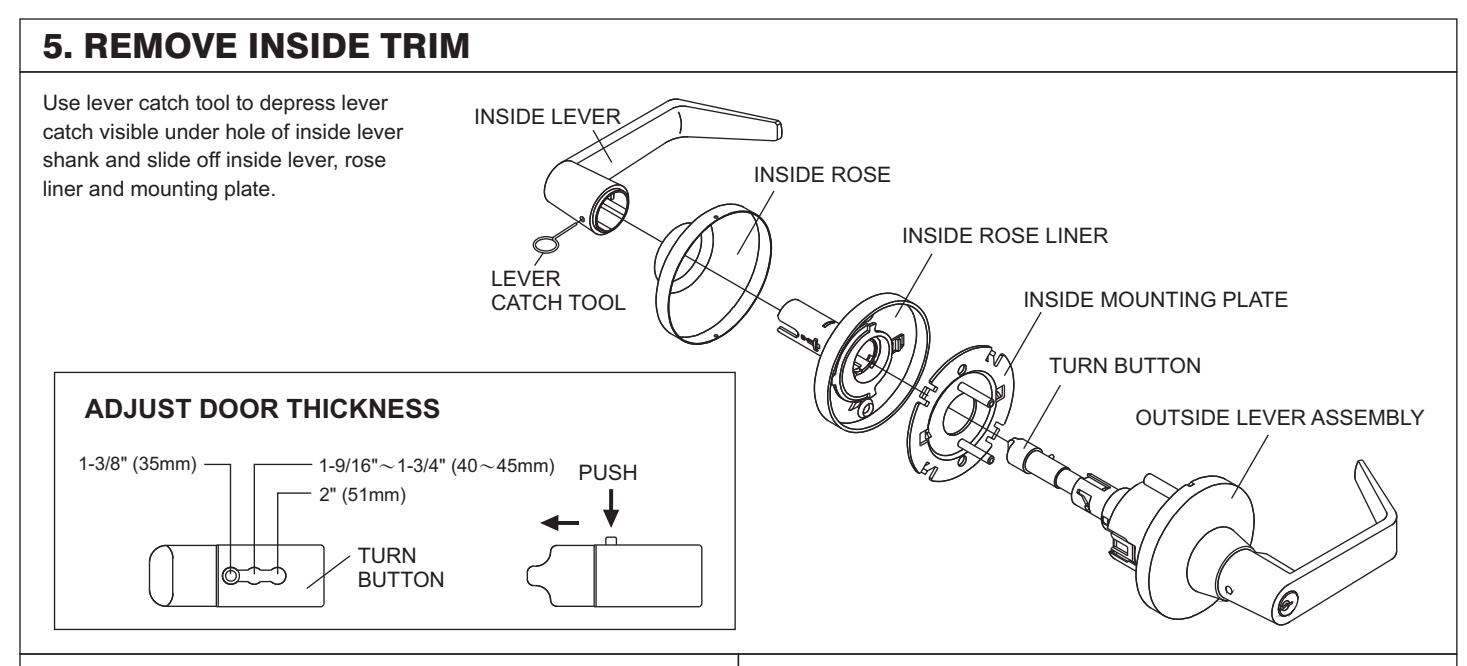
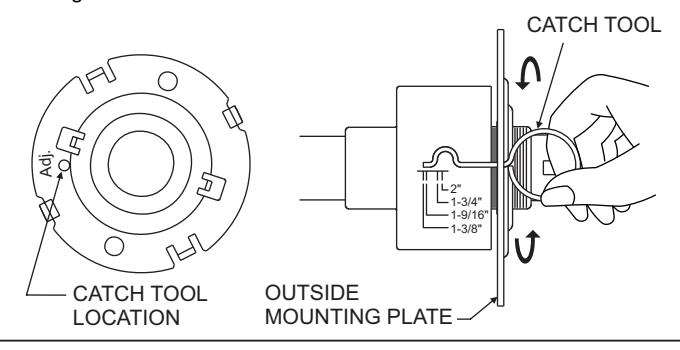
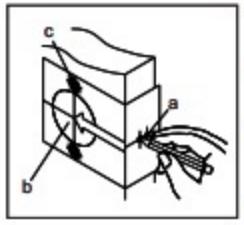
6. ADJUST DOOR THICKNESS
a. Remove outside mounting plate toward cylindrical case.
- b. Put the catch tool into the allocated position of outside mounting plate as the illustrating bellow.
- c. Rotate outside mounting plate to required door thickness by using a catch tool.
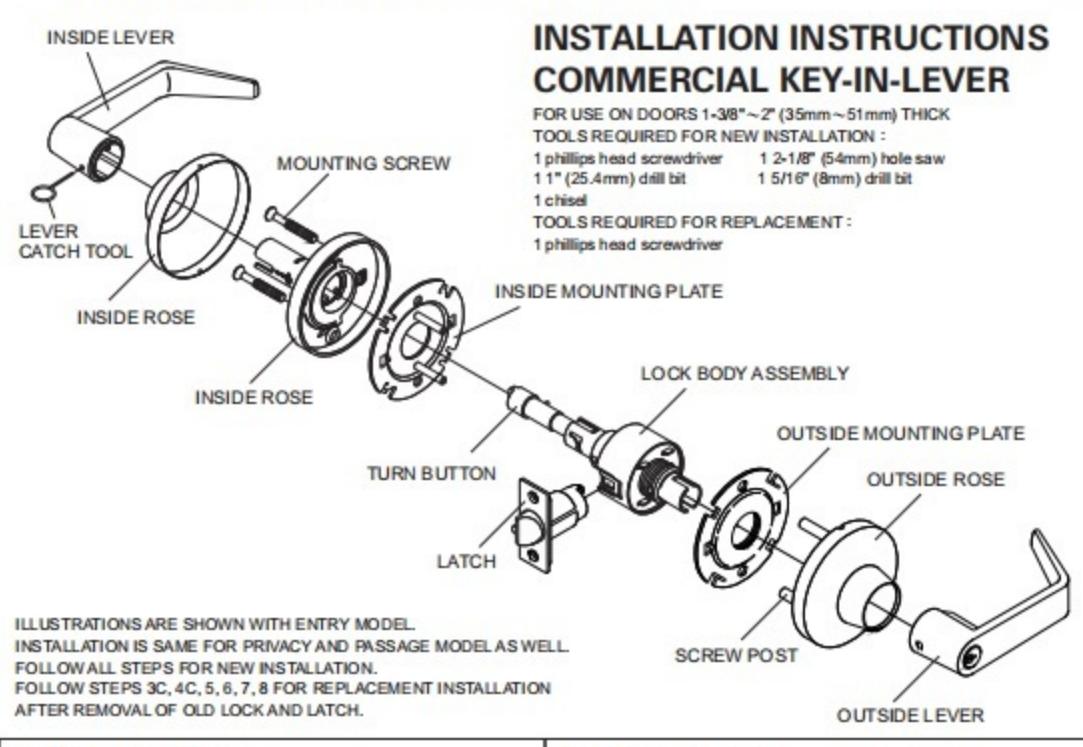
7. INSTALL OUTSIDE LEVER ASSEMBLY
Install outside lever assembly on the door. Make sure tail of latch is engaging with retractor correctly as illustrated.
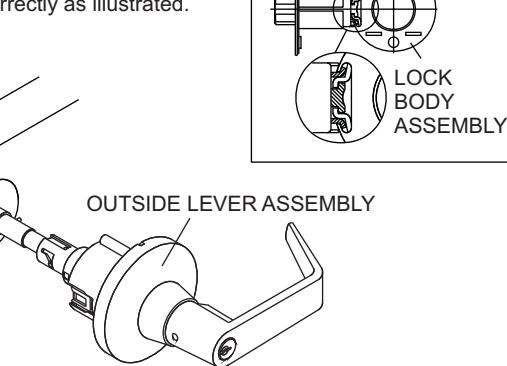
LATCH
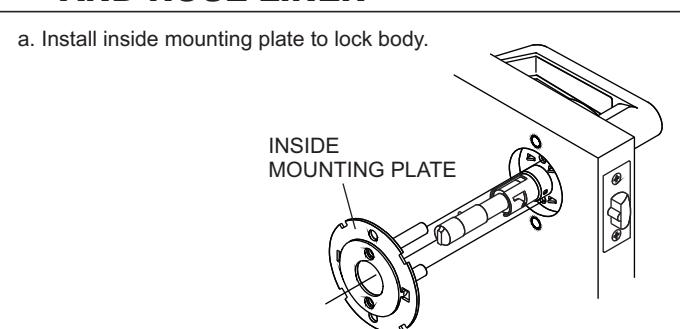
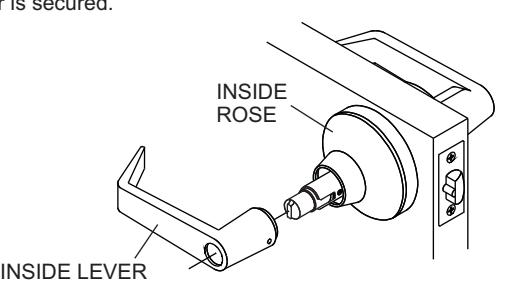
8. INSTALL INSIDE MOUNTING PLATE 9. INSTALL INSIDE ROSE AND LEVER AND ROSE LINER
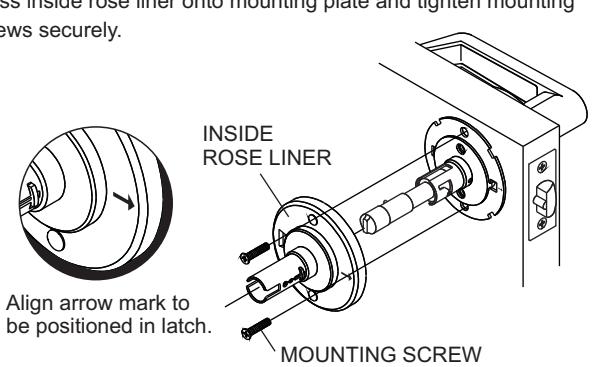
b. Press inside rose liner onto mounting plate and tighten mounting screws securely.
a. Be sure to fit rose in recess of rose liner.
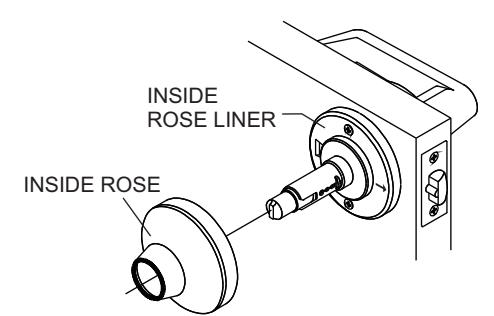
b. Depress lever catch with tool provided. Push inside lever on completely until catch engages in lever. Confirm lever is secured.
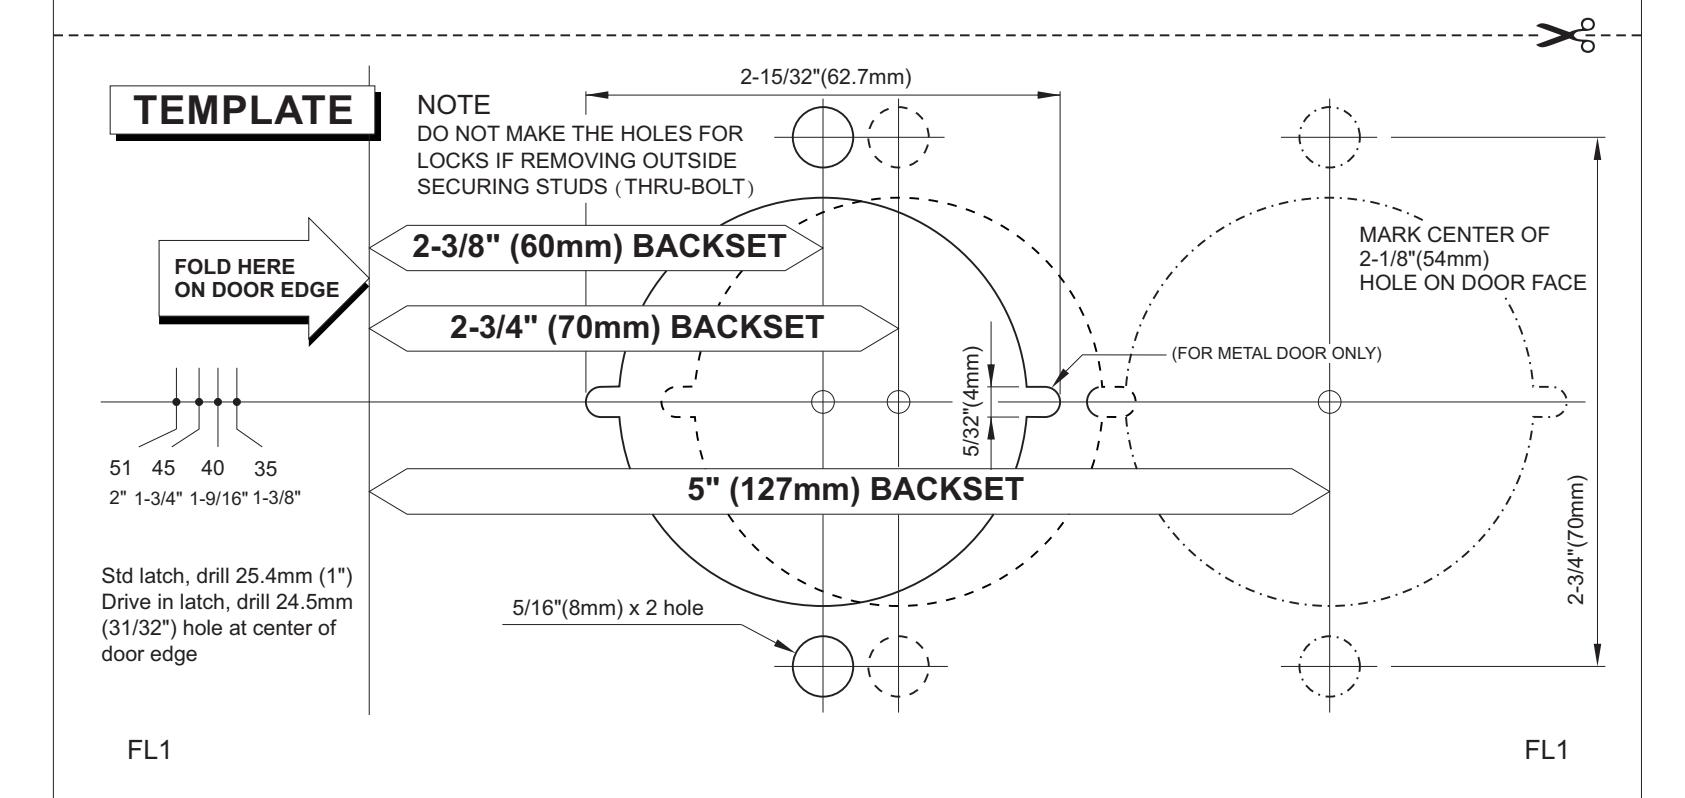
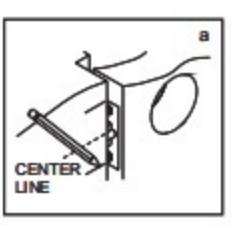
1. MARK DOOR
- a. Start 38" from floor and mark center of door edge.
- b. Select backset 2-3/8" or 2-3/4" and mark hole center on door face. NOTE ··BACKSET ON DOOR FACE MUST BE SAME AS
BACKSET OF YOUR LOCK.
c. Mark two holes for screw post.
2. DRILL HOLES
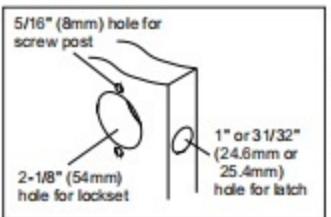
Drill holes as marked.
NOTE-DRILL 2-1/8" (54mm) HOLE FROM BOTH SIDES TO AVOID SPLITTING WOOD.
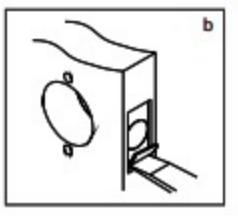
3. INSTALL LATCH
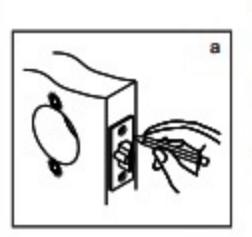
- Insert latch in hole and keep it parallel to door face. Mark outline and remove latch.
- b. Chisel 11/64" (4~4.3mm) deep or until faceplate flush with door edge.
- c. Insert latch and tighten screws. NOTE -- LATCHBOLT BEVEL MUST FACE TO CLOSING DIRECTION.
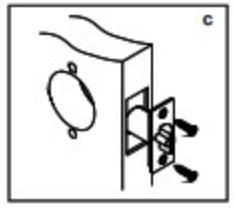
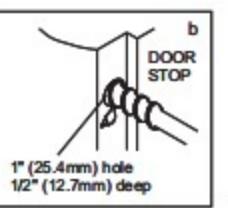
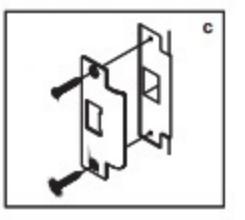
4. INSTALL STRIKE
- Close door to mark horizontal line of strike.
- b. Measure one half of door thickness from door stop to mark vertical center line of strike. Drill 1" (25.4mm) hole, 1/2" (12.7mm) deep at intersection of horizontal and vertical center lines.
- Cut out jamb 3/32" (2.4mm) deep or until strike flush with jamb. Tighten screws securely.