Auxiliary Fire Latch Installation Instructions – I-ED00863-Rev05
Open the original PDF document
View PDF

AUXILIARY FIRE LATCH INSTALLATION INSTRUCTIONS
For use with 4500 Less Bottom Rod (LBR) and Concealed Less Bottom Rod (CLB) Exit Devices I-ED00863
DEVICES COVERED IN THESE INSTRUCTIONS
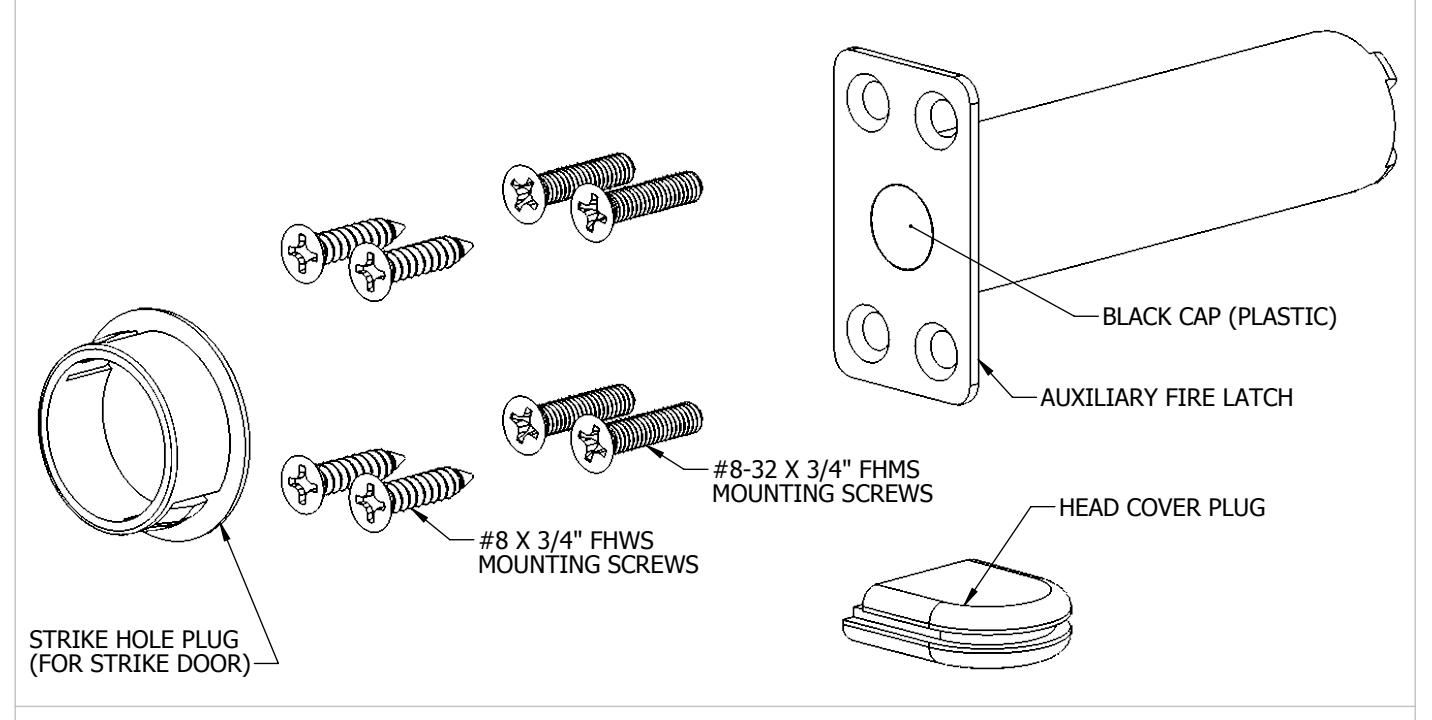
2-649-0166 Auxiliary Fire Latch
2-649-0167 4500/4600 LBR Head Cover Plug
IMPORTANT NOTES - READ BEFORE INSTALLING
- The auxiliary fire latch will keep the doors in alignment during a fire when the bolt extends from the auxiliary fire latch into the strike hole in the opposite door. For the auxiliary fire latch bolt to extend into the strike hole, the black cap visible on the face of the auxiliary fire latch and the strike hole plug must melt. Therefore, do not cover the door gap directly in front of the auxiliary fire latch with a door edge guard or any other similar type device.
- A double door application consists of two LBR devices and one auxiliary fire latch. The auxiliary fire latch is only for use with the Hager 4500 Series LBR and CLB devices. The 4500 Series LBR device comes with a standard top latch strike (4923F), which must be utilized to maintain fire listing. The 4500C Series CLB device comes with a standard top latch strike (4945F) which must be utilized to maintain fire listing.
- Refer to the 4500 SVR/LBR Installation Instructions (I-ED00792) or the 4500 CVR/LBR Installation Instructions (I-ED01285) for further details on the 4500 Series LBR devices.
TOOLS NEEDED
- Drill
- Drill Bits (7/8", 1", #29 ( 0.136"))
- Tap (#8-32)
- Tape Measure
- Screw Driver
- Chisel
REV: 5 REV DATE: 02/20/2019 Page 1 of 3

AUXILIARY FIRE LATCH INSTALLATION INSTRUCTIONS
For use with 4500 Less Bottom Rod (LBR) and Concealed Less Bottom Rod (CLB) Exit Devices I-ED00863
STEP 1: PREPARE AUXILIARY FIRE LATCH DOOR LEAF
- A. Mark horizontal centerline 6" [152mm] from the bottom of the door.
- B. Mark vertical centerline at center of door thickness.
- C. Drill a 7/8" [22mm] diameter by 3-7/16" [87mm] deep hole in the auxiliary fire latch door leaf.
- D. Insert auxiliary fire latch in hole keeping it parallel to the door face. Mark outline of latch face plate and remove latch.
- E. Chisel 1/16" [2mm] deep or until latch face plate is flush with door edge.
- F. Pre-drill screw holes with a 1/8" drill for #8 wood screws or drill and tap for #8-32 machine screws.
STEP 2: PREPARE STRIKE HOLE PLUG DOOR LEAF
- A. Transfer horizontal centerline from latch door leaf.
- B. Mark vertical centerline at center of door thickness.
- C. Drill a 1" [25mm] diameter by 1-3/4" [44mm] deep hole in the strike plug door leaf.
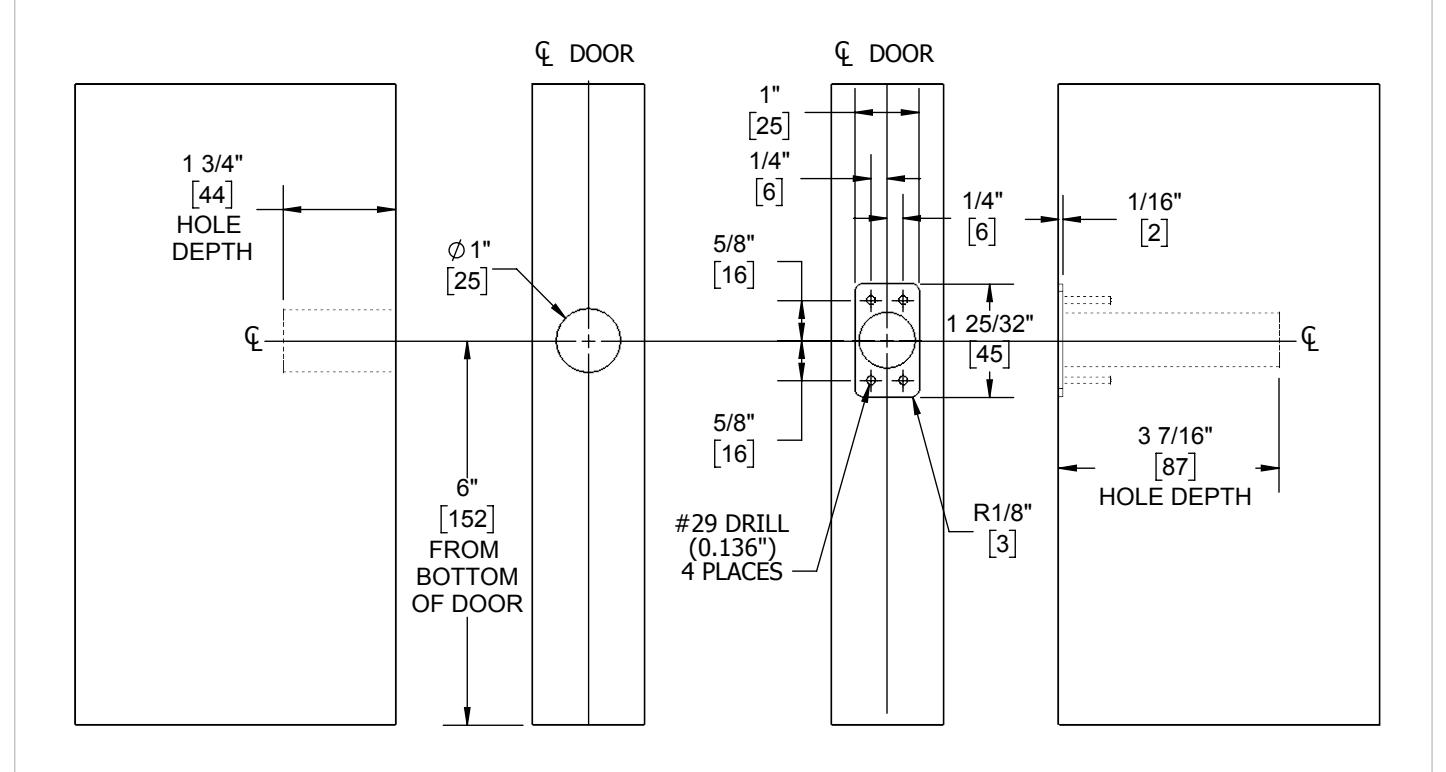
STRIKE HOLE PLUG DOOR LEAF
AUXILIARY FIRE LATCH DOOR LEAF
REV: 5 REV DATE: 02/20/2019 Page 2 of 3

AUXILIARY FIRE LATCH INSTALLATION INSTRUCTIONS
For use with 4500 Less Bottom Rod (LBR) and Concealed Less Bottom Rod (CLB) Exit Devices I-ED00863
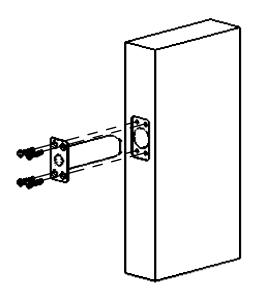
STEP 3: INSTALL AUXILIARY FIRE LATCH
- A. Insert latch and use the provided screws to secure latch.
-
B. Screws:
- #8 Wood screws for wood doors
- #8-32 x 3/4" Machine screws for metal doors
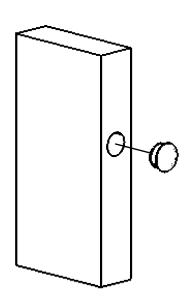
STEP 4: INSTALL STRIKE HOLE PLUG
- A. Insert hole plug into the 1" hole in the strike door leaf.
- B. Self adjusting tabs on the hole plug will lock in place to secure the plug.
STEP 5: REVIEW INSTALLATION
- A. Close both doors and verify auxiliary fire latch and strike hole are lined up.
- B. Be sure the door gap directly in front of the auxiliary fire latch is not covered with a door edge guard or any other similar type device.
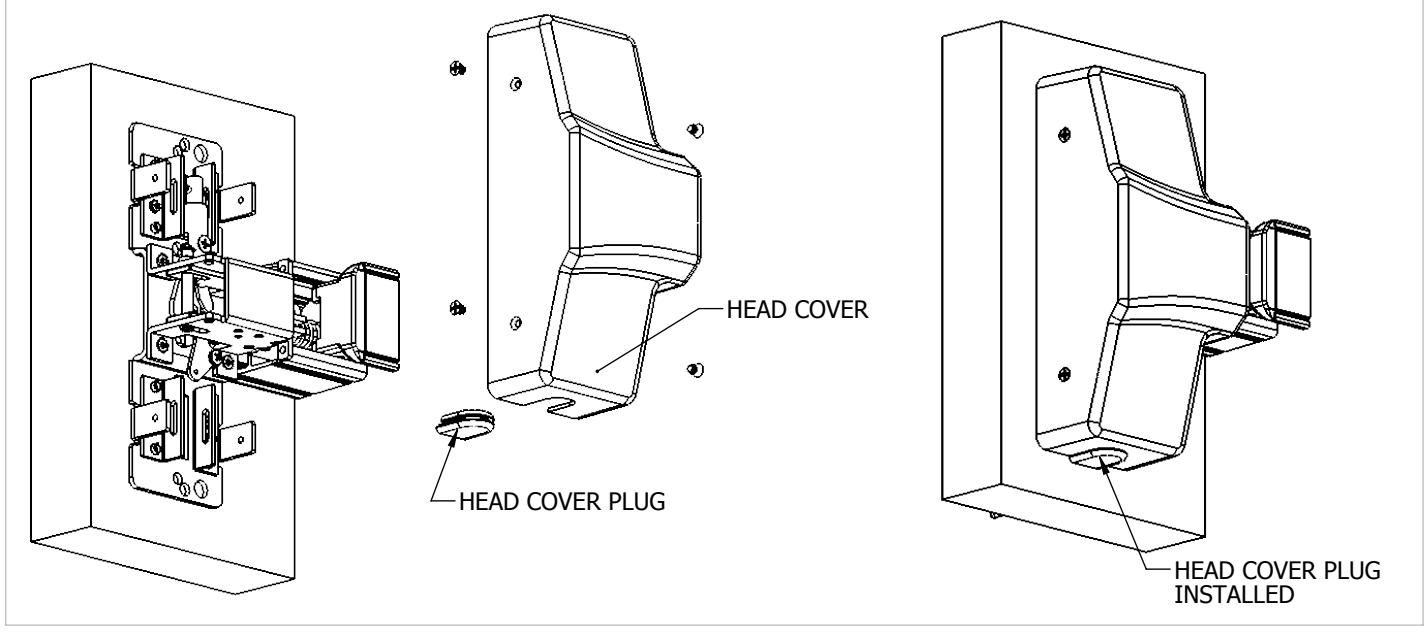
STEP 6: INSTALL HEAD COVER PLUG (4500 LBR only)
A. Slide the head cover plug in the bottom slot on the exit device head cover. Since the LBR does not use a bottom rod, the hole plug will block off this hole from debris or tampering.
REV: 5 REV DATE: 02/20/2019 Page 3 of 3