Alarm Lock PDL6600, DL6600, PL6600 Installation Instructions Supplement to WI1004
Open the original PDF document
View PDFSUPPLEMENT to WI1004
The steps below supplement the WI1004 installation instructions, replacing step 6:
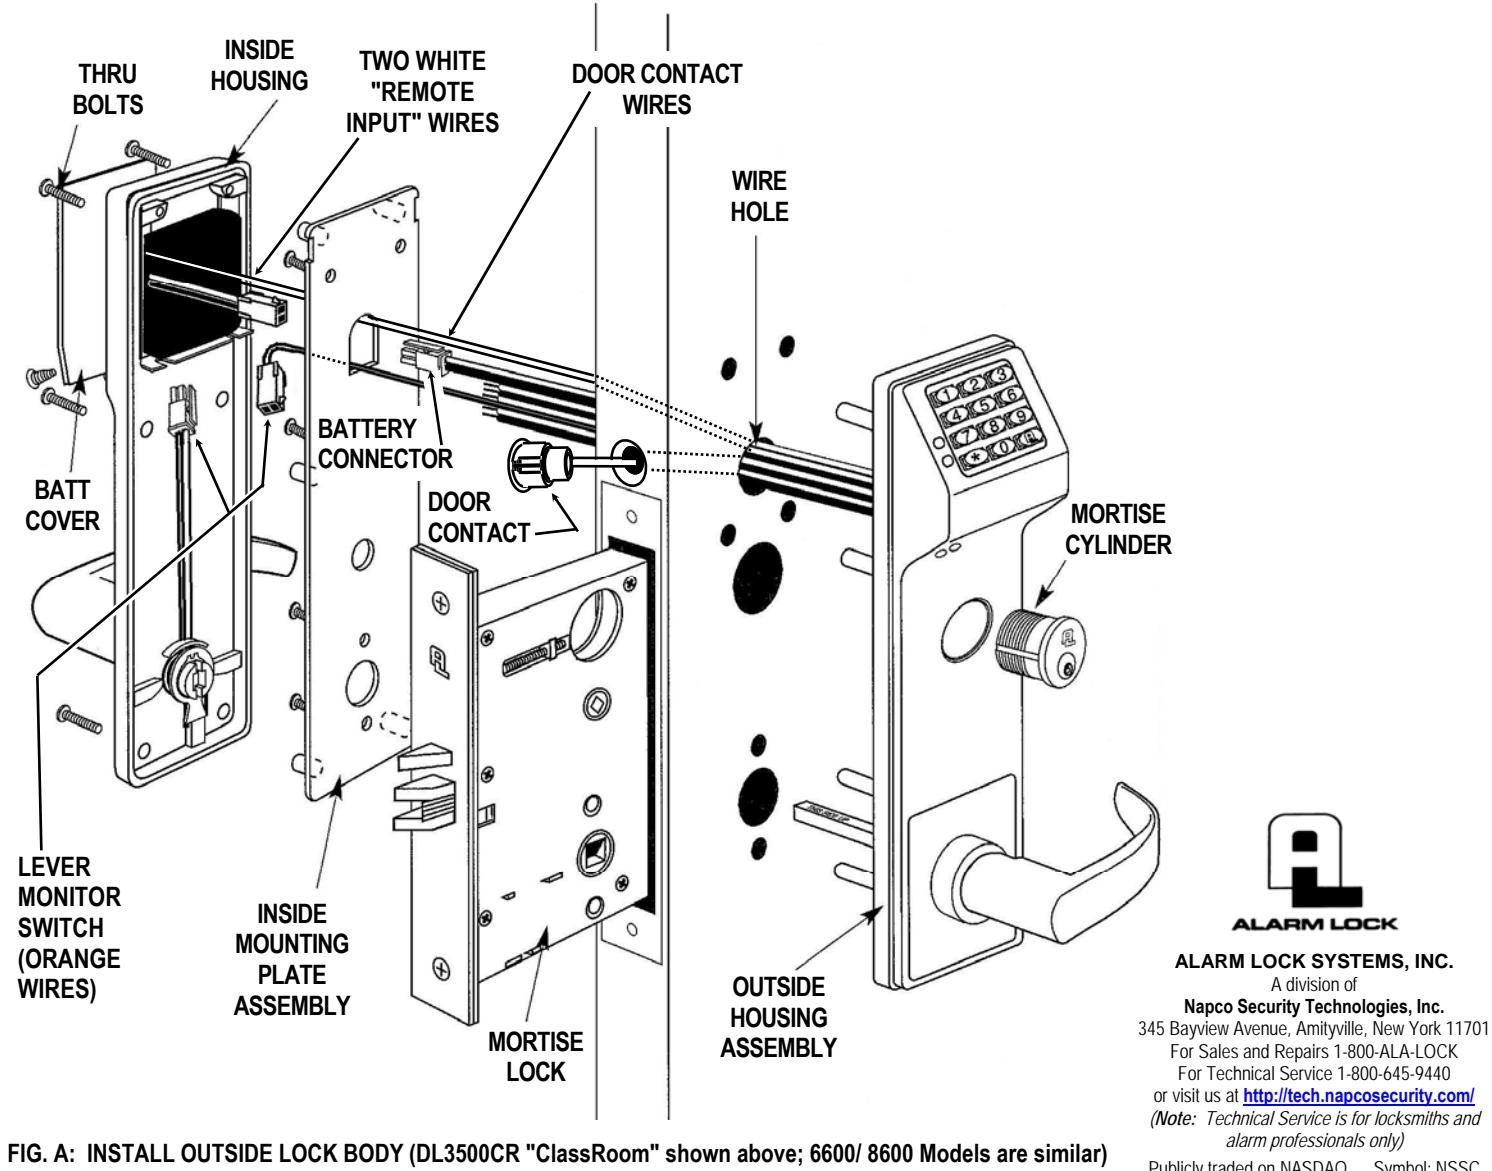
6. INSTALL INSIDE ASSEMBLY
A. Drilling hole for the supplied Door Contact (labeled " DOOR CONTACT PREP " on template) is only necessary if the two white " Remote Input " wires inside the lock (see Fig. A) will be used for "Door Monitoring" features. If Door Monitoring features will NOT be programmed, and the two white " Remote Input " wires will either be unused or used for a "Remote Release" only, there is NO need to drill a hole for the Door Contact . ( Note: Lock programming is performed after lock is installed on the door; in addition, these instructions will henceforth assume the Door Contact will need to be installed).
As shown in WI1004 step 1, the template is used to mark and drill the holes required. The provided template ( WI2036 ) includes the additional hole "A" for the Door Contact ; if this hole "A" was not drilled, be sure to

WI2023B 11/14
Publicly traded on NASDAQ Symbol: NSSC © ALARM LOCK 2014
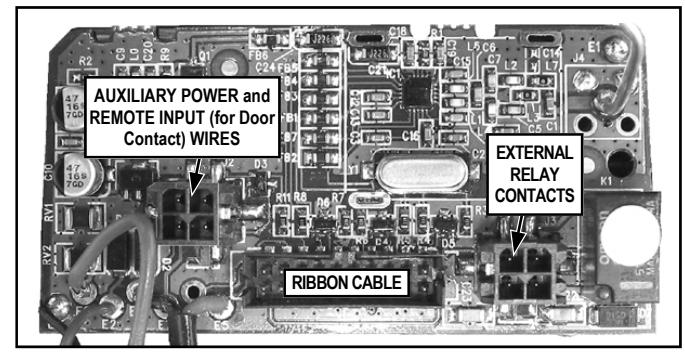
FIG. B: SOCKETS LOCATED IN THE "INSIDE HOUSING" CIRCUIT BOARD
drill this hole now as per the instructions printed on the template WI2036 (drill hole "A" to either hole "B" or "C" used). Be very careful not to drill through any wires in holes "B" or "C".
Door Contact Hole: For Hardwood Doors:
Drill a 1/4" hole into the door edge a distance of 2¾" (to hole "B" or "C"). Then use a ¾" bit to enlarge this hole to a depth of 7/8" to allow the Door Contact to sit flush.
Door Contact Hole: For Hollow Metal Doors:
Drill a ¾" hole into the metal surface of the door edge. IMPORTANT: Be sure to remove all metal burrs from connector cable hole-- sharp edges will eventually wear away wire insulation .
- B. Insert the Lever Monitor Switch plug (orange wires) through the wire hole as described in step 4. Next, insert Door Contact wires into hole in door edge and pull wires through the wire hole as shown in step 4.
- C. See Fig. A and Fig. B. Before installing the black plastic Inside Housing , apply dielectric grease (provided) into all of the following plugs and sockets as they are connected: Connect the Ribbon Cable plug into its socket located on the Inside Housing circuit board. As shown in Fig. B, connect the plug into the Auxiliary Power / Remote Input socket. If used, connect the plug into the External Relay Contacts socket. Connect the Lever Monitor Switch plug and socket (orange wires) as shown in Fig. A. Note: These plugs and sockets fit only one way -- do not force any connections. Do not allow wires to cross or lay on top of each other. Before tightening any of the screws or bolts described below, jiggle the ribbon cable and all other wiring to ensure wires are not pinched.
The two white Remote Input wires (see Fig. B) can be programmed as a "Remote Release" or for "Door Monitoring" (programming is performed after the lock is installed on the door):
- When a "Remote Release" is desired (factory default), connect the two white Remote Input wires inside the lock to a normally-open contact switch (switch is shorted/closed to unlock the lock).
- When "Door Monitoring" is desired , connect these two white Remote Input wires to the supplied Door Contact wires ( Note: When the door is closed the contacts are also "closed").
- D. Secure the top of the Inside Housing to the Inside Mounting Plate Assembly with two black 4-40 x ¼ flat head Phillips or spanner head security screws. See Fig. C.
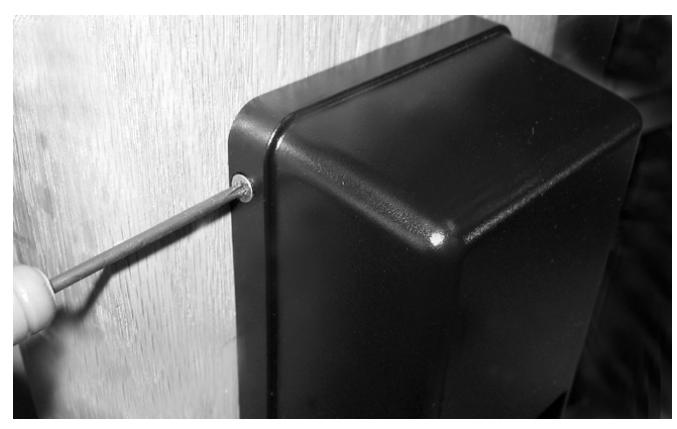
FIG. C: SECURE TOP OF "INSIDE HOUSING"
E. Connect the Battery Connector battery pack plug and circuit board battery plug as shown in Fig. D. Note that upon connection of the battery pack, you will hear three beeps.
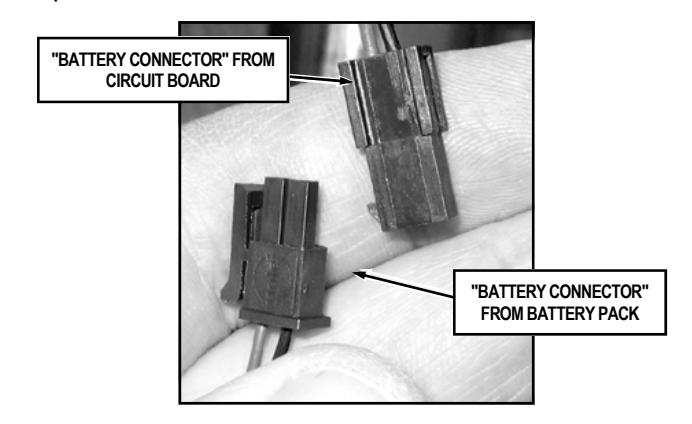
FIG. D: CONNECT THE "BATTERY CONNECTOR" PLUGS
F. Insert the battery pack into Inside Housing as shown in Fig. E.
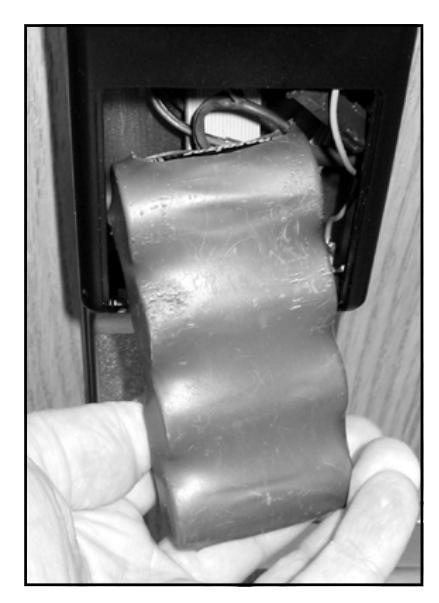
FIG. E: INSERT BATTERY PACK INTO "INSIDE HOUSING" ("SEALED" TYPE PACK SHOWN)
G. Secure the Battery Cover to the Inside Housing with two black 4-40 x ¼ flat head Phillips or spanner head security screws (see Fig. F).
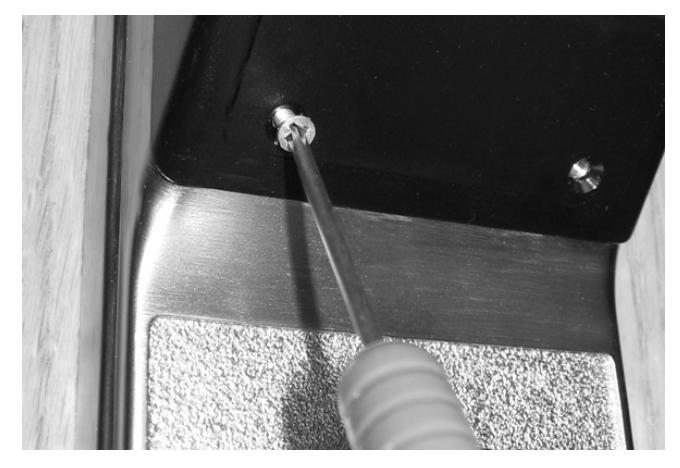
FIG. F: SECURE "BATTERY COVER"
DOOR CONTACT MAGNET INSTALLATION (JAMB)
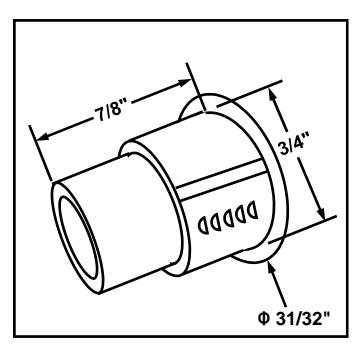
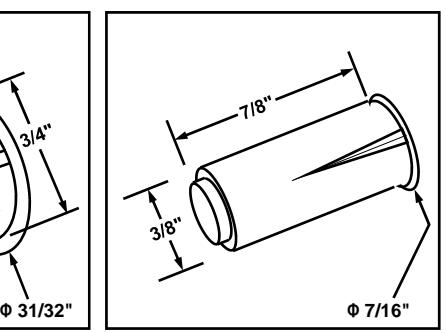
FIG. G: TWO MAGNETIC "DOOR CONTACT" TYPES (ONE PROVIDED)
- 1. With the door closed, place a mark on the inside door jamb directly opposite the Door Contact hole drilled in the door.
- 2. For one of the two Door Contact (magnet) types provided with your lock, note its dimensions in the image above. Drill into the door jamb as follows:
For Hardwood Jambs:
- For the thicker contact (above left image): Drill a 3/4" hole 7/8" deep for the magnet side of the Door Contact .
- For the thinner contact (above right image): Drill a 3/8" hole 7/8" deep for the magnet side of the Door Contact .
For Hollow Metal Jambs:
Use either a 3/8" or 3/4" bit (depending on type) to drill a hole into the surface for the Door Contact .
Insert the magnetic Door Contact in the hole; the contact sits flush with the jamb when fully inserted. Ensure a secure fit by using adhesive appropriate for the material.
Installation is complete. Now see the programming instructions for first time startup.
WIRE CONNECTIONS

- 1. Ground (Shown above for reference only)
- 2. Battery Wires
- 3. Motor Wire
- 4. Auxiliary Power / Remote Input (Programmable)
Wire colors in supplied plug are as follows:
Auxiliary Power :
Red : 6-9VDC Black : Ground
Remote Input (Programmable) :
Two White Wires can be used for either a "Remote Release" or for "Door Monitoring" functions:
- For " Remote Release " (factory default): Wire to a N/O contact switch (short to unlock the lock).
- For " Door Monitoring ": Connect to the supplied Door Contact wires. Note: When the door is closed the contacts are also "closed".
- 5. Ribbon Cable
- 6. External Relay Contacts
Wire colors are as follows:
COM-Orange / NO-Green / NC-Yellow
FIG. H: WIRE CONNECTIONS
ALARM LOCK LIMITED WARRANTY
ALARM LOCK SYSTEMS, INC. (ALARM LOCK) warrants its products to be free from manufacturing defects in materials and workmanship for twenty four months following the date of manufacture. ALARM LOCK will, within said period, at its option, repair or replace any product failing to operate correctly without charge to the original purchaser or user.
This warranty shall not apply to any equipment, or any part thereof, which has been repaired by others, improperly installed, improperly used, abused, altered, damaged, subjected to acts of God, or on which any serial numbers have been altered, defaced or removed. Seller will not be responsible for any dismantling or reinstallation charges, environmental wear and tear, normal maintenance expenses, or shipping and freight expenses required to return products to ALARM LOCK. Additionally, this warranty shall not cover scratches, abrasions or deterioration due to the use of paints, solvents or other chemicals.
THERE ARE NO WARRANTIES, EXPRESS OR IM-PLIED, WHICH EXTEND BEYOND THE DESCRIPTION ON THE FACE HEREOF. THERE IS NO EXPRESS OR IMPLIED WARRANTY OF MERCHANTABILITY OR A WARRANTY OF FITNESS FOR A PARTICULAR PUR-POSE. ADDITIONALLY, THIS WARRANTY IS IN LIEU OF ALL OTHER OBLIGATIONS OR LIABILITIES ON THE PART OF ALARM LOCK.
Any action for breach of warranty, including but not limited to any implied warranty of merchantability, must be brought within the six months following the end of the warranty period.
IN NO CASE SHALL ALARM LOCK BE LIABLE TO ANY-ONE FOR ANY CONSEQUENTIAL OR INCIDENTAL DAMAGES FOR BREACH OF THIS OR ANY OTHER WARRANTY, EXPRESS OR IMPLIED, EVEN IF THE LOSS OR DAMAGE IS CAUSED BY THE SELLER'S OWN NEGLIGENCE OR FAULT.
In case of defect, contact the security professional who installed and maintains your security system. In order to exercise the warranty, the product must be returned by the security professional, shipping costs prepaid and insured to ALARM LOCK. After repair or replacement, ALARM LOCK assumes the cost of returning products under warranty. ALARM LOCK shall have no obligation under this warranty, or otherwise, if the product has been repaired by others, improperly installed, improperly used, abused, altered, damaged, subjected to accident, nuisance, flood, fire or acts of God, or on which any serial numbers have been altered, defaced or removed. ALARM LOCK will not be responsible for any dismantling, reassembly or reinstallation charges, environmental wear and tear, normal maintenance expenses, or shipping and freight expenses required to return products to ALARM LOCK. Additionally, this warranty shall not cover scratches, abrasions or deterioration due to the use of paints, solvents or other chemicals.
This warranty contains the entire warranty. It is the sole warranty and any prior agreements or representations, whether oral or written, are either merged herein or are expressly cancelled. ALARM LOCK neither assumes, nor authorizes any other person purporting to act on its behalf to modify, to change, or to assume for it, any other warranty or liability concerning its products.
In no event shall ALARM LOCK be liable for an amount in excess of ALARM LOCK's original selling price of the product, for any loss or damage, whether direct, indirect, incidental, consequential, or otherwise arising out of any failure of the product. Seller's warranty, as hereinabove set forth, shall not be enlarged, diminished or affected by and no obligation or liability shall arise or grow out of Seller's rendering of technical advice or service in connection with Buyer's order of the goods furnished hereunder.
ALARM LOCK RECOMMENDS THAT THE ENTIRE SYS-TEM BE COMPLETELY TESTED WEEKLY.
Warning: Despite frequent testing, and due to, but not limited to, any or all of the following; criminal tampering, electrical or communications disruption, it is possible for the system to fail to perform as expected. ALARM LOCK does not represent that the product/system may not be compromised or circumvented; or that the product or system will prevent any personal injury or property loss by burglary, robbery, fire or otherwise; nor that the product or system will in all cases provide adequate warning or protection. A properly installed and maintained alarm may only reduce risk of burglary, robbery, fire or otherwise but it is not insurance or a guarantee that these events will not occur. CONSEQUENTLY, SELLER SHALL HAVE NO LIA-BILITY FOR ANY PERSONAL INJURY, PROPERTY DAMAGE, OR OTHER LOSS BASED ON A CLAIM THE PRODUCT FAILED TO GIVE WARNING. Therefore, the installer should in turn advise the consumer to take any and all precautions for his or her safety including, but not limited to, fleeing the premises and calling police or fire department, in order to mitigate the possibilities of harm and/or damage.
ALARM LOCK is not an insurer of either the property or safety of the user's family or employees, and limits its liability for any loss or damage including incidental or consequential damages to ALARM LOCK's original selling price of the product regardless of the cause of such loss or damage.
Some states do not allow limitations on how long an implied warranty lasts or do not allow the exclusion or limitation of incidental or consequential damages, or differentiate in their treatment of limitations of liability for ordinary or gross negligence, so the above limitations or exclusions may not apply to you. This Warranty gives you specific legal rights and you may also have other rights which vary from state to state.