Alarm Lock DL-Windows V5.4.x Quick Start Guide
Open the original PDF document
View PDF
DL-WINDOWS ™ V5.4.x QUICK START GUIDE
WI1152CLF 8/17
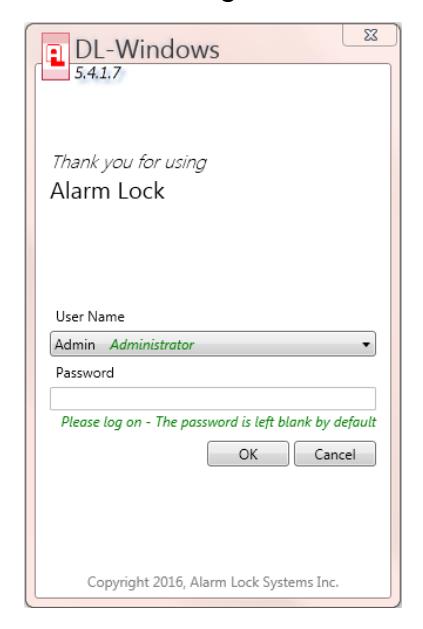
1. To open DL Windows , click the DL Windows icon on the desktop. The log on screen appears (below). The User Name is " Admin "; a password is not required, therefore click OK to begin.
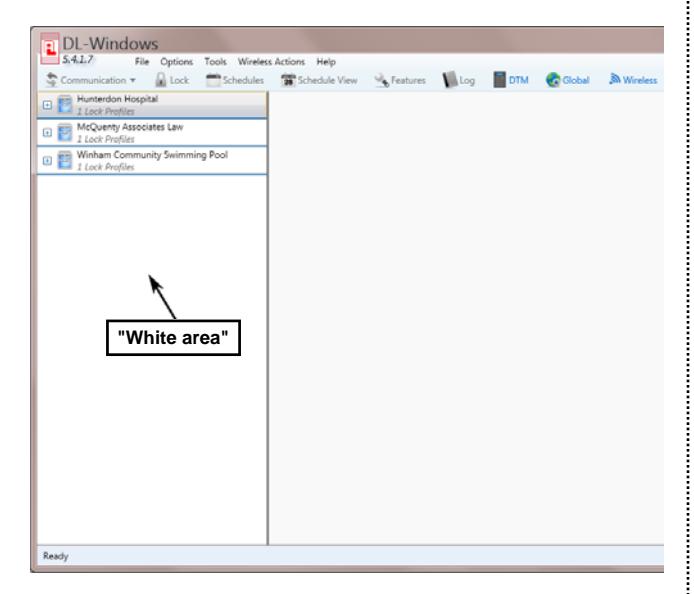
Existing accounts appear in the "white area" on the left side of the screen.
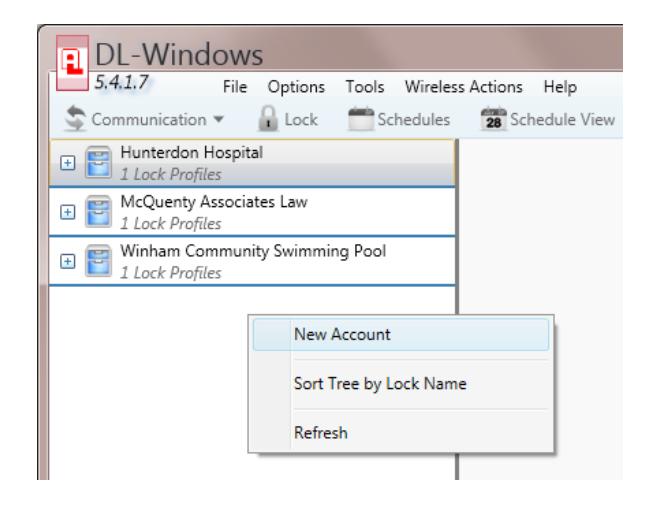
2. To create a new Account , right-click the white area. From the pop-up window, click New Account .
3. In the New Account dialog, type a description in the Account Description field, and click OK . In the following example we will use "ABC General Hospital".

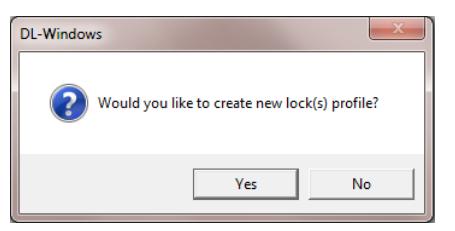
4. Create Locks. Click Yes when asked to create new lock profiles.
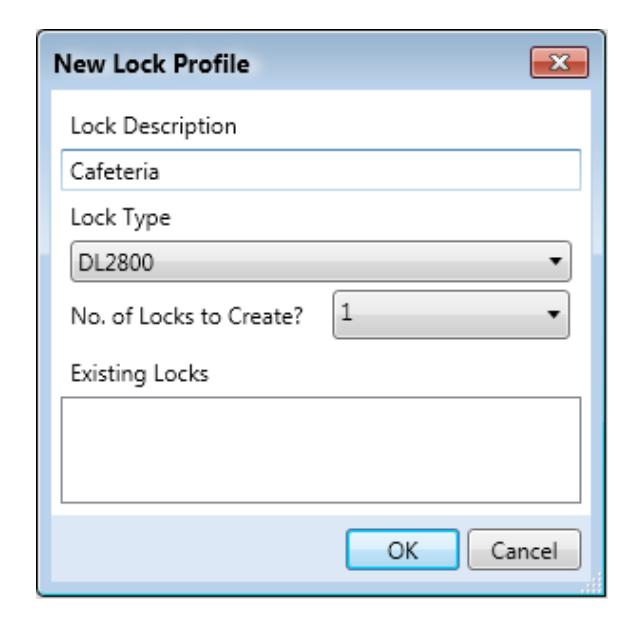
In the New Lock Profile dialog (shown below),
type a new lock profile description, choose your Lock Type (using the Alarm Lock model numbers) and the number of locks you want to create. For this example we will call our first lock "Cafeteria". When finished, click OK .
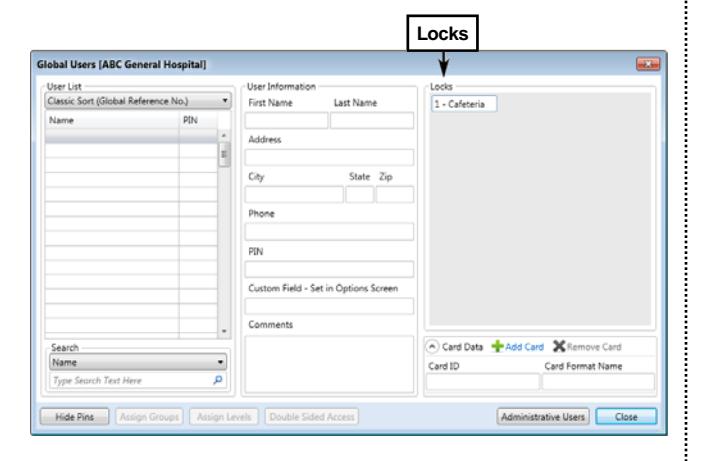
Please note that each created lock will appear in the Locks section of the Global Users screen (see image below). Up to 2000 locks may be created within each Account.
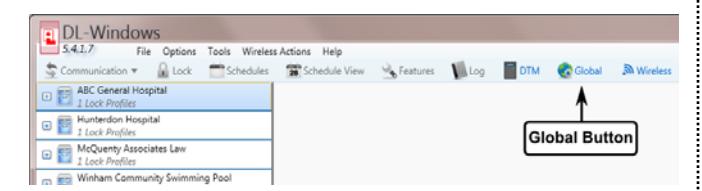
5. To open your newly created Account or an existing Account, click the Account name in the Account list (on the left side of the screen). The Global button illuminates.
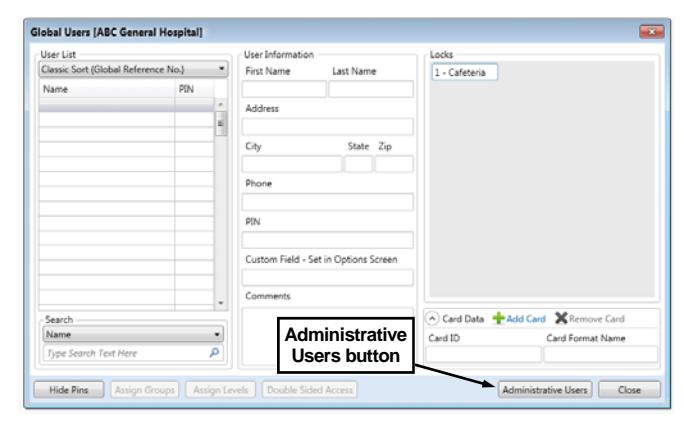
6. Click the Global button to open the Global Users screen, and click the Administrative
Users button to set the User Codes for the Master , Installers , Managers , DTM , PC Download , etc. (see image below).
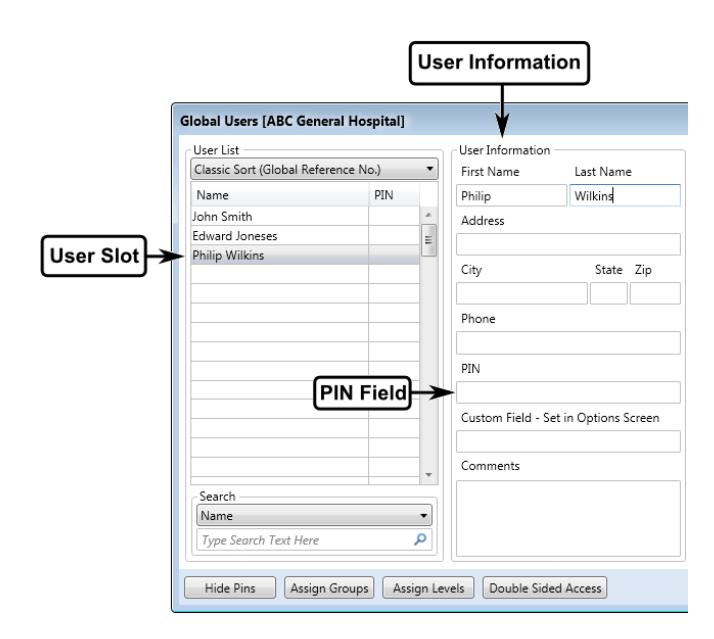
7. Add administrative users. Add all names first, then go back and add PIN codes and/or proximity cards. Click on an Admin User slot, then add user information in the User Information section.
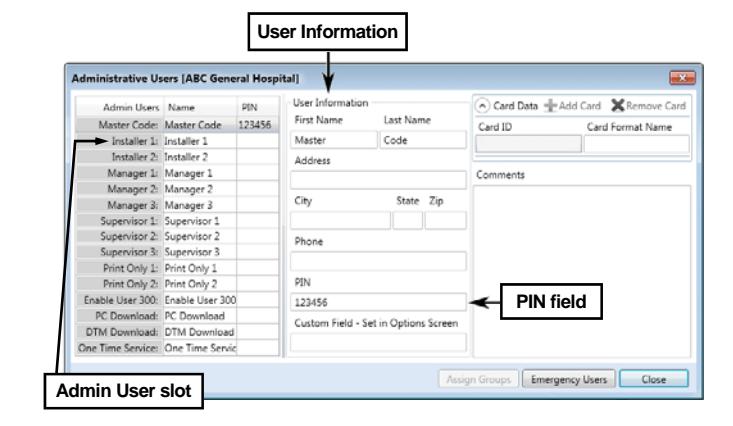
Add PIN codes one at a time by either:
- highlighting an individual name and typing a code individually into the PIN field (shown above), or
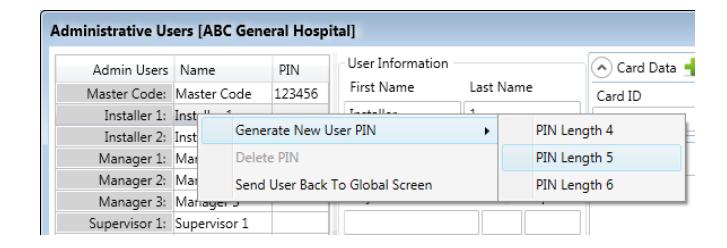
- highlight and right-click a name, then have the software generate a 4- to 6-digit random code from the pop-up window.
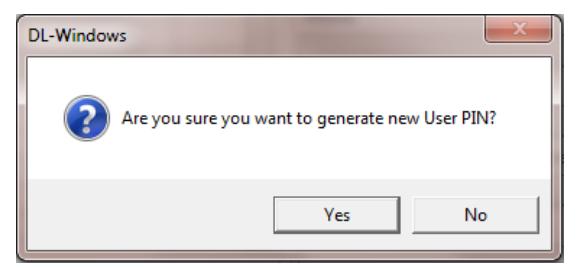
After selecting a PIN length, click Yes on the pop-up to confirm.
Note: The Master Code must be 6 digits long.
7b. Add proximity cards to users. Select a user, click Add Card and choose the correct Card Type and Card Format . Next, type the Card Code and Facility Code .
When using HID Prox cards from Alarm Lock, select as follows:
- Card Type: Select " Prox Cards 125kHz Prox Cards for all… "
- Card Format: Select " NAP36bit "
- Facility Code: Select "19"
- Card Code: (Type the number printed on the card itself)
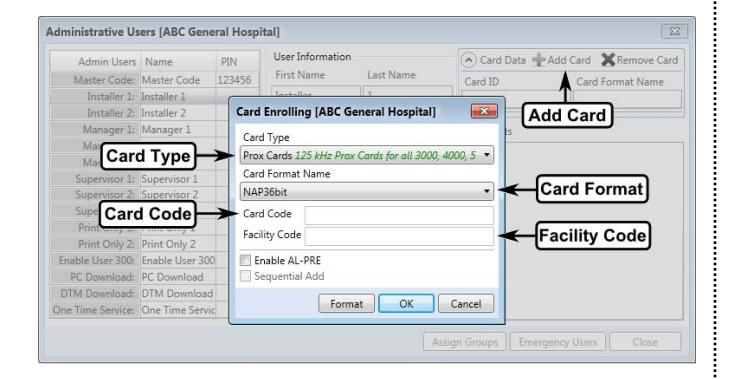
When finished, click OK . The selected user name is highlighted when card data is successfully added, and a "card" icon is shown next to the user. Note: The Master Code cannot have a Prox card assigned.
8. Add "Basic Users" to the Global Users screen. Add all names first, then go back and add PIN codes and/or proximity cards. Click on a user in the User List , then add user information in the User Information section.
-
8a. Add PIN codes
one at a time by either:
- highlighting individual names and typing each code individually into the PIN field shown in the previous image, or
- highlight and right-click a name, then have the software generate a 4- to 6-digit random code from the pop-up window (shown in step 7).
The software can "auto-generate" 4- to 6-digit random codes for multiple users at one time:
- Click to highlight the first User Name;
- Press and hold the keyboard Shift key;
- Click to highlight the last User Name;
- Right-click the highlighted area;
- Highlight Generate New User PIN ;
- Select the desired PIN length.
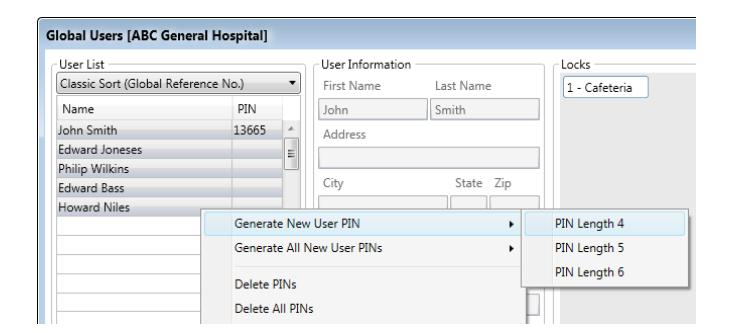
After selecting a PIN length, click Yes on the pop-up to confirm.

8b. Add proximity cards to users. Select a user, click Add Card and choose the correct Card Type and Card Format . Next, type the Card Code and Facility Code .
When using HID Prox cards from Alarm Lock, select as follows:
- Card Type: Select " Prox Cards 125kHz Prox Cards for all… "
- Card Format: Select " NAP36bit "
- Facility Code: Select "19"
- Card Code: (Type the number printed on the card itself)
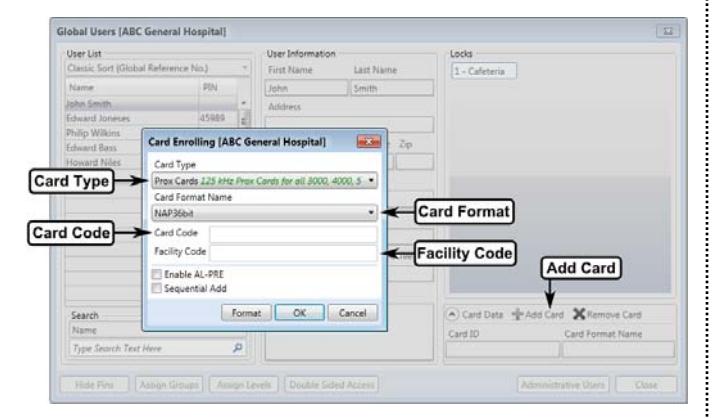
When finished, click OK . The selected user name is highlighted when card data is successfully added, and a "card" icon is shown next to the user.
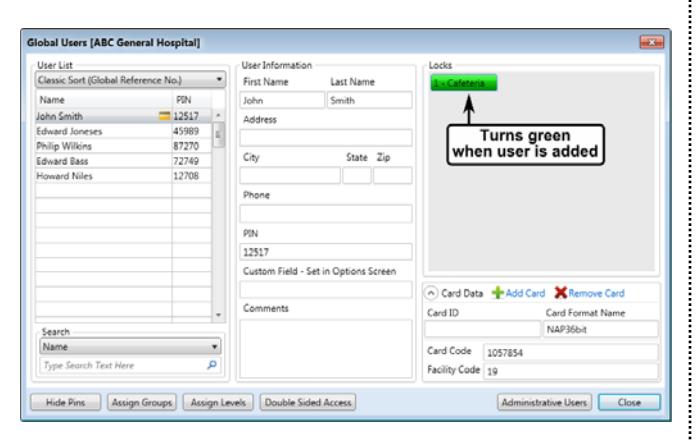
9. Add Users to Locks. In the Global Users screen, simply highlight a user name in the User List , then double-click the desired lock(s) in the " Locks " section (see below image). When the Lock ID rectangle turns green, the highlighted user (the user's associated PIN) is added to the Lock Profile.
You may also add multiple users to specific lock(s) --or-- to ALL locks in your Account:
- Click to highlight the first user name;
- Press and hold the Shift key;
- Click to highlight the last user name;
- Right-click the highlighted area;
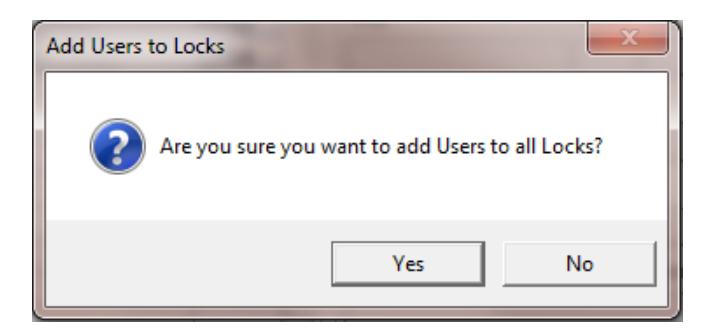
Click Add Users to All Locks then click Yes on the confirmation popup:
–or–
To add users to specific lock(s), place a check next to the appropriate lock(s):

Again, when the Lock ID rectangle turns green, the user is added to the lock.
To add specific users to specific lock(s):
- Click the individual user name while pressing and holding the Ctrl keyboard key; this will highlight only those individual users you wish to be added.
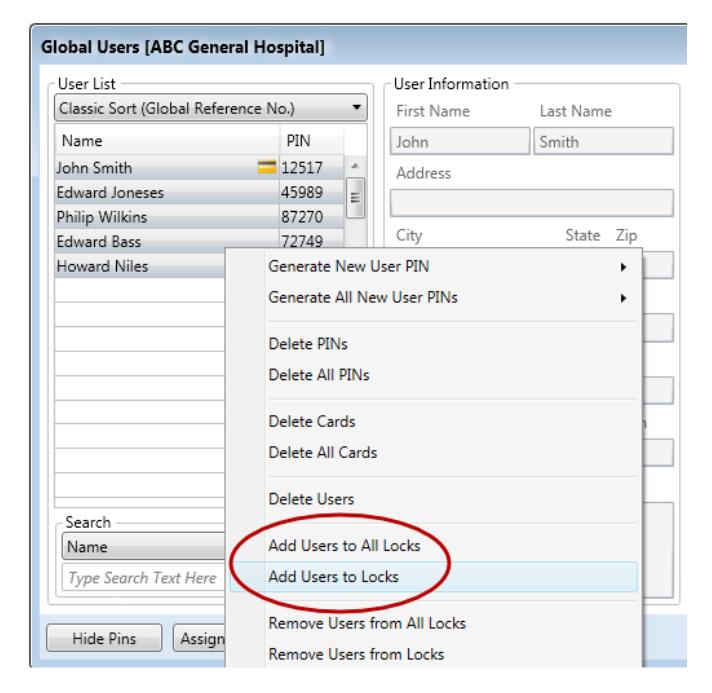
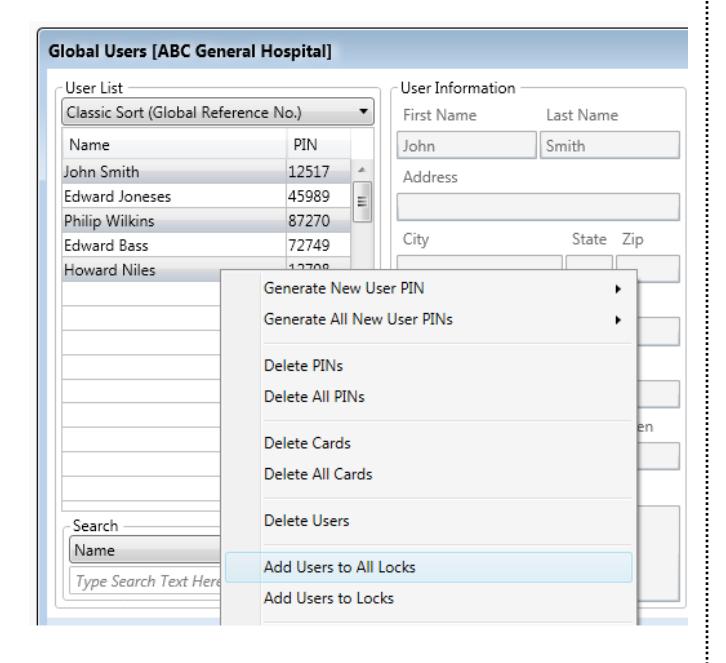
- Right-click one of the highlighted users. Click Add Users to All Locks then click Yes on the confirmation popup --or- click Add Users to Locks to add the selected users to specific lock(s) by checking the appropriate lock(s) as shown below.
-
10. Sending your program to the locks
can be performed in several ways depending on the model of your lock:
- For older, non- Networx locks, you must send the program directly from your PC to the lock with an AL-PCI interface cable (plugged into your computer's serial COM port). If your PC is located too far from your lock to use an AL-PCI cable, use an AL-DTM3 handheld Data Transfer Module . Alternatively, the ALPCI2-U interface cable is designed to work through your PC's USB port if your computer is not equipped with a serial COM port. Go to step 10a.
- For Networx locks, you must use either a Networx Gateway (or an AL-IME-USB portable USB Gateway) to wirelessly send your program to the locks. Go to step 10b.
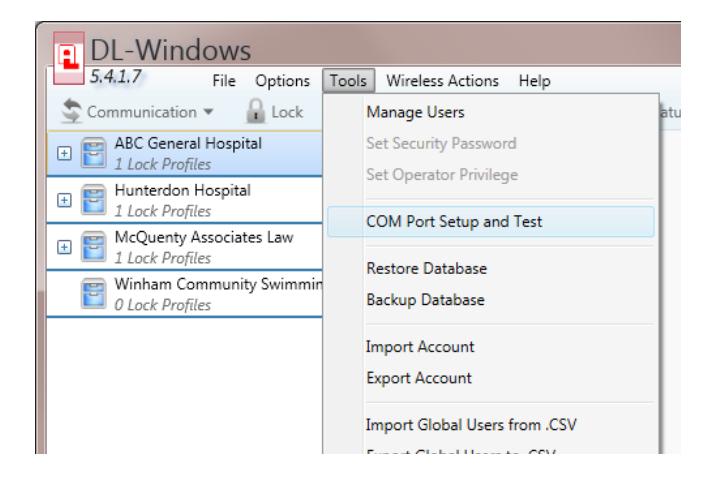
10a. Send program to the lock (non-Networx). Begin by following the instructions included with your AL-PCI or ALPCI2-U cable. Before using the ALPCI2-U , you must install the provided drivers into your PC. To use your cable, click Tools > COM Port Setup and Test . A loopback test of the COM port will automatically start.
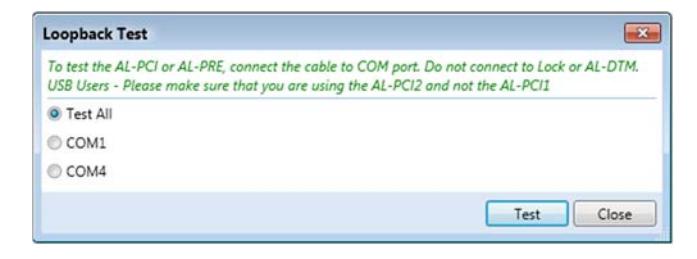
The Loopback Test window opens. Select the Test All radio button, then click Test . If only one COM port exists, then the Test All selection will not be available, simply click the Test button.
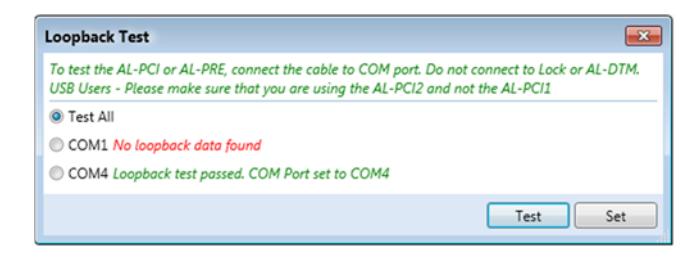
The Loopback Test will automatically test the COM ports and set the correct COM port connected to your AL-PCI or ALPCI2- U cable. When the test completes, click the Set button:
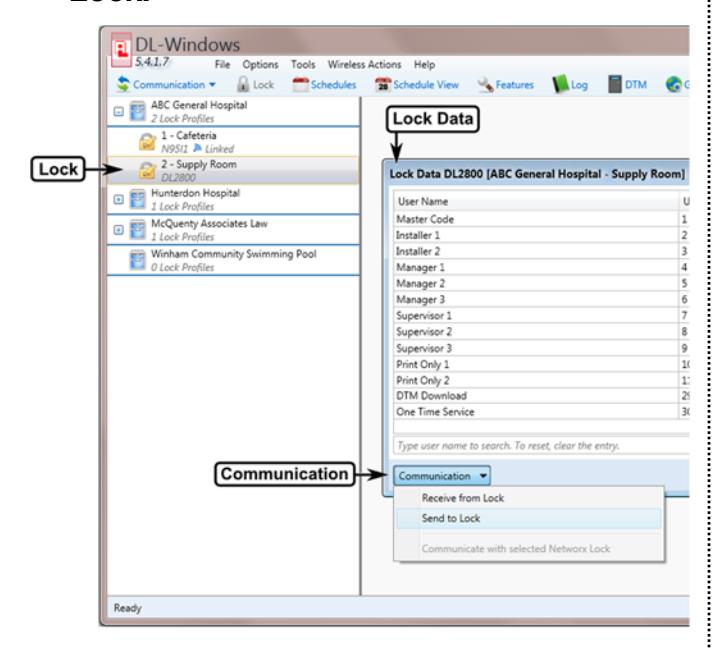
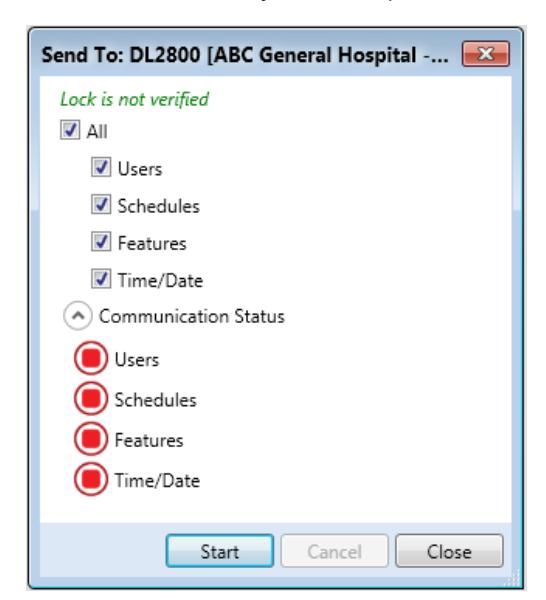
Send the program to your lock: Doubleclick the lock from your account. In the following example, we will send programming to a lock named "Supply Room". The Lock
Data window opens. Use the Communications pull-down menu (located at the lower left) shown below. Click Send to Lock.
Check ALL then click Start. At the physical lock, enter Program Mode and activate Function 58 to accept the download (if the lock model does not include a numeric keypad, refer to the programming instructions included with your lock).
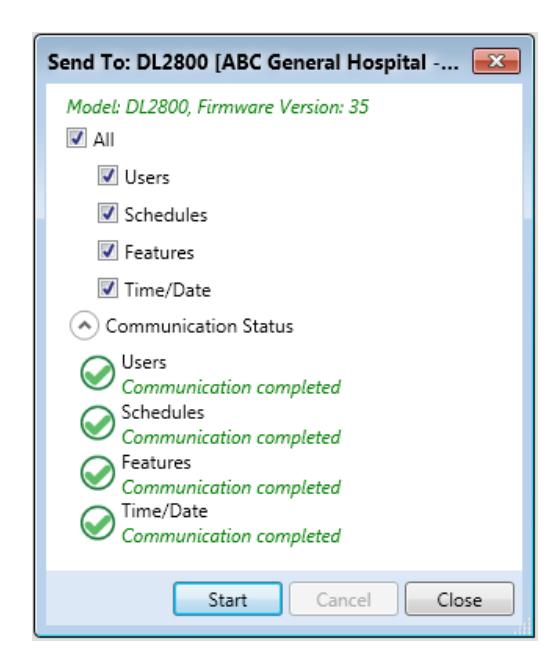
If the program was successfully sent to the lock, your window should look similar to the next image:
10b. Send program to the lock (Networx).
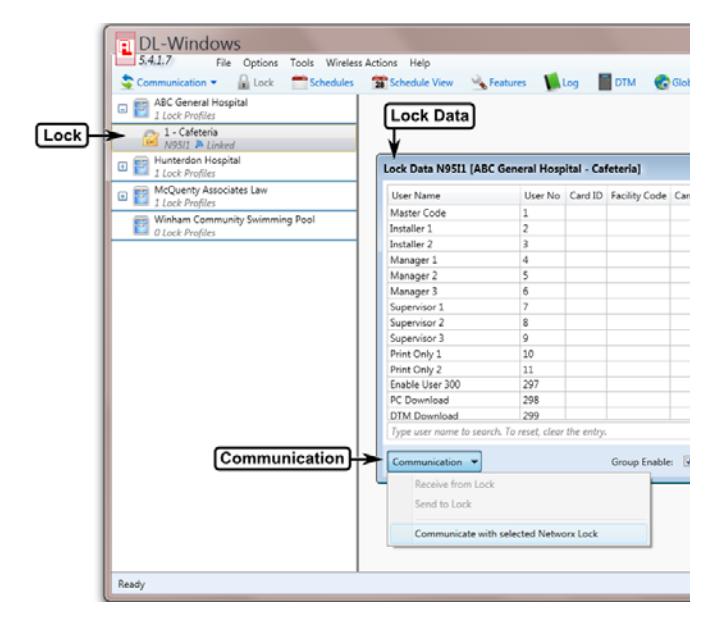
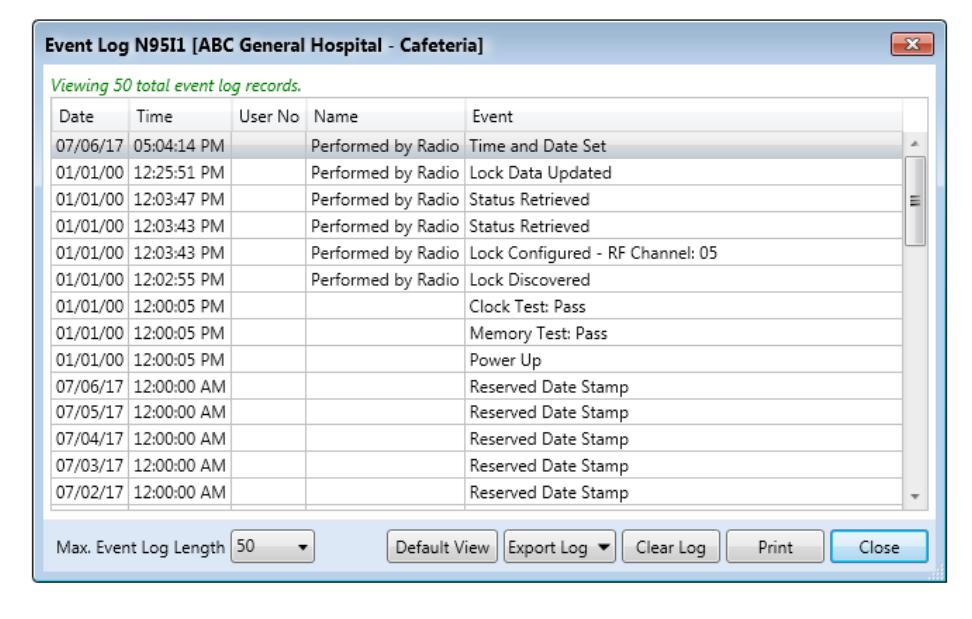
Input a Security Password using the Tools menu. Discover Gateways and Auto Add using the Gateway Config button. Add and link your locks using the Discover Locks button (see the DL-Windows for Networx V5 User's Guide (OI383) for full details). From your DL-Windows account, doubleclick the Networx lock and the Lock Data screen appears (shown below). Click the Communications pull-down (located at the lower left) and select " Communicate with selected Networx Lock ".
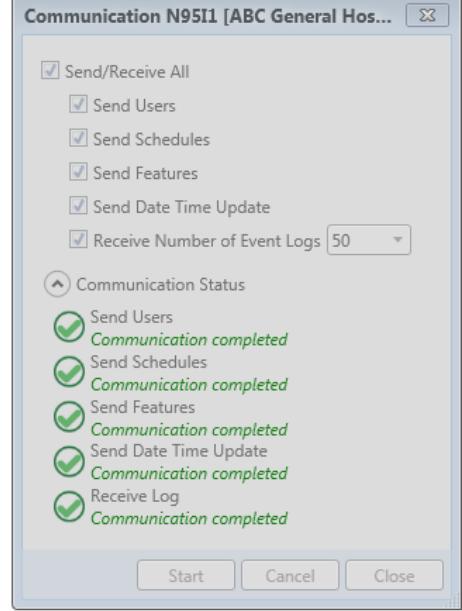
The Communication window opens (shown below). Check Send/Receive All , then click Start .
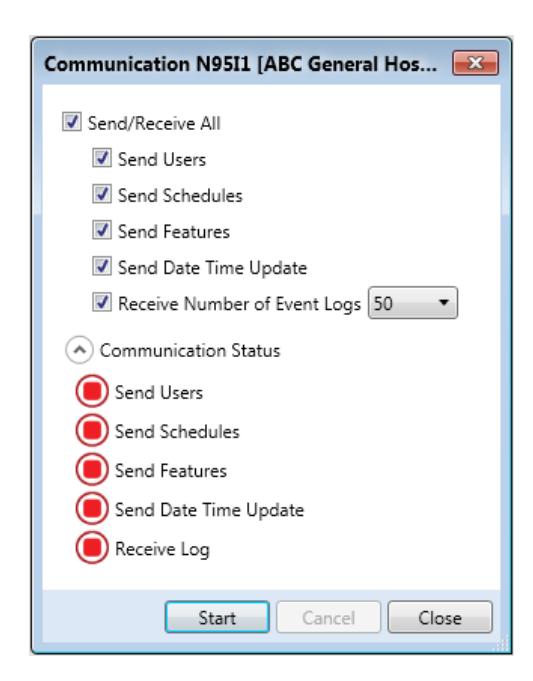
If the program data was successfully sent to the lock, your window should look similar to this:
345 Bayview Avenue, Amityville, New York 11701 For Sales and Repairs 1-800-ALA-LOCK For Technical Service 1-800-645-9440 or visit us at http://tech.napcosecurity.com/
(Note: Technical Service is for security professionals only) Publicly traded on NASDAQ Symbol: NSSC
© ALARM LOCK