Alarm Lock DL-Windows V3.6.x Quick Start Guide
Open the original PDF document
View PDF
DL-WINDOWS ™ V3.6.x QUICK START GUIDE 345 Bayview Avenue
Publicly traded on NASDAQ Symbol: NSSC © ALARM LOCK 2007 WI1152A 8/07
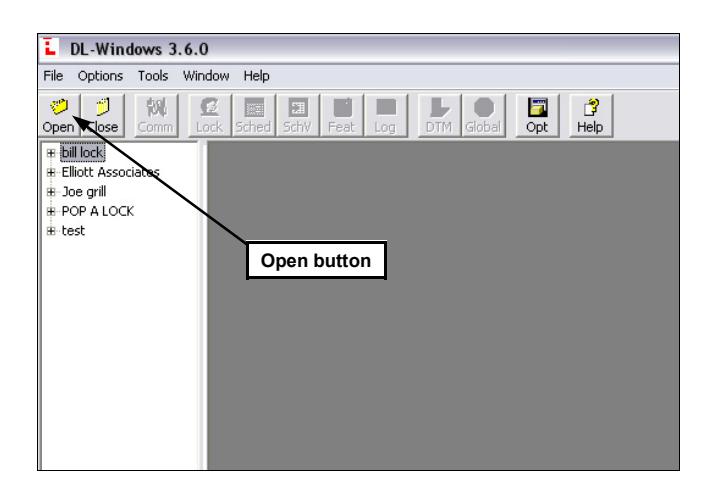
1. To open DL Windows , click the " DL Windows " icon on the desktop. Click the " Open " button to open existing Accounts or to create new Accounts.
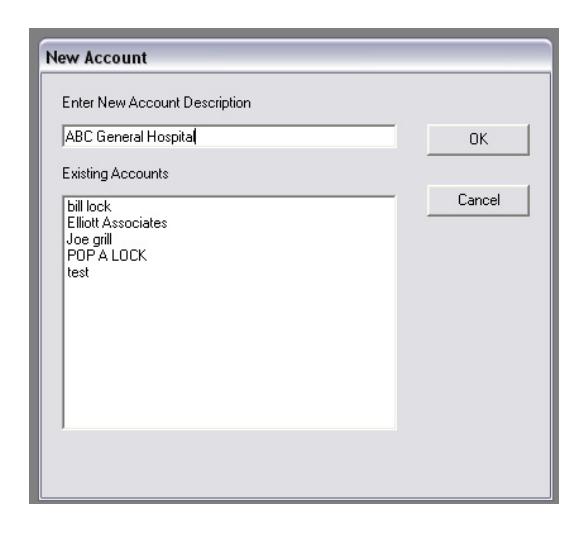
3. Type a New Account Description , and click " OK ".
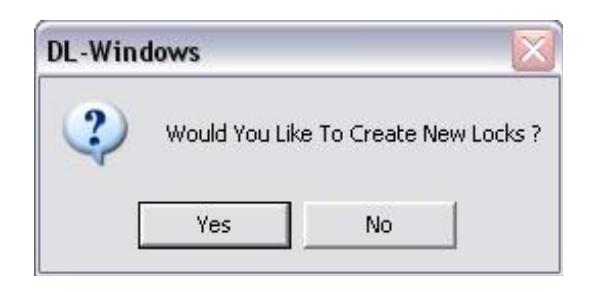
4. Click "No" when asked to create new locks (this will be done in a later step).
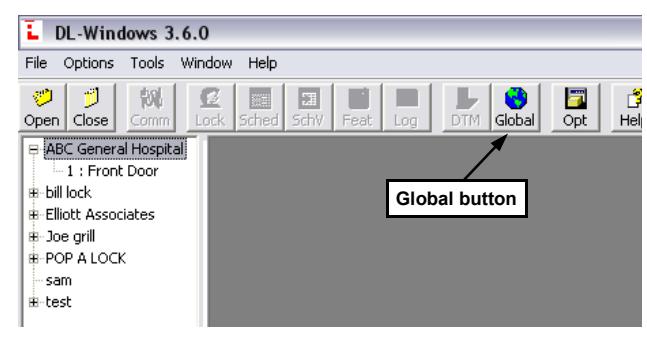
5. To open your newly created Account or an existing Account, double-click the Account name in the Account list (on the left side of the screen). The Global button will illuminate.
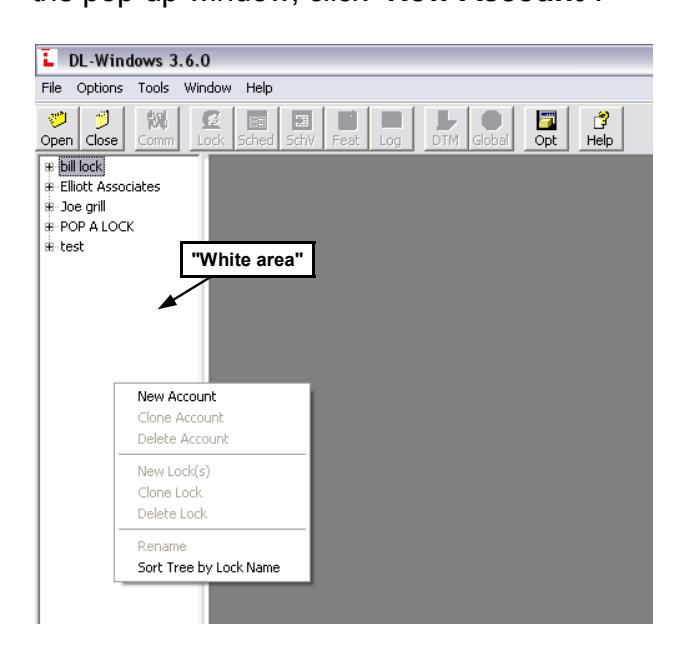
2. To create a new Account , right-click in the white area on the left side of the screen. From the pop-up window, click " New Account ".
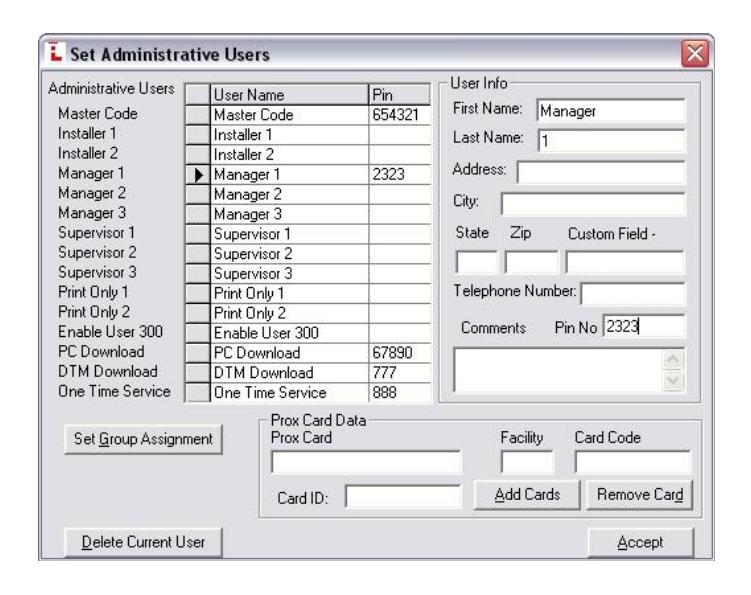
6. Double-click the " Global " button to open the Global Users Screen . Double-click the " Add Administrative Users " button to set the User Codes for the Master , Managers , DTM , PC Download , etc.
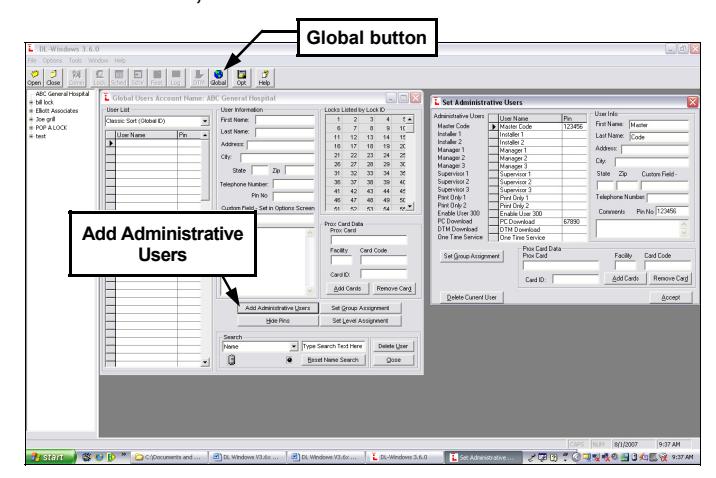
7. Determine your pin and/or Prox codes for the Administrative users. When finished, click the " Accept " button.
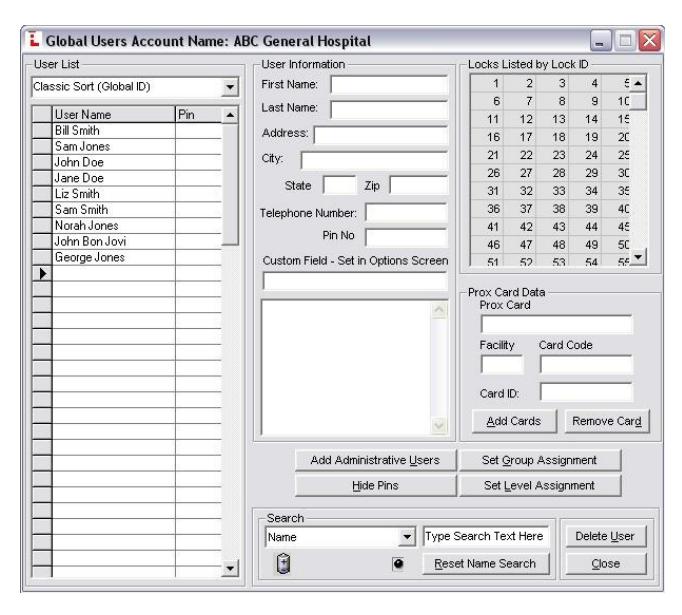
8. Add "Basic Users" to the Global Users Screen (add all names first, then go back and add pin codes and/or proximity cards).
-
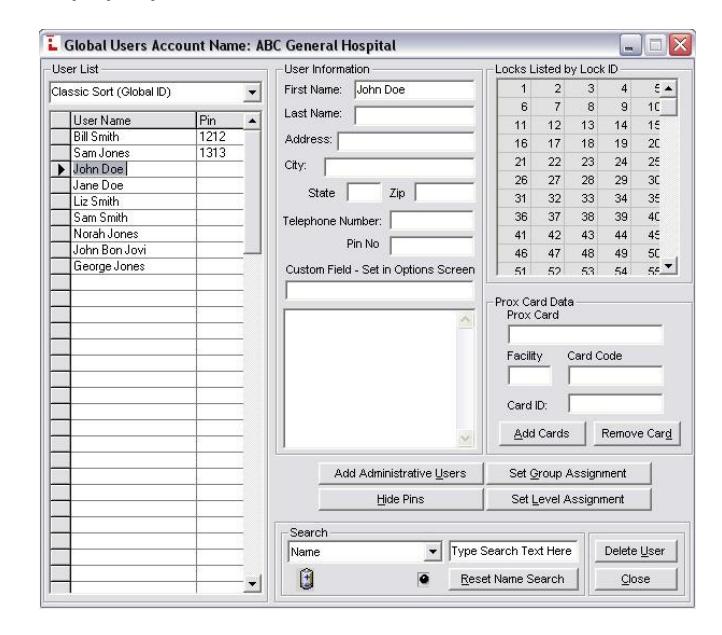
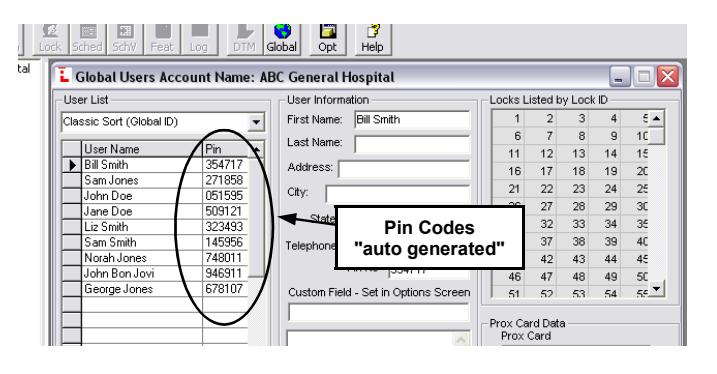
9. Add Pin codes
one at a time by either:
- highlighting individual names and typing each code individually (see image below), or
- right-click a name, then have the software create a 6-digit random code from the pop-up window.
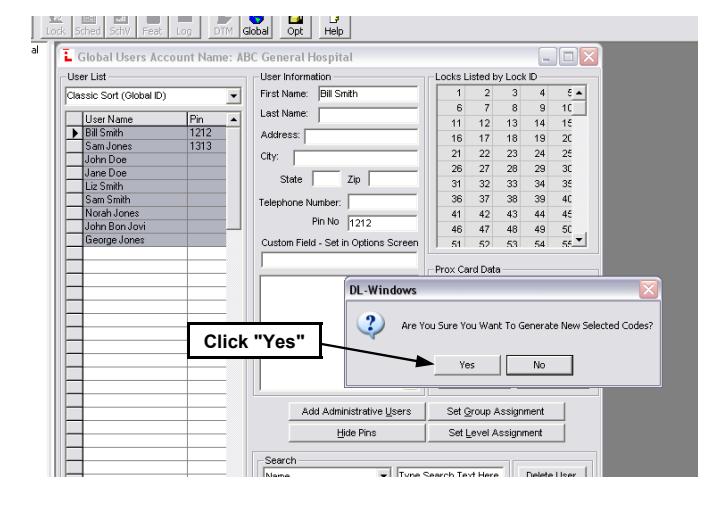
The software can "auto-generate" 6-digit random codes for multiple users at one time:
- Click to highlight the first name;
- Press and hold the shift key;
- Click to highlight the last name;
- Right-click the highlighted area;
- From the pop-up window, click " Generate Selected New Codes ".

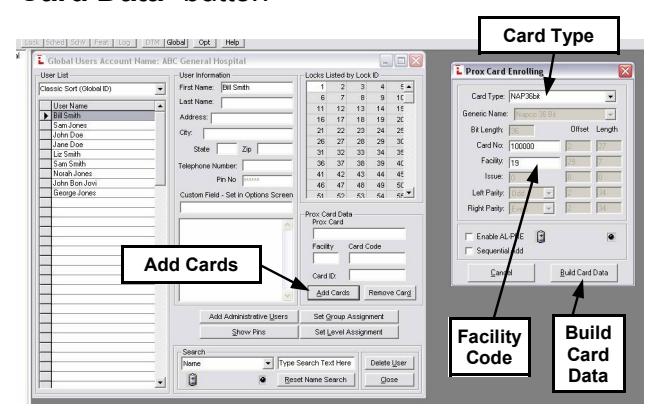
Add proximity cards to users. Select a user, click the " Add Cards " button and choose the correct Card Type, Card No. and Facility Code. When using HID Prox cards from Alarm Lock, choose " Nap 36 " as the Card Type, " 19 " for the Facility Code, and simply type the card number embossed on the card itself. When finished, click the " Build Card Data " button
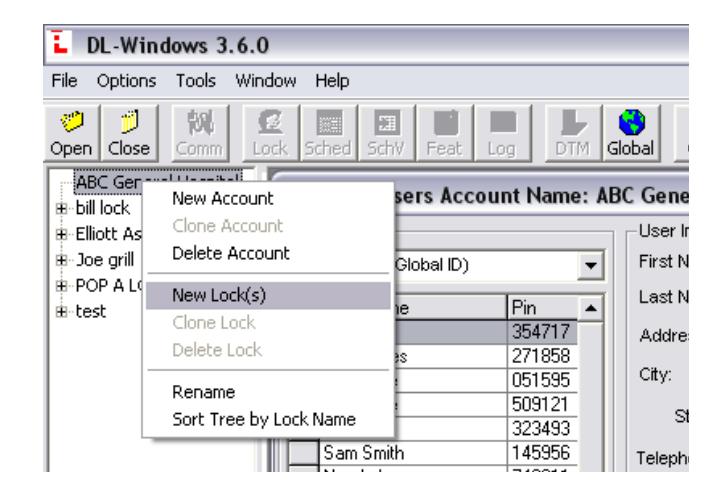
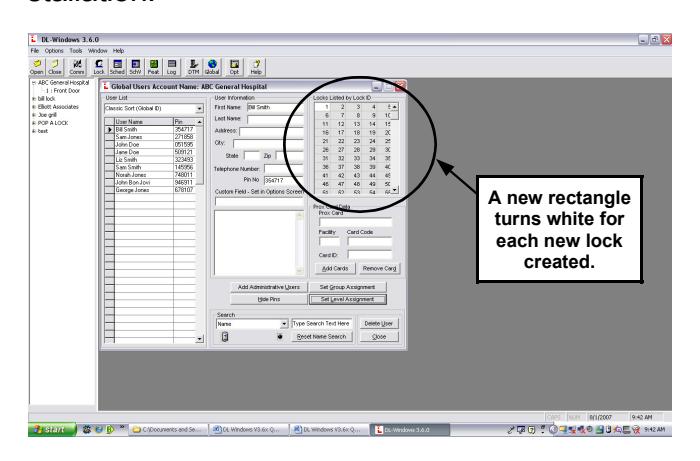
10. Create Locks. Highlight the Account in which you want to create one or more locks. Right-click and click " New Lock(s) " from the pop-up window.
Type a new lock description, choose your lock type (using manufactures part numbers) and the number of locks you want to create. When finished, click " OK ".
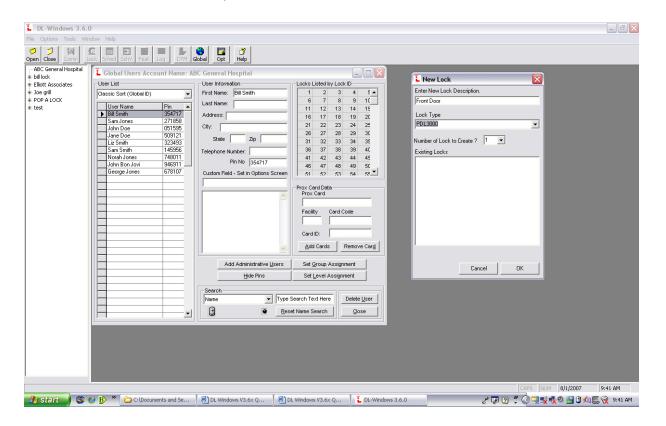
Please note that for each lock created, each rectangle will turn white (no longer grayed-out) in the "Locks Listed by Lock ID" chart. Up to 2000 locks may be created within each Account, and a maximum of 100 Accounts are allowed within each DL Windows Software installation.
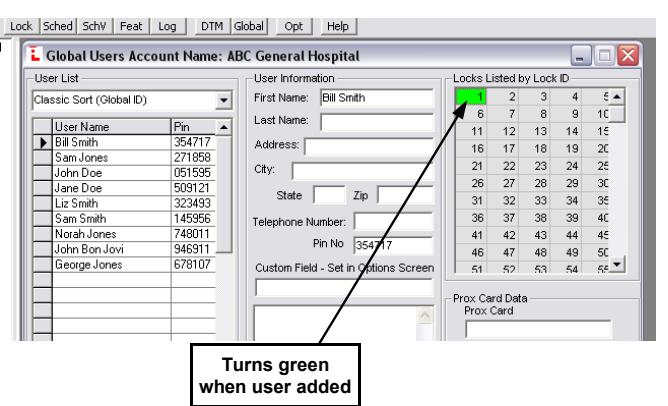
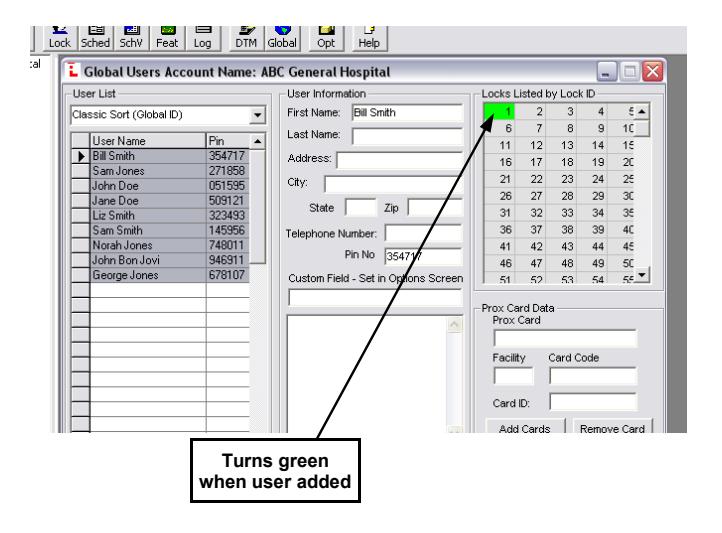
11. Add Users to Locks. Simply highlight the users name from the list, then double-click the desired lock(s). When the Lock ID rectangle turns green, the user is added to the lock.
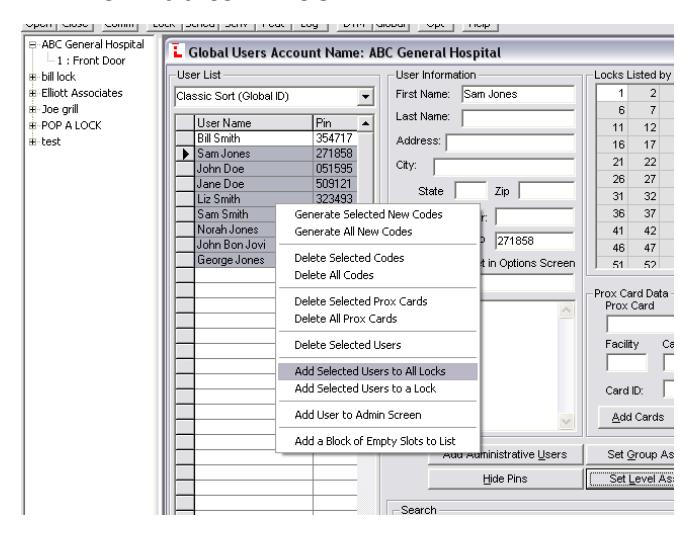
You may also add multiple users to a specific lock --or-- to ALL locks in your Account:
- Click to highlight the first name;
- Press and hold the shift key;
- Click to highlight the last name;
- Right-click the highlighted area;
- From the pop-up window, click " Add to All or Add to A Lock ".
Again, when the Lock ID rectangle turns green, the user is added to the lock.
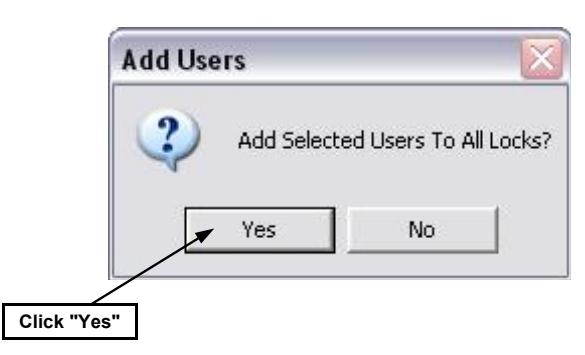
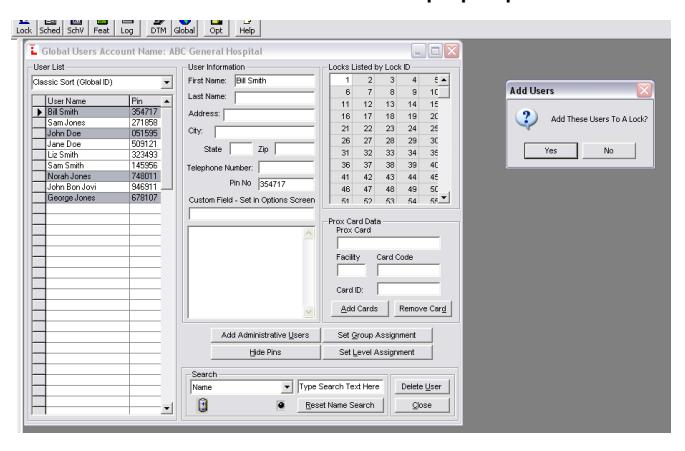
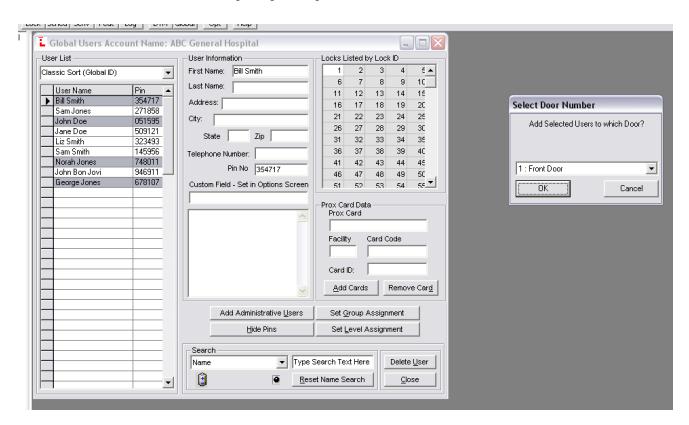
To add specific users to a specific lock, click to highlight only those users to be added, and click " Yes " in the Add Users pop-up...
...then select the specific lock in the Select Door Number pop-up.
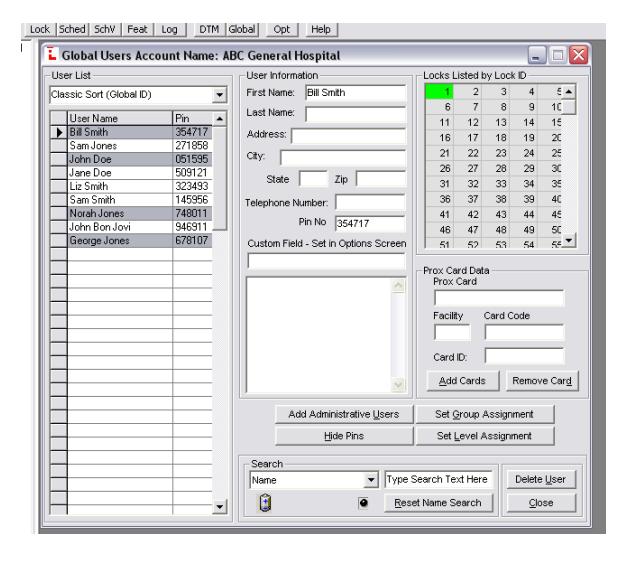
As shown in the image below, specific users have been added to a specific lock. A green Lock ID rectangle indicates the user is added to the lock.
12. Send program to locks using your laptop:
- Double-click the lock you wish to program in the Account;
- Click the " Send/Receive " button;
- Click " Send ";
- Click " Start ";
- Enter the PC Download code you previously used in the Admin Screen.
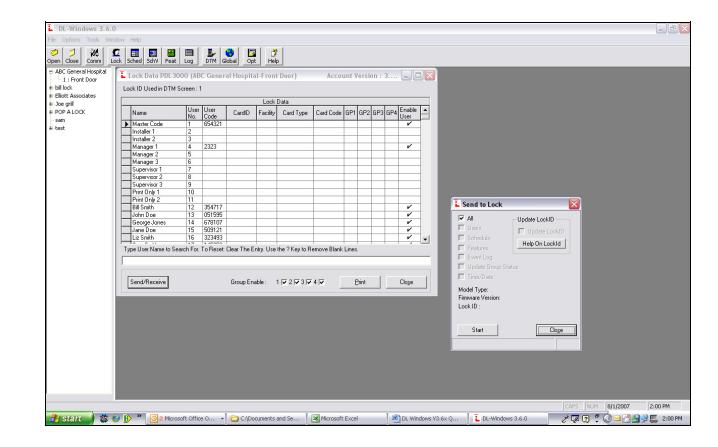
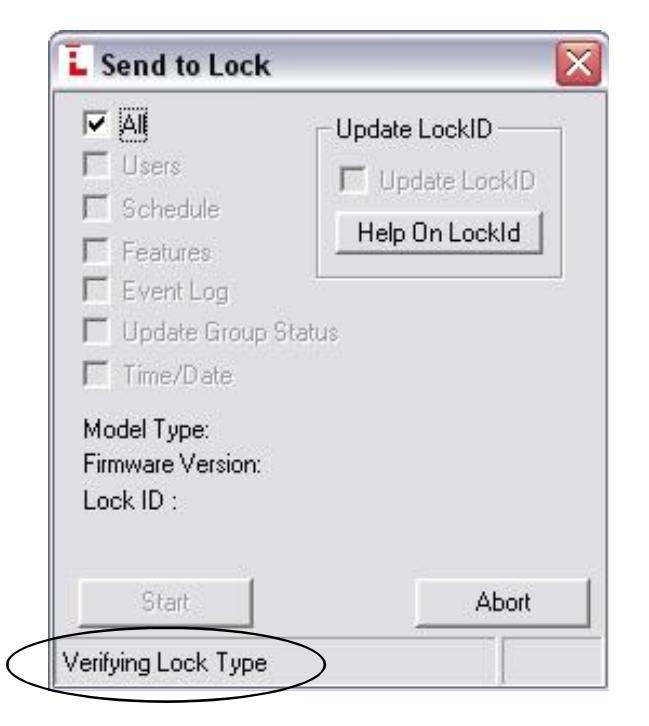
While transmitting, look for the words "Verifying Lock Type" and then rolling numbers at the bottom of the " Send to Lock " screen. When finished, the message reads " Transmission Complete ".
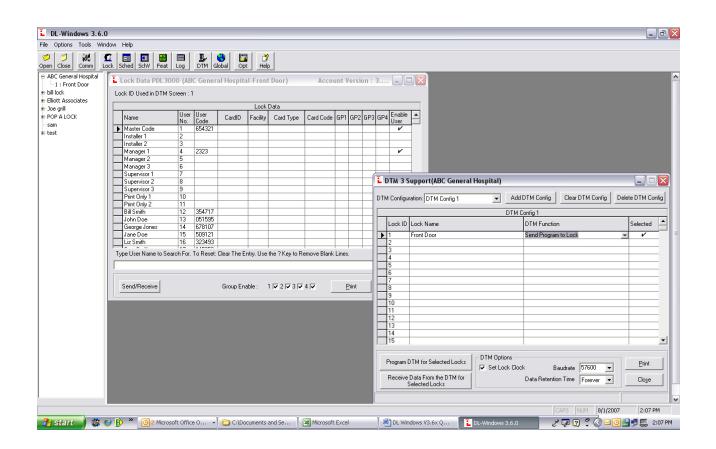
Using your DTM-III to program the lock:
- Double-click the DTM button to open the " DTM 3 Support " screen.
- Under the " DTM Function " column, click the row for the lock you wish to program.
- Select " Send Program to Lock "
- Under the " Selected " column, double-click the row(s) for the lock(s) you wish to program. The check mark () appears for each lock selected (the DTM-III can program up to 200 locks at one time).
- Click the " Program DTM for Selected Locks " button to start the transmission. As before, rolling numbers at the bottom of the screen indicate the software and DTM-III are transmitting the data.