Alarm Lock Assigning Group Associations for Multiple Users
Open the original PDF document
View PDF
ALARM LOCK
345 Bayview Avenue, Amityville, New York, U.S.A. 11701 For Sales and Repairs 1-800-ALA-LOCK • For Technical Service 1-800-645-9440 Fax: 631-789-3383 • info@alarmlock.com
Note: Technical Service is for security professionals only
ALARM LOCK Tech Support


Date: Monday, September 26, 2011
Subject: Assigning Group Associations for Multiple Users
Models: DL-Windows V3.6.0 or later
In many installations, large numbers of Users share similar attributes--for example, their workplace location, work hours, access to certain secure locations, etc. Placing these similar Users into "Groups" allows for large numbers of Users to be controlled all at once rather than individually, saving time and effort. Assigning Group associations for multiple Users is easy with the Set Group Assignment screen. Proceed as follows:
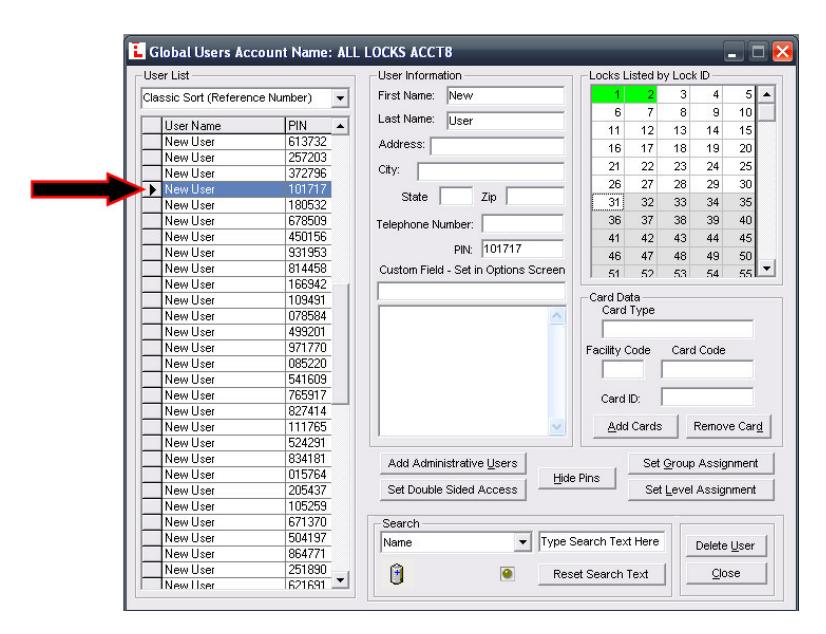
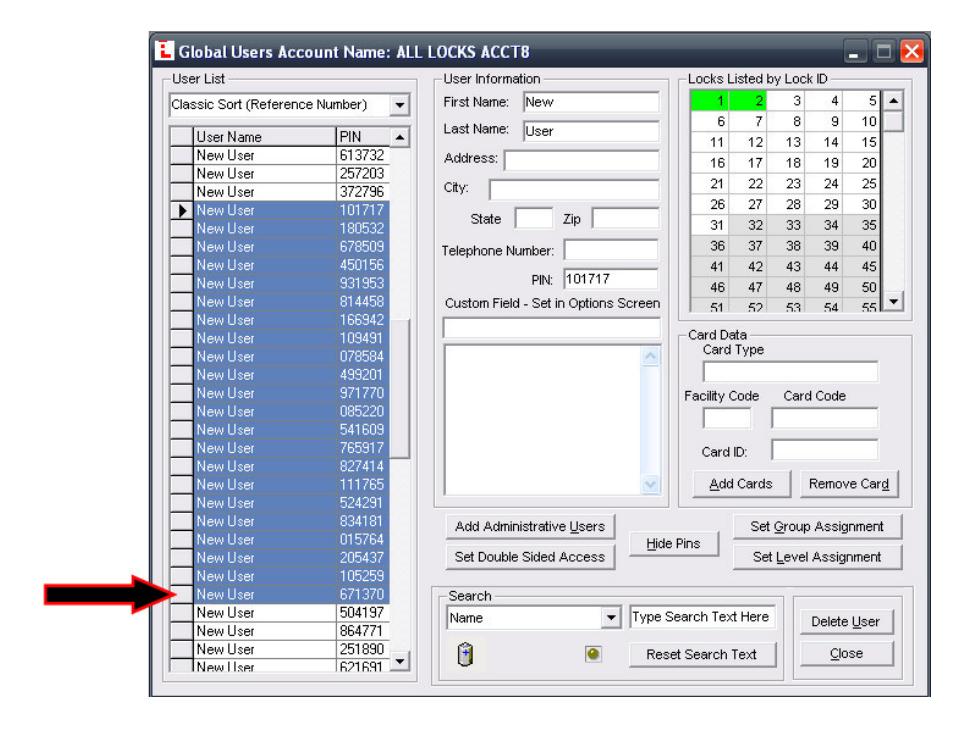
1. Select multiple Users : In DL-Windows, open the Account and click the Global button to open the Global Users screen. In the Global Users screen, select the first User to be assigned to a Group by clicking the gray box to the left of the User Name as shown in the image below:
ALARM LOCK
345 Bayview Avenue, Amityville, New York, U.S.A. 11701 For Sales and Repairs 1-800-ALA-LOCK • For Technical Service 1-800-645-9440
Fax: 631-789-3383 • info@alarmlock.com Note: Technical Service is for security professionals only
Scroll down to the last User to be assigned to a Group, but before clicking to select the User, press and hold the SHIFT key on your keyboard, then click the gray box to the left of the last User Name. Multiple User Names are selected and highlighted in blue, as shown in the image below:
2. Set the Group Assignment : Click the Set Group Assignment button in the Global Users screen. The Set Group Assignment for User dialog opens:

This screen allows you to assign Users a Group number, and also to assign the Group number to a Lock ID . In the grid shown above, double-click the Group number listed under the appropriate Lock ID , and that Group number "cell" will appear highlighted in green as shown below:
ALARM LOCK
345 Bayview Avenue, Amityville, New York, U.S.A. 11701 For Sales and Repairs 1-800-ALA-LOCK • For Technical Service 1-800-645-9440
Fax: 631-789-3383 • info@alarmlock.com
Note: Technical Service is for security professionals only
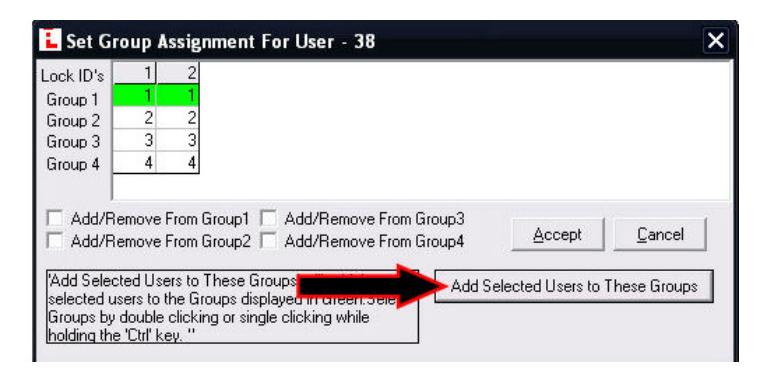
3. Click on the " Add Selected Users to These Groups " button to add the selected Users to the Group(s) highlighted in green. In the above example, all multiple Users selected in step 1 are now assigned to Group 1 , and Group 1 is assigned to Lock ID's 1 and 2. The following popup appears, warning that of all the Users selected in step 1, only those actually assigned to a lock (in the Global Users screen) will be added to the green highlighted Group(s):
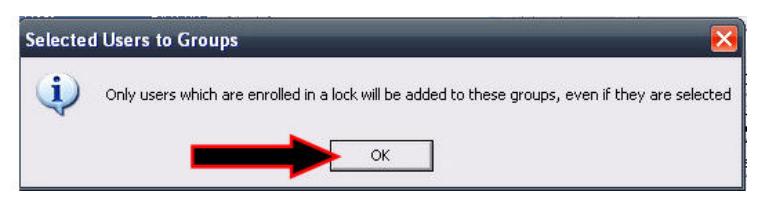
Click OK to close the popup. Click the Accept button in the Set Group Assignment for User dialog to complete the Group assignment process.
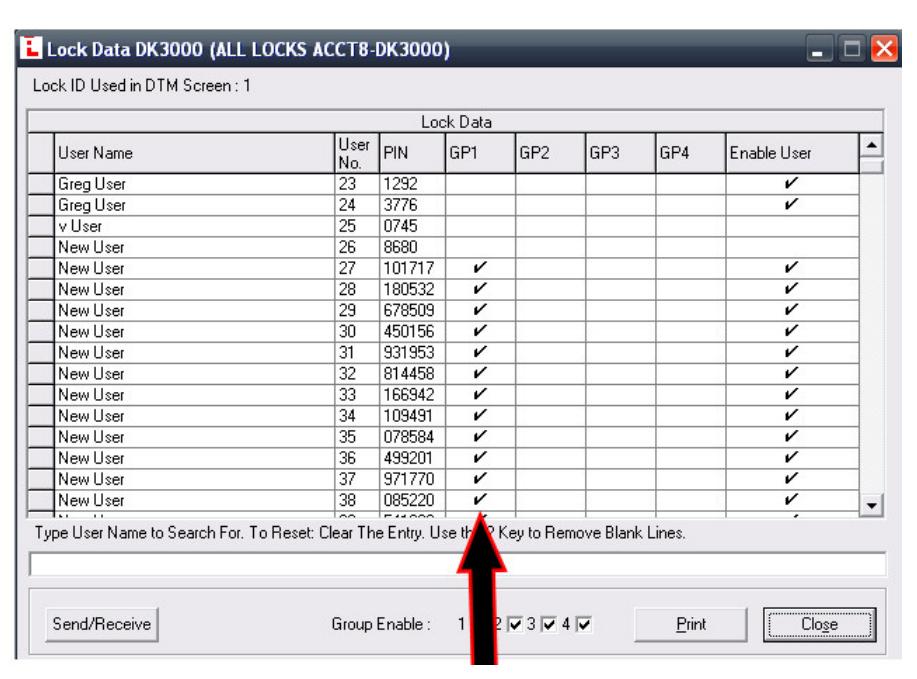
4. Open the Lock Data screen to confirm the selected Users are assigned to the proper Group number: