ASSA ABLOY ACCENTRA D100 Series Installation Instructions_80-YMD1-0120-999
Open the original PDF document
View PDF

D100 Series Grade 1 Cylindrical Deadbolt Installation Instructions
Attention Installer
Cylindrical deadbolts must be through-bolted in all door applications. Improper product installation may result in damage to the lock assembly and may void the factory warranty.
Turning key will expose screw holes. Align Tab with keyway slot. Inside of Door Mounting Plate For 1-1/2" Hole Only FOR 1-1/2" HOLE DO NOT USE COLLAR ORIENTATION FOR 1-1/2" HOLE COLLAR ORIENTATION FOR 2-1/8" HOLE Deadbolt needs to be extended at all times during installation. Housing Assembly Outside Cylinder Outside Of Door
IMPORTANT: Accurate door preparation is critical to the proper function of this cylindrical deadbolt. Any misalignment will cause premature component wear, reducing deadbolt life and lessening security.
Any retrofit or other field modification to a fire rated opening can potentially impact the fire rating of the opening, and Yale Locks & Hardware makes no representations or warranties concerning what such impact may be in any specific situation. When retrofitting any portion of an existing fire rated opening, or specifying and installing a new fire-rated opening, please consult with a code specialist or local code official (Authority Having Jurisdiction) to ensure compliance with all applicable codes and ratings.
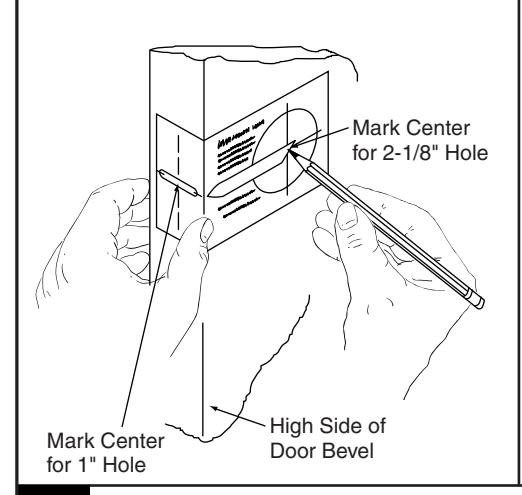
MARK HOLES
Using enclosed template, mark door as illustrated at desired lock height and correct backset.
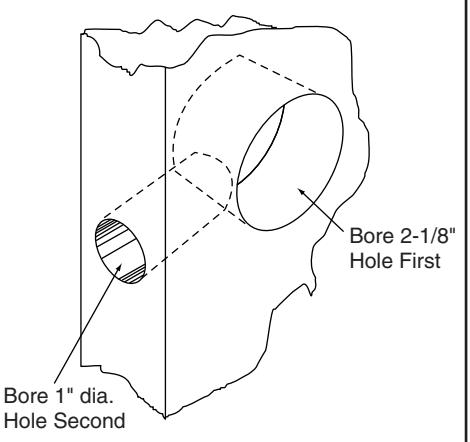
BORE TWO HOLES
Drill 2-1/8" hole through both sides of the door as shown and 1" dia. hole into front face of the door. Be certain holes are perpendicular.
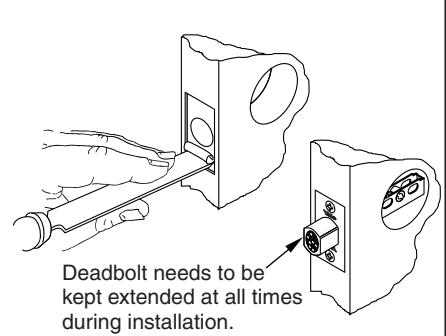
INSTALL DEADBOLT Insert deadbolt in hole, keeping it
Insert deadbolt in hole, keeping it parallel to face of the door and scribe line around face plate. Remove deadbolt and chisel out scribed area to depth of 5/32" or until face is flush with door edge. Insert deadbolt and fasten with two deadbolt screws (#8-32 x 3/4").
4
INSTALL OUTSIDE TRIM
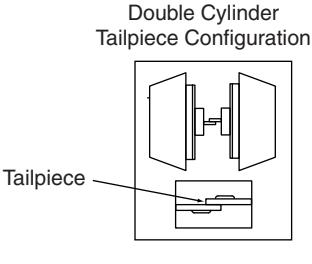
With deadbolt extended, install cylinder housing without a key in the cylinder and with the tailpiece in line with the tailpiece slot in the deadbolt.
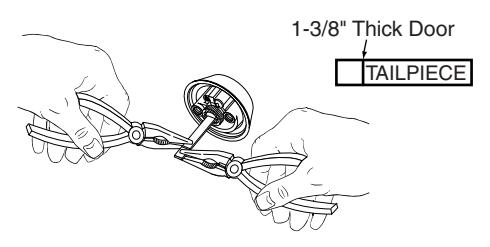
- 1. Measure door thickness.
- If the tailpiece needs to be shortened; grip the tailpiece with pliers on both sides of the score mark and twist to break off.
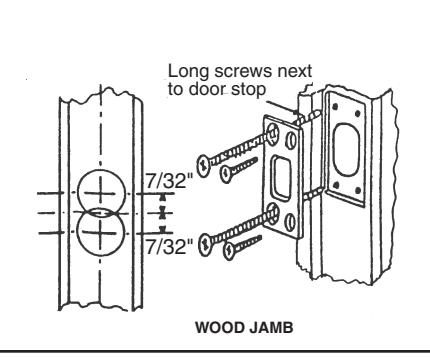
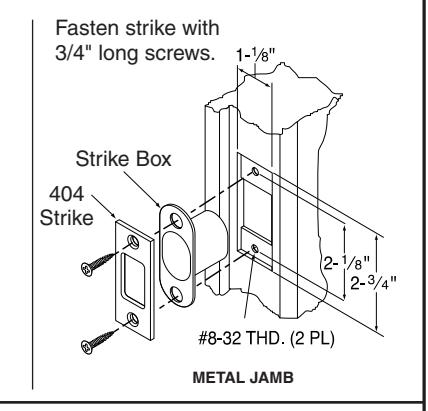
INSTALL STRIKE ON DOOR JAMB
Mark jamb exactly opposite centerline of latch hole. Bore two 1" dia. Holes 7/32" above and below height line to a depth of 1-1/8". Mortise for strike and box strike. Install and fasten four screws as illustrated.
NOTE: Drill 1/8" dia. pilot holes for 3/4" long screws, and 5/32" dia. for 3" long screws.
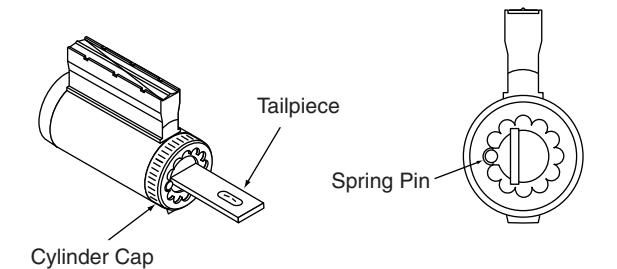
HOW TO CHANGE TAILPIECE
All locks are preset for 1-3/4" door thickness. For 1-3/8" doors, substitute with shorter tailpieces provided in poly bag.
Depress spring pin and unscrew cylinder cap. Remove and replace tailpiece. Screw cylinder cap onto plug while holding spring pin depressed until the cap is tight, then back off one or two notches as required. Check cylinder for proper clearance. If cap is too loose, the key cannot be withdrawn and if too tight cylinder will bind. Make sure that spring pin is engaged with cylinder cap.
Yale Locks & Hardware
Product Support Tel 800.438.1951 • www.yalelocks.com
Yale Locks & Hardware is a division of Yale Security Inc., an ASSA ABLOY Group company.
Yale® is a registered trademark of Yale Security Inc., an ASSA ABLOY Group company. Other products' brand names may be trademarks or registered trademarks of their respective owners and are mentioned for reference purposes only. These materials are protected under U.S. copyright laws. All contents current at time of publication. Yale Security Inc. reserves the right to change availability of any item in this catalog, its design, construction, and/or its materials. Copyright © 2010, 2012, Yale Security Inc., an ASSA ABLOY Group company.
All rights reserved. Reproduction in whole or in part without the express written permission of Yale Security Inc. is prohibited.
2