ASSA ABLOY ACCENTRA 88 Security Latchlocks Installation Instructions_80-9350-0004-000
Open the original PDF document
View PDFN° 88 Latchlock
Auxiliary Latchbolt
Installation Instructions

General Info
For wood doors 1-3/8" to 2-1/4" (35mm to 57mm) thick with wood frames.
For Doors Opening Outward Use #8 Reverse Bevel Strike (Available Upon Request)
Connecting bar and screws available for 2-1/4" to 3-1/4" (57mm to 82mm) doors.
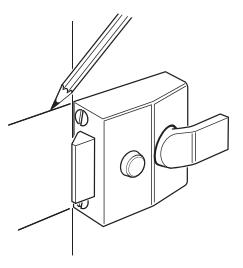
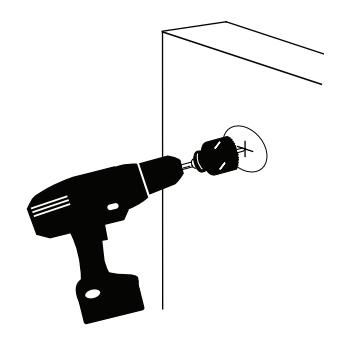
1. Wood Door Prep
A. Mark door at 2-3/8" (60mm) from door edge.
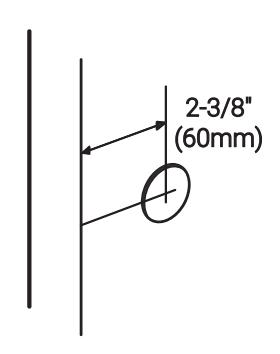
B. Drill a 1-1/4" (43mm) diameter hole through door.
⚠ WARNING
This product can expose you to lead which is known to the state of California to cause cancer and birth defects or other reproductive harm. For more information go to www.P65warnings.ca.gov.
⚠ WARNING
Attention Installer: Any retrofit or other field modification to a fire rated opening can potentially impact the fire rating of the opening, and ASSA ABLOY ACCENTRA™ makes no representations or warranties concerning what such impact may be in any specific situation. When retrofitting any portion of an existing fire-rated opening, or specifying and installing a new fire-rated opening, please consult with a code specialist or local code official (Authority Having Jurisdiction) to ensure compliance with all applicable codes and ratings.
80-9350-0004-000 01/24

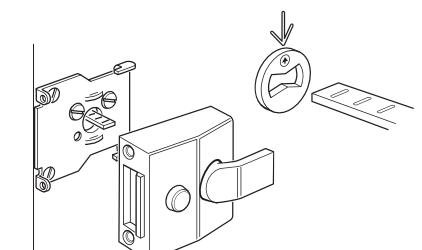
2. Lock Installation
A. Insert cylinder through brass ring and install from outside of door.
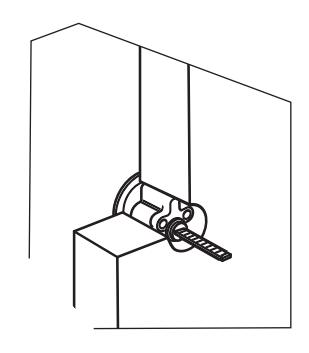
B. Hold mounting plate against inside of the door. If necessary, shorten the flat connecting bar so it projects 15/32" (12mm) beyond surface of mounting plate.
Secure mounting plate to door with two wood screws supplied. Make sure the projection on the front of the mounting plate is 1/16" (1.5mm) from edge of door.
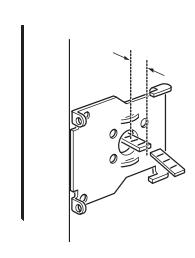
C. Secure the cylinder to the mounting plate using flat head screws through the top pair of holes in the center of the mounting plate. For doors less than 1-3/4" (45mm) thick, shorten screws so they fit tight to the mount-
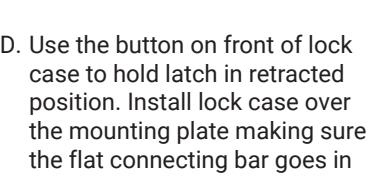
the slot on the lock case.
E. Push lock case firmly onto the mounting plate. Slide the case sideways so it sits flush with the edge of the door. Secure the lock case to the mounting plate with the two small screws supplied.
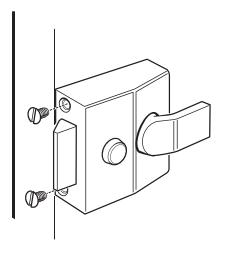
ing plate.
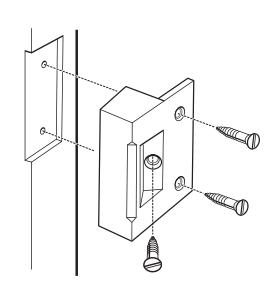
3. Frame Prep and Strike Installation
Close door and use lock case as a guide to position strike.
- A. Mortise frame to suit.
- B. Drill pilot holes.
- C. Install strike.