ASSA ABLOY ACCENTRA 7380F Multi-Point Lock Installation Instructions_80-8470-7380-000
Open the original PDF document
View PDFASSA ABLOY
Installation Instructions
MARNING
This product can expose you to lead which is known to the state of California to cause cancer and birth defects or other reproductive harm. For more information go to www.P65warnings.ca.gov.
MARNING
Attention Installer: Any retrofit or other field modification to a fire rated opening can potentially impact the fire rating of the opening, and ASSA ABLOY makes no representations or warranties concerning what such impact may be in any specific situation. When retrofitting any portion of an existing fire-rated opening, or specifying and installing a new fire-rated opening, please consult with a code specialist or local code official (Authority Having Jurisdiction) to ensure compliance with all applicable codes and ratings.
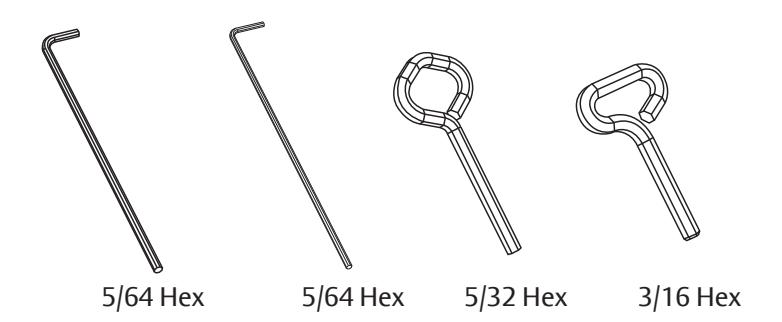
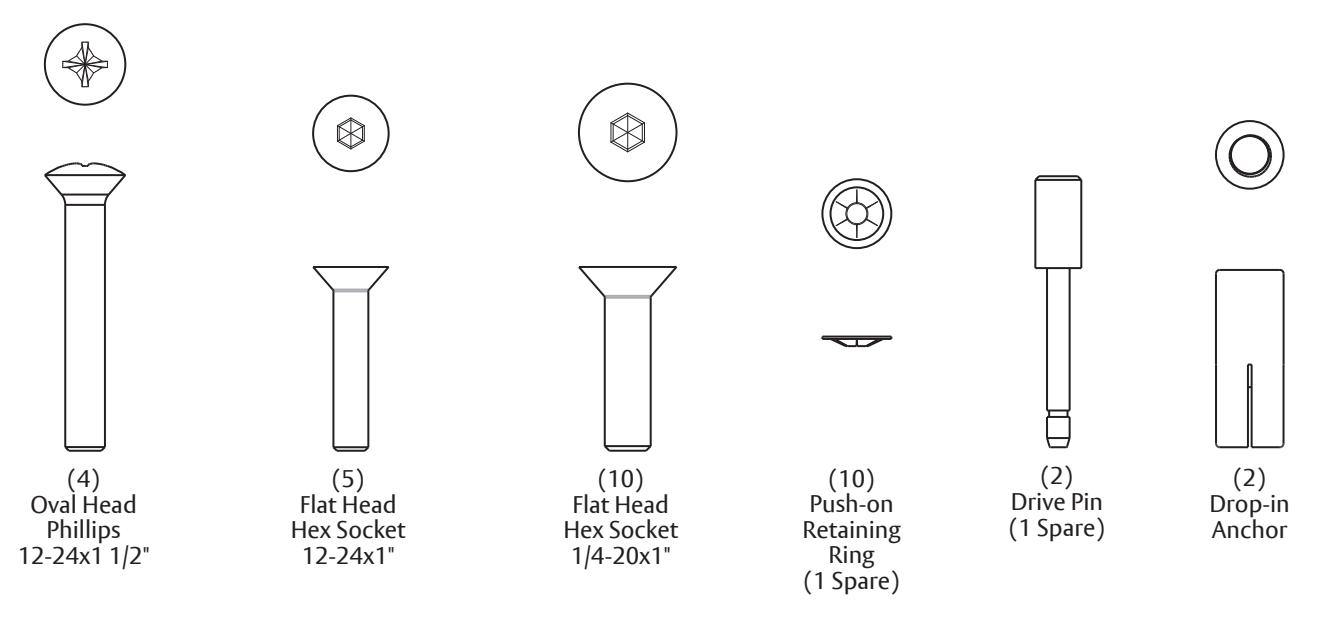
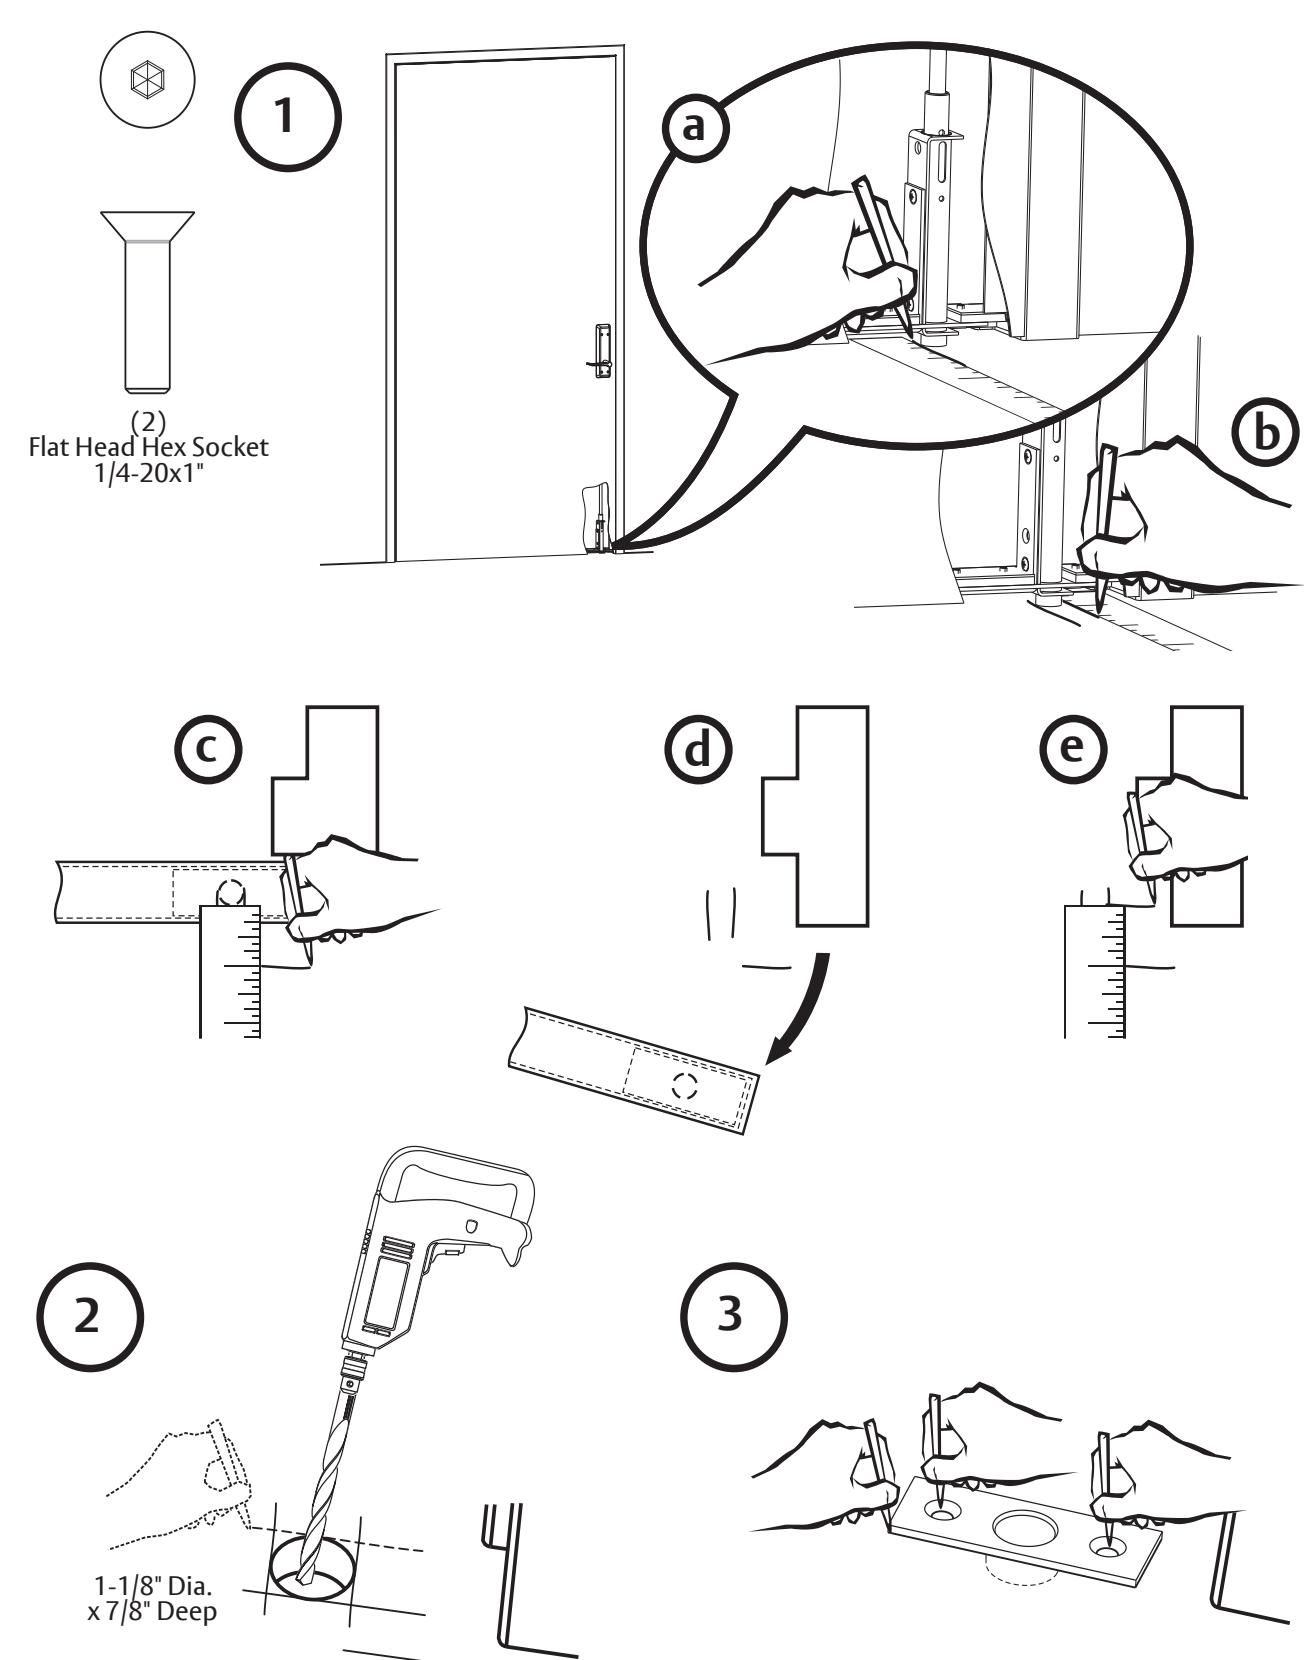
Tools Supplied
IMPORTANT: This device is intended to be part of an integrated door, frame and hardware assembly UL-approved for both FEMA 361 and FEMA 320 guidelines for both in-swing and out-swing doors.
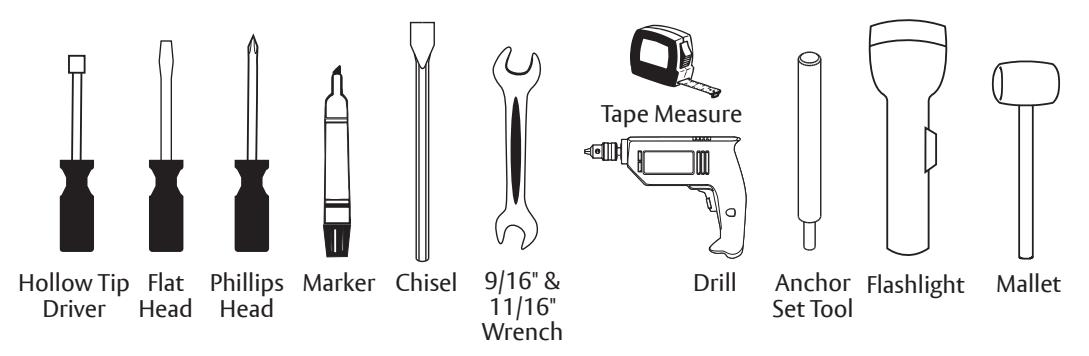
Tools Required
Mounting Hardware (Full Scale)
Installation Instructions
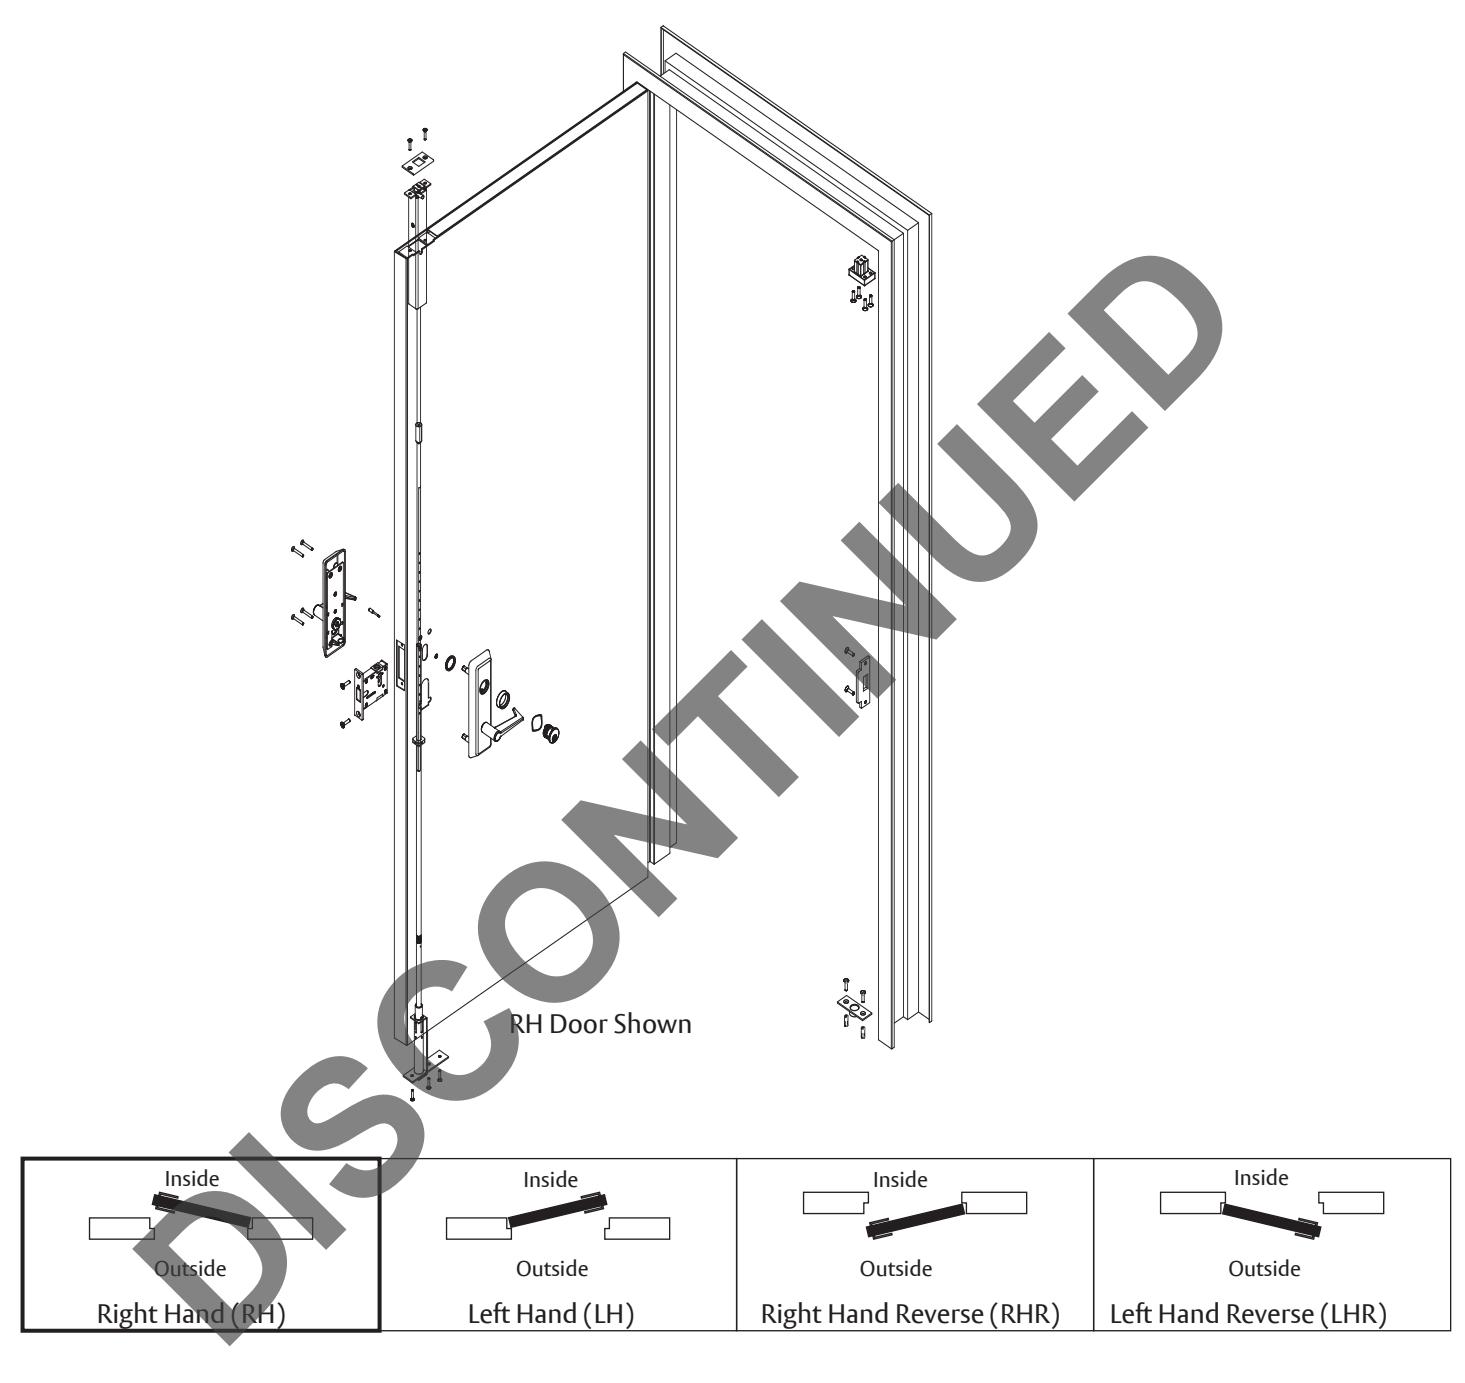
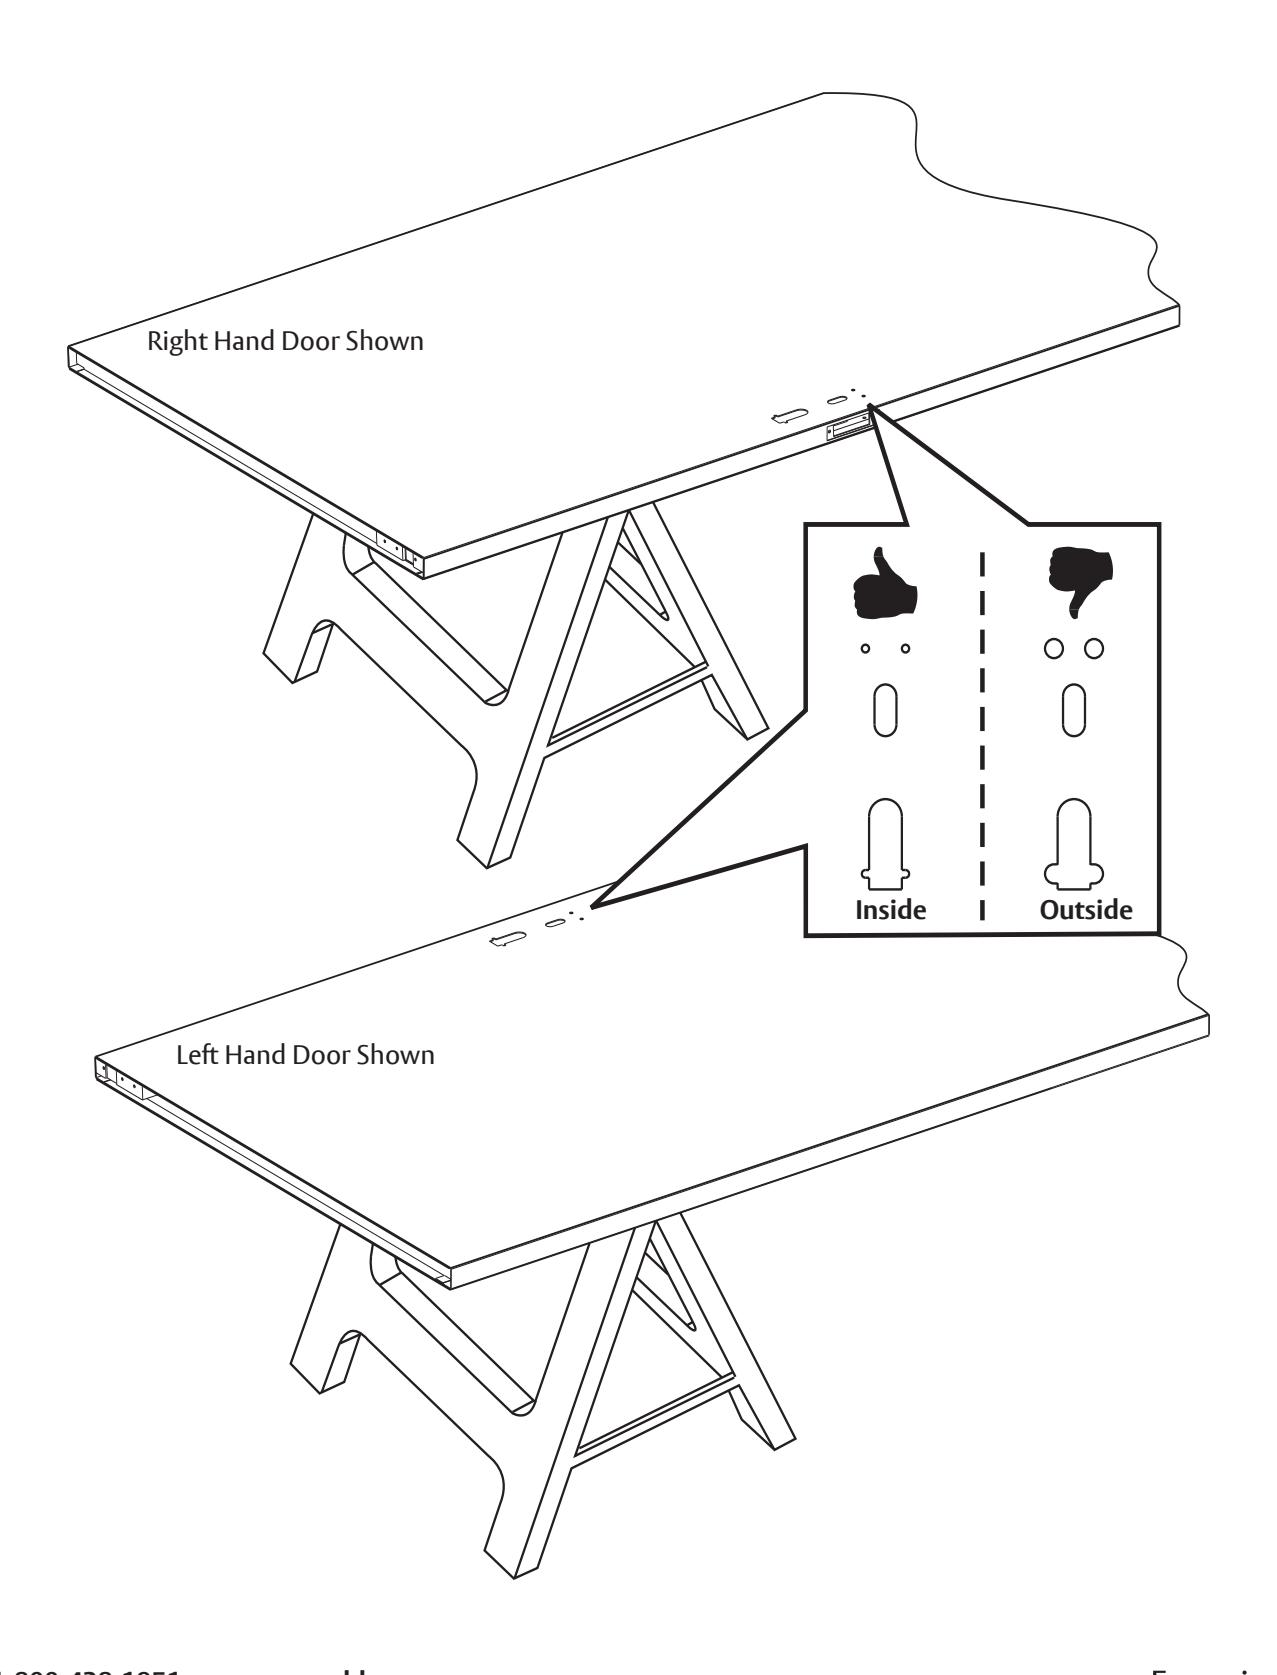
Verify Handing
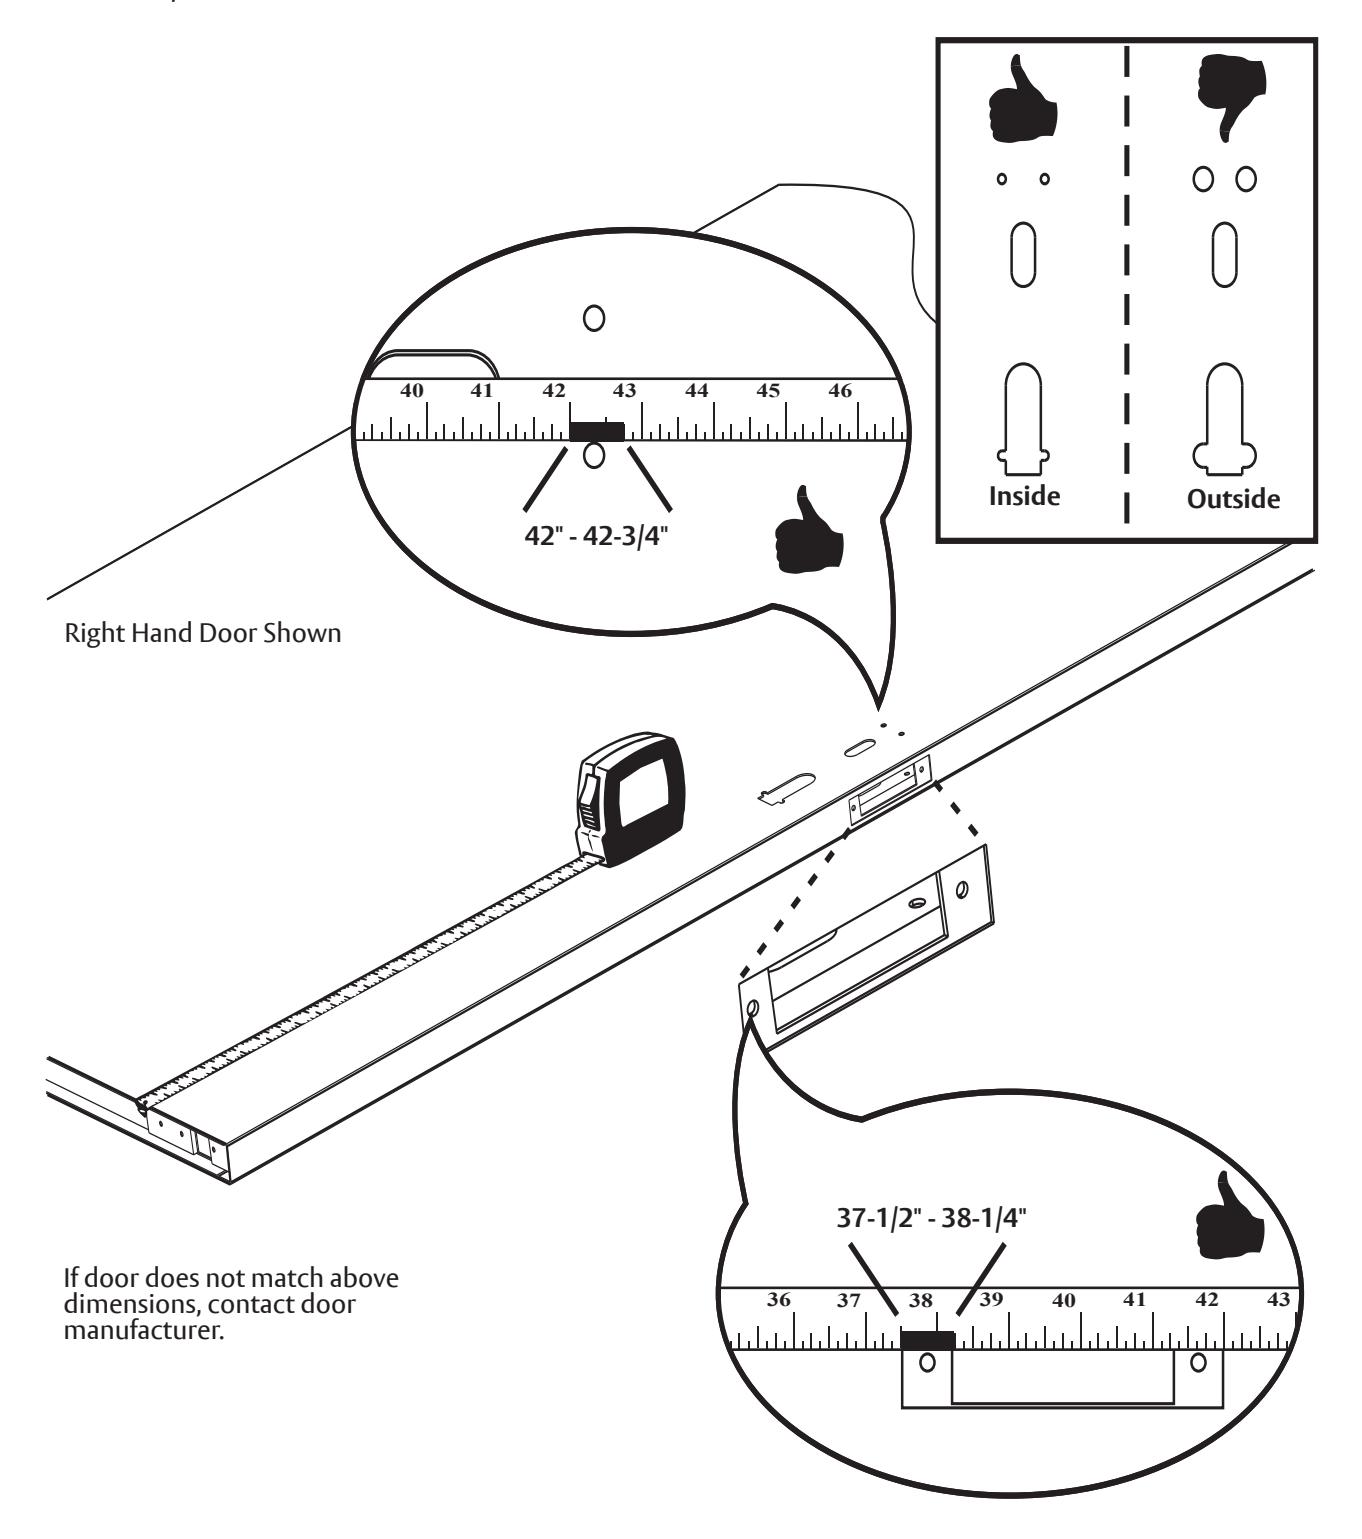
Verify Door Dimensions
MARNING: LOCK IN condition can occur and EMERGENCY EGRESS will be prevented if critical dimensions are not met. Device will not operate if door cutouts are not within the dimensions below.
Installation Instructions
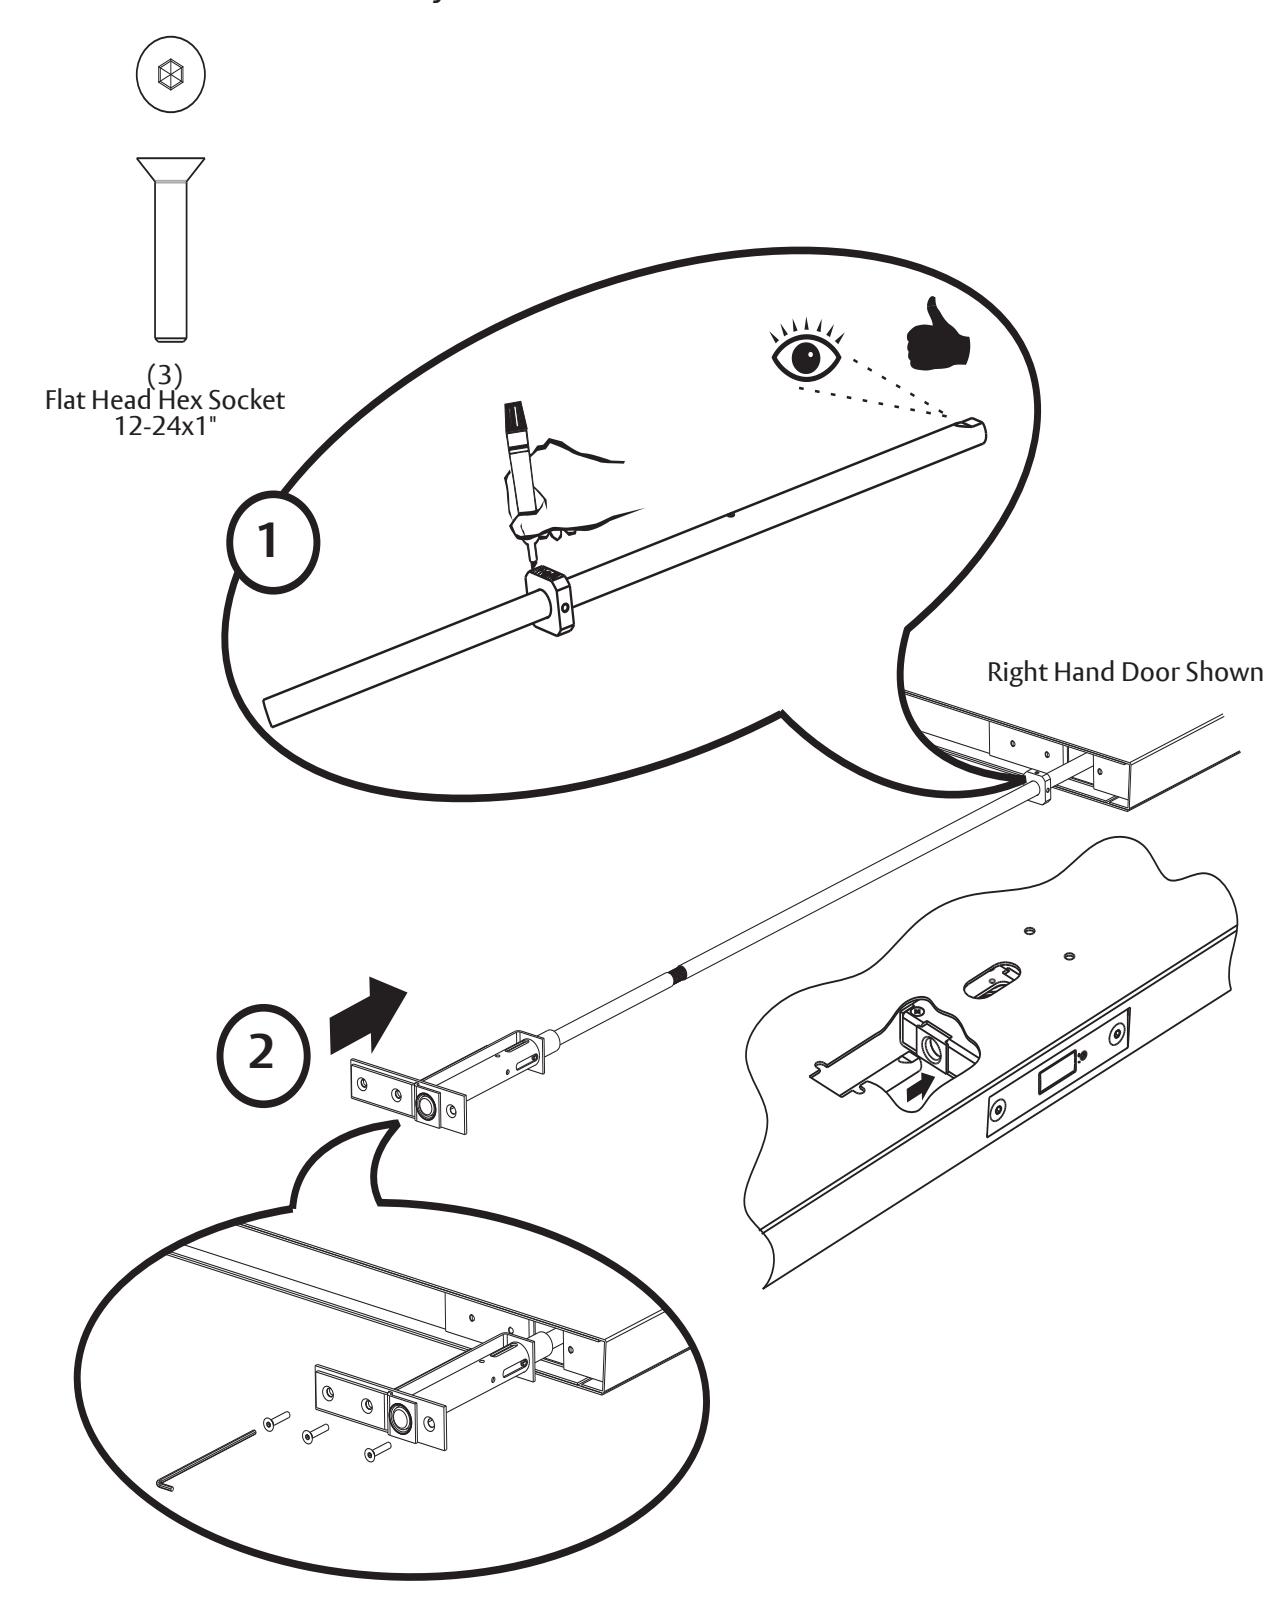
1. Install Deadbolt Assembly
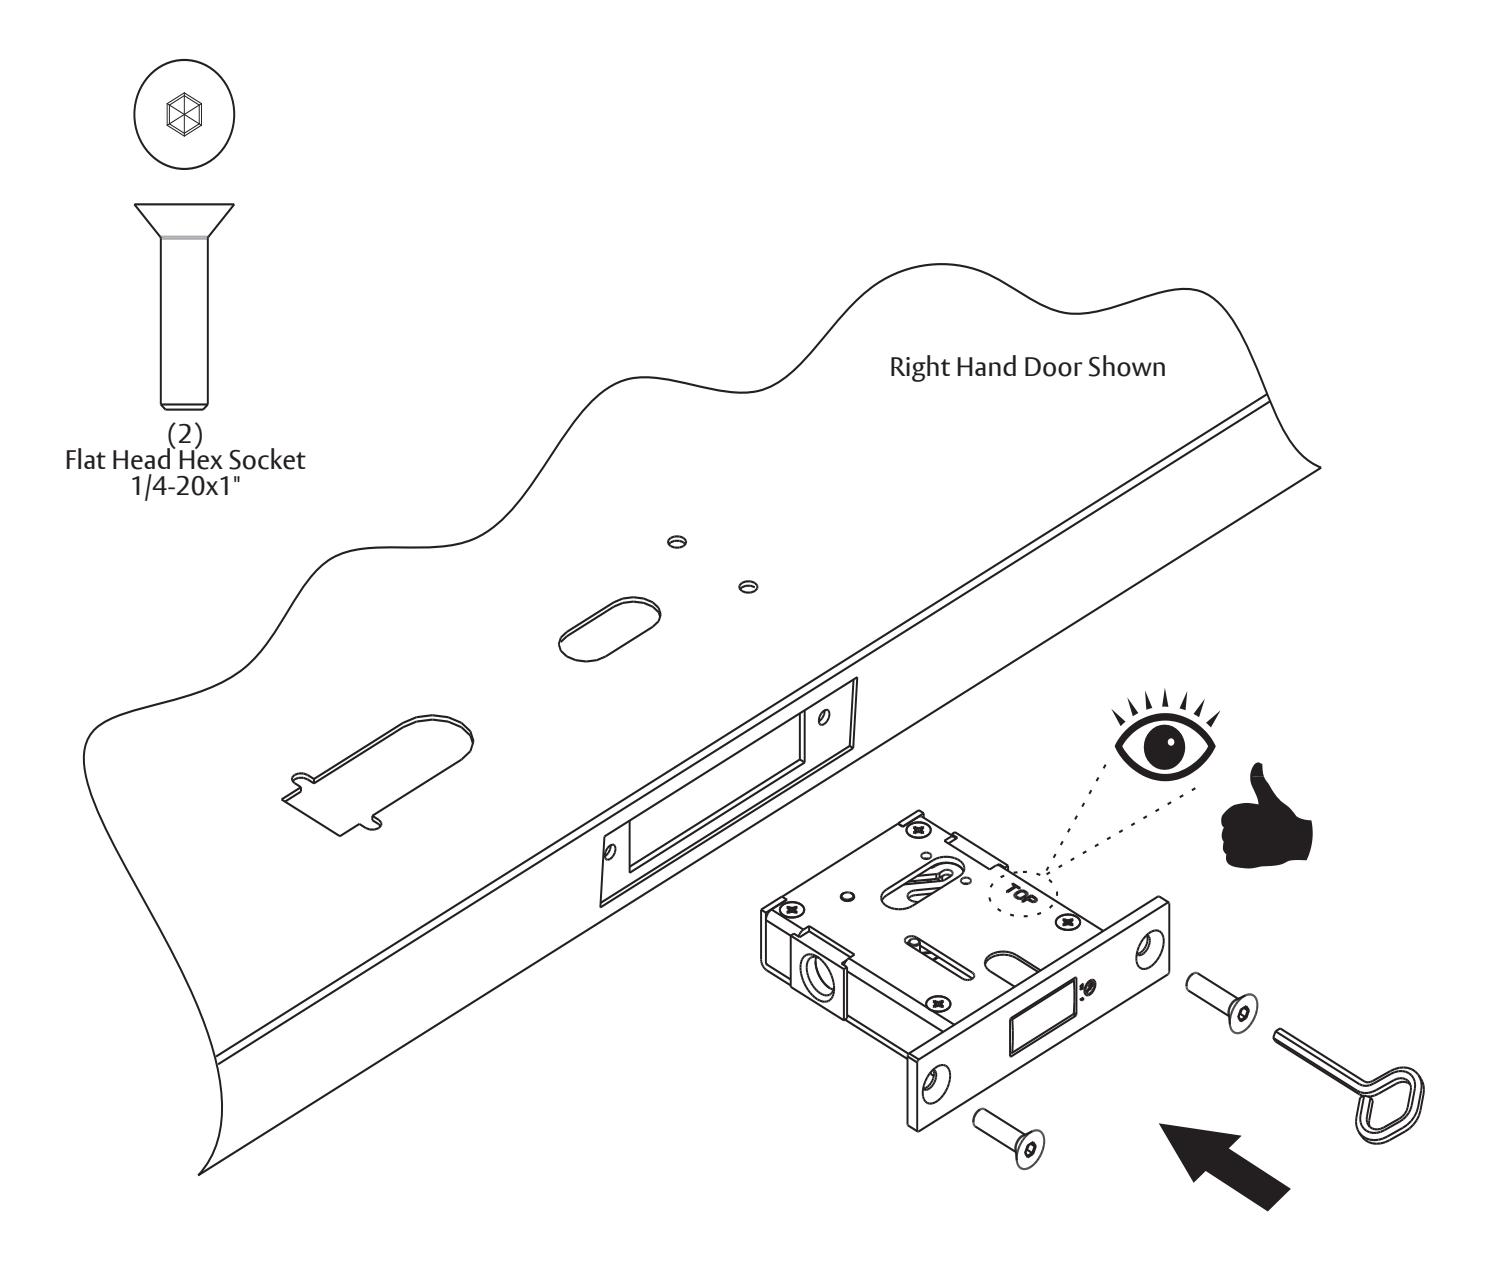
WARNING: Deadbolt must be retracted before moving to the next step.
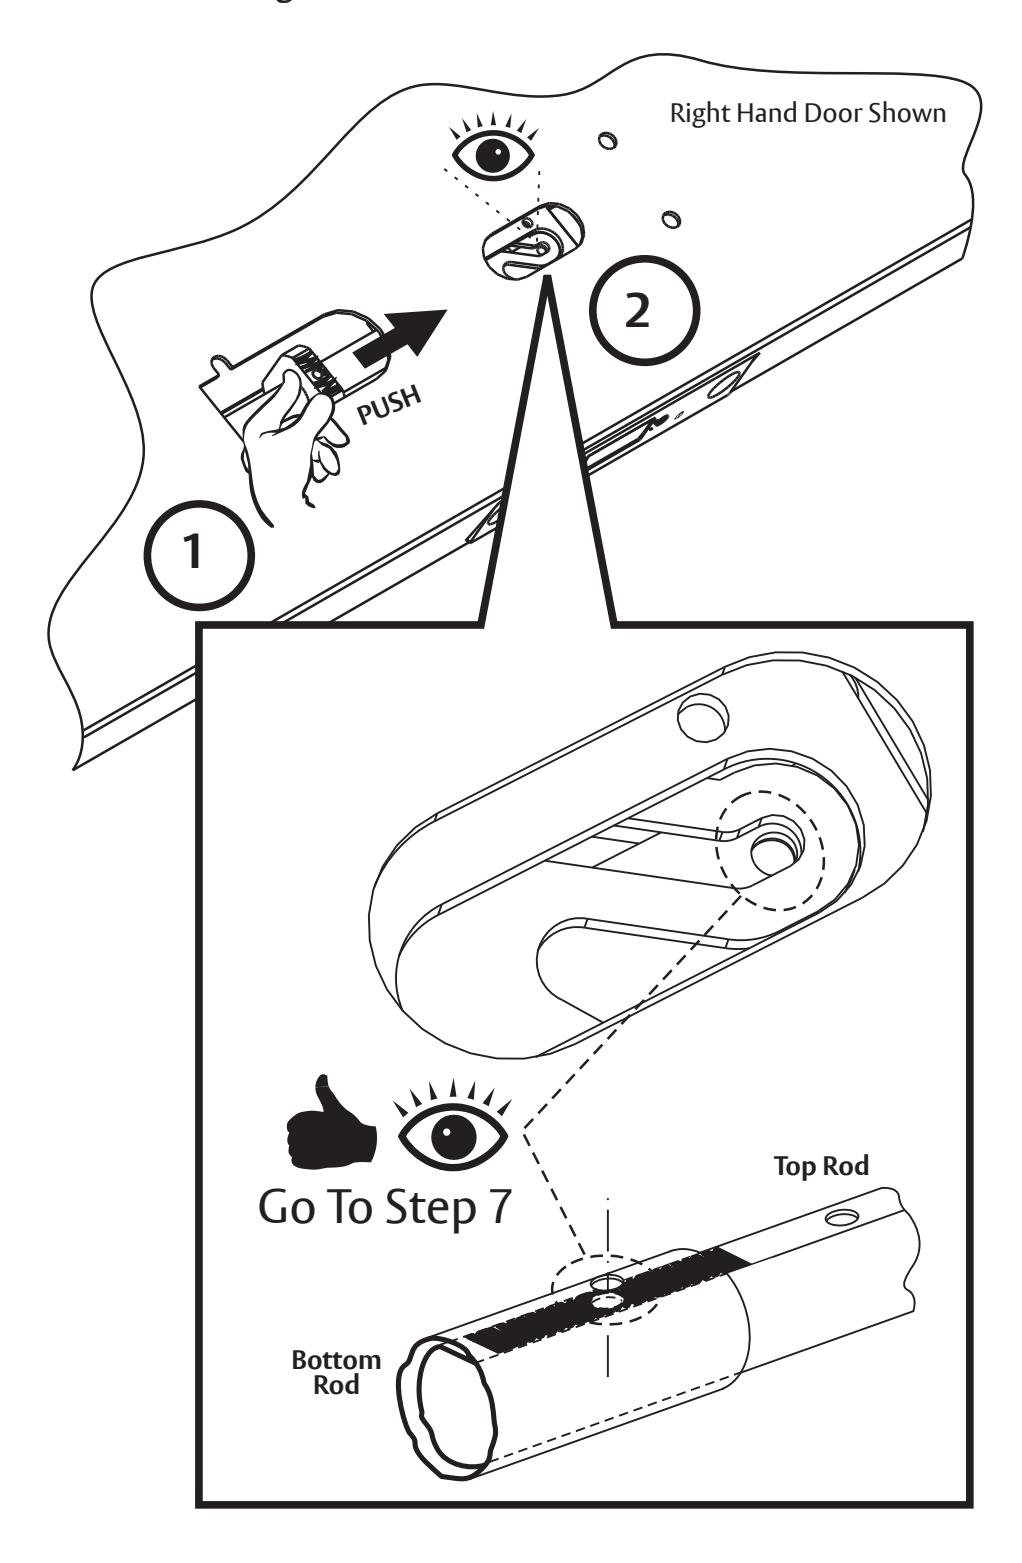
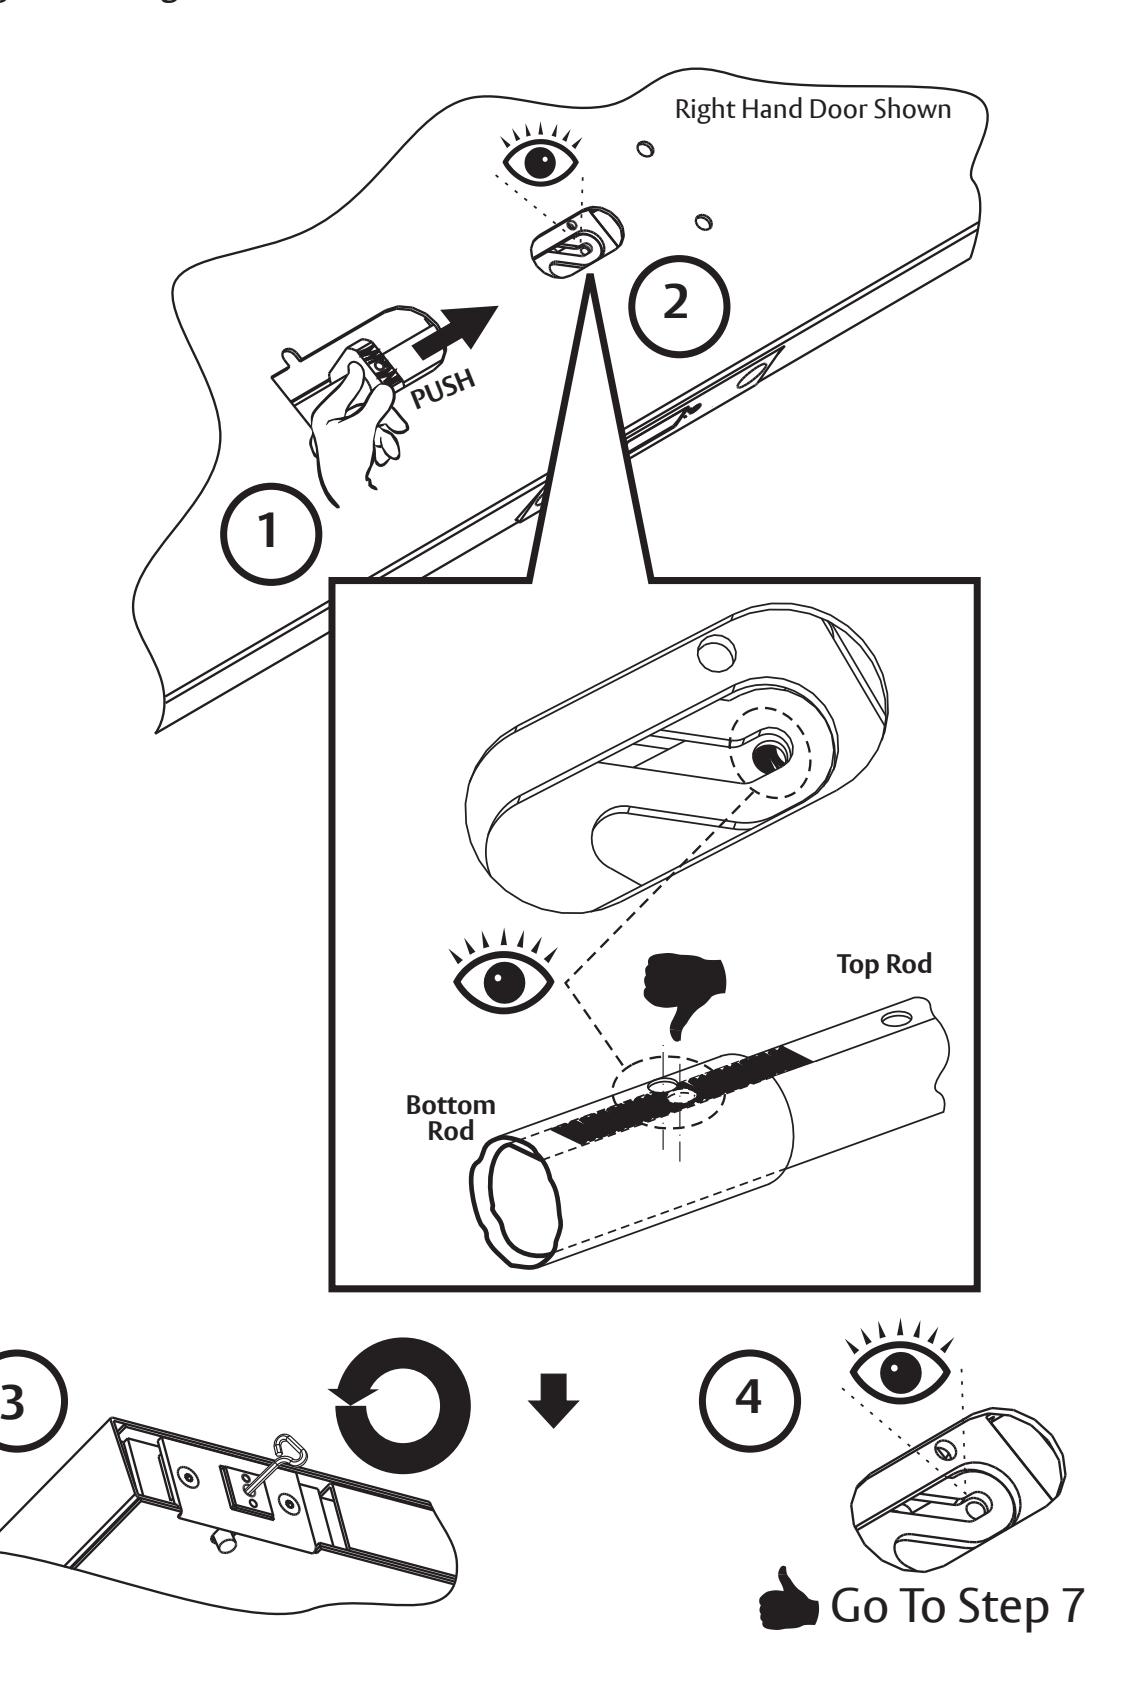
2. Install Bottom Bolt Assembly
Installation Instructions
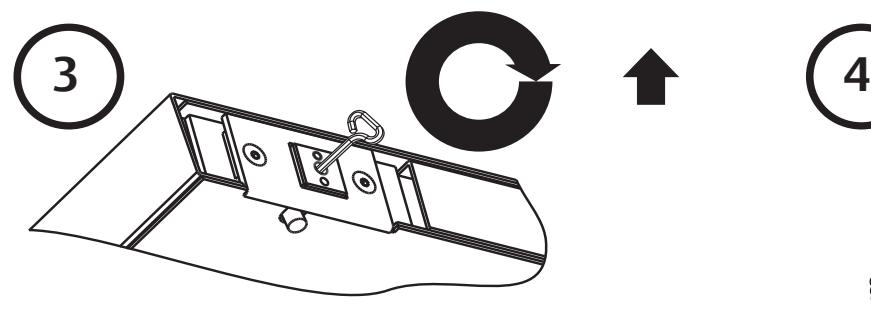
3. Align Bottom Bolt Assembly
Installation Instructions
4. Prep Top Assembly
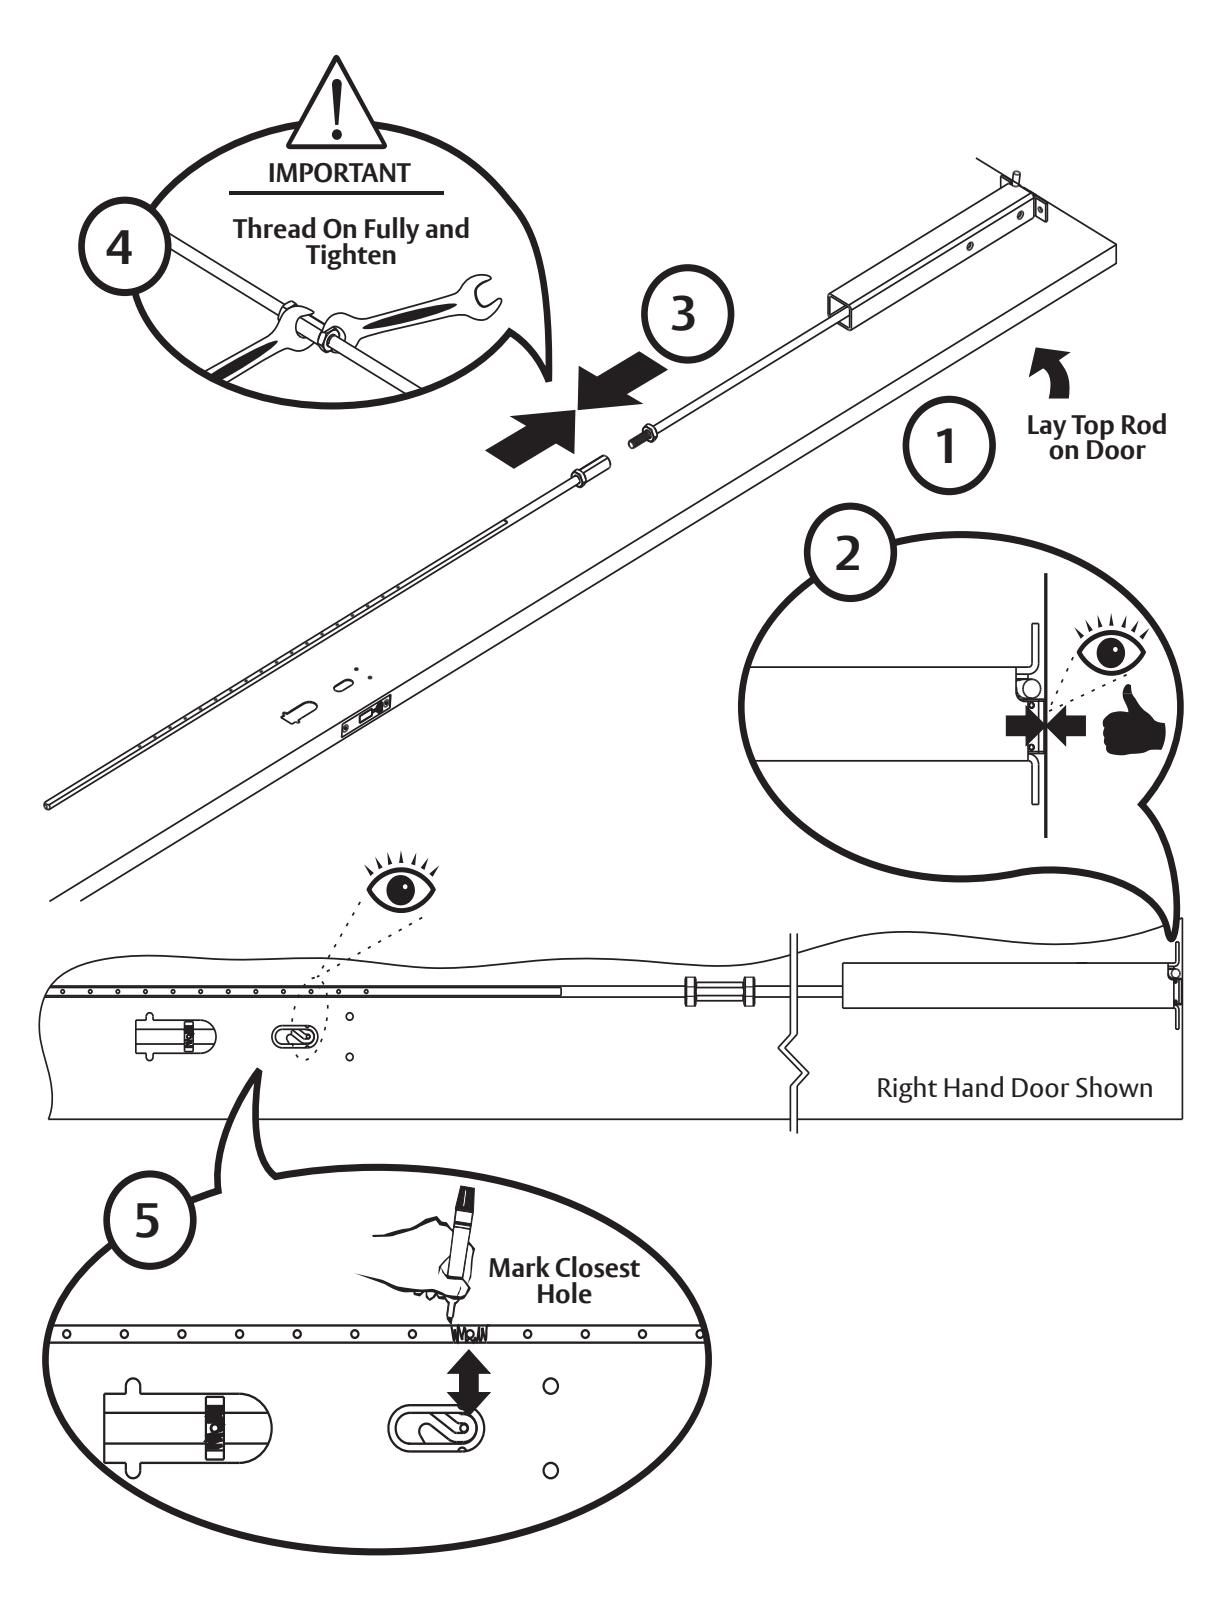
Installation Instructions
5. Install Top Assembly
6. Align Top & Bottom Rod Pinning Holes

Installation Instructions
6a. Adjust Misaligned Pinning Holes Up
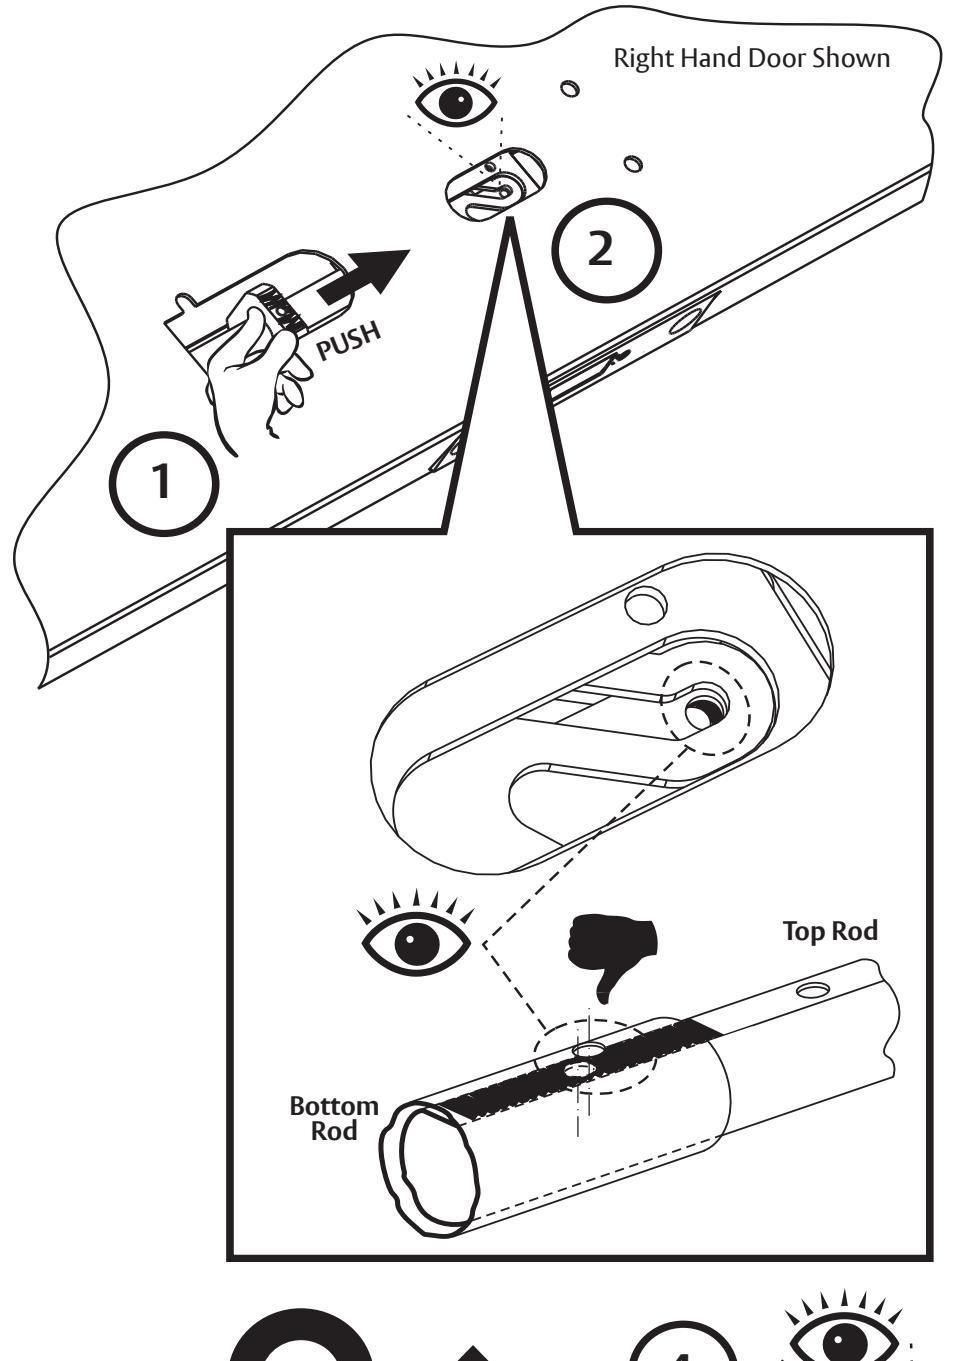

6b. Adjust Misaligned Pinning Holes Down
Installation Instructions
7. Pin Three Assemblies
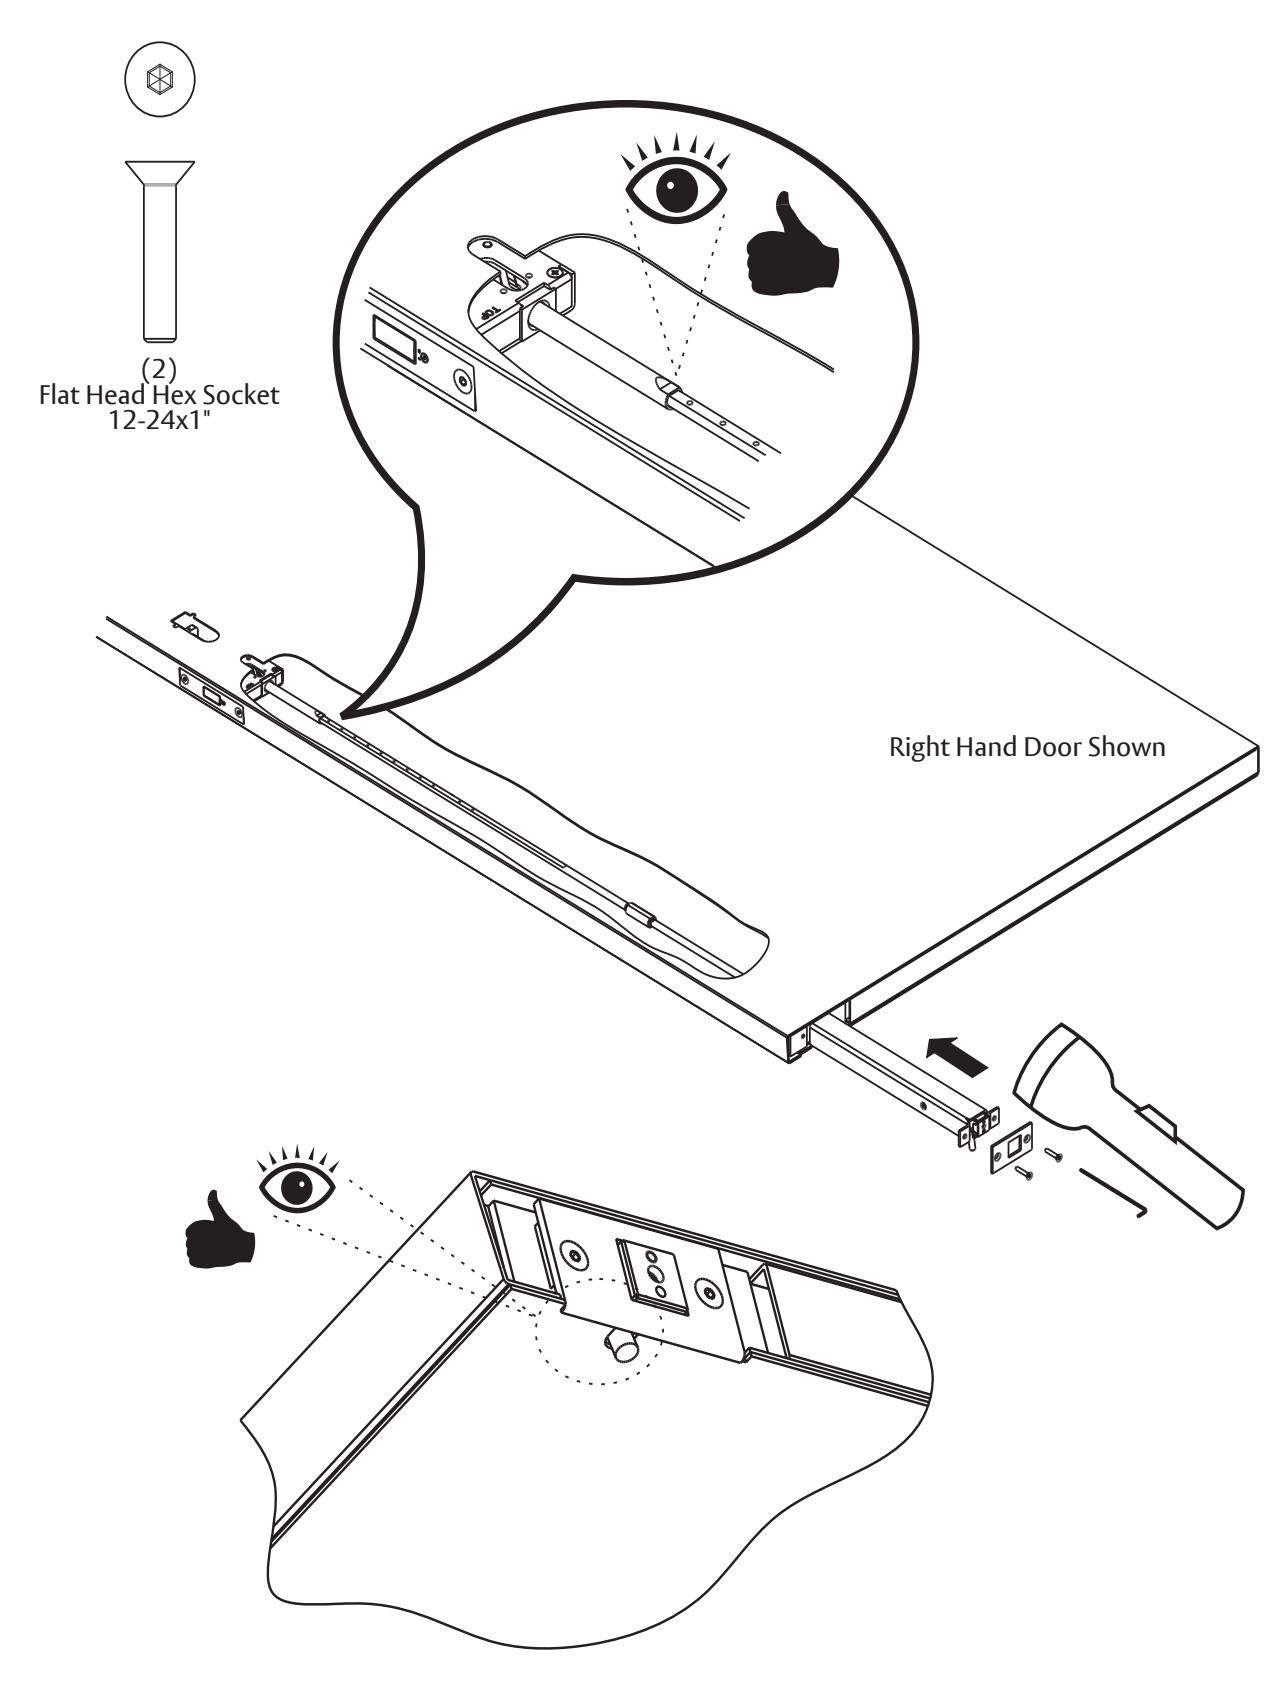
8. Mount Door to Frame

1-800-438-1951 • www.assaabloy.com
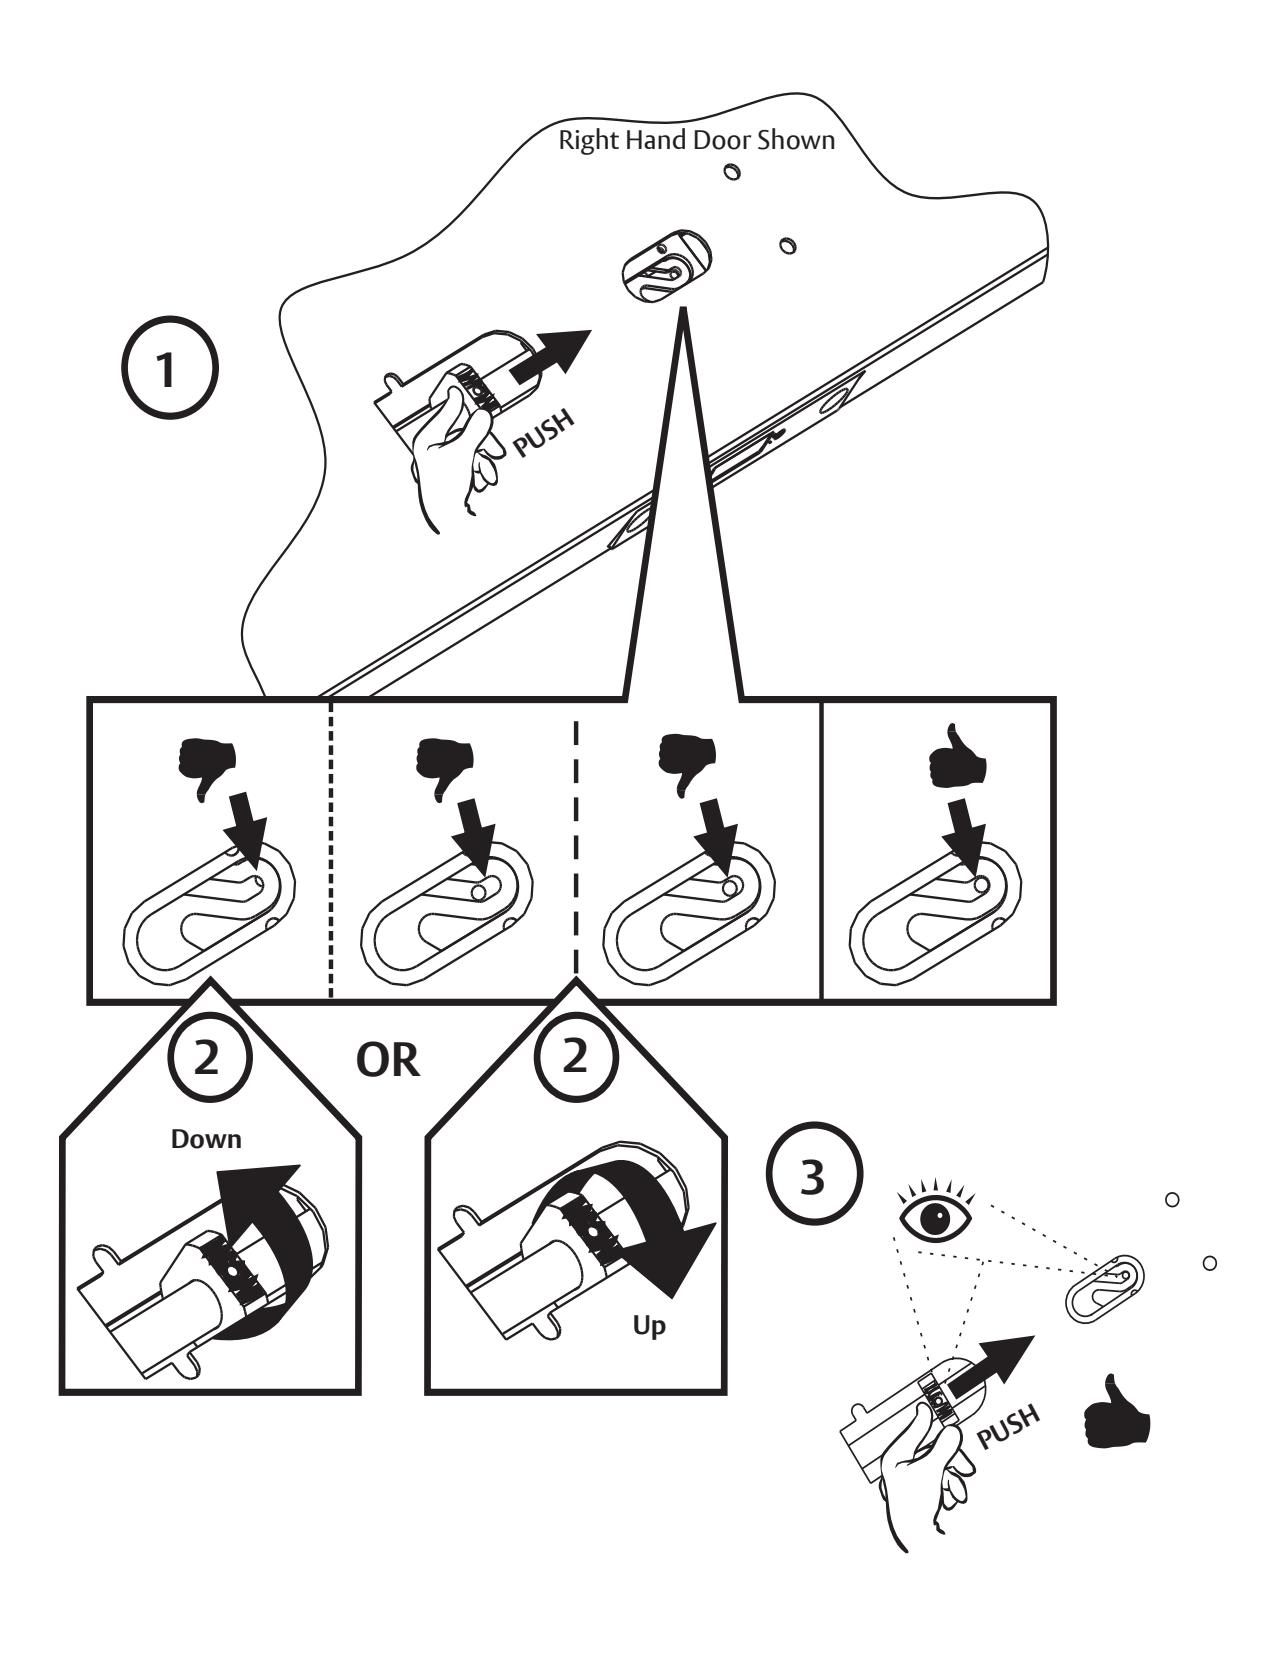
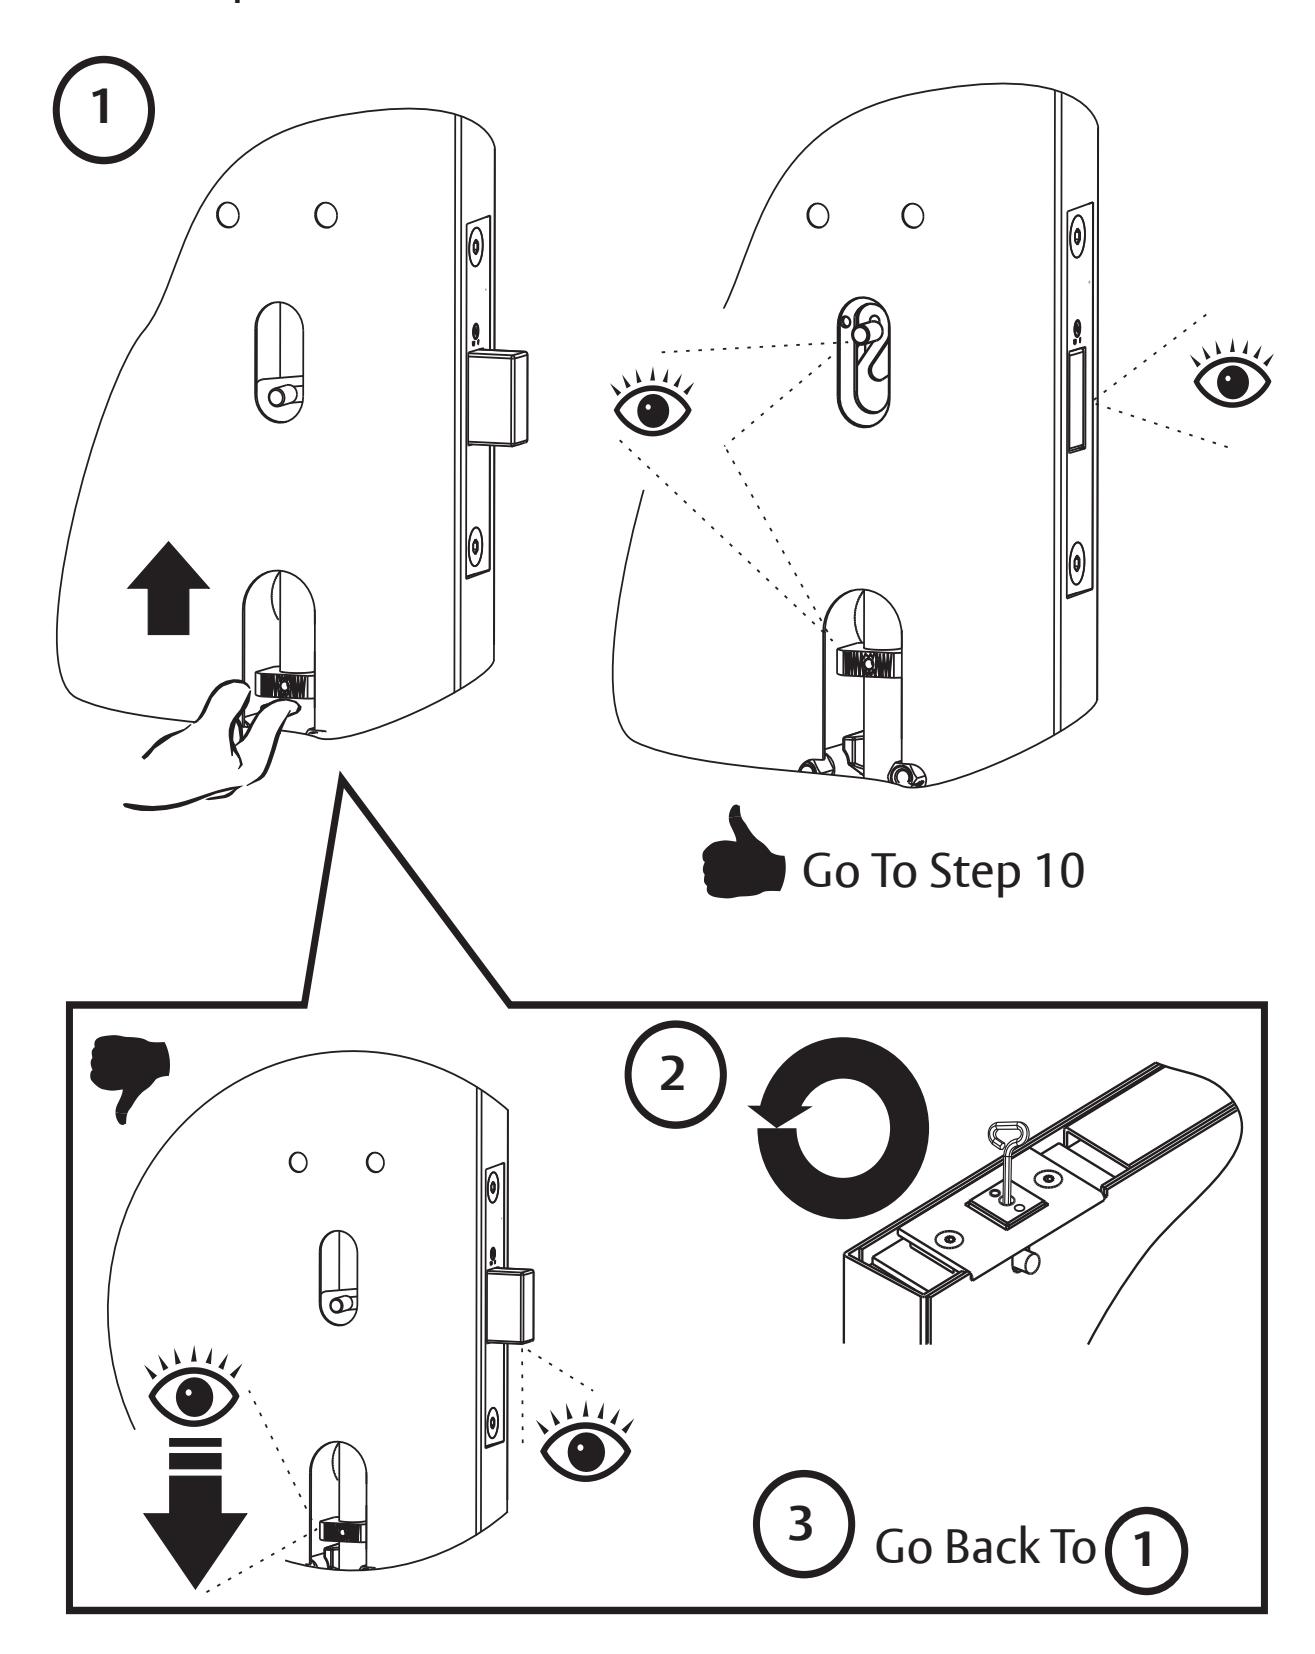
9. Check for Hold Open
Installation Instructions
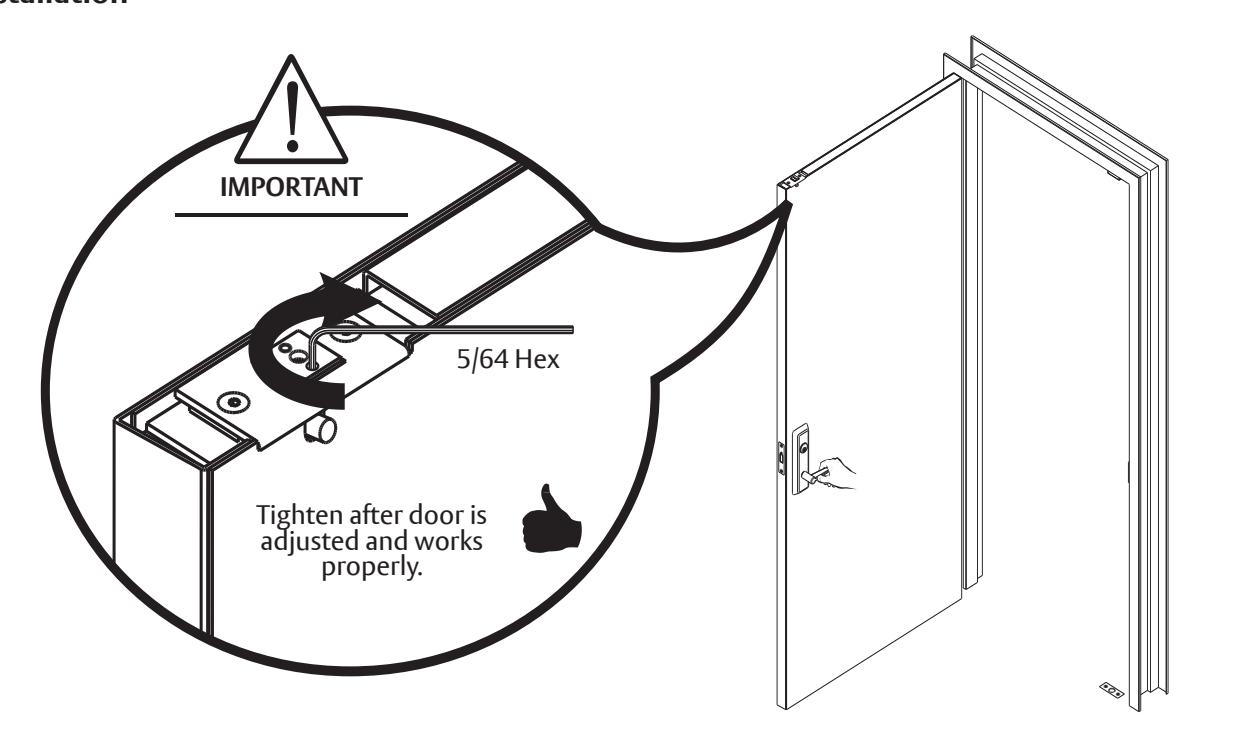
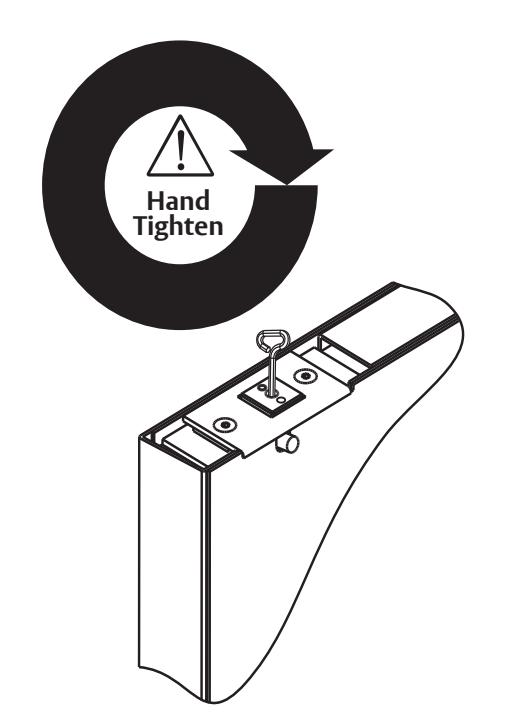
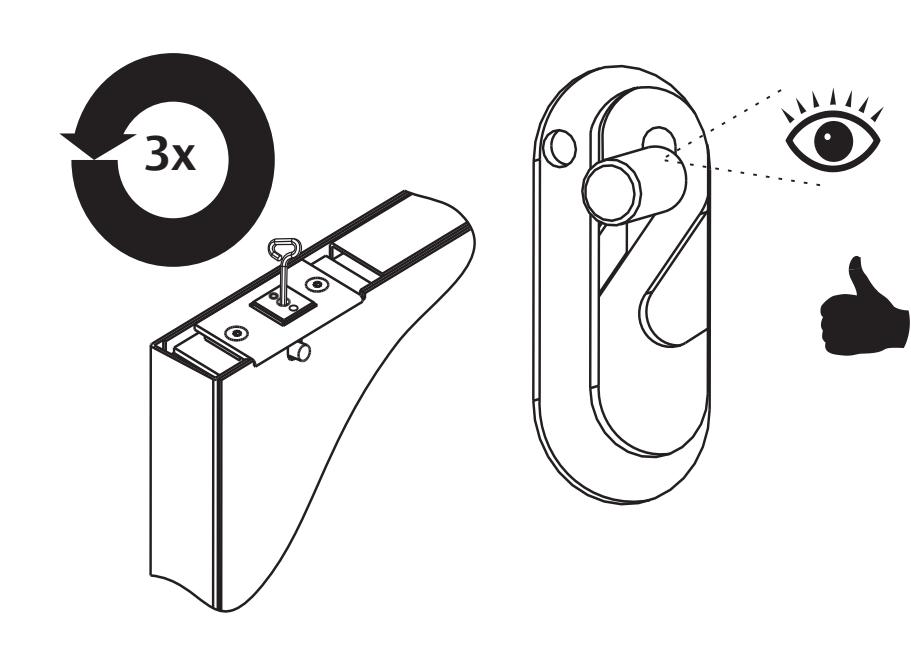
10. Adjust Device

IMPORTANT: Device Must Be In HOLD OPEN Before Adjusting Device.


IMPORTANT: Must Rotate Exactly Three Revolutions.
Installation Instructions
11. Trigger Device & Final Check
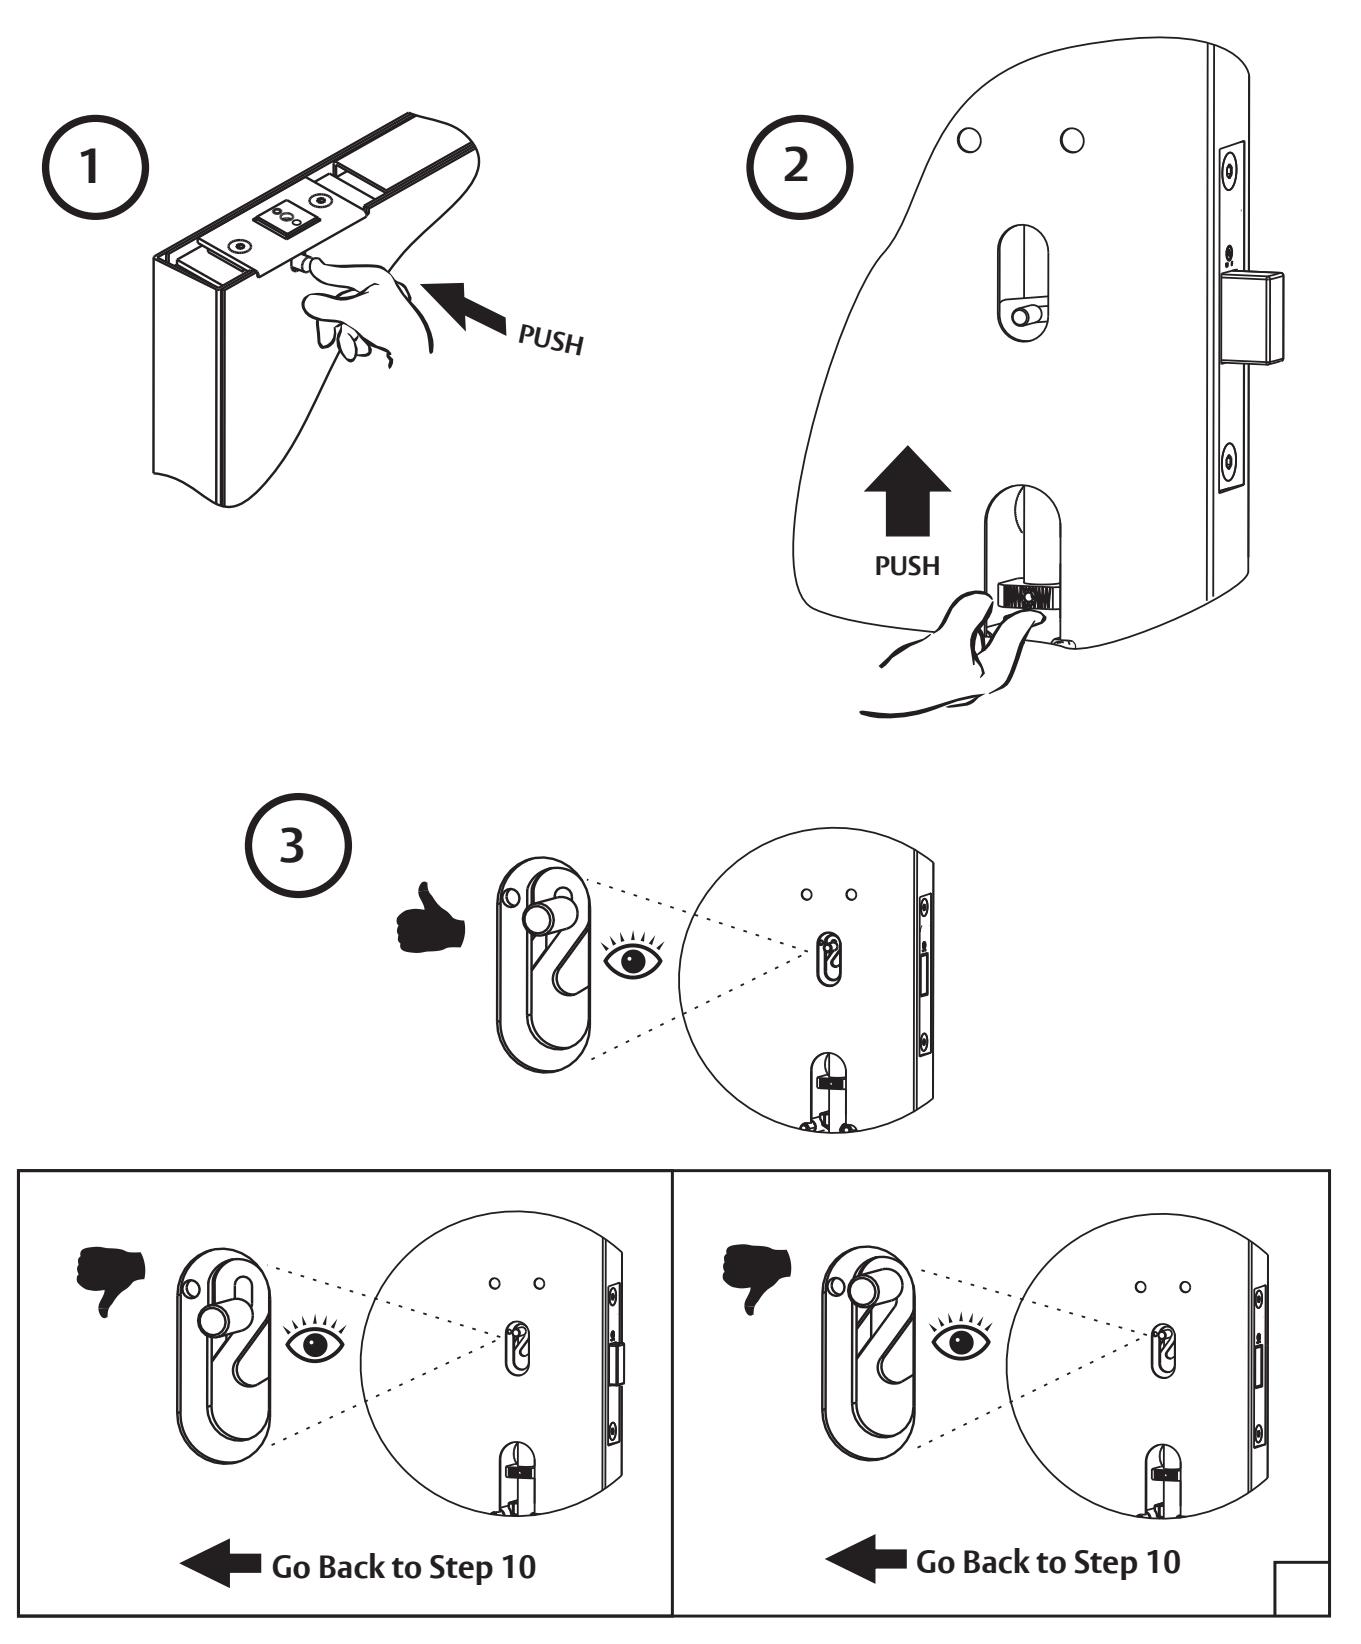
Installation Instructions
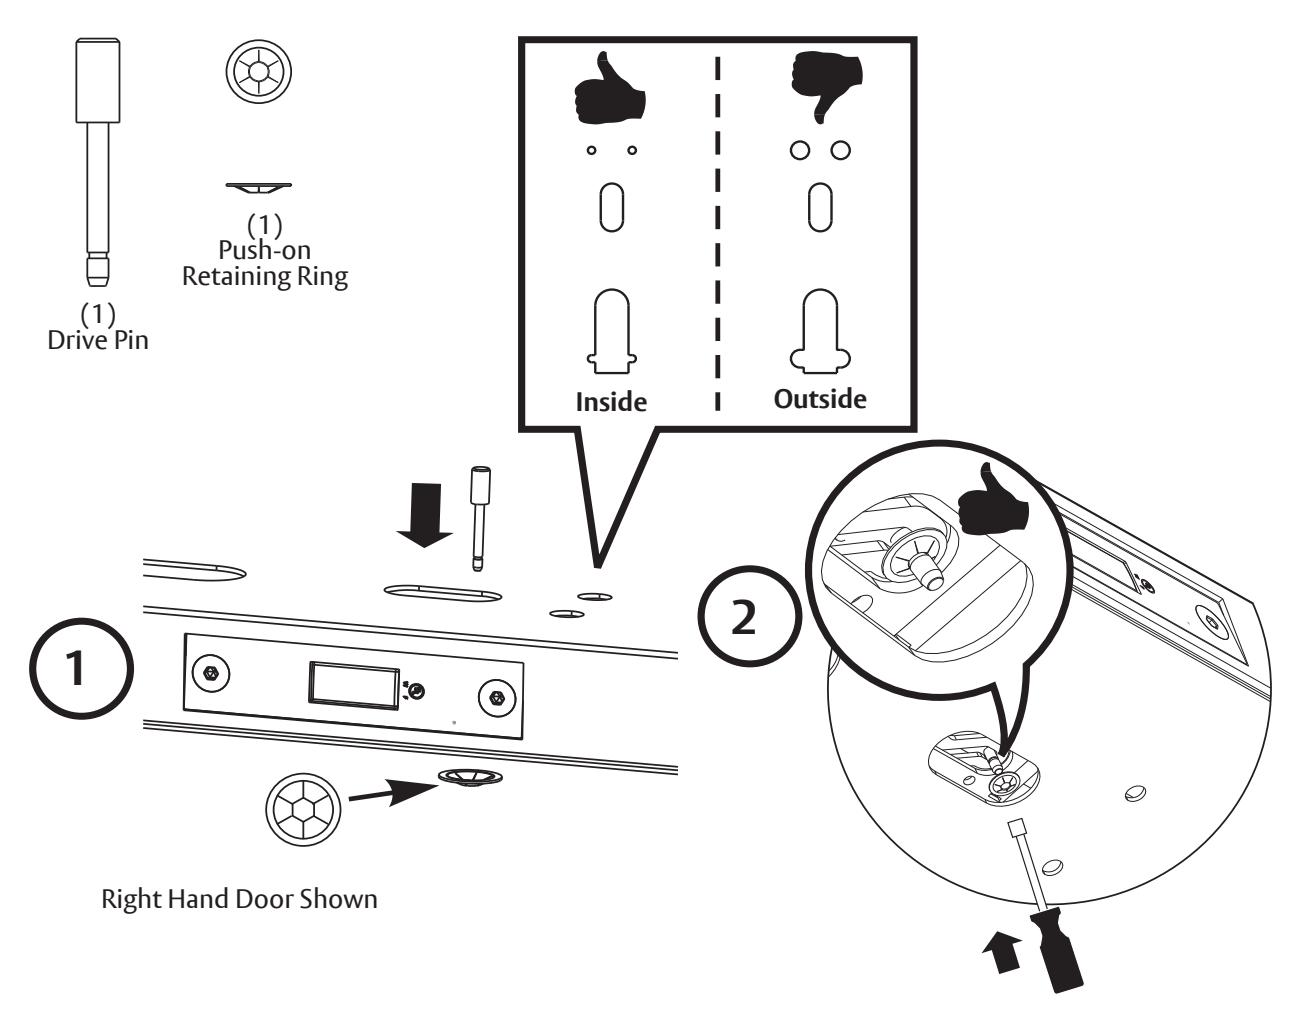
12. Assemble Cylinder into Outside Trim

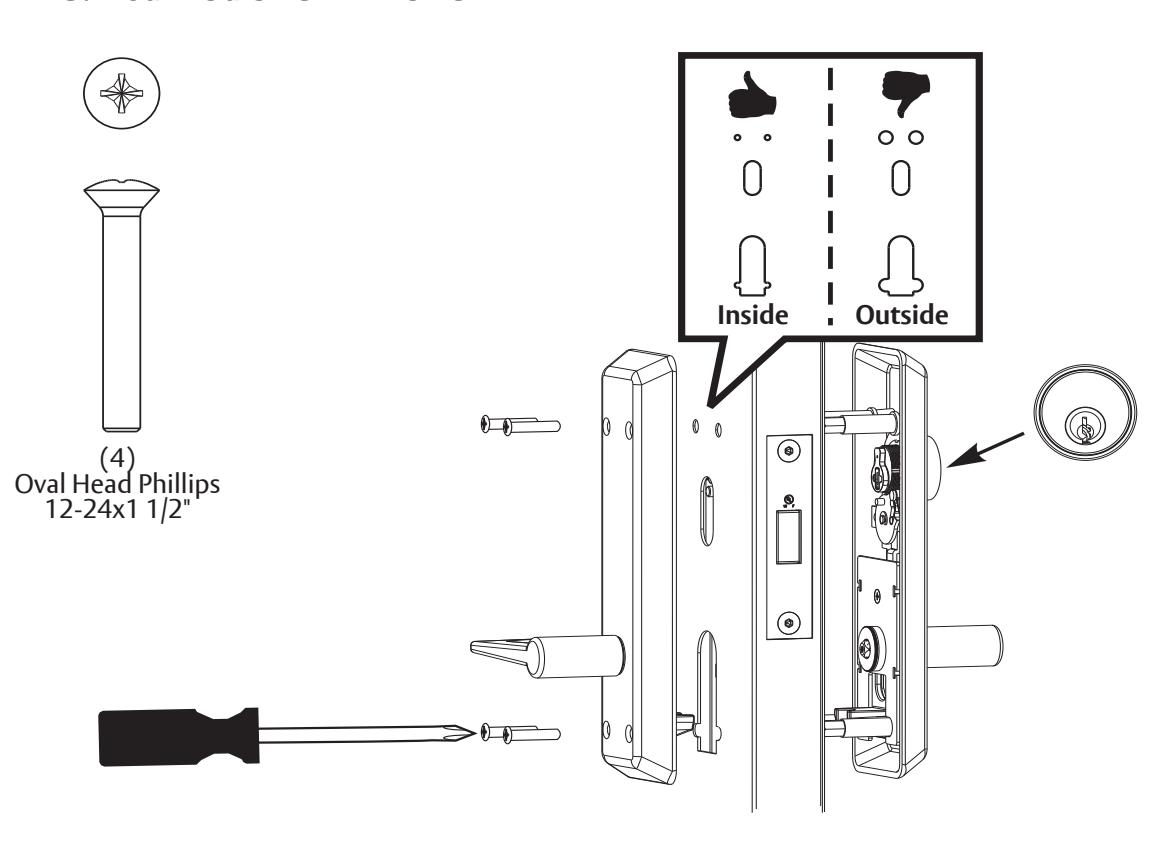
13. Mount Outside and Inside Trim
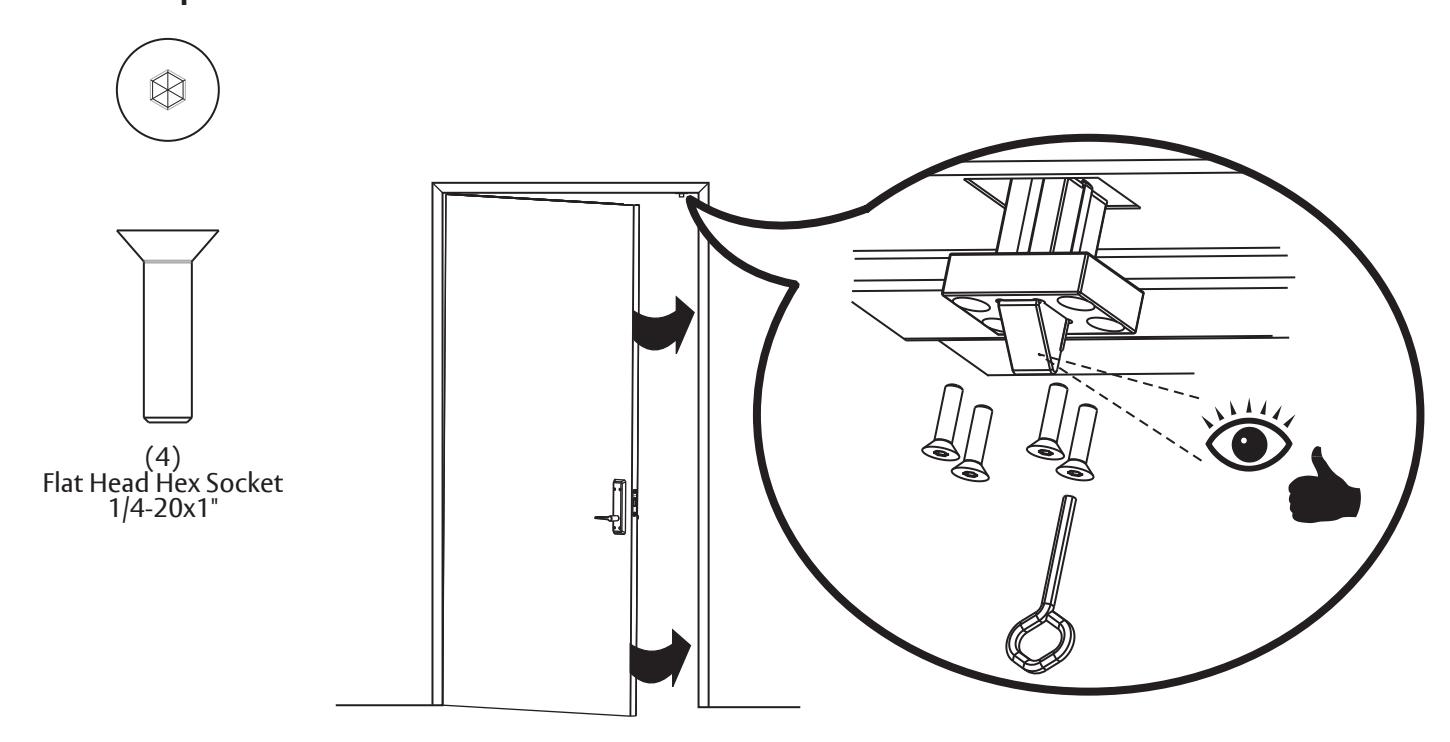
14. Install Top Latch into Door Frame
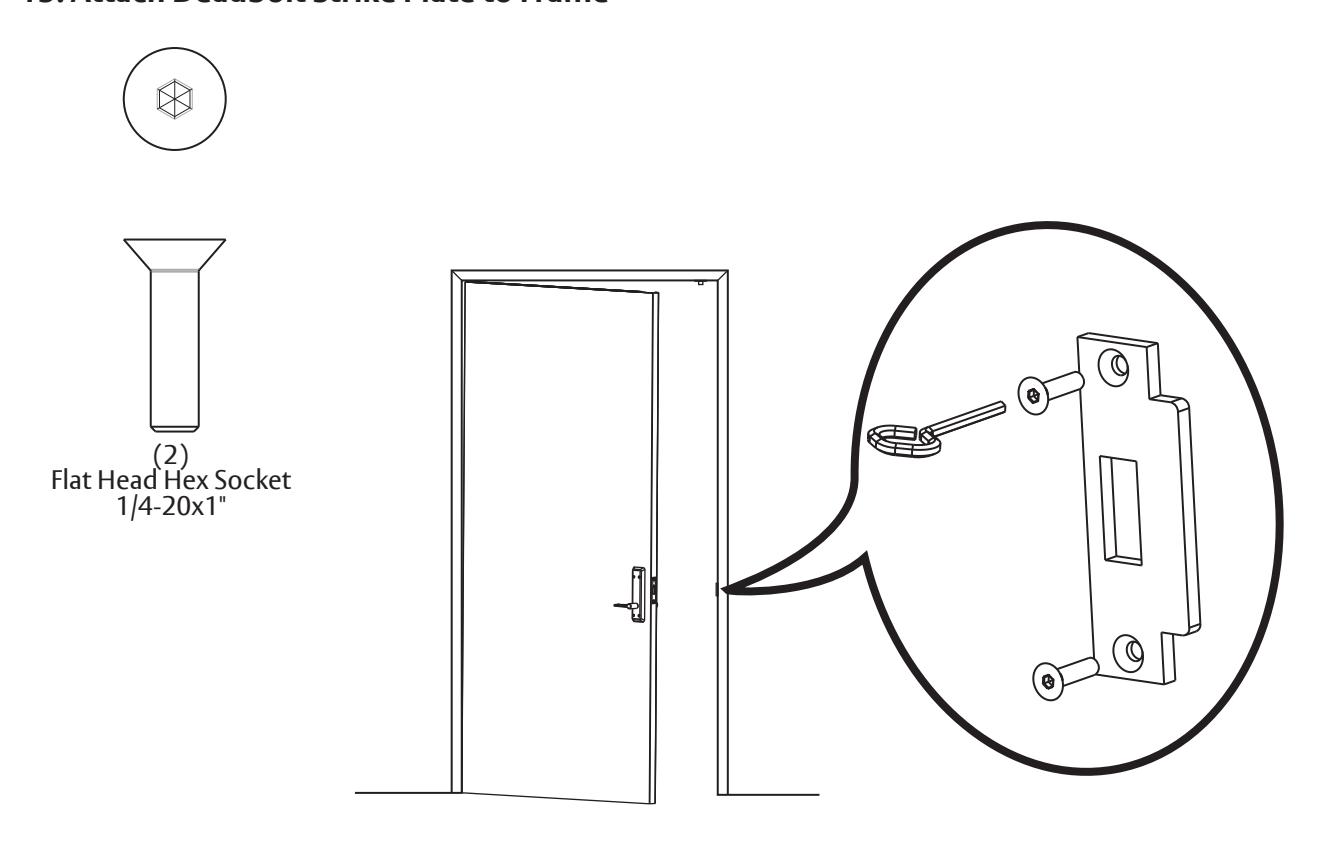
15. Attach Deadbolt Strike Plate to Frame
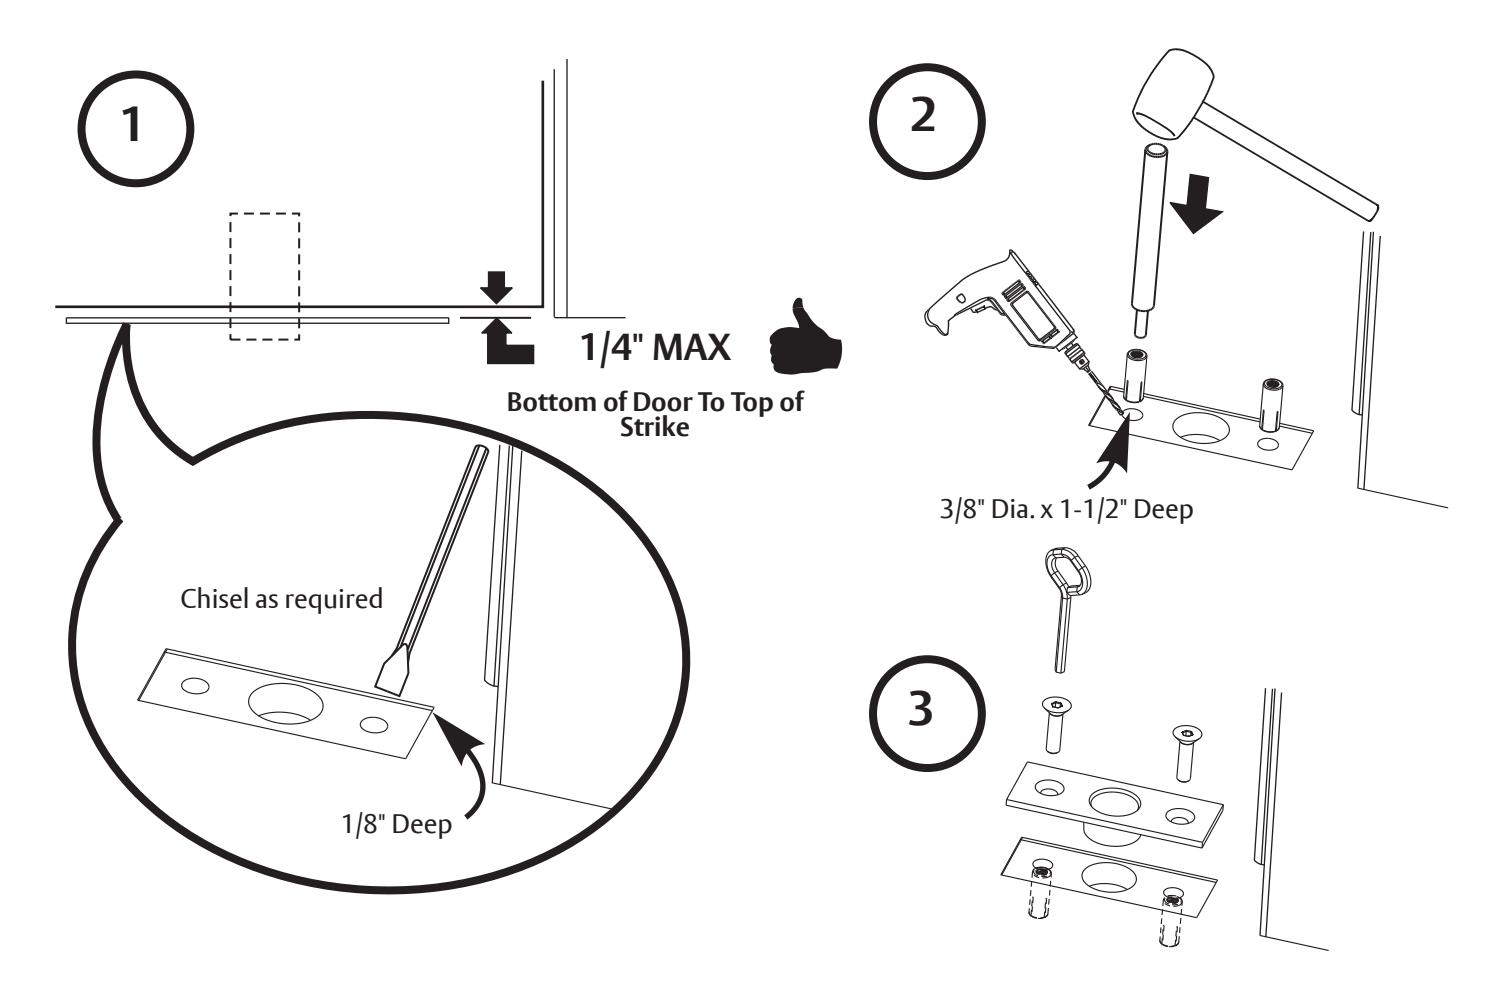
Installation Instructions
16. Prepare Floor for Bottom Strike
80-8470-7380-000 10/23
1-800-438-1951 • www.assaabloy.com
17. Install Bottom Strike
18. Test Installation