ASSA ABLOY ACCENTRA 350 Series Mortise Deadlocks Installation Instructions_80-9004-0001-010
Open the original PDF document
View PDF350 Series Mortise Deadlocks
Installation Instructions
ACCENTRA ASSA ABLOY
1. Mortise door.
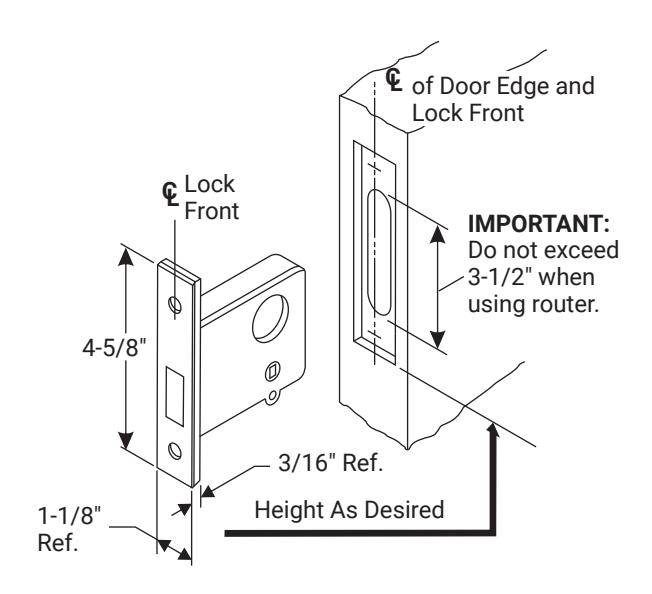
Mortise for lock case and front at centerline of door edge. Mortise door so that latch case is centered in door.
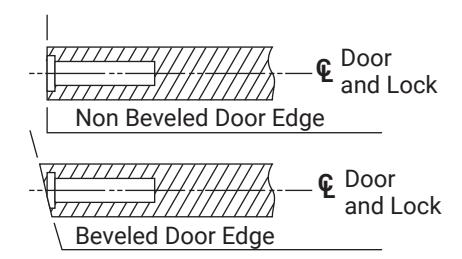
NOTE: Examine lockset to make sure it is the correct bevel for door. If not, loosen screws (fastening front to case), rotate front to proper bevel and retighten.
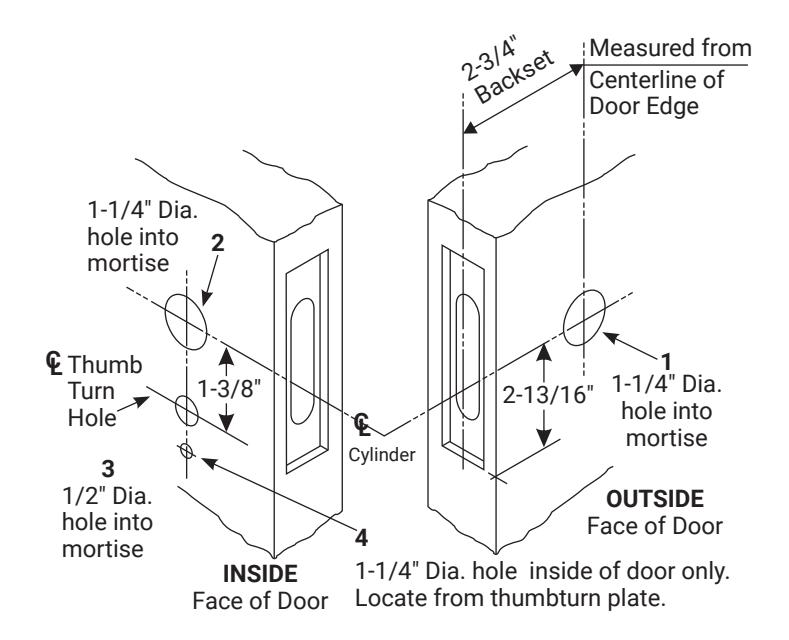
2. Bore holes.
- Check box label for function number before cutting holes in door.
- B. Bore required holes for cylinder and thumbturn as indicated in chart.
| MODEL # | HOLE #'s |
|---|---|
| 351 | 1 and 2 |
| 352 | 1, 3, and 4 |
| 353 | 1 |
| 354 | 3 and 4 |
| 356 | 1, 2, 3, and 4 |
| 357 | 1, 3, and 4 |

This product can expose you to lead which is known to the state of California to cause cancer and birth defects or other reproductive harm. For more information go to www.P65warnings.ca.gov.
⚠ WARNING
Attention Installer: Any retrofit or other field modification to a fire rated opening can potentially impact the fire rating of the opening, and ASSA ABLOY makes no representations or warranties concerning what such impact may be in any specific situation. When retrofitting any portion of an existing fire-rated opening, or specifying and installing a new fire-rated opening, please consult with a code specialist or local code official (Authority Having Jurisdiction) to ensure compliance with all applicable codes and ratings.
1-855-557-5078 Ext. 2 · www.accentra-assaabloy.com
Experience a safer and more open world
350 Series Mortise Deadlocks
Installation Instructions
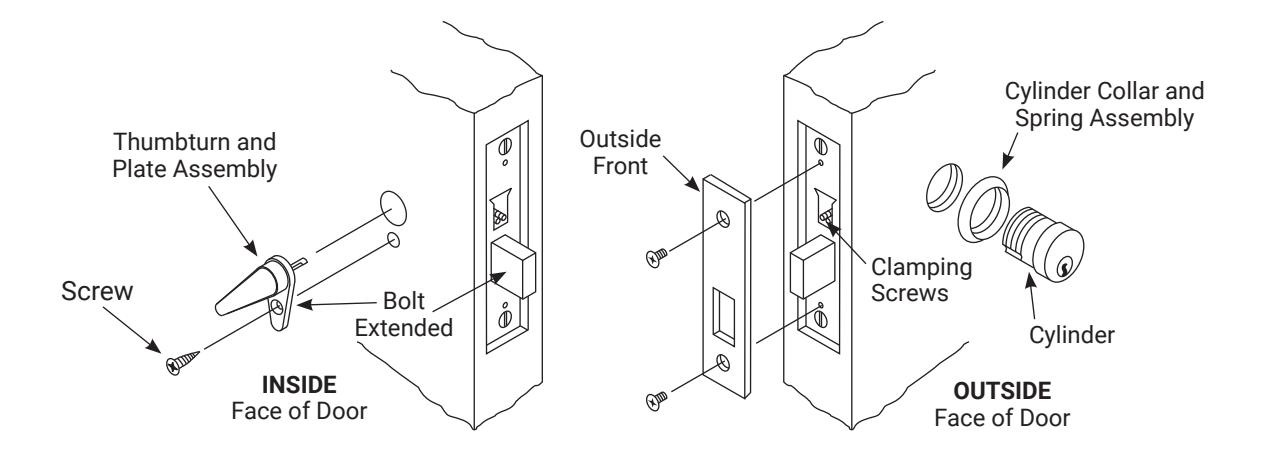
3. Install lock.
- A. Mount lock case as shown. Loosely install the screws that attach the lock case to the door. You will finish tightening them before you install the outside front to the lock case.
- B. Place cylinder through cylinder collar and screw into lock until face of cylinder is flush with top of collar and keyhole is facing down.
- C. Tighten appropriate clamping screw and operate cylinder with key. If necessary loosen clamping screw and adjust cylinder in or out one turn to locate best operating position.
- D. If installing model 351 or 356, repeat steps B and C for inside cylinder. Be sure that both cylinders function properly and that they do not interfere with each other before proceeding.
- E. Tighten the lock case mounting screws that you left loose in step A.
- F. If installing model 352, 354, 356, or 357, install the thumbturn and rose, screwing the rose to the lock case through hole 4.
- G. Install the outside front by screwing it to the face of the lock case.
350 Series Mortise Deadlocks
Installation Instructions

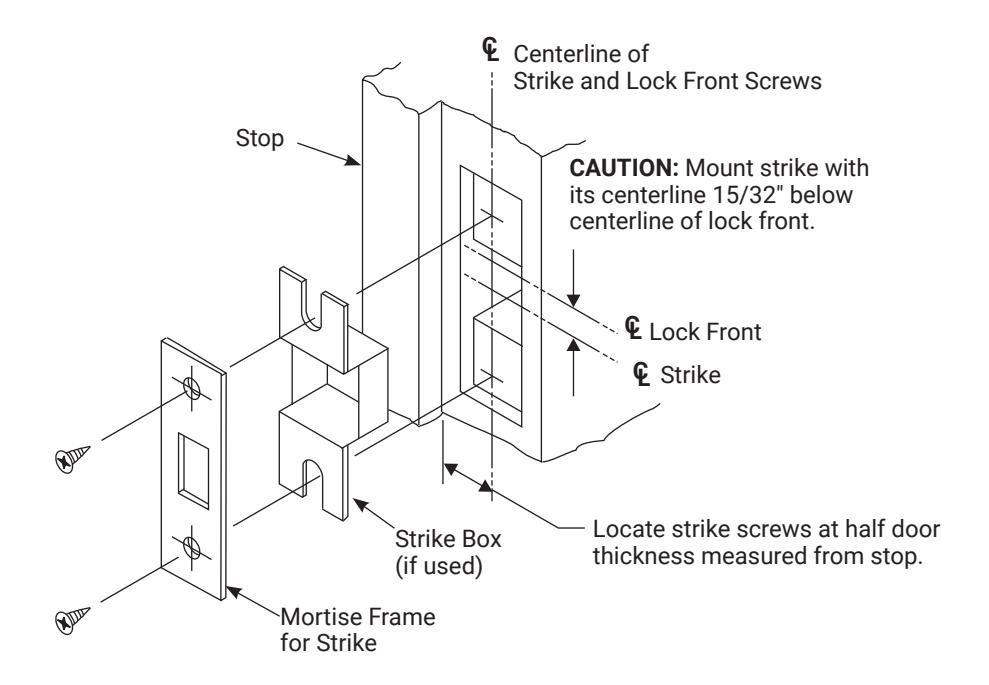
4. Strike installation (Wood Frames Only).