570 & 571 Rod Connector, Extension Kits Instructions
Open the original PDF document
View PDFInstallation Instructions

#570 & #571 Rod Connector/Extension Kits
Vertical Rod Exit Device
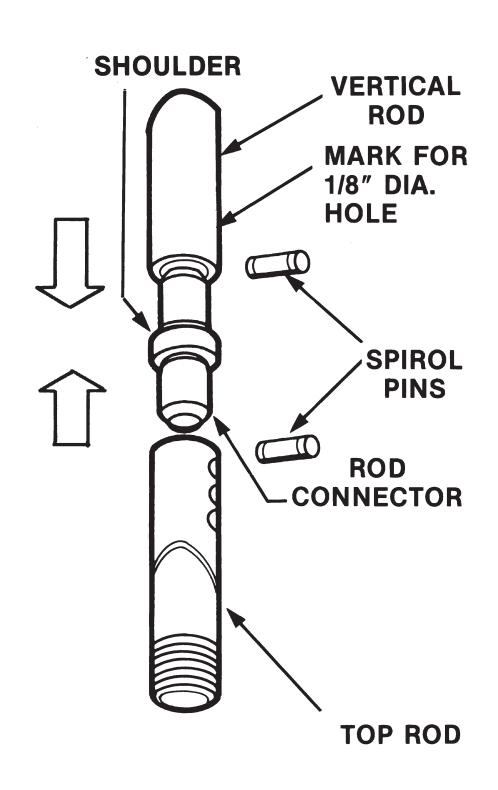
1 #570 Rod Extension Kit
- Line up one end of the vertical rod with the shoulder of the rod connector, and mark for the hole location on the rod.
- Drill 1/8" diameter hole through the rod.
- Assemble the connector to the rods with two spirol pins. Assemble flush. (Two 1/8" diameter pins are provided in the rod connector kit.)
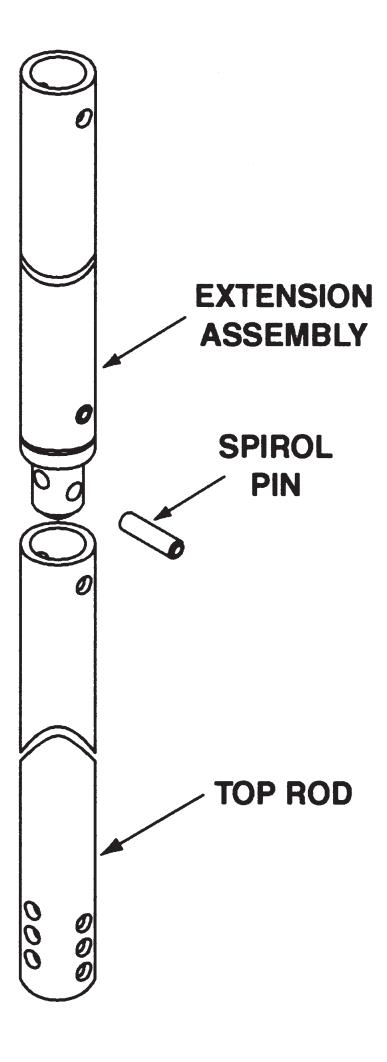
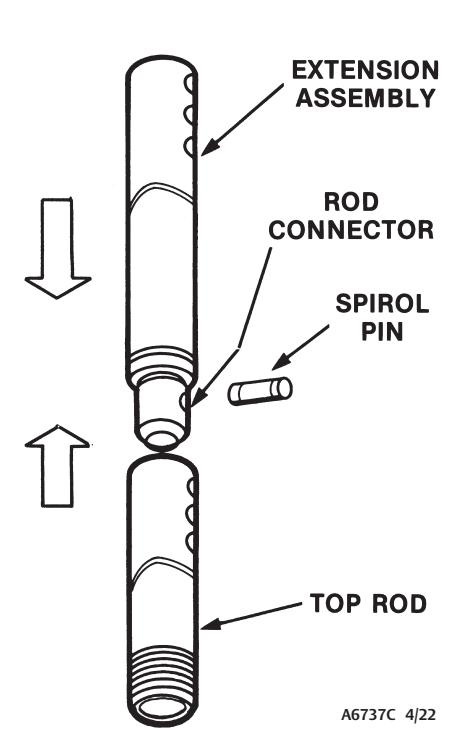
2 #571 Rod Extension Kit
- Insert the rod connector end of the extension assembly into the top end of the rod. Align with the top hole in the rod.
- Drive spirol pin through the rod and connector. Assemble flush (1/8" diameter pin is included in the rod extension kit.)
- Screw top rod* into the main slide in the center case, and adjust the rod accordingly. Refer to the exit device instruction sheet for proper adjustment
*If shorter rod is required:
- 1. Cut to desired length.
- 2. Drill 1/8" diameter hole through rod.

This product can expose you to lead which is known to the state of California to cause cancer and birth defects or other reproductive harm. For more information go to www.P65warnings.ca.gov.
1-800-727-5477 • www.sargentlock.com
Copyright © 2022 SARGENT Manufacturing Company. All rights reserved. Reproduction in whole or in part without the express written permission of SARGENT Manufacturing Company is prohibited.

#522 Rod Extension Kit
Center & Top Latching Exit Devices
2 #571 Rod Extension Kit
- Insert the rod connector end of the extension assembly into the top end of the rod. Align with the top hole in the rod.
- Drive spirol pin through the rod and connector. Assemble flush (1/8" diameter pin is included in the rod extension kit.)
- Slide top rod into the adjustment tube and adjust the rod. Refer to the exit device instruction sheet for proper adjustment.