3896 Supplemental Installation Instruction – I-LS00980-Rev3
Open the original PDF document
View PDFSTEP 1
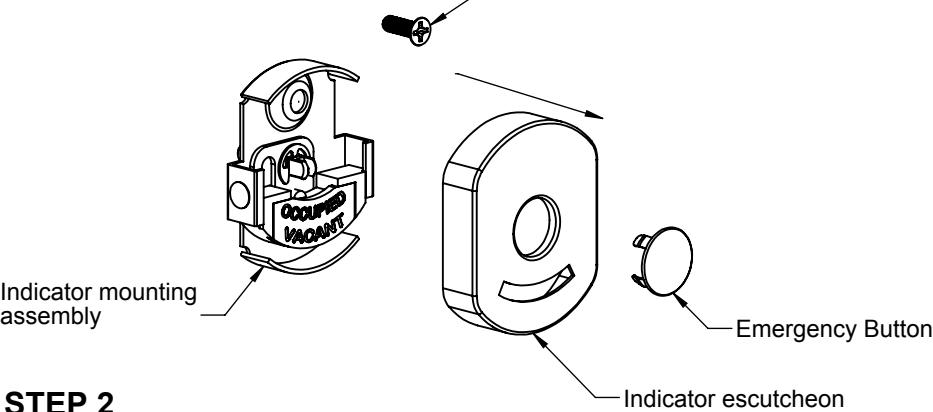
- a. The parts shown are provided.
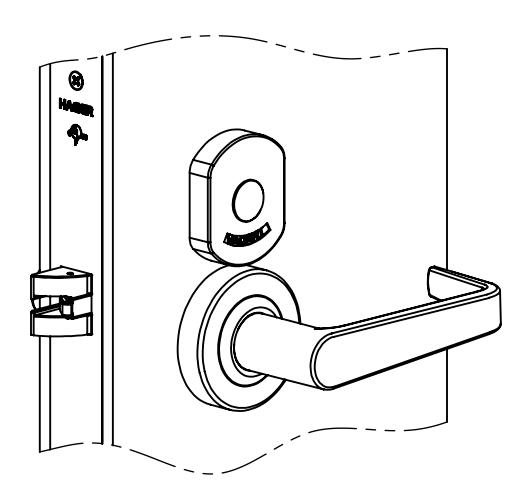
- b. The indicator escutcheon is provided preinstalled. Remove the indicator escutcheon by pulling it off the indicator mounting assembly.
#8 x 1/2" UPHW Screw or #8-32 x 3/4" UPHM Combo Screw For Wood Doors
8-32 x 7/16" UPHM Screw for Metal Doors
3896 SUPPLEMENTAL INSTRUCTIONS PRIVACY WITH INDICATOR FUNCTION FOR SECTIONAL MORTISE LOCK

STEP 2
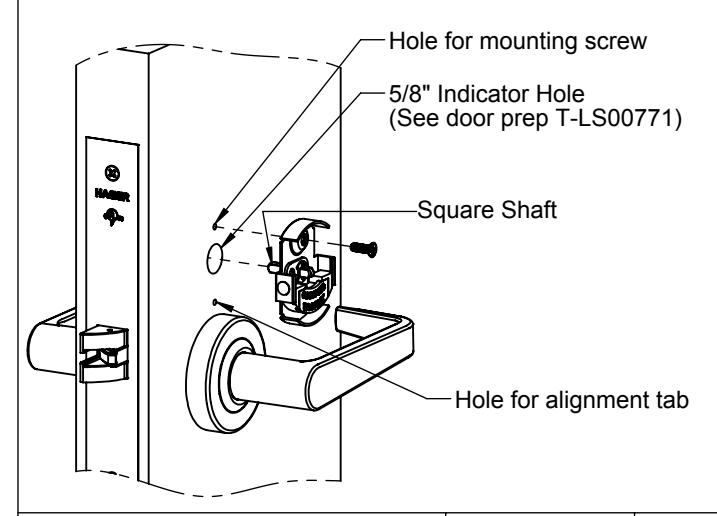
- a. Install indicator mounting assembly through 5/8" hole. Be sure square shaft is properly engaged with lock body by turning thumb turn on inside of door. The indicator should move from one state to the other (i.e. "Vacant" to "Occupied").
- b. Align indicator mounting assembly so it is straight vertically and horizontally.
-
c. Mark screw location on door and prepare hole by using indicator mounting assembly or dimensions shown on page 2.
- i. Wood door: Pre-drill 1/8" hole.
- ii. Metal: Drill/tap for #8-32 machine screw.
- d. Mark location for alignment tab and drill hole by using indicator mounting assembly or dimensions shown on page 2.
- e. Install indicator mounting assembly and secure with provided screw.

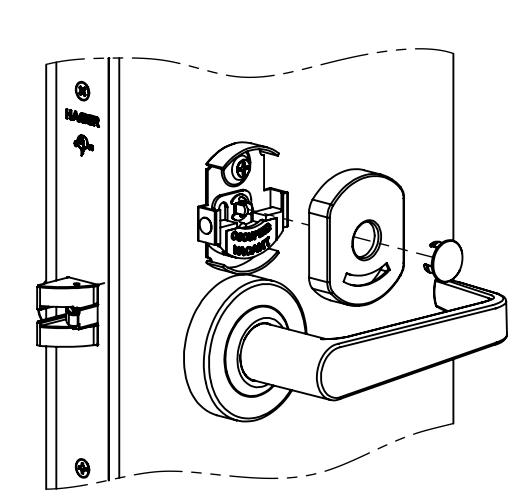
- a. Press on indicator escutcheon over the indicator mounting assembly.
- b. Press emergency button into hole on indicator escutcheon.
- a. Rotate thumbturn on inside of door to verify indicator changes state (Vacant/Occupied).
- b. If indicator is not showing the correct state, remove indicator, rotate thumbturn, then reinstall indicator.
HAGER COMPANIES 139 Victor Street, St. Louis, MO 63104 - (800) 325-9995 - Fax (800) 782-0149
DRAWING NO: I-LS00980 REV: 03 SHEET 1 OF 2
Mounting Screw Square Spindle (Mates with lock body) Alignment Tab
15/16" 24 11/16" 18 Note 1 See 2 3/4" 70 2 7/16" 62 5/8" See Door Prep T-LS00771 16 See Door Prep T-LS00771 See Note 2
for all hole and mortise details
3896 SUPPLEMENTAL INSTRUCTIONS PRIVACY WITH INDICATOR FUNCTION FOR SECTIONAL MORTISE LOCK
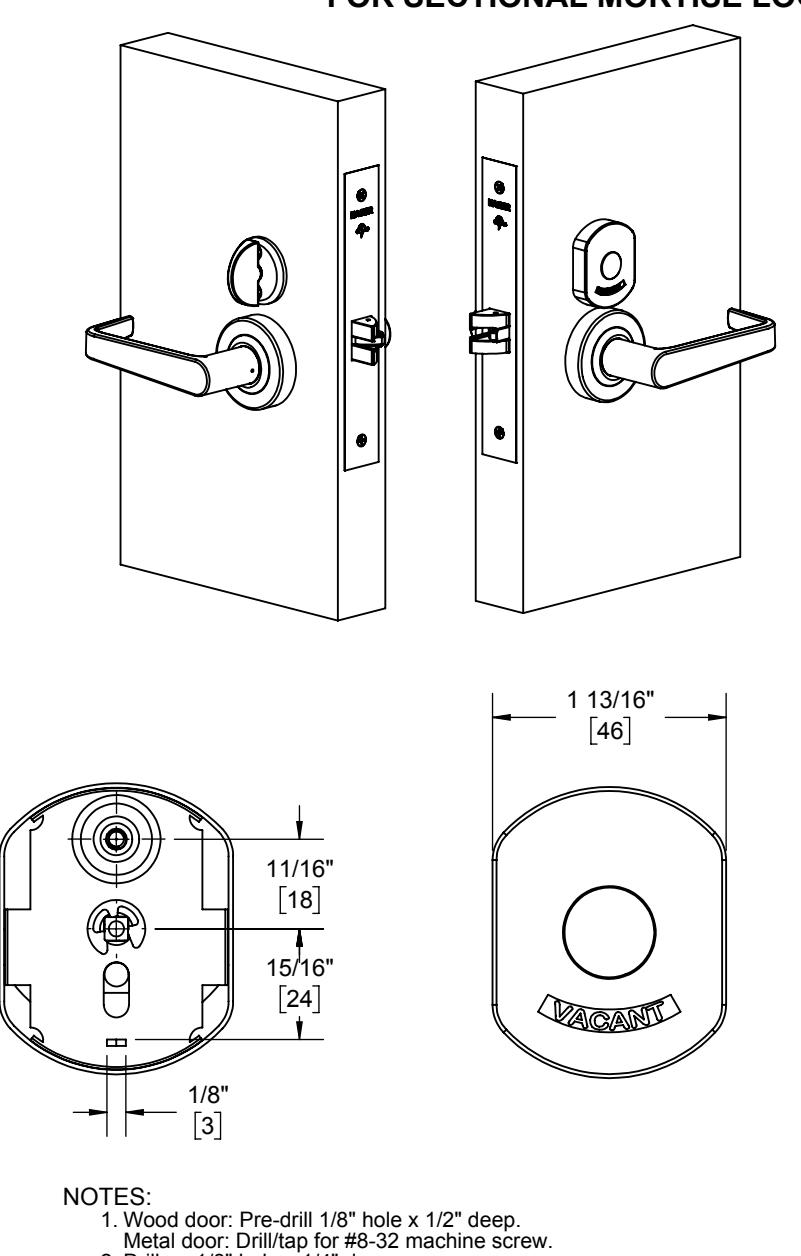
- 2. Drill an 1/8" hole x 1/4" deep.