2310 2340 Installation Instruction – I-LS01887
Open the original PDF document
View PDF

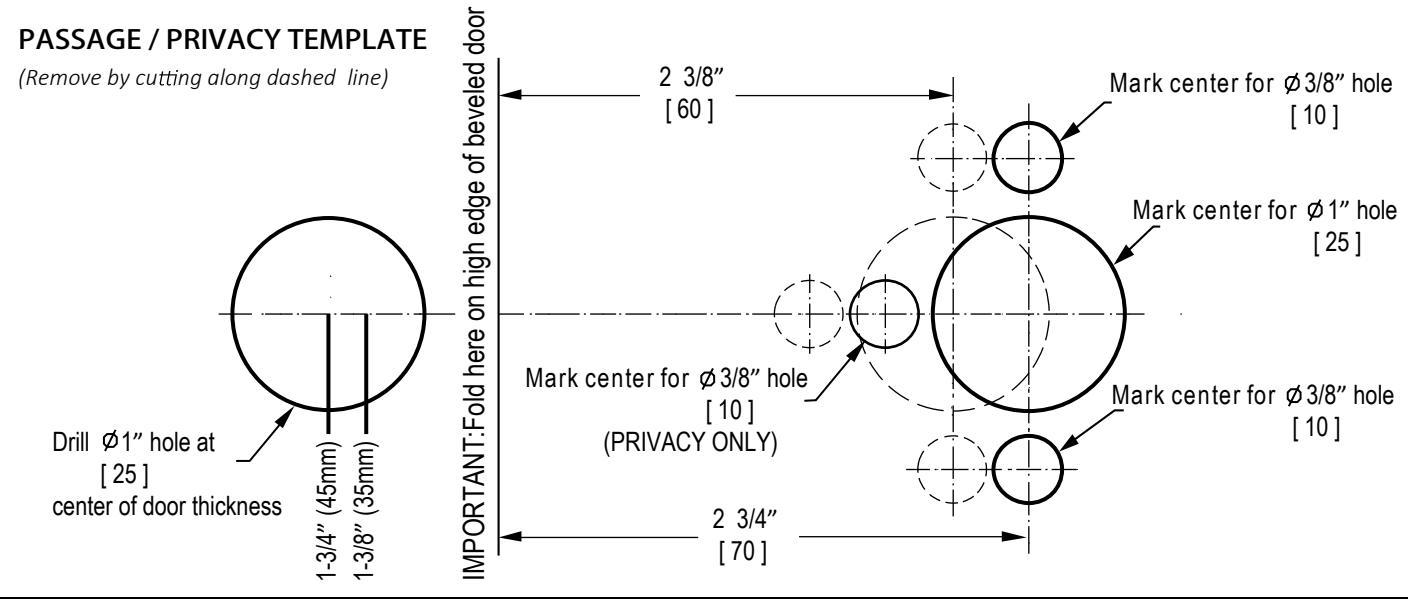
For use on doors 1-3/8" -1-3/4" (35mm-45mm) thick Tools required for installation: 1" Drill Bit 3/8" Drill Bit Drill #2 Screwdriver Chisel
DOOR PREPARATION (PLEAES READ ALL INSTRUCTIONS CAREFULLY BEFORE INSTALLING)
If needed, use door prep template attached on page 2. Information below is for reference only.

- 1. Inside lever assembly
- 2. Outside lever assembly
- 3. M5X40 machine screw (2)
- 4. Rose (2)
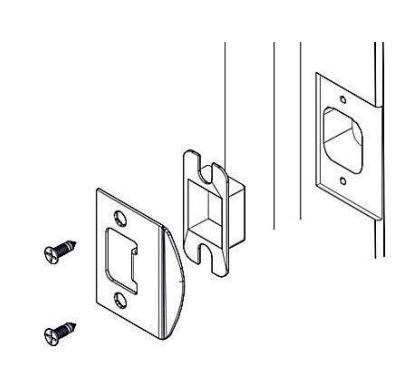
- 5. Round corner latch faceplate
- 6. Square corner latch faceplate
- 7. Round corner full lip strike
- 8. Square corner full lip strike
- 9. Dust Box
- 10. #8-32 x 3/4" Strike / Latch screws (4)
- 11. Mounting post (2)
- 12. Emergency release plug (privacy only)
- 13. Hex key (privacy only)
- 14. Privacy button (privacy only)
- 15. Latch bolt
- 16. Alignment Block(used with 160/161 door preps, refer to Supplemental Instructions for use)
1. PREP DOOR & FRAME (Skip ahead to step 2 for retrofit and previously prepared door applications)

B.Prep Door
C.Prep frame for strike
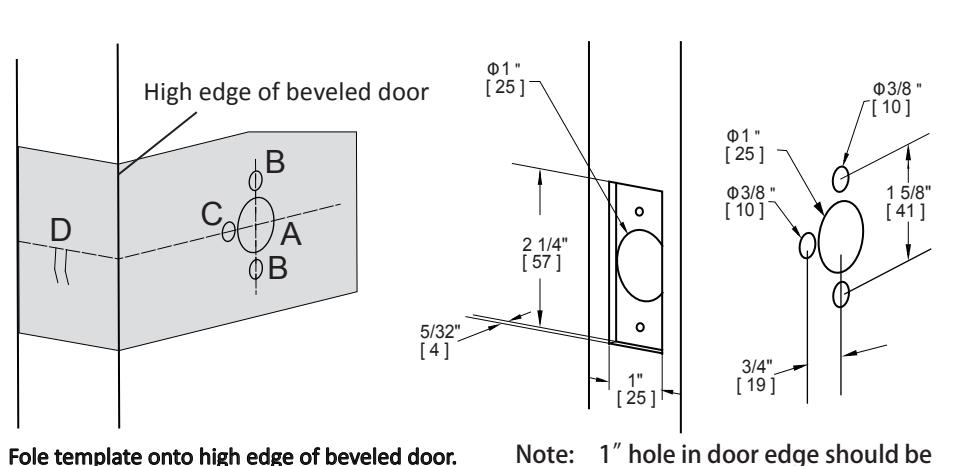
Fole template onto high edge of beveled door.
- 1. Mark hole A for privacy or passage locksets
- 2. Mark hole B for privacy or passage locksets
- 3. Mark hole C for privacy locksets
- 4. Mark hole D based on door thickness
Note: Strike centerline should be aligned with centerline of faceplate cutout.
Rev 2, Rev Date: 11/12/2015 Page 1 of 2
drilled to a depth of 3.5" (89mm).

2. INSTALL LATCHBOLT
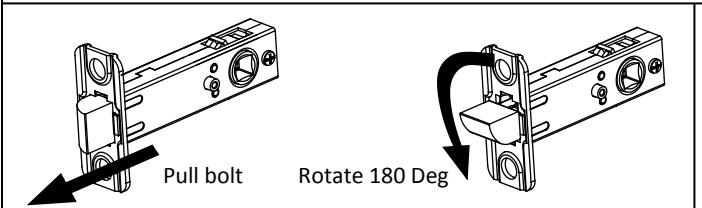
All privacy latch bolts are supplied handed to accommodate inward opening doors. For outward opening doors, follow the instruction above to rotate the bolt.
THREADED PORTION OF BUTTON MUST FACE THE INSIDE IF PRIVACY LATCH IS INSTALLED.
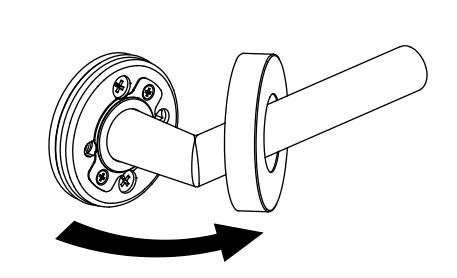
3. REMOVE ROSES FROM SPRING CAGE
4. INSTALL LOCKSET
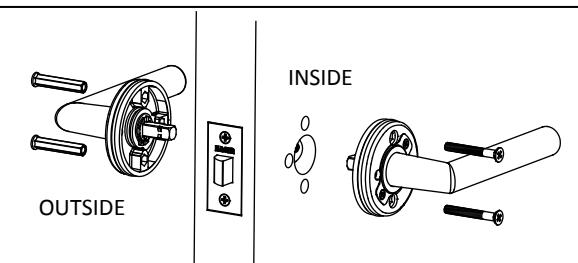
Tighten leverset to the door using (2) M5X40 machine screws and mounting posts
5. INSTALL ROSES
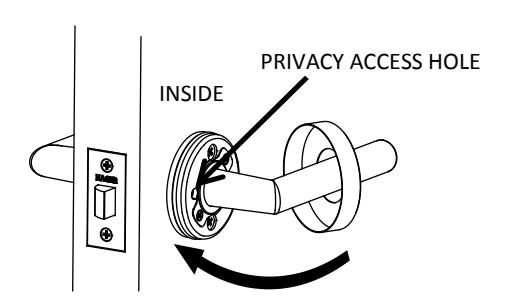
Slide roses onto spring cage and press tight to door face. For privacy locksets, align hole in rose to the privacy hole in spring cage.
6. INSTALL BUTTON AND PLUG (PRIVACY ONLY)
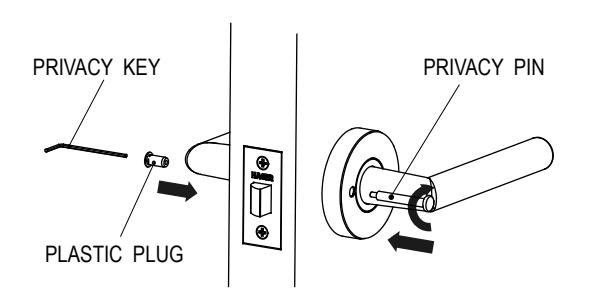
- 1. Insert pin in inside rose and thread tight to latch bolt.
- 2. Snap plug into hole on exterior rose.
Rev 2, Rev Date: 11/12/2015 Page 2 of 2